

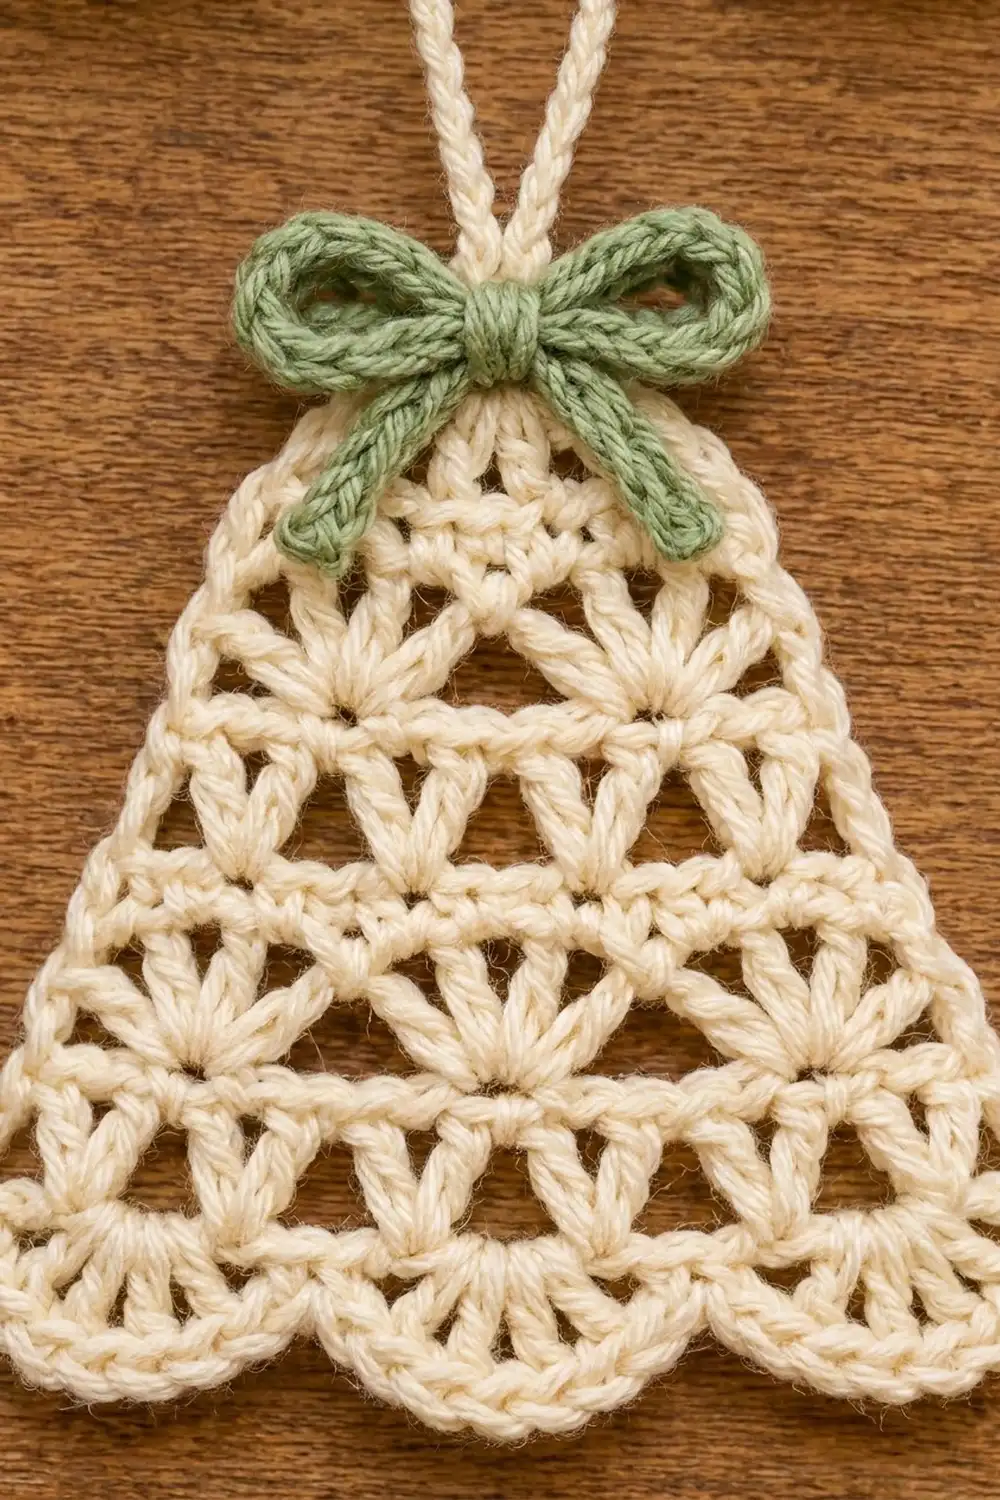
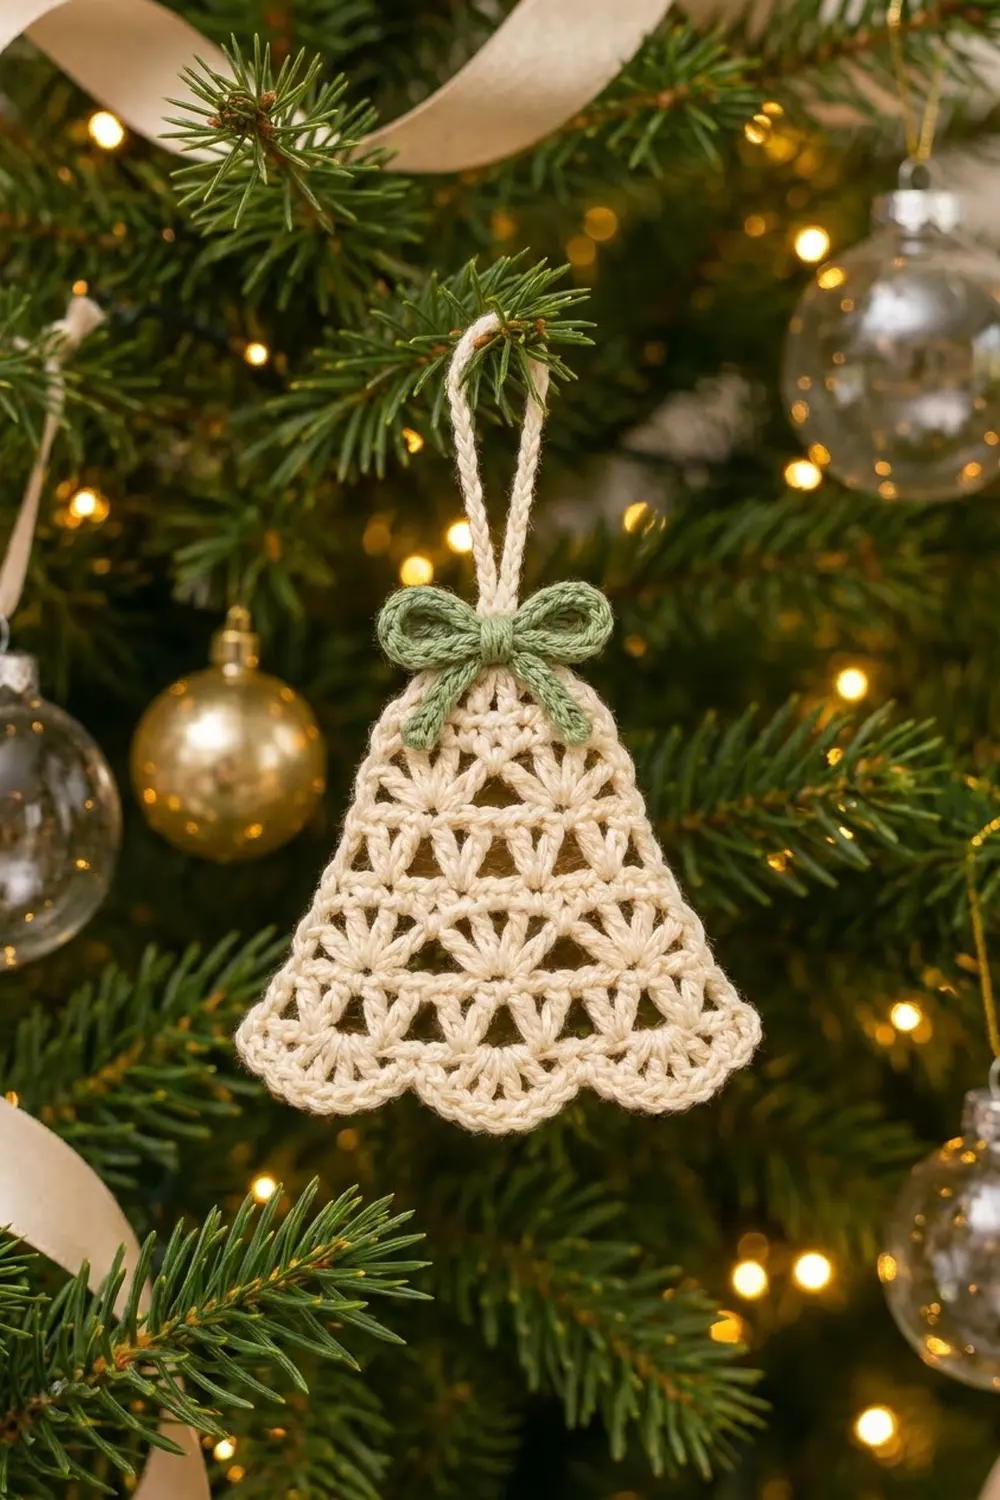
The Frosted Lace Bell is a flat, lacy Christmas ornament with a classic bell shape. Open V-stitch rows alternate with fanned shell rows, so the bell looks light and airy against tree lights. Four rounded scallops finish the hem, and a crisp single-crochet edging keeps the outline tidy.
The palette is soft and simple. The bell and hanging loop are cream, and a small sage-green bow sits at the top. The look is vintage and snowy, and it suits a natural or farmhouse tree as well as gift toppers.
This pattern uses US crochet terms. The finished bell measures 3.75 in (9.5 cm) tall and 4.5 in (11.4 cm) wide at the hem. The loop adds 2 in (5.1 cm), so the total hanging height is 5.75 in (14.6 cm).
The bell is worked flat in rows from the top down. Each row gets wider, and the last row forms the scallops. After that, one edging round goes all the way around the bell, and the hanging loop is worked onto the top. The bow is made from two short cords, shaped by hand, and sewn on.
Finished Size and Construction
- Finished size: 3.75 in (9.5 cm) tall × 4.5 in (11.4 cm) wide, plus a 2 in (5.1 cm) loop
- Skill level: Easy
- Terminology: US crochet terms
- Yarn weight: Sport (#2) cotton
- Hook: 3.25 mm (US D/3)
- Number of pieces: 1 bell body (with the loop worked on) plus 2 small bow cords sewn on as appliqué
- Layout: one standalone ornament
- Bell size before edging: 3.5 in (8.9 cm) tall × 4.25 in (10.8 cm) wide
- Edging depth: 0.125 in (0.3 cm) on every edge
- Bow size: about 2.25 in (5.7 cm) wide
Materials
Yarn: Use a smooth sport-weight cotton or cotton blend. Mercerized cotton gives the clearest stitch definition and blocks very well. Avoid fuzzy yarns, because they fill in the lace openings.
- Cream (Color A): 10 g, about 31 m (bell, edging and loop)
- Sage green (Color B): 3 g, about 9 m (bow)
These amounts assume a yarn with about 155 m per 50 g. Both amounts include a margin for your gauge swatch and weaving in ends.
Tools:
- 3.25 mm (US D/3) crochet hook
- Tapestry needle
- Scissors
- 2 stitch markers
- Blocking mat and rustproof pins
- Spray bottle
- Optional: light fabric stiffener or starch
Abbreviations (US Terms)
- ch – chain
- sl st – slip stitch
- sc – single crochet
- dc – double crochet
- sk – skip
- sp – space
- st(s) – stitch(es)
- tch – turning chain
- RS / WS – right side / wrong side
Special stitches:
- V-stitch (V-st): (dc, ch 1, dc) in the stitch or space given.
- Shell: 5 dc in the stitch or space given.
- Fan: 9 dc in the stitch or space given (used only in Row 7).
Note: A ch-3 at the beginning of a row counts as 1 dc throughout.
Gauge and Checkpoints
Base gauge: 11 sc = 2 in (5.1 cm) wide, measured on Row 1. Each dc row (Rows 2–6) is 0.5 in (1.3 cm) tall after light blocking.
This ornament is small, so the bell itself works as your test piece. Measure at each checkpoint below. If you’re far off at Row 1, start again before you continue.
Checkpoints (measured flat and lightly patted into shape):
- After Row 1: 2 in (5.1 cm) wide, 0.25 in (0.6 cm) tall
- After Row 3: about 2.75 in (7.0 cm) wide at the bottom, 1.25 in (3.2 cm) tall
- After Row 5: about 3.75 in (9.5 cm) wide, 2.25 in (5.7 cm) tall
- After Row 6: about 4 in (10.2 cm) wide, 2.75 in (7.0 cm) tall
- After Row 7: 4.25 in (10.8 cm) wide across the scallops, 3.5 in (8.9 cm) tall
- After edging: 4.5 in (11.4 cm) wide, 3.75 in (9.5 cm) tall
If your piece is too big: go down a hook size to 2.75 mm, or work the chain-1 spaces more snugly.
If your piece is too small: go up a hook size to 3.5 mm. Let each dc reach its full height before you yarn over to finish it.
Width matters more than height here. If your Row 1 is right but the rows are a little short, blocking will usually open them up.
Bell Body
Use Color A.
Foundation: Ch 12.
Row 1 (RS): Sc in the 2nd ch from the hook and in each ch across, turn. (11 sc)
This row is the flat band at the top of the bell. Place a marker in the foundation chain at each end. The markers show you where to put the top corners in the edging.
Row 2 (WS, first V row): Ch 3. Sk the next sc. V-st in the next sc. (Sk 1 sc, V-st in the next sc) 3 times, so you have V-sts in the 3rd, 5th, 7th and 9th sc. Sk 1 sc, dc in the last sc, turn.
Count: 4 V-sts + 2 edge dc = 10 dc and 4 ch-1 sps.
Row 3 (RS, first shell row): Ch 3. Shell in the ch-1 sp of the first V-st. (Ch 1, shell in the ch-1 sp of the next V-st) 3 times. Dc in the top of the tch, turn.
Count: 4 shells (20 dc) + 2 edge dc = 22 dc, plus 3 ch-1 sps between the shells.
Row 4 (WS, second V row): Ch 3. V-st in the center (3rd) dc of the first shell. (V-st in the next ch-1 sp, V-st in the center dc of the next shell) 3 times. Dc in the top of the tch, turn.
Count: 7 V-sts (4 over the shells + 3 in the gaps) = 14 dc, plus 2 edge dc = 16 dc and 7 ch-1 sps.
This is the main increase row. Placing V-sts in both the shells and the gaps nearly doubles the number of lace units, and that is what gives the bell its flare.
Row 5 (RS, second shell row): Ch 3. Shell in the ch-1 sp of each of the 7 V-sts across. Dc in the top of the tch, turn.
Count: 7 shells (35 dc) + 2 edge dc = 37 dc.
The shells sit side by side with no chains between them. The gap that forms naturally between the tops of neighboring shells makes the triangular openings.
Row 6 (WS, third V row): Ch 3. V-st in the center dc of the first shell. (Dc in the gap between this shell and the next shell, V-st in the center dc of the next shell) 6 times. Dc in the top of the tch, turn.
Count: 7 V-sts (14 dc) + 6 separator dc + 2 edge dc = 22 dc and 7 ch-1 sps.
Row 7 (RS, scallop row): Ch 1. Sc in the first dc. Fan in the ch-1 sp of V-st 1. Sc in the ch-1 sp of V-st 2. Fan in V-st 3. Sc in V-st 4. Fan in V-st 5. Sc in V-st 6. Fan in V-st 7. Sc in the top of the tch.
Skip all the other dc of Row 6, including the separator dc. Do not turn and do not fasten off.
Count: 4 fans (36 dc) + 5 sc = 41 sts.
You now have four rounded scallops. Each one is anchored by a sc on both sides. Check: the bell should measure 3.5 in (8.9 cm) tall and 4.25 in (10.8 cm) wide.
Edging
The edging is one round of sc in Color A, worked with the RS facing. It squares off the top corners, smooths the stepped sides and outlines the scallops.
Edging gauge: 5.5 sc per inch (2.5 cm), the same as Row 1.
Round 8: Continue from the end of Row 7. Ch 1, then rotate the work so you can crochet along the side edge.
- First side: Work into the row ends from the hem up to the top. Put 1 sc in the end of Row 7, 3 sc in the end of each dc row from Row 6 to Row 2, and 1 sc in the end of Row 1. (17 sc)
- Top: Work into the free loops of the foundation chain. Put 3 sc in the first chain (marked), 1 sc in each of the next 9 chains, and 3 sc in the last chain (marked). (15 sc, including both 3-sc corner groups)
- Second side: Work down the row ends the same way: 1 sc in the end of Row 1, 3 sc in the end of each row from Row 2 to Row 6, and 1 sc in the end of Row 7. (17 sc)
- Hem: Work into the stitches of Row 7. Sc in the first sc. Then, for each fan: sc in the first 4 dc, 2 sc in the 5th (center) dc, sc in the last 4 dc. Sc in each sc between the fans. Sc in the last sc.
Hem count: 41 sts worked one-for-one + 4 extra sc at the scallop peaks = 45 sc.
Sl st to the first sc of the round.
Round total: 17 + 15 + 17 + 45 = 94 sc.
Fasten off and weave in the ends.
How the counts are split: The two top corners belong to the top count of 15. The side counts of 17 do not include them. Each bottom corner is the first or last sc of the hem count of 45. That way no corner stitch is counted twice.
Why the math works:
- Each dc row is 0.5 in (1.3 cm) tall, so 3 sc per row end works out to 6 sc per vertical inch. The sides slant outward, so the edge is longer than the bell is tall. Spread along that slant, 3 sc per row end comes to about the 5.5 sc/in gauge. The sides stay flat without rippling or pulling in.
- On the top band, 1 sc per chain matches Row 1 exactly. The 3-sc corners turn the angle cleanly.
- Each scallop curves outward, so its outer edge is slightly longer than the 9 dc beneath it. The 1 extra sc at each peak (10 sc per scallop) covers that extra length, so the scallops lie flat instead of cupping.
- The edging adds 0.125 in (0.3 cm) on every side. That brings the bell from 3.5 × 4.25 in (8.9 × 10.8 cm) to 3.75 × 4.5 in (9.5 × 11.4 cm).
Hanging Loop
With the RS facing, join Color A with a sl st in the 8th (center) sc of the 15 top stitches.
Ch 26, then sl st in the same sc. Work 1 sc in each chain all the way around the loop (26 sc). Sl st in the joining sc.
Fasten off and weave in the ends.
The loop stands 2 in (5.1 cm) above the bell. The sc layer makes it thick and sturdy, like the loop in the photo.
Bow Appliqué
Use Color B.
Loop cord: Ch 28. Sc in the 2nd ch from the hook and in each ch across (27 sc). Fasten off and leave a 6 in (15.2 cm) tail. The cord is about 5 in (12.7 cm) long.
Tail cord: Ch 17. Sc in the 2nd ch from the hook and in each ch across (16 sc). Fasten off and leave a short tail. The cord is about 3 in (7.6 cm) long.
Shaping:
- Lay the loop cord flat. Fold both ends in to the center so they overlap by 0.25 in (0.6 cm). You now have two loops, each about 1.1 in (2.8 cm) wide.
- Fold the tail cord in half to make an upside-down V. Place the fold behind the center of the loops so the two tails angle down and outward.
- Wrap the long tail tightly around the center 6–8 times to form a knot about 0.3 in (0.8 cm) wide. Secure it with a few stitches through the back.
The finished bow is about 2.25 in (5.7 cm) wide.
Attaching: Center the bow on the top band, directly below the base of the loop. The tails should lie over the first V-stitch row. Sew it in place through the knot and the back of each loop, keeping your stitches out of sight.
Final Blocking
- Spray the bell until it is damp all the way through but not dripping. Leave the bow dry.
- Lay it RS up on the blocking mat.
- Pin the top band straight at 2.25 in (5.7 cm) wide.
- Pin the hem to 4.5 in (11.4 cm), with one pin at the peak of each scallop and one at each low point between scallops.
- Ease the sides into straight, even slants, and pin the overall height at 3.75 in (9.5 cm).
- Open each V-stitch and each triangular gap with your fingertip.
- Optional: brush or spray on a light coat of stiffener.
- Let it dry completely before you remove the pins.
- Lay the loop flat while the bell dries so it keeps its shape.
Final Quality-Control Checklist
- Row 7 has 41 stitches and forms 4 even scallops.
- The edging has 94 sc: 17 on each side, 15 across the top and 45 across the hem.
- The top corners are square and the sides are straight slants.
- The bell measures 3.75 × 4.5 in (9.5 × 11.4 cm).
- The loop is centered and stands 2 in (5.1 cm) tall.
- The bow is centered with even loops and tails, and no stitching shows from the front.
- All ends are woven in securely and none show through the lace.
Troubleshooting
The bell isn’t flaring out. Check Row 4. It needs 7 V-sts, with one in each ch-1 sp between the shells.
The scallops are cupping. Make sure you worked 2 sc in the center dc of each fan during the edging.
The scallops are rippling. You may have worked extra sc into the fans. There should be exactly 10 sc per scallop.
The sides pull in. Use 3 sc per dc row end and keep the edging tension relaxed.
The sides are wavy. You have too many sc. Count again for 17 per side.
The top corners look rounded. Make sure you worked 3 sc into each marked foundation chain.
The loop flops over. Pull the sc snugger, or add a little stiffener to the loop.
Care
Hand wash in cool water and lay flat to dry. If the ornament softens after washing, block it again and re-apply stiffener if you like.
Final Notes
Here is the measurement chain to keep in mind. Row 1 is 11 sc = 2 in (5.1 cm). Each dc row adds 0.5 in (1.3 cm). Row 7 brings the bell to 3.5 × 4.25 in (8.9 × 10.8 cm). The edging adds 0.125 in (0.3 cm) on every side, for 3.75 × 4.5 in (9.5 × 11.4 cm). The loop adds 2 in (5.1 cm), so the ornament hangs at 5.75 in (14.6 cm). If Row 1 is the right width, the rest of the bell will follow.
Happy crocheting!