

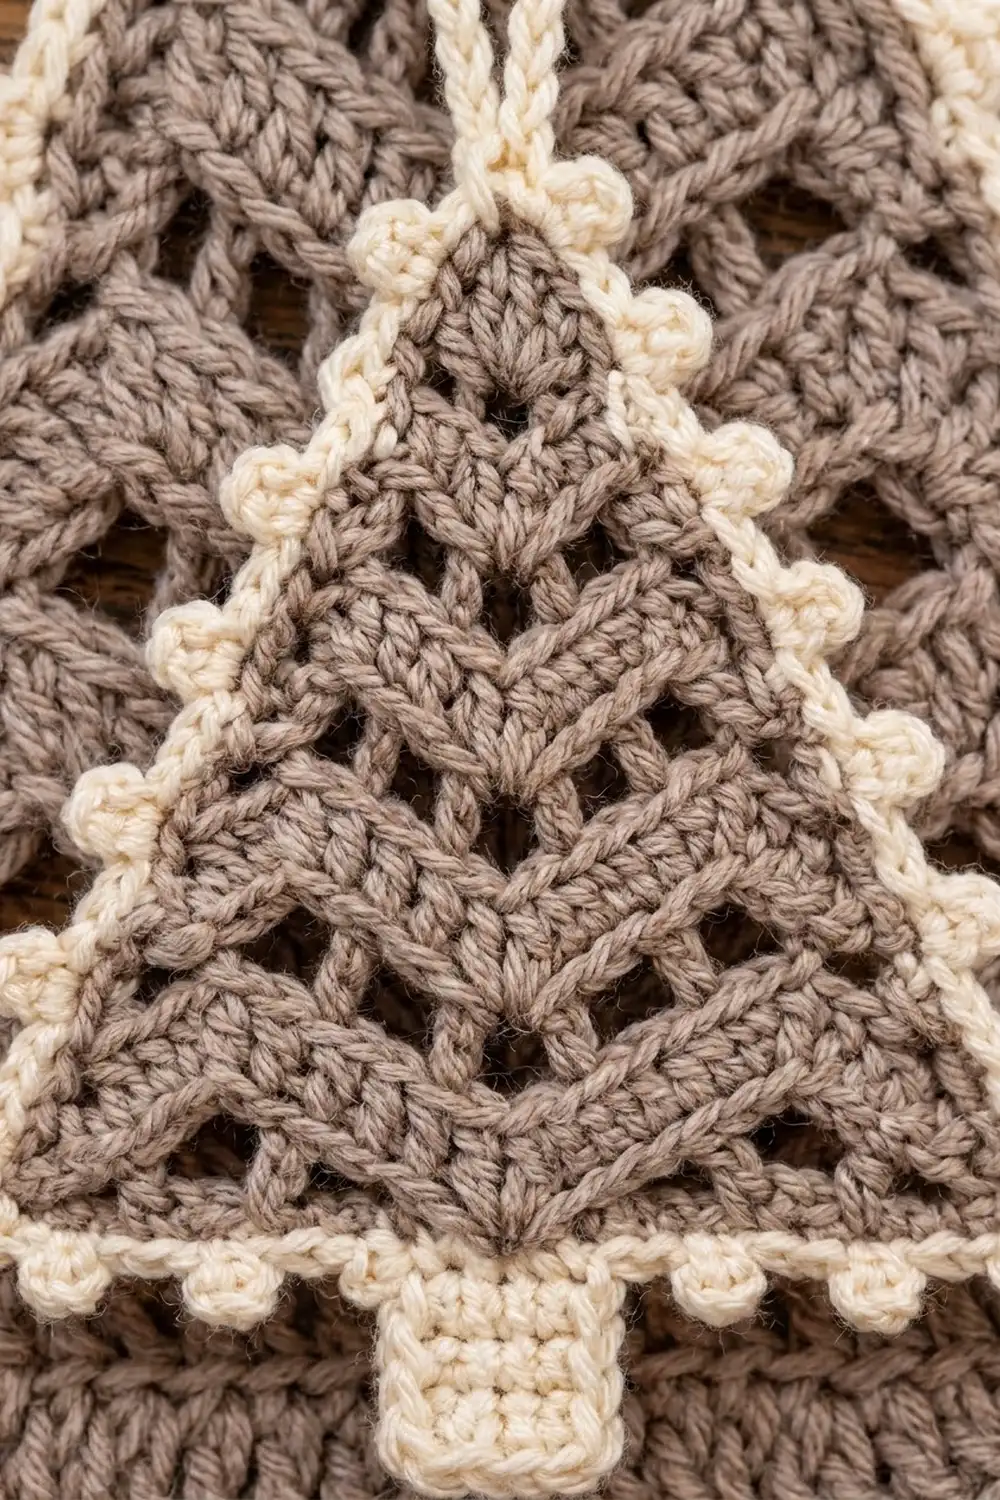
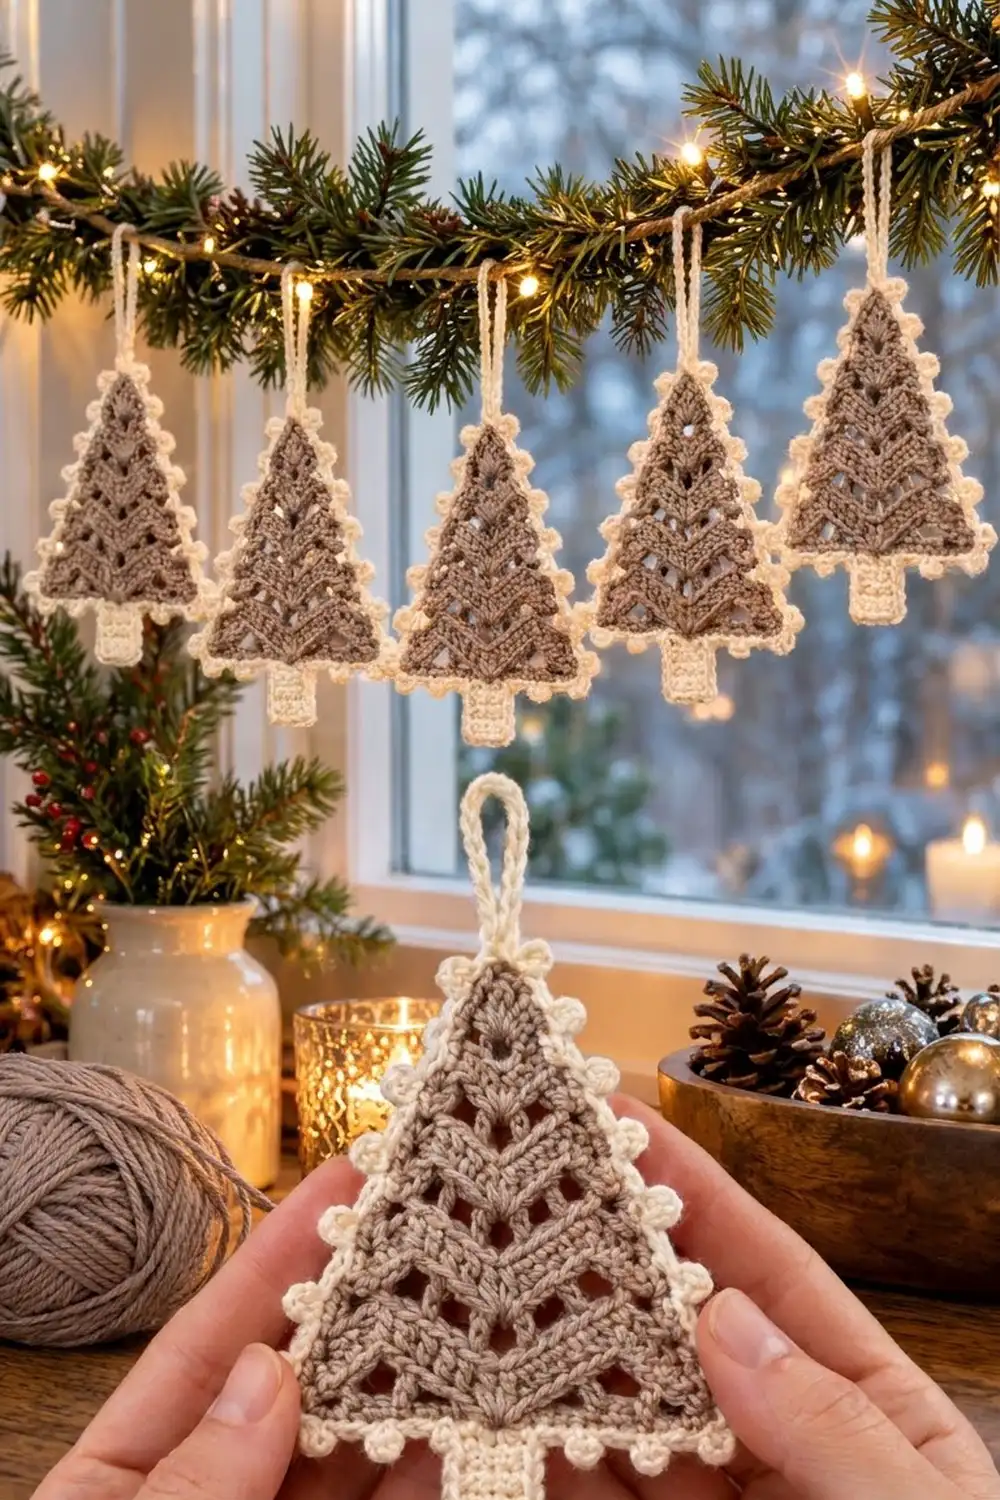
The Frosted Pine Chevron Tree is a small, flat Christmas tree ornament with a soft Scandinavian look. The body is a warm taupe. Its rows climb in stacked chevrons that point upward and look like layered pine branches. A small column of eyelets runs straight up the center spine.
A cream border frames the tree, with little round picots spaced evenly along both slanted sides and the bottom edge. A solid cream trunk sits at the bottom center. A cream chain loop at the tip lets you hang the ornament on a tree, a gift, or a window hook.
The pattern uses US crochet terms. The finished ornament is about 4.6 in (11.7 cm) wide and 5.1 in (13.0 cm) tall from the tip to the bottom of the trunk, not counting the hanging loop.
The ornament is made in one piece. You crochet the taupe body from the bottom up in turned rows of double crochet. Each row decreases at both edges and increases at the center, which bends it into a chevron. Then you add two cream border rounds; the second one has the picots and the hanging loop. Last, you crochet the trunk down from the bottom border.
Finished Size and Construction
- Finished size: about 4.6 in (11.7 cm) wide x 5.1 in (13.0 cm) tall, plus a hanging loop about 1.75 in (4.4 cm) tall
- Skill level: Easy+ (basic stitches plus simple clusters)
- Terminology: US crochet terms
- Yarn weight: DK (#3)
- Hook: 3.5 mm (E-4)
- Number of pieces: 1 (single ornament, no joining)
- Layout: one standalone triangle with trunk and loop
- Body size before border: 3.8 in (9.7 cm) wide at the base x 3.5 in (8.9 cm) tall
- Border depth: about 0.4 in (1.0 cm), including picots
- Trunk: about 1.0 in (2.5 cm) wide x 0.9 in (2.3 cm) tall
Materials
A smooth DK cotton or cotton blend gives the crispest stitch definition. A matte, slightly heathered taupe shows the chevrons best, and a soft ivory or cream gives the picots a frosted look. Acrylic DK also works, but it may need a little more blocking to lie flat.
- Color A (taupe): 8 g, about 18 m
- Color B (cream): 5 g, about 12 m
These amounts include a small margin for your test piece and for weaving in ends.
Tools:
- 3.5 mm (E-4) crochet hook
- Tapestry needle
- Scissors
- 1 stitch marker
- Blocking mat and rust-proof pins
- Spray bottle with water
- Optional: light fabric stiffener
Abbreviations (US Terms)
- ch – chain
- sl st – slip stitch
- sc – single crochet
- dc – double crochet
- st(s) – stitch(es)
- sp – space
- RS – right side
- WS – wrong side
Special stitches
- dc3tog (double crochet 3 together): [Yarn over, insert hook in next st, pull up a loop, yarn over, pull through 2 loops] 3 times, yarn over, pull through all 4 loops on hook. Uses 3 sts and makes 1 st.
- dc5tog (double crochet 5 together): Work like dc3tog, but repeat the bracketed steps 5 times in the places stated, then yarn over and pull through all 6 loops. Makes 1 st.
- Picot: Ch 3, sl st in 3rd ch from hook. It sits on top of the sc you just made.
Turning chains in this pattern do not count as stitches.
Gauge and Checkpoints
- Body gauge: 20 dc and 10 rows = 4 in (10.2 cm) in Color A
- Border gauge: 20 sc and 22 rows = 4 in (10.2 cm) in Color B
Make one full ornament as your test piece. It’s small, so it’s quicker than a separate swatch.
Checkpoints:
- After Row 1: the strip is 3.8 in (9.7 cm) wide.
- After Row 5: the body is 2.0 in (5.1 cm) tall at the side edges.
- After Row 9: the body is 3.5 in (8.9 cm) tall and 3.8 in (9.7 cm) wide at the base.
- After Border Round 1: about 4.2 in (10.7 cm) wide.
- After Border Round 2: about 4.6 in (11.7 cm) wide.
If Row 1 is too wide, go down half a hook size. If it’s too narrow, go up half a hook size. Row height matters too. If each row is taller than 0.4 in (1.0 cm), the tree will look stretched, so try a smaller hook or a firmer yarn. If you need to change hooks, start the piece over rather than switching partway through.
Body (Color A, Taupe)
The body is worked from the base up in turned rows. The side facing you on odd rows is the RS.
Foundation: With Color A, ch 22.
Row 1 (RS): Dc in 4th ch from hook (the skipped ch do not count as a st) and in next 8 ch, ch 1, skip next ch, dc in last 9 ch, turn. (18 dc + 1 center ch-1 sp)
Row 1 is flat. The skipped center chain sits directly below the eyelet spine that forms in the next rows.
Rows 2–8: Ch 2 (does not count as st), dc3tog over first 3 sts, dc in each dc to center ch-1 sp, (dc, ch 1, dc) in ch-1 sp, dc in each dc to last 3 sts, dc3tog over last 3 sts, turn.
On each half of the row, the dc3tog removes 2 sts at the edge and the (dc, ch 1, dc) adds 1 st at the center. So each half loses 1 st and each row loses 2 sts in total. Losing stitches at the edges while adding them at the center bends every row into an upward chevron. The ch-1 spaces stack on top of each other to form the center eyelet column.
Stitch counts (dc only, not counting the center ch-1 sp):
- Row 2: 16 dc
- Row 3: 14 dc
- Row 4: 12 dc
- Row 5: 10 dc
- Row 6: 8 dc
- Row 7: 6 dc
- Row 8: 4 dc
On Row 8 there are no dc between each dc3tog and the center. You work dc3tog, (dc, ch 1, dc) in the sp, dc3tog. Each half has 2 sts.
Row 9 (RS): Ch 2 (does not count), dc5tog, working 1 leg in each of the first 2 sts, 1 leg in the ch-1 sp, and 1 leg in each of the last 2 sts. Ch 1 to close. Fasten off. (1 st – the apex)
Weave in the starting tail.
Check: the body is a triangle 3.8 in (9.7 cm) across the base and 3.5 in (8.9 cm) tall. The sides should be straight, not wavy.
Border (Color B, Cream)
The border goes around the triangle only. You add the trunk afterward.
Border gauge: 20 sc = 4 in (10.2 cm), so each sc is about 0.2 in (0.5 cm) wide. Each dc row is 0.4 in (1.0 cm) tall, so 2 sc per row end match the row height. The slanted sides are slightly longer than the stacked rows, so 2 sc per row end keeps the edge snug and straight without ruffling.
Round 1 (RS): With RS facing and the foundation edge at the bottom, join Color B with sc in the free loop of the first foundation ch at the bottom right corner. Work 2 more sc in the same loop (bottom right corner made).
- Working up the right side, work 2 sc in each of the 8 row ends of Rows 1–8 (16 sc).
- Work 3 sc in the top of the Row 9 cluster (apex corner).
- Working down the left side, work 2 sc in each of the 8 row ends of Rows 8–1 (16 sc).
- Work 3 sc in the free loop of the last foundation ch (bottom left corner).
- Sc in each of the next 17 free loops across the bottom, including the loop of the skipped center ch.
Join with sl st to first sc. (58 sc)
Stitch count per side. The middle sc of each 3-sc corner group is the corner stitch:
- Right side: 1 corner + 18 sts between + 1 corner = 20 sts
- Left side: 1 corner + 18 sts between + 1 corner = 20 sts
- Bottom: 1 corner + 19 sts between + 1 corner = 21 sts
Each corner stitch is shared by two sides, so the total is 3 corners + 18 + 18 + 19 = 58 sc. Place a marker in the apex corner st.
Round 2 (RS): Ch 1, sc in first st (this is the last of the 19 bottom sts between corners).
- Bottom right corner: (sc, picot, sc) in next st.
- Right side: sc in next st, (sc, picot) in next st, sc in next 2 sts 5 times, (sc, picot) in next st, sc in next st. (18 sc, 6 picots)
- Apex: (sc, ch 18, sc) in the marked st. This chain is the hanging loop.
- Left side: sc in next st, (sc, picot) in next st, sc in next 2 sts 5 times, (sc, picot) in next st, sc in next st. (18 sc, 6 picots)
- Bottom left corner: (sc, picot, sc) in next st.
- Bottom: sc in next st, (sc, picot) in next st, sc in next 2 sts, (sc, picot) in next st, sc in next 9 sts, (sc, picot) in next st, sc in next 2 sts, (sc, picot) in next st. (18 sc, 4 picots)
Join with sl st to first sc. Fasten off.
Round 2 totals: 61 sc (3 corners x 2 + 18 + 18 + 19), 18 picots, and 1 hanging loop.
Why the math works: Each slanted side has 18 sts between corners. The repeat puts picots on sts 2, 5, 8, 11, 14, and 17, which leaves exactly 1 plain sc at each end, so the picots are centered on the side. On the bottom, the 19 sts between corners get picots on sts 2, 5, 15, and 18, which mirror each other. Sts 8–12 stay plain; these are the 5 center sts you’ll work the trunk into.
Trunk (Color B, Cream)
Hold the tree upside down with RS facing. Find the center sc of the bottom edge, which sits directly below the eyelet spine. Count 2 sts to the right of it.
Row 1: Join Color B with sc in that st, sc in next 4 sts, turn. (5 sc)
Rows 2–5: Ch 1, sc in each st across, turn. (5 sc)
Fasten off after Row 5. The trunk is about 1.0 in (2.5 cm) wide and 0.9 in (2.3 cm) tall, centered under the spine.
Final Blocking
- Weave in all ends through stitches of the same color.
- Mist the ornament with water until it’s evenly damp but not dripping.
- Lay it RS up on the blocking mat.
- Pin the two bottom corners 4.6 in (11.7 cm) apart.
- Pin the apex so the total height to the bottom of the trunk is 5.1 in (13.0 cm).
- Straighten both slanted sides with pins placed between the picots, not through them.
- Pin the trunk square and centered.
- Gently roll each picot between your fingers to round it.
- Let it dry completely. For a stiffer ornament, brush on a light fabric stiffener and let it dry again.
Final Quality-Control Checklist
- The body is 3.8 in (9.7 cm) wide x 3.5 in (8.9 cm) tall before the border.
- The center eyelet column is straight and vertical.
- Both slanted sides are straight and the same length.
- Round 1 has 58 sc; Round 2 has 61 sc and 18 picots.
- Each slanted side has 6 picots, and the bottom has 2 picots on each side of the trunk.
- Corner picots sit exactly on the two bottom points.
- The hanging loop sits exactly at the apex and is about 1.75 in (4.4 cm) tall.
- The trunk has 5 sc in each of 5 rows and is centered.
- The finished size is about 4.6 in (11.7 cm) x 5.1 in (13.0 cm).
- All ends are hidden and secure.
Troubleshooting
Sides look wavy: You probably worked more than 2 sc in some row ends. Recount: each side should have 16 sc between the corner groups.
Sides pull in and the tree cups: The border is too tight. Go up half a hook size for Round 1 only.
Chevrons look flat: Make sure you work (dc, ch 1, dc) in the center sp on every row from 2 to 8.
Tree is too short and wide: Your dc rows are too short. Pull up your loops a little taller, or go up half a hook size.
One half is off by 1 st: You probably worked a separate dc into the last st instead of including it in the dc3tog. Each half should match the counts listed.
Picots lean or flatten: Keep the sl st snug and the 3 chains even. Shape the picots while blocking.
Trunk is off-center: Pull it out and rejoin 2 sts to the right of the center bottom sc.
Care
Hand wash in cool water with mild soap, press out the water in a towel, and reshape the ornament flat to dry. Store it flat or hanging, away from heavy decorations that could crush the picots.
Final Notes
The whole ornament follows one simple measurement chain. Row 1 sets the base at 3.8 in (9.7 cm). Nine rows bring the body to 3.5 in (8.9 cm) tall. Border Round 1 has 58 sc and brings the width to about 4.2 in (10.7 cm). Round 2 adds the picots and loop and finishes the width at 4.6 in (11.7 cm). The 5-row trunk brings the total height to 5.1 in (13.0 cm).
If each checkpoint matches, the next stage will fit. Make one ornament, check it against these numbers, then make as many as you like for your tree or gift wrapping.
Happy crocheting!