

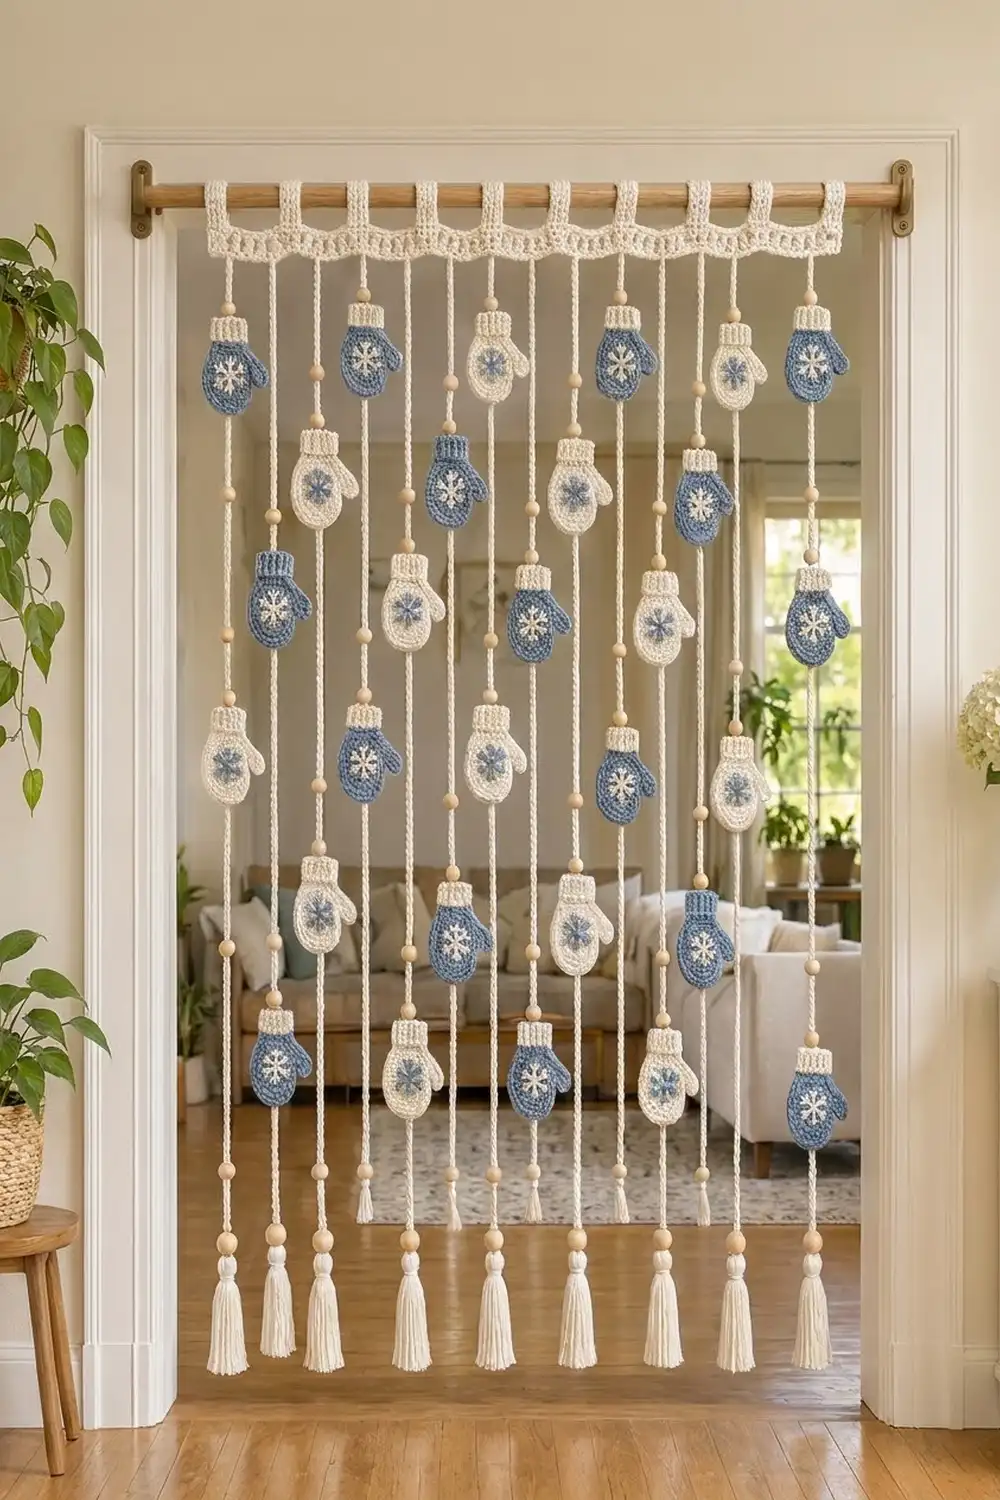
This beaded doorway curtain hangs from a wooden rod. Twelve cream cords hang from a scalloped header band, and small flat mittens are stitched along each cord. Natural wooden beads sit between them, and each cord ends in a soft cream tassel.
The colors are wintry and calm: dusty denim blue, warm cream and pale natural wood. Half the mittens are blue with cream snowflakes, and half are cream with blue snowflakes. Most cuffs are cream ribbing, and a few blue mittens have blue cuffs.
This pattern uses US crochet terms. The finished curtain is 33 in (83.8 cm) wide and 72 in (182.9 cm) long, measured from the top of the header band to the tassel tips. Each mitten is 3.5 in (8.9 cm) wide and 4.5 in (11.4 cm) tall.
Here is how it comes together. You work the mittens flat in rows, then add a thumb, an outline round, a ribbed cuff and an embroidered snowflake. Next you make the slip-stitch cords and the tassels. The header band is worked in rows and gets scallops and tabs. Finally, you bead the cords, stitch the mittens on and attach the cords to the scallop peaks.
Finished Size and Construction
- Finished size: 33 in (83.8 cm) x 72 in (182.9 cm), plus tabs
- Skill level: Intermediate
- Terminology: US
- Yarn weight: Worsted (#4) cotton
- Hook: 4.0 mm (G-6)
- Number of pieces: 48 mittens, 12 cords, 12 tassels and 1 header band
- Layout: 12 cords with 4 mittens each, staggered on alternate cords
- Mitten size: 3.5 in (8.9 cm) x 4.5 in (11.4 cm); 4.25 in (10.8 cm) wide including the thumb
- Mitten body before outline and cuff: 3 in (7.6 cm) x 3.3 in (8.4 cm)
- Header band before scallops: 33 in (83.8 cm) x 2 in (5.1 cm)
- Scallop depth: 0.5 in (1.3 cm)
Materials
Use a smooth, firmly plied worsted cotton. Cotton holds the flat mitten shape and resists stretching on long cords. These estimates assume about 175 m per 100 g.
- Cream: 400 g / 700 m (header, cords, tassels, cream mittens, most cuffs, and the snowflakes on blue mittens)
- Dusty blue: 160 g / 280 m (blue mittens, 6 blue cuffs, and the snowflakes on cream mittens)
- 4.0 mm (G-6) crochet hook
- 115 natural wooden beads, 12 mm, with holes of at least 5 mm
- Wooden dowel rod, 1 in (2.5 cm) thick and 36 in (91.4 cm) long, with 2 brackets
- Tapestry needle, plus a bodkin or loop threader
- Rigid card 4.5 in (11.4 cm) tall, for the tassels
- Stitch markers, blocking mat, rust-proof pins and a measuring tape
The quantities include a margin of about 15 percent for swatching and tails.
Abbreviations (US Terms)
- ch: chain
- sl st: slip stitch
- sc: single crochet
- hdc: half double crochet
- dc: double crochet
- tr: treble crochet
- sc2tog: single crochet 2 together
- FPhdc / BPhdc: front post / back post half double crochet
- st(s): stitch(es)
- sk: skip
- RS: right side
Special stitch: slip-stitch cord. Make a chain, then work 1 sl st into the back bump of each chain. This gives a firm, rounded cord that does not curl.
Gauge and Checkpoints
Gauge: 16 sc and 18 rows = 4 in (10.2 cm). In dc, 16 sts = 4 in (10.2 cm), and each dc row is about 0.5 in (1.3 cm) tall.
Make one complete mitten first and check it at these points:
- After mitten Row 3: 3 in (7.6 cm) wide
- After mitten Row 15: 3.3 in (8.4 cm) tall
- After the cuff: 4.5 in (11.4 cm) tall in total
- Header after Row 1: 33 in (83.8 cm) long
If your pieces come out too big, go down one hook size. If they are too small, go up one hook size. Header width matters most, because the cord spacing depends on it.
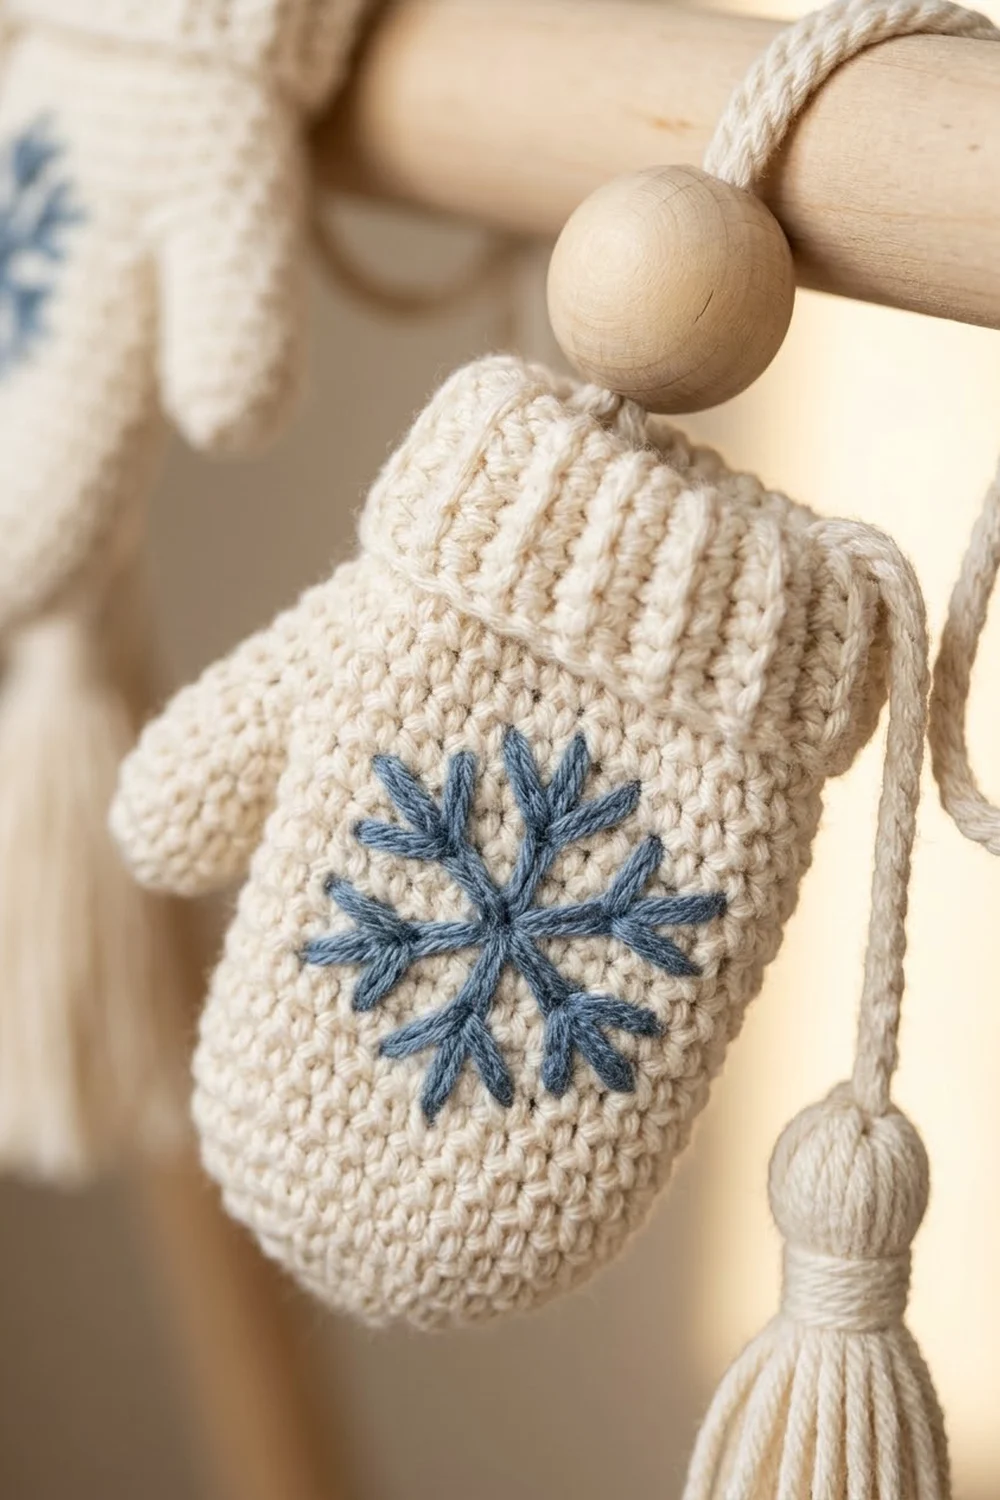
Mitten Body
Make 48 bodies: 24 in blue and 24 in cream. Row 1 is the RS.
Row 1: Ch 11, sc in 2nd ch from hook and in each ch across, turn. (10 sc)
Row 2: Ch 1, sc in each st across, turn. (10 sc)
Row 3: Ch 1, 2 sc in first st, sc in next 8 sts, 2 sc in last st, turn. (12 sc)
Rows 4–12: Ch 1, sc in each st across, turn. (12 sc)
Row 13: Ch 1, sc2tog, sc in next 8 sts, sc2tog, turn. (10 sts)
Row 14: Ch 1, sc2tog, sc in next 6 sts, sc2tog, turn. (8 sts)
Row 15: Ch 1, sc2tog, sc in next 4 sts, sc2tog. (6 sts) Fasten off.
The foundation edge is the wrist. Rows 13–15 round off the fingertips.
Thumb
Hold the mitten with the RS facing and the foundation at the bottom. Join the same color in the right-hand row-end of Row 5.
Row 1: Ch 1, work 1 sc in each row-end of Rows 5–8, turn. (4 sc)
Rows 2–3: Ch 1, sc in each st, turn. (4 sc)
Row 4: Ch 1, sc2tog twice. (2 sts) Fasten off.
The thumb sticks out about 0.75 in (1.9 cm).
Outline Round
With the RS facing, join the body color at the bottom-right corner. Work 1 sc in each right-hand row-end of Rows 1–4 (4 sc). Work around the thumb with 1 sc in each of its 4 row-ends on one side, 1 sc in each of its 2 tip sts and 1 sc in each of its 4 row-ends on the other side (10 sc). Work 1 sc in each row-end of Rows 9–15 (7 sc). Across Row 15, work 2 sc in the first st, sc in the next 4 sts and 2 sc in the last st (8 sc). Work 1 sc in each left-hand row-end of Rows 15–1 (15 sc). Fasten off. (44 sc)
Leave the foundation edge unworked for the cuff.
Ribbed Cuff
Turn the mitten so the foundation edge is at the top, with the RS still facing. Join the cuff color in the last outline st.
Row 1: Ch 1, sc in the same st, sc in each of the 10 foundation loops, then sc in the first outline st, turn. (12 sc)
Row 2: Ch 2 (does not count), hdc in each st, turn. (12 hdc)
Rows 3–4: Ch 2 (does not count), *FPhdc around next st, BPhdc around next st; rep from * 5 more times, turn. (12 sts)
Fasten off. Stack each FPhdc over a FPhdc so the ribs run straight up and down. The cuff is 3 in (7.6 cm) wide and 1 in (2.5 cm) tall.
Cuff colors: Give all cream mittens cream cuffs. Give 18 blue mittens cream cuffs and 6 blue mittens blue cuffs.
Snowflake Embroidery
Use cream on the blue mittens and blue on the cream mittens. Center the snowflake on palm Rows 4–12.
- Work 3 straight stitches that cross at one center point. This makes 6 spokes, each reaching 0.75 in (1.9 cm) from the center.
- At the tip of each spoke, add a small V made of 2 straight stitches, each 0.25 in (0.6 cm) long.
- Add a short bar across the middle of each spoke.
The finished snowflake is 1.5 in (3.8 cm) across.
Cords
Make 12 in cream.
Ch 267, then sl st in the back bump of the 2nd ch from hook and in each ch across. (266 sl st)
The cord is 66.5 in (168.9 cm) long. The top 0.5 in (1.3 cm) overlaps behind the header, which leaves 66 in (167.6 cm) hanging. Leave a 10 in (25.4 cm) tail at each end.
Tassels
Make 12 in cream.
Wrap the yarn 20 times around the 4.5 in (11.4 cm) card. Tie the loops together at the top, then cut through the loops at the bottom. Wrap tightly around the bundle 0.5 in (1.3 cm) below the top, then trim the tassel to 4 in (10.2 cm).
Make All Pieces
- 18 blue mittens with cream cuffs and cream snowflakes (B)
- 6 blue mittens with blue cuffs and cream snowflakes (b)
- 24 cream mittens with cream cuffs and blue snowflakes (C)
- 12 cords, 12 tassels and 108 beads (plus 7 spares)
Distances in the grid run from the scallop peak down to the top of each cuff.
Drop              1  2  3  4  5  6  7  8  9 10 11 12
 6 in (15.2 cm)   B  .  B  .  B  .  B  .  B  .  B  .
13 in (33.0 cm)   .  C  .  C  .  C  .  C  .  C  .  C
20 in (50.8 cm)   C  .  C  .  C  .  C  .  C  .  C  .
27 in (68.6 cm)   .  B  .  B  .  B  .  B  .  B  .  B
34 in (86.4 cm)   b  .  b  .  b  .  b  .  b  .  b  .
41 in (104.1 cm)  .  C  .  C  .  C  .  C  .  C  .  C
48 in (121.9 cm)  C  .  C  .  C  .  C  .  C  .  C  .
55 in (139.7 cm)  .  B  .  B  .  B  .  B  .  B  .  B
This gives 24 blue mittens (18 B + 6 b) and 24 cream mittens (C).
Joining
Bead the cords. Each cord takes 9 beads:
- 1 top bead, 3 in (7.6 cm) below the peak
- 1 bead directly above each of the 4 mittens
- 1 spacer bead centered in each of the 3 gaps between mittens
- 1 bead at the bottom end
Use a bodkin to thread all 9 beads onto the bottom tail, in order. Slide each bead into place, then tack it with one stitch through the cord just below the bead.
Attach the mittens. Lay each mitten face up with the cord running down behind its center. Whipstitch the cord to the back of the 2 center sts of cuff Row 4, then to the back of the 2 center sts of mitten Row 15. Catch only the back loops so the stitches don’t show on the front. Keep the cord relaxed rather than stretched, so each mitten hangs flat.
Attach the tassels. Pass the bottom tail through the top of a tassel and knot it securely just below the bottom bead.
Attach the cords to the header. Once the header is finished (next section), attach cord 1 to segment 1, cord 2 to segment 2, and so on. Pass the top tail through the space between the 2 tr at the segment’s peak. Overlap 0.5 in (1.3 cm) of cord behind the peak and sew it down firmly.
Checkpoint: The cords sit 2.75 in (7.0 cm) apart, center to center, and hang 66 in (167.6 cm) below the peaks.
Border: Header Band, Scallops and Tabs
Work the whole header in cream. The border gauge is the same as the main gauge: 16 sts = 4 in (10.2 cm).
Row 1: Ch 133, sc in 2nd ch from hook and in each ch across, turn. (132 sc)
Row 2: Ch 3 (counts as dc), dc in each st across, turn. (132 dc)
Row 3 (eyelet row): Ch 4 (counts as dc and ch 1), sk next st, *dc in next st, ch 1, sk next st; rep from * 63 more times, dc in each of last 2 sts, turn. (132 sts, counting each dc and each ch-1 as 1 st)
Row 4: Ch 3 (counts as dc), dc in each dc and each ch-1 sp across, turn. (132 dc)
Row 5: Ch 1, sc in each st across. (132 sc) Fasten off.
The band now measures 33 in x 2 in (83.8 cm x 5.1 cm). Place a marker after every 11 sts to divide it into 12 segments.
Row 6 (scallops, conversion row): Turn the band so the foundation edge is at the top. Join yarn in the first foundation loop. In each 11-st segment, work 1 of the following in each st: sc, hdc, dc, 2 dc, tr, 2 tr (the peak), tr, 2 dc, dc, hdc, sc. That makes 14 sts per segment. Fasten off. (132 sts worked 1 per st + 36 extra = 168 sts)
Row 7 (tabs, make 12): In each segment, join in the 4th st of Row 5. Ch 1 and sc in sts 4–8 (5 sc). Work 15 more rows of 5 sc, for 16 rows in total. Fold the tab to the back and whipstitch its last row to the back of Row 2, sts 4–8. Each tab is 1.25 in (3.2 cm) wide and forms a loop about 3.5 in (8.9 cm) around.
Row 8 (short ends): On each short end, work 1 sc in each sc row-end and 2 sc in each dc row-end. (1 + 6 + 1 = 8 sc per side)
Why the math works: There are 12 cords and 11 sts per segment, so 12 x 11 = 132 sts along both the top and bottom edges. At 16 sts per 4 in, 132 sts = 33 in (83.8 cm). Row 6 adds exactly 3 sts per segment, grouped around the peak. That builds the wave without changing the 11-st spacing. The tabs use the center 5 of each segment’s 11 sts, so each tab sits right above its cord.
Final Blocking
- Wet each mitten and roll it in a towel to press out the water. Pin it to 3.5 in x 4.5 in (8.9 cm x 11.4 cm), with the thumb angled out.
- Pin the header to 33 in x 2 in (83.8 cm x 5.1 cm). Pin each scallop peak 0.5 in (1.3 cm) below the band.
- Let everything dry completely.
- Hang the finished curtain on the rod overnight so the cords settle.
- Lightly steam the tassels and trim them evenly to 4 in (10.2 cm).
Final Quality-Control Checklist
- 48 mittens, each 3.5 in x 4.5 in (8.9 cm x 11.4 cm)
- Every outline round has 44 sc, and every cuff has 12 sts
- Snowflakes are centered, with 6 even spokes
- The header has 132 sts, 168 scallop sts and 12 tabs
- Cords are 2.75 in (7.0 cm) apart and hang 66 in (167.6 cm)
- Mitten colors match the layout grid
- All beads are tacked and all ends are woven in
Troubleshooting
- Mitten curls: Your tension is too tight. Block the mitten firmly, or go up one hook size.
- Thumb looks lumpy: Thumb Row 1 needs exactly 1 sc per row-end.
- Ribbing looks flat: Stack each FPhdc over a FPhdc.
- Cords are different lengths: Recount to 266 sl st, then hang the cords side by side to compare.
- Header ripples: Check that Row 1 has exactly 132 sc.
- Mittens twist on the cord: Add a third tack at the middle of the palm.
Care
Dust the curtain gently, or hand-wash it in cool water and dry it flat. Rehang it only once the cords are completely dry.
Final Notes
Here is the full measurement chain. A 3 in (7.6 cm) body becomes a 3.5 in x 4.5 in (8.9 cm x 11.4 cm) mitten. Twelve segments of 11 sts make a 132-st header that is 33 in (83.8 cm) wide. The 2 in (5.1 cm) band, 66 in (167.6 cm) cords and 4 in (10.2 cm) tassels add up to 72 in (182.9 cm). Check each stage before moving on, and the curtain will hang straight.
Happy crocheting!