

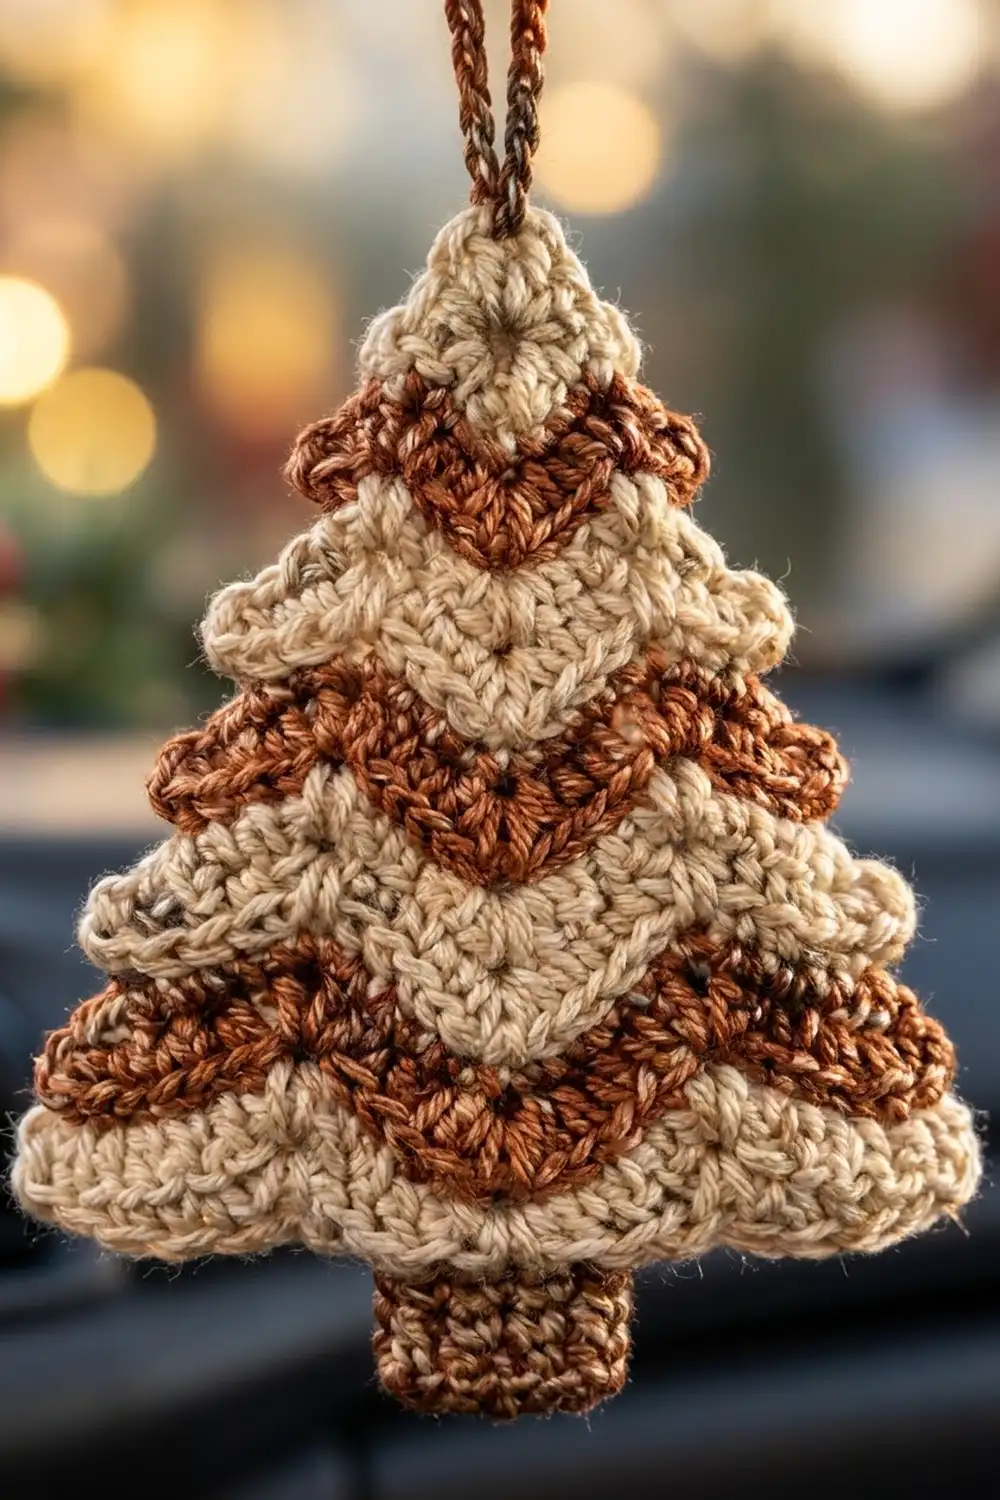
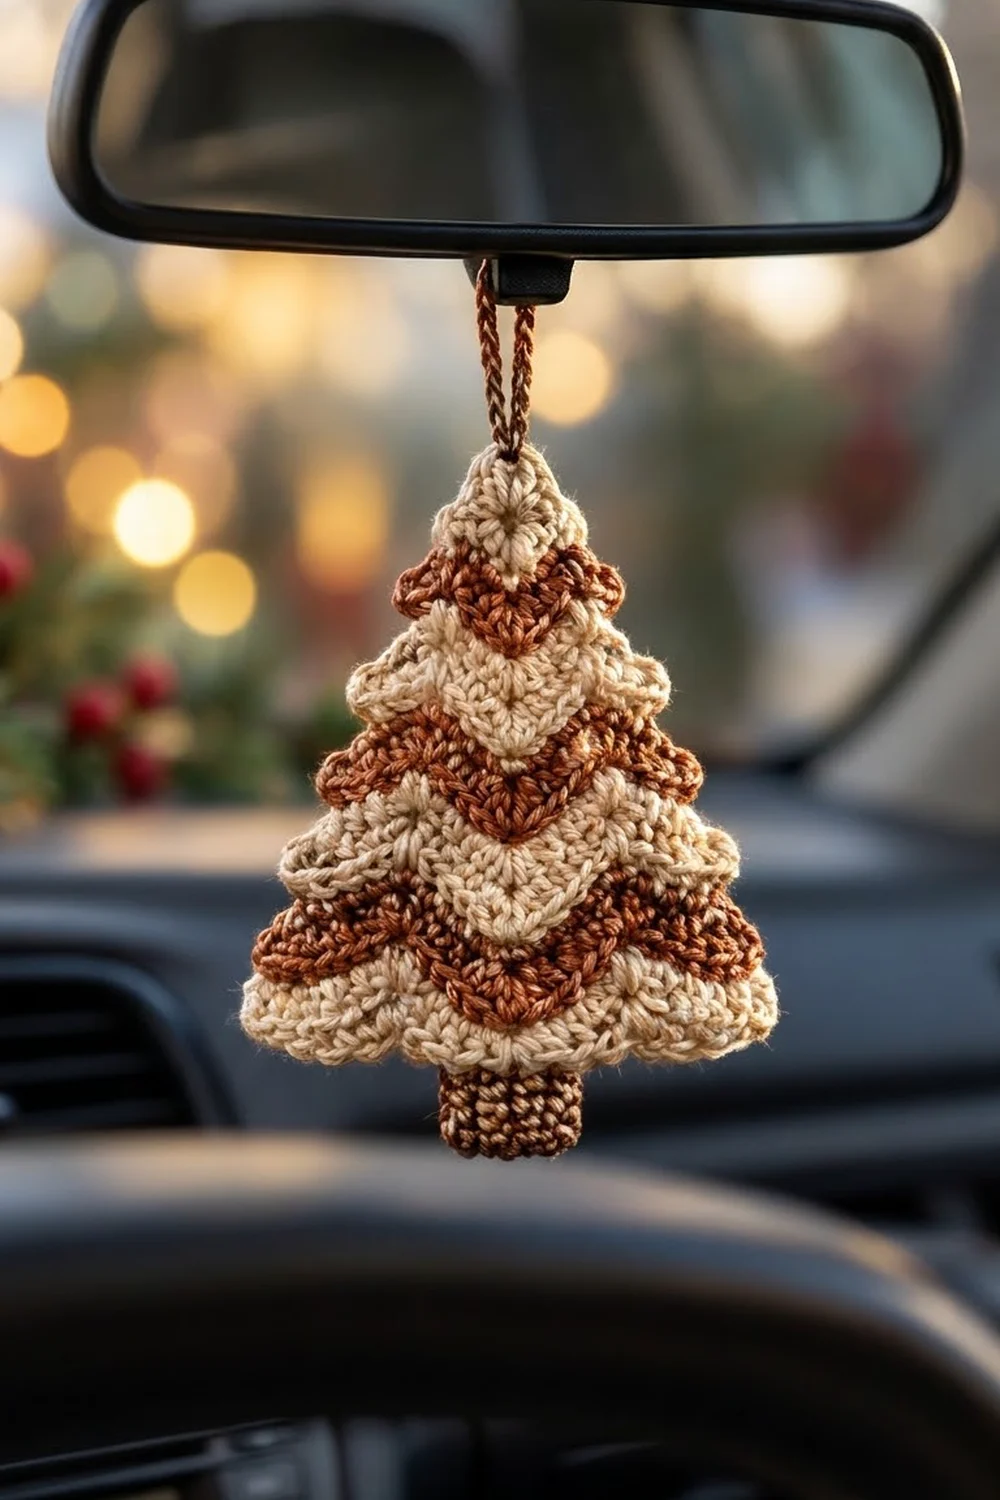
This little tree is made to hang from a rearview mirror, a window latch, or a branch of your real tree. It is one flat piece with cream and rusty copper stripes. Every stripe dips into a soft V at the center, so the tree looks like it has layered branches.
The palette is warm and simple: a creamy oatmeal and a deep rust-brown. Together they look a lot like gingerbread and icing. A small square rust trunk sits at the bottom, a row of cream scallops finishes the lower edge, and a chained rust loop at the tip makes it easy to hang.
The pattern uses US crochet terms. The finished tree is 4.5 in (11.4 cm) wide and 4.5 in (11.4 cm) tall from the tip to the bottom of the trunk. That height doesn’t include the hanging loop.
The tree is worked top-down in rows from a magic ring at the tip. Each row adds stitches at both edges and at the center, and that center increase is what forms the chevron. You fasten off at the end of every row and join the next color at the right edge, so every row is worked with the right side facing. A scalloped border goes along the bottom. Then the trunk is worked into the free back loops at the center, and the loop is chained at the tip.
Finished Size and Construction
- Finished size: 4.5 in (11.4 cm) wide × 4.5 in (11.4 cm) tall, not counting the loop
- Skill level: Easy / advanced beginner
- Terminology: US crochet terms
- Yarn weight: Sport weight (2), cotton or cotton blend
- Hook: 3.25 mm (US D/3)
- Number of pieces: 1. The trunk and loop are worked onto the tree, so there’s no sewing.
- Layout: A single flat triangle tree with 8 chevron stripe rows, a scalloped bottom border, a trunk, and a loop
- Tree body before the border: 4.25 in (10.8 cm) wide × 3.5 in (8.9 cm) tall
- Border depth: 0.25 in (0.6 cm)
- Trunk: 0.8 in (2.0 cm) wide, with 0.75 in (1.9 cm) showing below the scallops
- Hanging loop: about 1.5 in (3.8 cm) drop
Materials
Choose a smooth cotton in sport weight. Cotton holds the scallops and the V points crisply and doesn’t stretch much when the ornament hangs. A soft acrylic also works, but the ornament will be a little floppier.
Yarn
- Color A, Cream (oatmeal): 5 g / about 15 m (16 yd)
- Color B, Rust (copper-brown): 5 g / about 15 m (16 yd)
These quantities include a margin for joins, weaving in ends, and a gauge test. The tree uses only about two-thirds of each amount.
Tools
- 3.25 mm (US D/3) crochet hook
- Tapestry needle
- Scissors
- Stitch marker (1)
- Ruler or tape measure
- Blocking mat and rust-proof pins
- Spray bottle with water
Abbreviations (US Terms)
- ch: chain
- sl st: slip stitch
- sc: single crochet
- dc: double crochet
- st(s): stitch(es)
- FLO: front loop only
- BL: back loop
- RS / WS: right side / wrong side
- MR: magic ring
Special stitch: Standing dc. Start with a slip knot on your hook. Yarn over, insert the hook into the stitch, yarn over and pull up a loop, then [yarn over, pull through 2 loops] twice. It counts as 1 dc and gives a neater edge than a joined chain-3.
Special stitch: Standing sc. Start with a slip knot on your hook. Insert the hook into the stitch, yarn over and pull up a loop, then yarn over and pull through both loops. It counts as 1 sc.
Gauge and Checkpoints
Gauge: 12 dc and 5 rows of dc = 2 in (5.1 cm) square. That works out to 6 dc per 1 in (2.5 cm), and each dc row is about 0.4 in (1.0 cm) tall.
The tree is small, so make one and use it as your gauge test. Width is measured straight across from edge to edge at the widest point. Height is measured from the tip straight down to the V point at the center.
| After | Stitches | Width | Height |
|---|---|---|---|
| Row 2 | 9 | 1.25 in (3.2 cm) | 0.8 in (2.0 cm) |
| Row 4 | 17 | 2.25 in (5.7 cm) | 1.75 in (4.4 cm) |
| Row 6 | 25 | 3.25 in (8.3 cm) | 2.6 in (6.6 cm) |
| Row 8 | 33 | 4.25 in (10.8 cm) | 3.5 in (8.9 cm) |
| Border | 33 | 4.5 in (11.4 cm) | 3.75 in (9.5 cm) |
If your tree is too big (more than 0.25 in / 0.6 cm over at Row 4), go down to a 3.0 mm hook. You can also tighten your yarn-overs.
If your tree is too small, go up to a 3.5 mm (US E/4) hook.
If the width is right but the V is too shallow or too deep, check the center group. All 3 dc must go into the single center stitch.
Pattern
Notes
- Work every row with the RS facing, from right to left. Don’t turn.
- Fasten off at the end of every row, leaving a 4 in (10.2 cm) tail. Join the next color with a standing dc in the first stitch at the right edge.
- Work over the previous row’s tails for the first few stitches of each row. This cuts your weaving in roughly in half.
- The center stitch is the middle stitch of each row. Place a marker in it and move the marker up as you go.
- Each row adds 4 stitches: 1 at each edge and 2 at the center.
Tree Body
Row 1 (Color A, Cream): Make a MR. Ch 3 (counts as dc), then work 4 dc in the ring. Pull the ring tightly closed. Fasten off. (5 sts) The center stitch is st 3.
Row 2 (Color B, Rust): Work a standing dc in the first st, then dc in the same st (2 dc in the first st). Dc in the next st, 3 dc in the center st, dc in the next st, 2 dc in the last st. Fasten off. (9 sts)
General increase row: 2 dc in the first st, dc in each st up to the center st, 3 dc in the center st, dc in each st up to the last st, 2 dc in the last st. If the previous row has P stitches, you work (P − 3) ÷ 2 single dc on each side of the center.
Row 3 (Color A): 2 dc in the first st, dc in the next 3 sts, 3 dc in the center st, dc in the next 3 sts, 2 dc in the last st. (13 sts)
Row 4 (Color B): 2 dc in the first st, dc in the next 5 sts, 3 dc in the center st, dc in the next 5 sts, 2 dc in the last st. (17 sts) Checkpoint: 2.25 in (5.7 cm) wide.
Row 5 (Color A): 2 dc in the first st, dc in the next 7 sts, 3 dc in the center st, dc in the next 7 sts, 2 dc in the last st. (21 sts)
Row 6 (Color B): 2 dc in the first st, dc in the next 9 sts, 3 dc in the center st, dc in the next 9 sts, 2 dc in the last st. (25 sts) Checkpoint: 3.25 in (8.3 cm) wide.
Row 7 (Color A): 2 dc in the first st, dc in the next 11 sts, 3 dc in the center st, dc in the next 11 sts, 2 dc in the last st. (29 sts)
Row 8 (Color B): 2 dc in the first st, dc in the next 13 sts, 3 dc in the center st, dc in the next 13 sts, 2 dc in the last st. (33 sts) The center is st 17. Checkpoint: 4.25 in (10.8 cm) wide, 3.5 in (8.9 cm) tall.
Count check for Row 8: 2 + 13 + 3 + 13 + 2 = 33.
You now have a cream tip followed by four rust stripes alternating with cream. The 2-dc increases make each row flare a little at both ends. That gives the side edges their softly stepped, tiered look, with each stripe slightly wider than the one above it.
Border
The tree has one bordered edge: the bottom. The side edges stay as the natural stepped row ends.
Border gauge: Each scallop uses 4 stitches of Row 8, which is about 0.67 in (1.7 cm) along the stripe. The finished scallops are about 0.6 in (1.5 cm) wide and 0.25 in (0.6 cm) deep.
Row 9 (Color A, Cream), worked in FLO of Row 8: With the RS facing, join with a standing sc in the front loop of the first st. Skip the next st, 3 dc in the next st, skip the next st, sc in the next st. Repeat from * to * 7 more times (8 repeats total). The last sc lands in st 33. Fasten off.
Count: 9 sc + 8 shells of 3 dc (24 dc) = 33 sts, which matches Row 8.
Why the math works: The first sc uses 1 stitch, and each repeat uses exactly 4 more (skip, shell, skip, sc). So 1 + (8 × 4) = 33. The sc stitches land on stitches 1, 5, 9, 13, 17, 21, 25, 29, and 33. That puts the fifth sc right on center st 17 at the V point, with 4 shells on each side. Each shell fans 3 dc into 1 stitch, which adds about 0.125 in (0.3 cm) of flare at each outer corner. That brings the width from 4.25 in (10.8 cm) to 4.5 in (11.4 cm).
Because Row 9 was worked in the front loops, the back loops of Row 8 are still free on the WS. You’ll work the trunk into them next.
Trunk
Row 1 (Color B, Rust): Turn the tree to the WS and rotate it so the bottom edge is at the top. Find st 15 of Row 8, which is 2 stitches before center st 17. Join with a standing sc in the free BL of st 15. Sc in the BL of the next 4 sts (sts 16–19). (5 sc)
Rows 2–7: Ch 1, turn, sc in each st across. (5 sc)
Fasten off, leaving a 6 in (15.2 cm) tail.
The trunk is 5 sc wide, or about 0.8 in (2.0 cm), and 7 rows long, or about 1 in (2.5 cm). About 0.25 in (0.6 cm) of it sits behind the center scallops, so 0.75 in (1.9 cm) shows below the tree. That makes the total height 3.75 in + 0.75 in = 4.5 in (11.4 cm). Row 1 spans the V point, so it bows slightly, and Rows 2–7 straighten it into a neat square. Use the tail to whipstitch the top corners of the trunk to the back of Row 8 so it hangs straight.
Hanging Loop
Color B, Rust: Join with a sl st in the top of the center st of Row 1 (st 3). Ch 30, then sl st into the same stitch to close the loop. For a firmer, cord-like loop, sl st into the back bump of each ch all the way around, then sl st into the starting stitch again. Fasten off.
The chain is about 3 in (7.6 cm) long. Folded, it gives a drop of about 1.5 in (3.8 cm), which is enough to go over a mirror arm.
Final Blocking
- Weave in every tail on the WS, inside its own color stripe.
- Lightly mist the tree with water until it’s damp but not soaked.
- Lay it RS up on the blocking mat.
- Pin the tip, then pin the two outer bottom corners 4.5 in (11.4 cm) apart.
- Pin the center V point so the tree measures 3.75 in (9.5 cm) from the tip to the center scallop.
- Put a pin in each of the 8 scallops so they open into even fans.
- Pin the trunk straight down, 0.8 in (2.0 cm) wide.
- Use your fingers to nudge each stripe into a crisp V and even up the stepped sides.
- Let it dry completely, which takes 2–4 hours. Then unpin it.
Final Quality-Control Checklist
- Row 8 has exactly 33 stitches, and center st 17 sits at the V point.
- The colors run correctly: cream tip, then rust and cream four times, ending with the cream scallops.
- There are 8 scallops and 9 sc, with the center sc right at the V.
- The trunk is 5 sc wide and 7 rows long, centered under the V.
- The tree is 4.5 in (11.4 cm) wide and 4.5 in (11.4 cm) tall.
- The loop is secure and hangs straight.
- No tails show on the RS, and both side edges are stepped evenly.
Troubleshooting
The tree curls or cups. Your edge increases are too tight. Loosen up at the edges or go up a hook size. Blocking fixes mild cupping.
The tree ruffles. Make sure you’re working exactly 3 dc in the center stitch, then recount each row.
The V is off center. Keep a marker in the center stitch. Each side run should be (P − 3) ÷ 2 stitches.
The scallops come out uneven. Row 8 must have exactly 33 stitches. Only then does the 1 + (8 × 4) sequence end on the last stitch.
The trunk sits crooked. Count from both edges. The trunk should start on st 15 counting from either side.
There’s a gap at the tip. Pull the magic ring tighter and weave the cream tail around it once more.
Care
Hand wash in cool water, press out the moisture in a towel, and lay flat to dry. Cotton holds its shape well, but long hours in a hot, sunny car can fade the colors over time.
Final Notes
The measurement chain is short. A gauge of 6 dc per 1 in (2.5 cm) gives a Row 4 width of 2.25 in (5.7 cm) and a 33-stitch Row 8 that measures 4.25 in (10.8 cm). The 33-stitch scallop border brings the width to 4.5 in (11.4 cm) and the height to 3.75 in (9.5 cm). The trunk adds 0.75 in (1.9 cm), for a finished tree of 4.5 in × 4.5 in (11.4 cm × 11.4 cm). If your Row 4 and Row 8 checkpoints are right, the rest of the tree will come out right too.
Happy crocheting!