

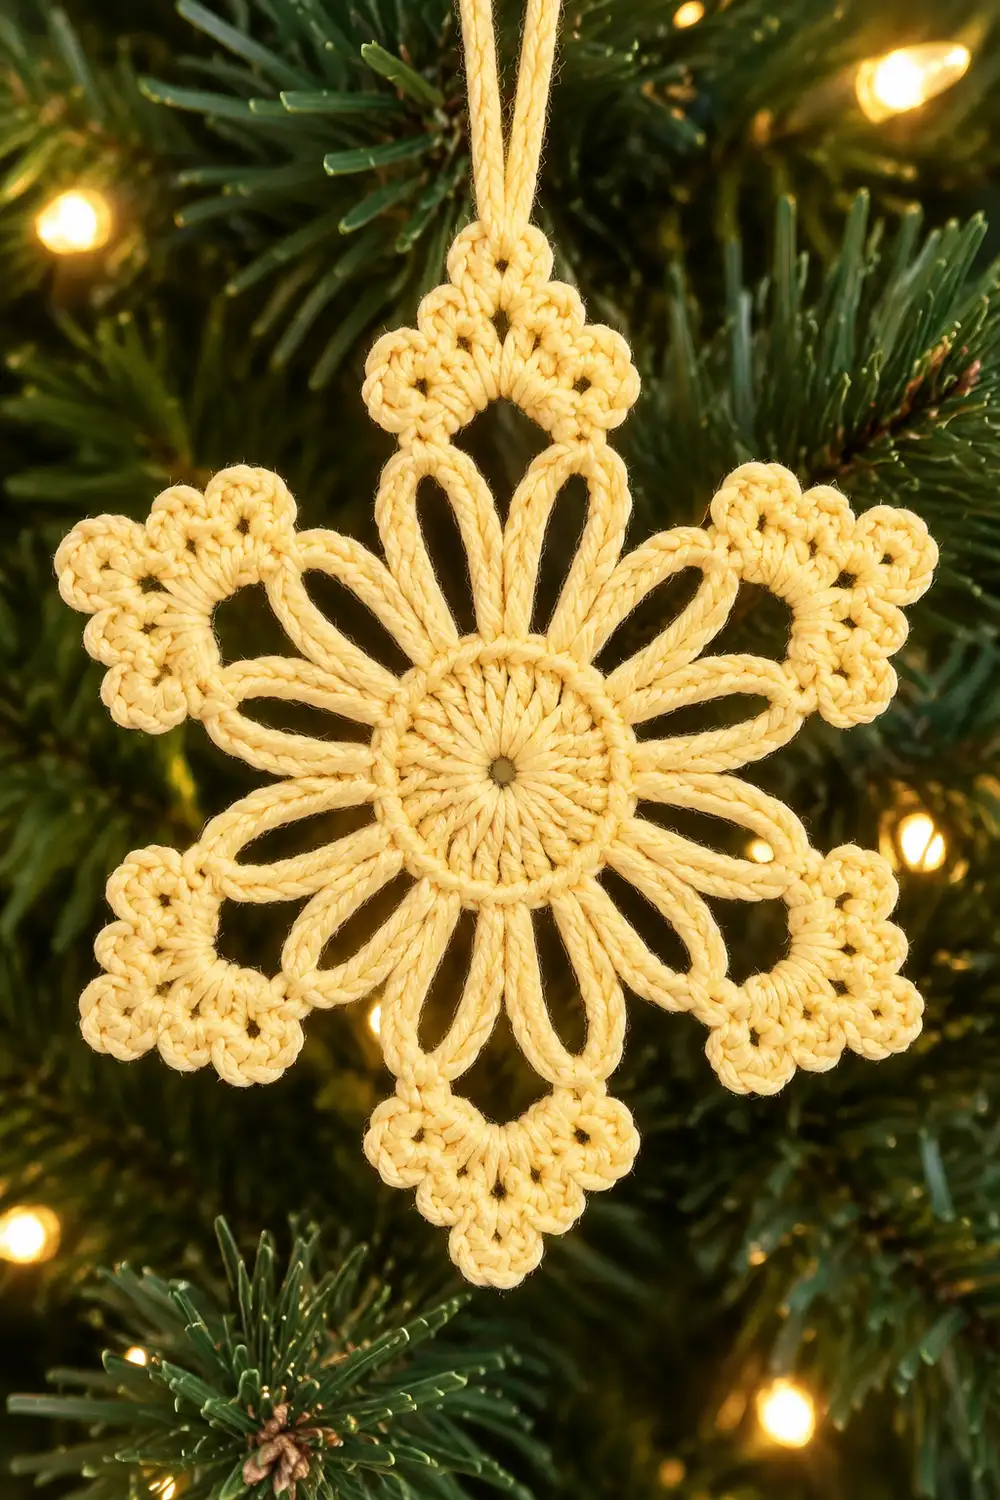
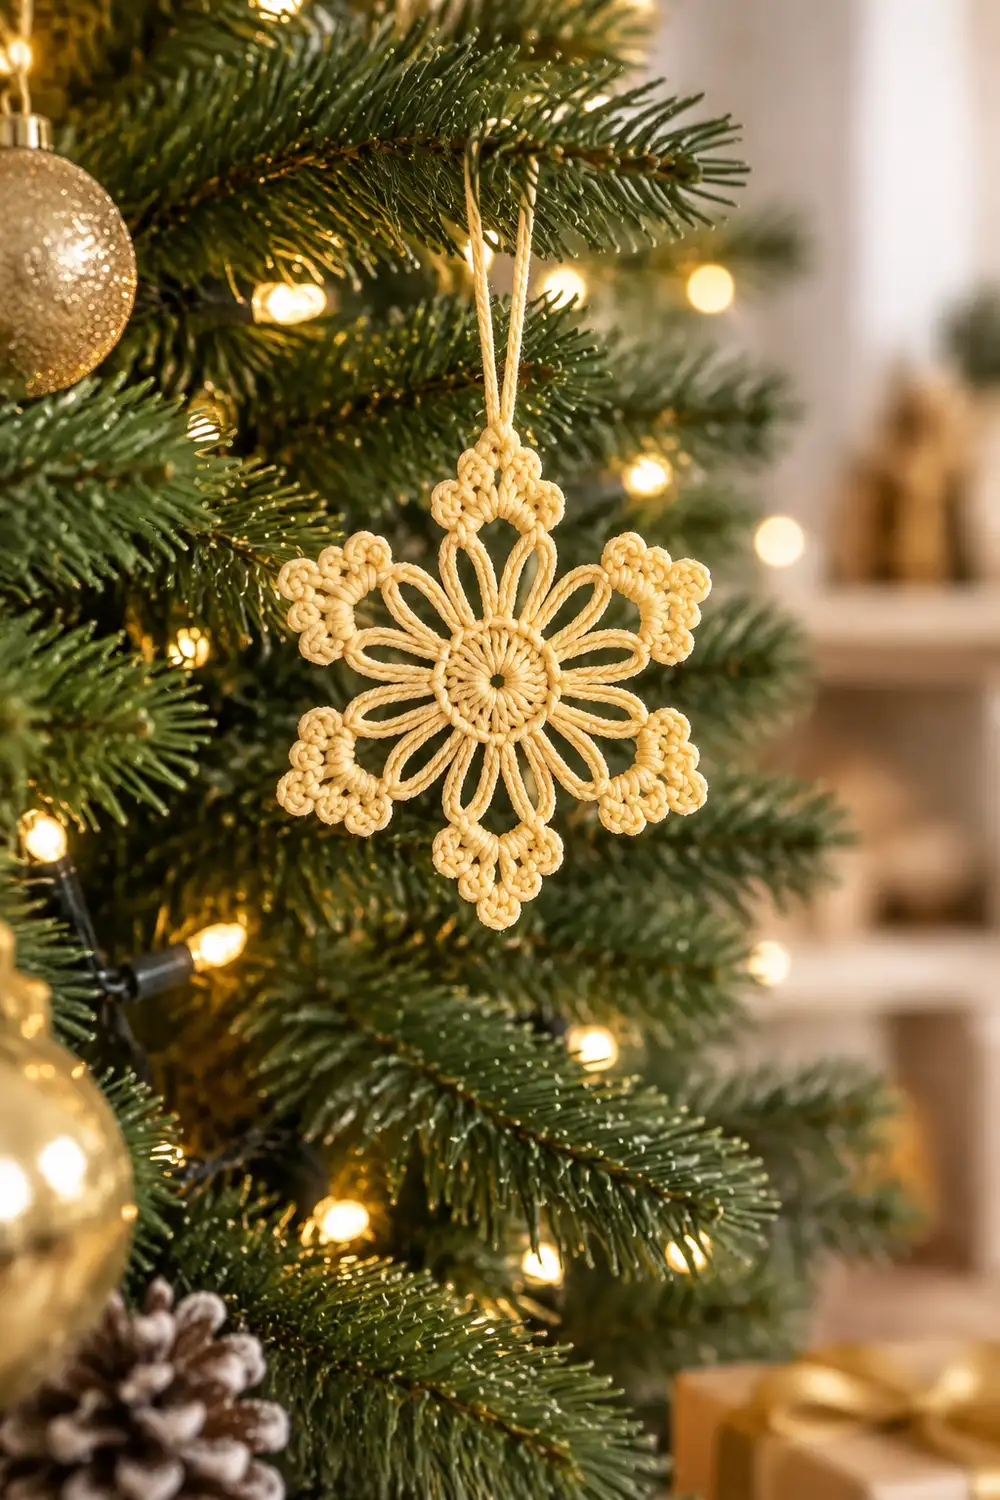
This little snowflake is a single lacy ornament with six crisp points. It has a solid round center, twelve slim petals, and picot-tipped points. A small hanging loop at the top lets it sit neatly on a tree branch. Hung in multiples among green branches and warm string lights, the cream-gold color glows softly.
The style is classic thread lace: airy, symmetrical, and flat once blocked. A pale yellow or cream cotton thread gives the warm look shown in the photo. White or ivory works just as well if you prefer a frosty look.
This pattern uses US crochet terms. The finished ornament measures 2.75 in (7.0 cm) across from point to point after blocking. The hanging loop adds about 1.5 in (3.8 cm) above the top point.
Construction is simple. You work six rounds from a magic ring. Rounds 1–2 form the solid center circle. Round 3 makes twelve chain spokes, and Round 4 fills them into pointed petals. Round 5 pairs the petals into six points, and Round 6 is the picot border. A chain hanging loop is added last.
Finished Size and Construction
- Finished size: 2.75 in (7.0 cm) point to point, blocked
- Skill level: Intermediate (thread work, small chain spaces)
- Terminology: US crochet terms
- Yarn weight: Size 3 cotton crochet thread (often labeled 1 – Super Fine)
- Hook: 2.0 mm steel hook
- Number of pieces: 1 (single motif)
- Layout: One six-pointed snowflake worked in the round
- Piece size: 2.75 in (7.0 cm) blocked
- Size before border (after Round 5): 2.25 in (5.7 cm)
- Border depth: 0.25 in (0.6 cm) on each side (Round 6)
- Hanging loop: about 1.5 in (3.8 cm) tall
Materials
Yarn advice: Choose a mercerized cotton thread in size 3. Mercerized cotton holds starch well, keeps picots sharp, and has a light sheen that catches tree lights. Avoid fuzzy or very stretchy fibers, because they blur the openwork.
- Cream / pale gold (one color): 4 g, about 14 m (15 yd)
This amount covers the motif, the hanging loop, and tails for weaving. It includes a margin of roughly 30% for a gauge swatch or one restart.
Tools:
- 2.0 mm steel crochet hook (plus 1.75 mm and 2.25 mm for gauge adjustment)
- Fine tapestry needle or small-eye sewing needle
- Small sharp scissors
- Fabric stiffener, spray starch, or white glue mixed 1:1 with water
- Foam blocking board or corkboard covered in plastic wrap
- Rustproof pins
- Paper template: a 2.75 in (7.0 cm) circle with six lines at 60° intervals
Abbreviations (US Terms)
- ch – chain
- sl st – slip stitch
- sc – single crochet
- hdc – half double crochet
- dc – double crochet
- st(s) – stitch(es)
- sp – space
- rnd – round
- rep – repeat
Special stitches:
- Picot (p): Ch 3, sl st in 3rd ch from hook.
- Triple picot (tp): [Ch 3, sl st in 3rd ch from hook] 3 times. Then sl st in the top of the last dc worked. This gathers the three picots into a small cluster at the tip of each point.
Gauge and Checkpoints
Thread lace depends on gauge more than on stitch counts per inch. Work one full test snowflake before committing to a batch of ornaments. Measure at each checkpoint below with the piece lying flat and unstretched.
| After round | Diameter |
|---|---|
| Rnd 1 | 0.75 in (1.9 cm) |
| Rnd 2 | 1 in (2.5 cm) |
| Rnd 3 | 1.75 in (4.4 cm) |
| Rnd 4 | 2 in (5.1 cm) |
| Rnd 5 | 2.25 in (5.7 cm) |
| Rnd 6, blocked | 2.75 in (7.0 cm) |
Too big: If Rnd 2 measures more than 1/8 in (0.3 cm) over 1 in (2.5 cm), switch to a 1.75 mm hook. Also check that your chains are not loose.
Too small: If Rnd 2 measures more than 1/8 in (0.3 cm) under, switch to a 2.25 mm hook.
Unblocked lace often cups slightly. Judge Rnds 1–2 by diameter. Judge Rnds 3–6 by whether the piece lies flat with gentle pressure.
Pattern
Round 1 – Center Circle
Make a magic ring.
Ch 3 (counts as first dc). Work 17 dc in ring. Pull the ring closed tightly. Sl st in top of beginning ch-3 to join.
Count: 18 dc.
Checkpoint: 0.75 in (1.9 cm).
Round 2 – Center Edge
Ch 1. *2 sc in next st, sc in next 2 sts; rep from * 5 more times. Sl st in first sc to join.
Each repeat works 3 sts into 4 sc. Count: 6 repeats × 4 sc = 24 sc.
This round gives the center circle its smooth, solid rim. Checkpoint: 1 in (2.5 cm).
Round 3 – Petal Spokes
Ch 1. *Sc in next st, ch 7, skip next st; rep from * 11 more times. Sl st in first sc to join.
Count: 12 sc and 12 ch-7 loops.
The skip-one pattern uses all 24 stitches of Rnd 2: 12 worked plus 12 skipped. The loops should fan evenly around the center. Checkpoint: 1.75 in (4.4 cm).
Round 4 – Pointed Petals
Sl st into first ch-7 loop. Ch 1.
*In the ch-7 loop work (4 sc, ch 3, 4 sc). Move to the next loop; rep from * 11 more times. Sl st in first sc to join.
Count: 12 petals. Each petal has 8 sc and 1 ch-3 tip, for a total of 96 sc and 12 ch-3 tips.
Push the stitches snugly along each loop so the petals look full and slender. Checkpoint: 2 in (5.1 cm).
Round 5 – Pairing Petals into Points
Sl st in next 3 sc. Sl st into the next ch-3 tip.
Ch 1. *Sc in ch-3 tip, ch 6, sc in next ch-3 tip, ch 2; rep from * 5 more times. Join with sl st in first sc.
Count: 12 sc, 6 ch-6 arches, and 6 ch-2 valleys.
Each ch-6 arch bridges two neighboring petals into one point. Each ch-2 valley pulls the gap between points inward, which creates the six-pointed silhouette. Checkpoint: 2.25 in (5.7 cm). This is your size before the border.
Border (Round 6 – Picot Points)
Border gauge: Each ch-6 arch holds 10 stitches plus 3 picot elements. The finished point should extend 0.25 in (0.6 cm) beyond Rnd 5.
Sl st into first ch-6 arch. Ch 1.
*In the ch-6 arch work (sc, hdc, 2 dc, p, dc, tp, dc, p, 2 dc, hdc, sc). Then work sc in the next ch-2 valley. Rep from * 5 more times. Sl st in first sc to join. Fasten off, leaving a 4 in (10.2 cm) tail.
Count per point:
- In the arch: 1 sc + 1 hdc + 2 dc + 1 dc + 1 dc + 2 dc + 1 hdc + 1 sc = 10 stitches, plus 2 picots and 1 triple picot
- In the valley: 1 sc
- Total per repeat: 11 stitches plus 3 picot elements
Round total: 6 × 11 = 66 stitches, plus 12 picots and 6 triple picots.
Why the math works:
- Rnd 2’s 24 stitches split evenly into 12 spokes.
- The 12 spokes become 12 petals.
- Pairing those petals two at a time gives exactly 6 points.
- Every point is worked identically, so the snowflake stays symmetrical.
- The stitch sequence in each arch is a mirror image around the triple picot. The hdc and dc build height toward the tip and fall away to the valley sc. This produces the lobed, picot-edged point shape.
Hanging Loop
Choose any point as the top. Join thread with a sl st in the middle picot of that point’s triple picot.
Ch 36, then sl st in the same picot. Fasten off.
The loop hangs about 1.5 in (3.8 cm) tall. Weave all tails along the back of the stitches, following the stitch path. Trim closely.
Final Blocking
Blocking turns soft lace into a crisp, flat snowflake. Do not skip this step.
- Place your paper template on the blocking board and cover it with plastic wrap.
- Dip the snowflake in stiffener or the glue-water mix. Squeeze out the excess gently in a towel. It should be damp, not dripping.
- Lay the motif face up and center the solid circle on the template.
- Pin the middle picot of each triple picot on a 60° line, at the edge of the 2.75 in (7.0 cm) circle.
- Pin each ch-2 valley inward along the line halfway between its two neighboring points.
- Open each petal with a pin tip so the spaces are even.
- Pin each side picot so it points outward.
- Lay the hanging loop straight up so it dries without kinks.
- Let it dry completely, about 12–24 hours. Unpin and check that the piece lies flat.
Final Quality-Control Checklist
- Diameter is 2.75 in (7.0 cm) point to point.
- All six points are the same length and shape.
- The center circle is solid, with the magic ring pulled tight.
- There are 12 open petals, evenly spaced.
- Each point has 2 side picots and 1 triple picot.
- The ornament lies flat with no cupping or ruffling.
- The hanging loop is centered on a top point and about 1.5 in (3.8 cm) tall.
- All tails are woven in and invisible from the front.
- The piece is stiff enough to hold its shape when hung.
Troubleshooting
Center won’t close: Tighten the magic ring before joining Rnd 1. Weave the starting tail through Rnd 1 again for security.
Piece cups after Rnd 3 or 4: Your chains are too tight. Loosen your chain tension or go up a hook size.
Piece ruffles after Rnd 4: The loops are too long for your tension. Work ch 6 instead of ch 7 in Rnd 3.
Points are uneven: Check that each ch-6 arch holds exactly 10 stitches. Re-pin during blocking.
Picots lean or twist: Keep the first chain of each picot firm. Pin each picot during blocking.
Triple picot looks loose: Make sure the closing sl st goes into the top of the dc just made, not into the chain arch.
Ornament droops on the tree: Re-block with stronger stiffener or a second coat.
Lace looks fuzzy: Use mercerized cotton thread instead of matte or blended yarn.
Care
Spot clean gently with a damp cloth. If the ornament softens over the years, rinse it, re-stiffen, and re-block on the template. Store it flat in a box between layers of tissue paper.
Final Notes
Your measurement chain is:
- Rnd 1: 0.75 in (1.9 cm)
- Rnd 2: 1 in (2.5 cm)
- Rnd 3: 1.75 in (4.4 cm)
- Rnd 4: 2 in (5.1 cm)
- Rnd 5: 2.25 in (5.7 cm)
- Rnd 6, blocked: 2.75 in (7.0 cm), with a 0.25 in (0.6 cm) border on each side
The stitch logic follows the same path: 18 dc, then 24 sc, then 12 spokes, then 12 petals, then 6 points, then 66 border stitches with 18 picot elements.
Check your size at each round, block on a template, and every snowflake will match.
Optional: Make several and hang them in a cluster for a tree display like the one in the photo.
Happy crocheting!