

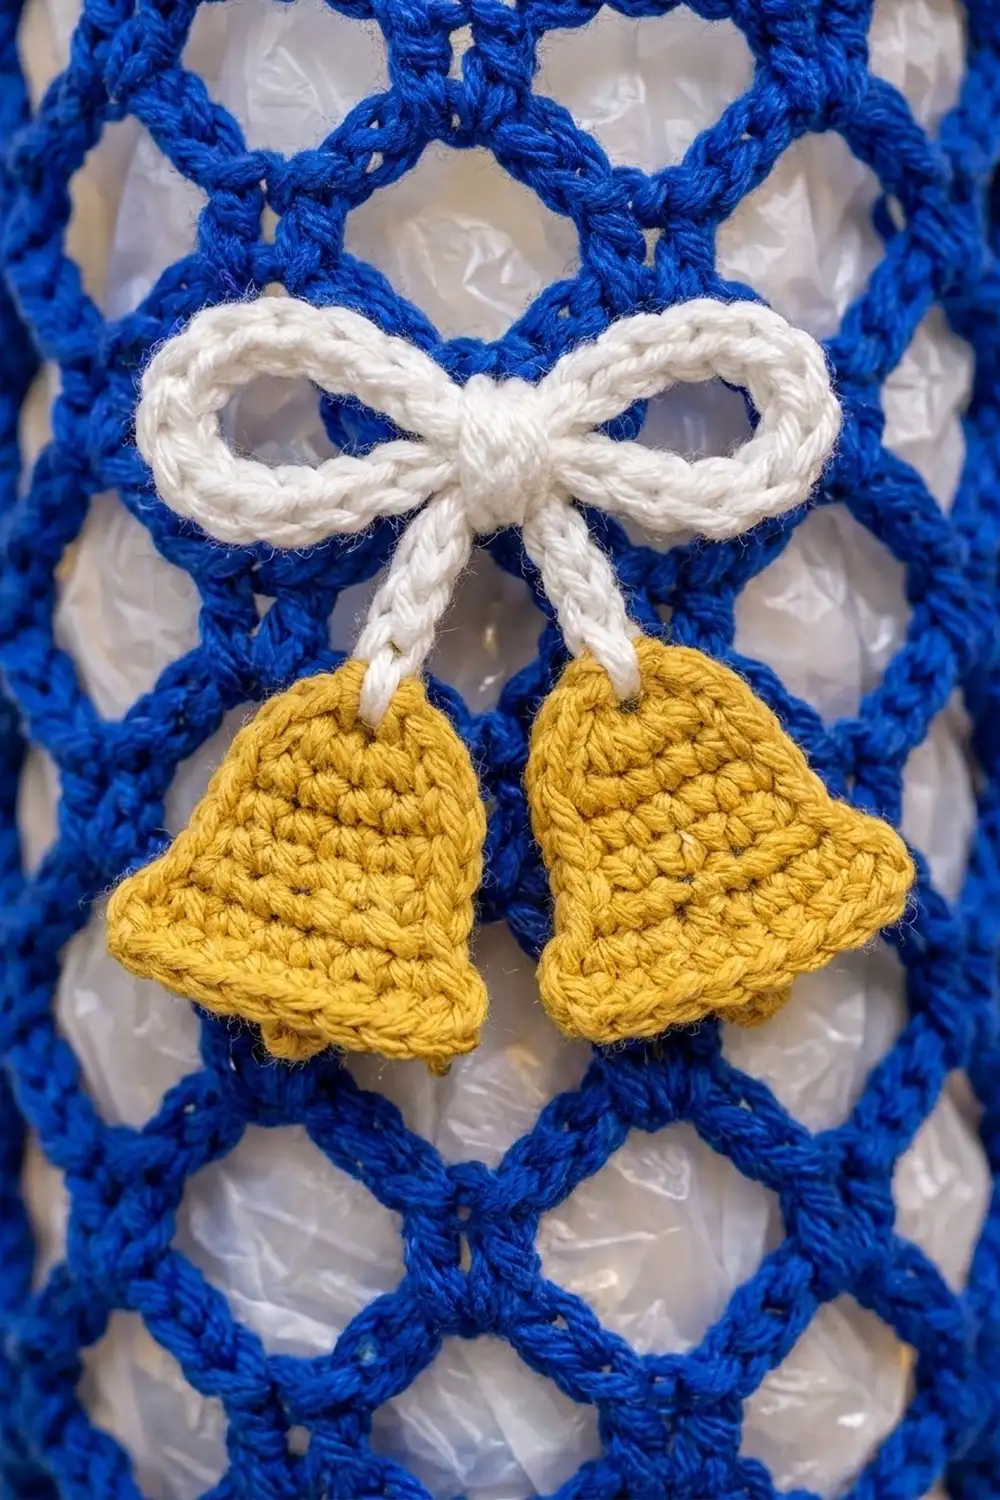
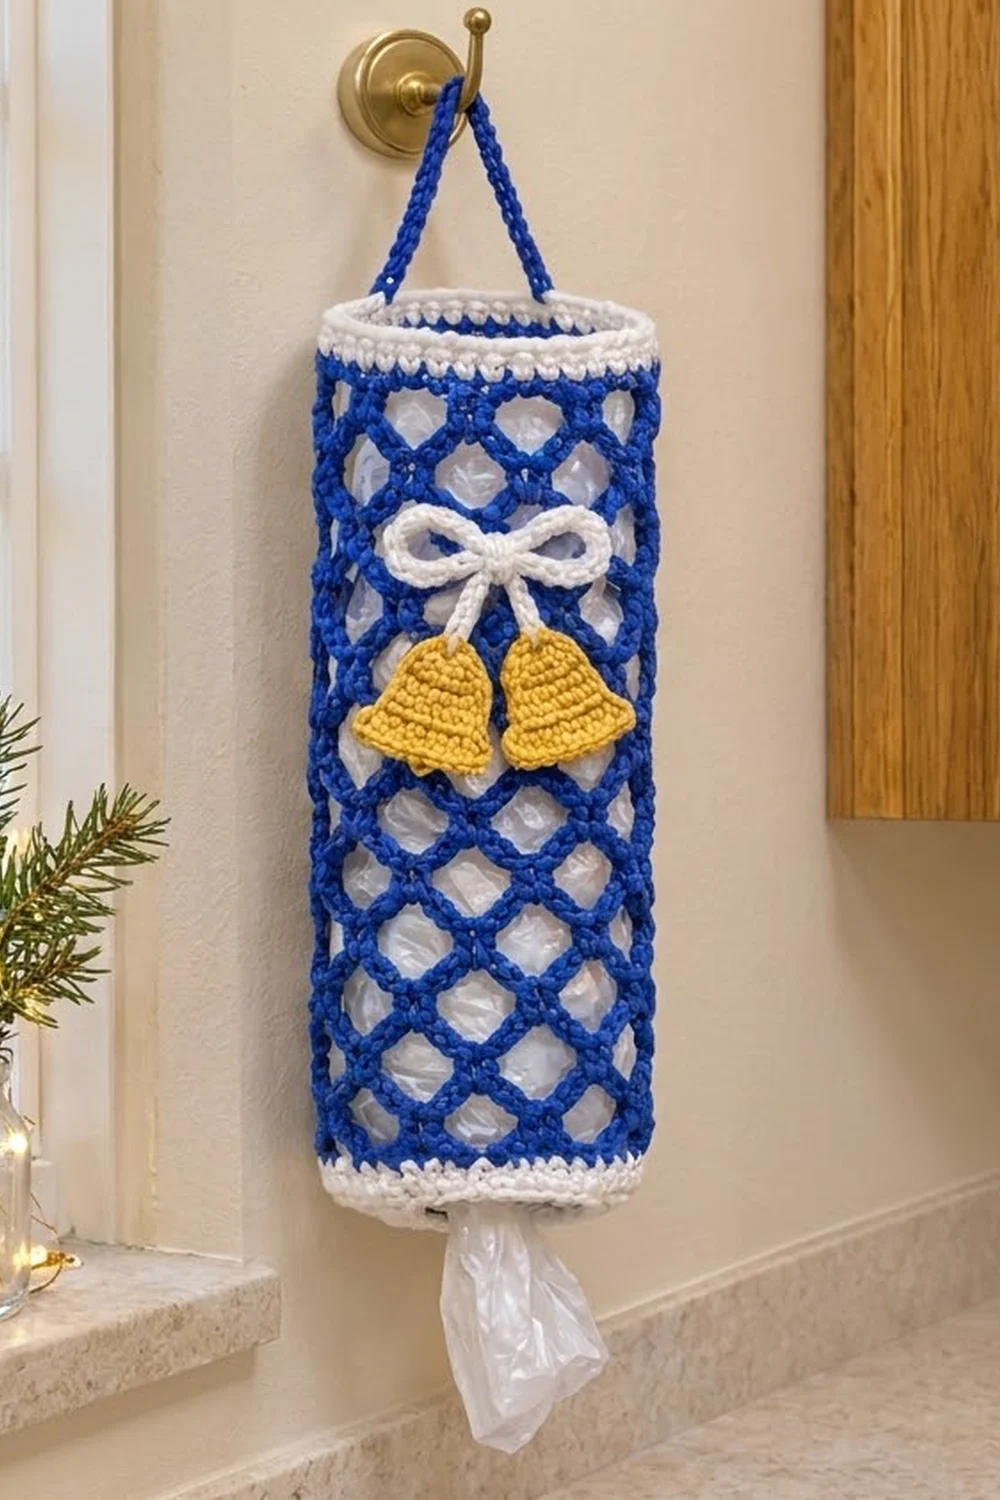
This holder keeps plastic grocery bags tidy and cheerful. The royal blue diamond mesh lets you see how many bags are left. Crisp white bands finish the top and bottom, and a white bow with two mustard-yellow bells makes it look festive on a kitchen hook or the inside of a pantry door.
The pattern uses US crochet terms. The finished holder measures about 16 in (40.6 cm) tall and 7.5 in (19.1 cm) wide laid flat, or about 4.8 in (12.2 cm) across when it’s hanging and round. The bottom opening is about 2.9 in (7.4 cm) across. That’s small enough to hold the bags in and big enough to pull one out at a time.
You work the body in one piece from the top down. You start with a white single crochet band, work a blue chain-loop mesh in joined rounds, and finish with a white bottom cuff that decreases to narrow the opening. The strap, bow and two bells are small separate pieces that you sew on at the end.
There’s no joining of motifs and no seaming of panels. It’s one tube with a few appliqués, so it’s a relaxing project you can finish in an evening or two.
Finished Size and Construction
- Finished size: 7.5 in (19.1 cm) wide flat × about 16 in (40.6 cm) tall, not counting the strap
- Circumference: 15 in (38.1 cm)
- Skill level: Easy / advanced beginner
- Terminology: US crochet terms
- Yarn weight: Medium worsted weight (#4)
- Hook: 5.0 mm (H-8)
- Number of pieces: 1 body, plus 1 strap, 1 bow and 2 bells
- Layout: One vertical tube with the bow and bells centered on the front
- Top band: 5 rounds, 1.1 in (2.8 cm)
- Mesh body: 18 rounds, 13.5 in (34.3 cm)
- Size before border: 7.5 in (19.1 cm) wide × 14.6 in (37.1 cm) tall (top band + mesh)
- Border (bottom cuff) depth: 6 rounds, 1.3 in (3.3 cm)
Materials
Use a smooth worsted cotton or cotton blend. Cotton keeps the mesh crisp and the bells flat, and it doesn’t stretch out under the weight of the bags. Acrylic works too, but the mesh may lengthen by 0.5–1 in (1.3–2.5 cm) after it has hung for a while.
- Royal blue (A): 100 g, about 180 m (mesh body and strap)
- White (B): 35 g, about 65 m (top band, bottom cuff and bow)
- Mustard yellow (C): 10 g, about 20 m (two bells)
These quantities include a margin of about 15% for your gauge swatch and small differences in tension.
Tools:
– 5.0 mm (H-8) crochet hook
– Tapestry needle
– 4 locking stitch markers
– Scissors
– Measuring tape
– Rust-proof pins and a blocking mat or folded towel
Abbreviations (US Terms)
- ch – chain
- sl st – slip stitch
- sc – single crochet
- dc – double crochet
- sc2tog – single crochet 2 together
- sp – space
- st(s) – stitch(es)
- rnd(s) – round(s)
- rep – repeat
Special stitches:
– Picot: Ch 3, then sl st in the 3rd ch from your hook.
– Bobble clapper: Ch 2. Work 4 dc in the 2nd ch from your hook, leaving the last loop of each dc on the hook (5 loops on hook). Yarn over and pull through all 5 loops.
– Mesh join: Ch 2, then dc in the first sc of the round. This makes a final loop the same height as a ch-5 and leaves your hook in the middle of that loop, ready for the next round.
Gauge and Checkpoints
Solid gauge: 16 sc and 18 rnds = 4 in (10.2 cm) in sc worked in the round.
Mesh gauge: 4 ch-5 loops = 4 in (10.2 cm) wide, and 4 mesh rnds = 3 in (7.6 cm) tall when relaxed and hanging.
Before you start the full holder, test your gauge on the piece itself. Work the top band (Part 1) and measure it flat. It should be 7.5 in (19.1 cm) wide.
Checkpoints:
1. After the top band: 7.5 in (19.1 cm) flat, 1.1 in (2.8 cm) deep.
2. After mesh Rnd 4: the mesh measures 3 in (7.6 cm) from the band when you let it hang.
3. After mesh Rnd 18: top band + mesh = 14.6 in (37.1 cm).
4. After the bottom cuff: about 16 in (40.6 cm) total, with a bottom opening of about 2.9 in (7.4 cm) across.
5. Bell: 2.75 in (7.0 cm) wide at the picot edge.
If the band is too big, go down to a 4.5 mm hook. If it’s too small, go up to a 5.5 mm hook. If the band is right but the mesh is too long, work 17 rounds of mesh instead of 18. Each round you remove takes off about 0.75 in (1.9 cm).
Part 1: Top Band (White, B)
With B, ch 60 and sl st to the first ch to form a ring. Don’t twist the chain.
Rnd 1: Ch 1, sc in each ch around, then sl st to the first sc. (60 sc)
Rnds 2–5: Ch 1, sc in each st around, then sl st to the first sc. (60 sc)
Fasten off B.
Checkpoint: the band is 7.5 in (19.1 cm) wide flat and 1.1 in (2.8 cm) deep. Place a marker in st 1 and another in st 31. These mark the strap points, which sit directly opposite each other with 30 sts between them.
Part 2: Mesh Body (Royal Blue, A)
The mesh hangs down from the top band. Each round has 15 loops, and every new sc lands in the center of a loop from the round before. That staggering creates the diamond pattern.
Rnd 1: Join A in st 1 of the band (the marked st). Ch 1, sc in the same st. Ch 5, skip 3 sts, sc in the next st. Rep from * 13 more times. Ch 2, skip the last 3 sts, and dc in the first sc to make the mesh join. (15 sc anchors and 15 loops: 15 + (15 × 3 skipped) = 60 band sts used)
Rnd 2: Ch 1, sc around the post of the joining dc. Ch 5, sc in the next ch-5 sp. Rep from * 13 more times. Ch 2, dc in the first sc. (15 loops)
Rnds 3–17: Repeat Rnd 2. (15 loops in each round)
Rnd 18: Ch 1, sc around the post of the joining dc. Ch 5, sc in the next ch-5 sp. Rep from * 13 more times. Ch 5, sl st to the first sc. (15 full ch-5 loops)
Ending with a full ch-5 instead of the ch-2/dc join gives the bottom cuff 15 equal loops to work into.
Checkpoint: let the piece hang from your hand. The mesh should measure 13.5 in (34.3 cm), and the total length so far should be 14.6 in (37.1 cm). Don’t fasten off yet if you’re going straight to the cuff. Otherwise, fasten off A.
Part 3: Hanging Strap (Royal Blue, A)
With A, ch 49.
Row 1: Sc in the 2nd ch from your hook and in each ch across. (48 sc)
Row 2: Ch 1, turn, sc in each st across. (48 sc)
Fasten off and leave a 10 in (25.4 cm) tail. The strap is 12 in (30.5 cm) long. When it’s attached, it forms a loop that rises about 5 in (12.7 cm) above the rim.
Part 4: Bow (White, B)
The bow is a single chain cord shaped into loops.
With B, ch 51.
Row 1: Sl st in the back bump of the 2nd ch from your hook and of each ch across. (50 sl st)
Fasten off and leave a 12 in (30.5 cm) tail. The cord is about 12.5 in (31.8 cm) long.
Shaping: Fold the cord into a figure eight with two loops, each 2 in (5.1 cm) wide, and two 2 in (5.1 cm) tails hanging down. That uses about 8 in (20.3 cm) for the loops and 4 in (10.2 cm) for the tails. Pinch the center and wrap the long tail tightly around it 6–8 times to form the knot. Secure it with a few stitches through the back and leave the remaining tail for sewing.
Part 5: Bells (Mustard, C) – Make 2
You work each bell flat, starting at the narrow top.
Row 1: Ch 4, sc in the 2nd ch from your hook and in each of the next 2 ch. (3 sc)
Row 2: Ch 1, turn, sc across. (3 sc)
Row 3: Ch 1, turn, 2 sc in the first st, sc in the next st, 2 sc in the last st. (5 sc)
Row 4: Ch 1, turn, sc across. (5 sc)
Row 5: Ch 1, turn, 2 sc in the first st, sc in the next 3 sts, 2 sc in the last st. (7 sc)
Row 6: Ch 1, turn, sc across. (7 sc)
Row 7: Ch 1, turn, 2 sc in the first st, sc in the next 5 sts, 2 sc in the last st. (9 sc)
Row 8 (flare): Ch 1, turn, 2 sc in the first st, sc in the next 7 sts, 2 sc in the last st. (11 sc)
Row 9 (picot edge): Ch 1, turn, sc in the first st. Picot, sc in each of the next 2 sts. Rep from * 4 more times. (11 sc and 5 picots: 1 + (5 × 2) = 11)
Clapper: Don’t turn. Count back to the 6th sc of Row 9, which is the center st. Sl st across to it, work a bobble clapper, then sl st into the same st. Fasten off and leave a 10 in (25.4 cm) tail coming from the top of the bell.
Checkpoint: each bell is 2.75 in (7.0 cm) wide at the picots and about 2.25 in (5.7 cm) tall including the clapper. Weave the yarn tail along the side edges so the sides look smooth.
Part 6: Assembly
- Strap: Sew one end of the strap to the inside of the top band at the st 1 marker, overlapping the band by 0.75 in (1.9 cm). Sew the other end at the st 31 marker the same way, making sure the strap isn’t twisted. Stitch through both the strap and the band so the joins can carry the weight of the bags.
- Front center: With the strap ends at the sides, the front center of the holder is halfway between them, at about st 16 of the band.
- Bow: Center the bow knot 2.5 in (6.4 cm) below the bottom edge of the top band. Sew the knot to the mesh crossings behind it, then tack each bow loop at its outer edge so the loops lie flat.
- Bells: Sew the top of each bell to the end of one bow tail, overlapping by 0.25 in (0.6 cm). Tack the bells lightly to the mesh at their shoulders so they hang side by side and don’t flip.
Border: Bottom Dispensing Cuff (White, B)
Border gauge: this is the same as the solid gauge, 16 sc = 4 in (10.2 cm).
You’re working into the 15 ch-5 loops of mesh Rnd 18.
Rnd 1 (conversion): Join B in any ch-5 sp. Ch 1, then work 4 sc in each ch-5 sp around and sl st to the first sc. (60 sc: 0 sts worked into existing sts + 15 loops × 4 sc)
Rnds 2–3: Ch 1, sc in each st around, sl st to the first sc. (60 sc)
Rnd 4 (decrease): Ch 1. Sc in the next 3 sts, sc2tog. Rep from * around, then sl st to the first sc. (48 sc: 12 repeats × 4)
Rnd 5 (decrease): Ch 1. Sc in the next 2 sts, sc2tog. Rep from * around, then sl st to the first sc. (36 sc: 12 repeats × 3)
Rnd 6: Ch 1, sc in each st around, sl st to the first sc. (36 sc)
Fasten off and weave in the end.
Why the math works: The mesh has 15 loops at 1 in (2.5 cm) each, so its circumference is 15 in (38.1 cm). Putting 4 sc into each loop gives 60 sc, which at 16 sc per 4 in also measures 15 in (38.1 cm). That’s the same 60 sts as the top band, so the cuff matches the mesh without flaring or puckering. The two decrease rounds take the cuff down to 36 sts, or 9 in (22.9 cm) around. That’s an opening of about 2.9 in (7.4 cm) across, which holds the bags in but lets you pull one out at a time. The cuff adds 1.3 in (3.3 cm), so the total length is 1.1 + 13.5 + 1.3 = 15.9 in (40.4 cm), about 16 in (40.6 cm).
Final Blocking
- Weave in every end, then mist the whole holder lightly with water until it’s damp but not wet.
- Slide a rolled towel inside the tube. Use a roll about 4.8 in (12.2 cm) across, or a tall bottle wrapped in a towel.
- Gently pull the mesh lengthwise until it measures 13.5 in (34.3 cm), with the diamonds even all the way around.
- Pin the bells flat on a mat. Open each picot with a pin tip and push the clapper so it sits centered.
- Flatten the bow loops by hand and pin them into rounded shapes.
- Let everything dry completely. That usually takes 12–24 hours.
- Check the measurements again: 7.5 in (19.1 cm) wide flat and about 16 in (40.6 cm) tall.
Final Quality-Control Checklist
- Top band: 60 sc, 7.5 in (19.1 cm) flat
- Every mesh round has exactly 15 loops
- The diamonds are aligned in straight diagonal lines and nothing twists around the tube
- Bottom cuff: 60 sc in Rnds 1–3, 48 in Rnd 4, 36 in Rnds 5–6
- The bottom opening is about 2.9 in (7.4 cm) across
- The strap ends sit directly opposite each other and are sewn securely
- The bow is centered 2.5 in (6.4 cm) below the top band
- Both bells are the same size: 2.75 in (7.0 cm) wide, 5 picots, clapper centered
- All ends are woven in and none show through the mesh
Troubleshooting
The mesh spirals around the tube. You probably skipped the mesh join or worked the first sc into the wrong place. Every round must begin around the post of the joining dc.
The loop count drifts to 14 or 16. Count the loops after every round. Put a marker in the first sc of each round so you know where the round starts.
The bottom cuff flares. You worked 5 sc into some loops. Pull back to the conversion round and work exactly 4 sc per loop.
The cuff puckers or pulls the mesh in. Your cuff tension is tighter than your mesh tension. Redo the cuff with a 5.5 mm hook.
Bags fall straight through the bottom. Add one more round: sc 1, sc2tog around. That leaves 24 sts, about 6 in (15.2 cm) around.
The bells curl. Block them flat while they’re damp. Next time, work Rows 1–8 a little more loosely.
The bow loops flop. Tack each loop to the mesh at its outer tip.
Care
Hand wash in cool water with a mild soap, press the water out in a towel, and reshape the holder over a rolled towel to dry. Don’t tumble dry, because heat can stretch the mesh and fade the yellow bells.
Final Notes
The measurements build on each other in this order:
– The 60-st top band measures 7.5 in (19.1 cm) flat, which is 15 in (38.1 cm) around.
– That divides evenly into 15 mesh loops of 1 in (2.5 cm) each.
– Eighteen mesh rounds add 13.5 in (34.3 cm).
– The cuff converts the mesh back to 60 sc and decreases to 36 sts, for a 2.9 in (7.4 cm) opening.
– The finished holder is about 16 in (40.6 cm) tall.
If your top band measures correctly, everything after it fits. Check it first, count your loops every round, and the bow and bells will sit neatly on an even tube.
Happy crocheting!