

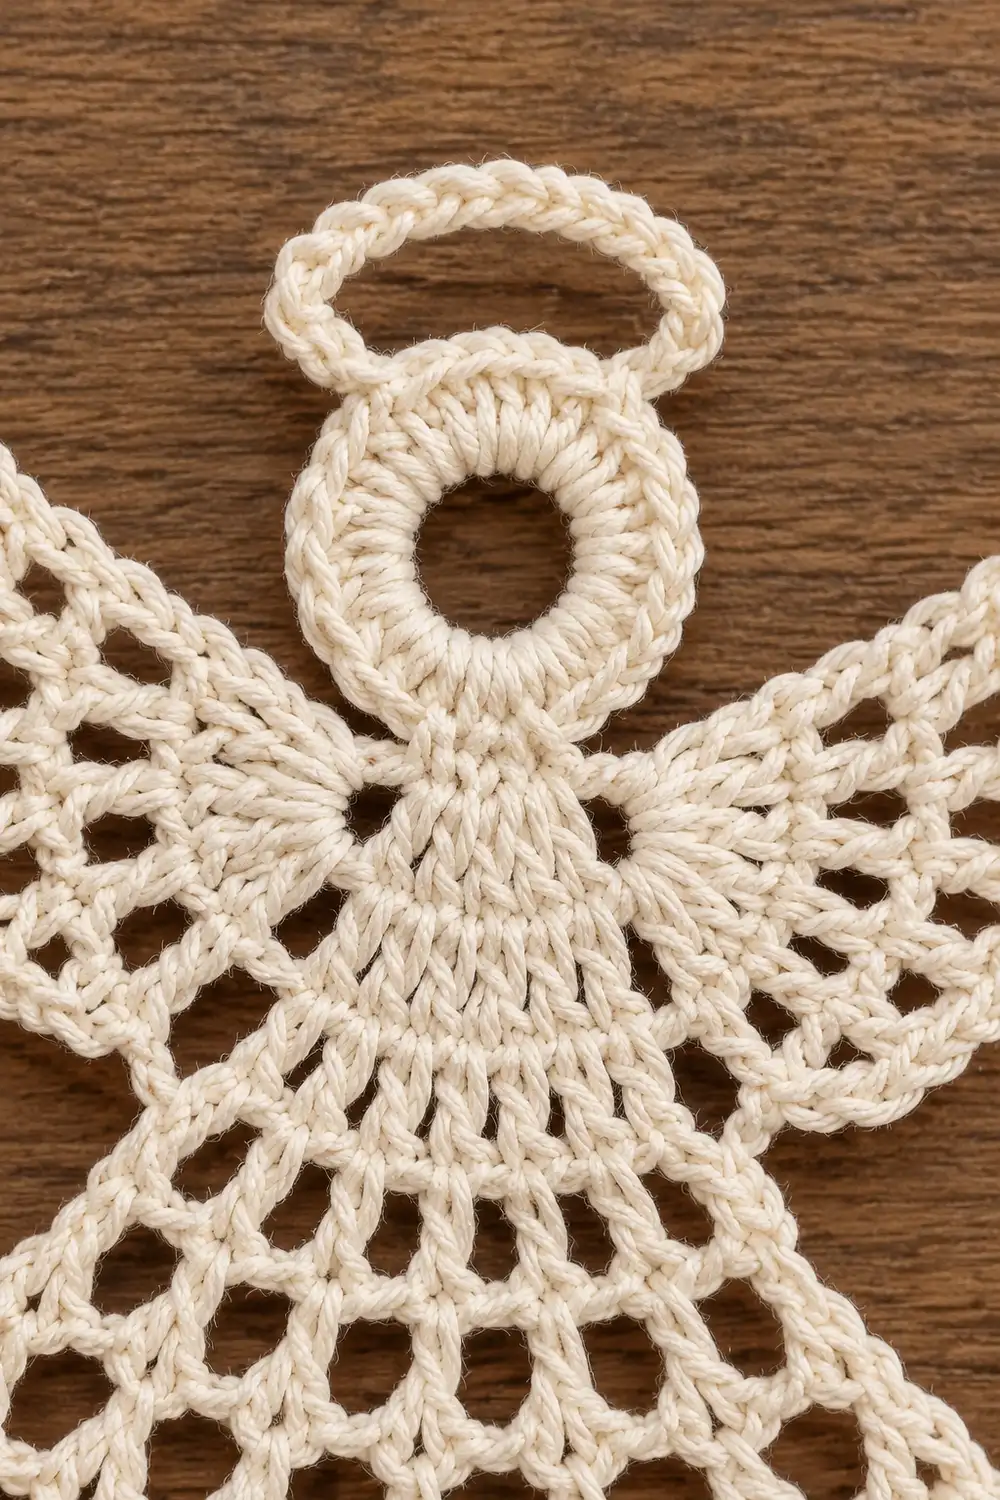
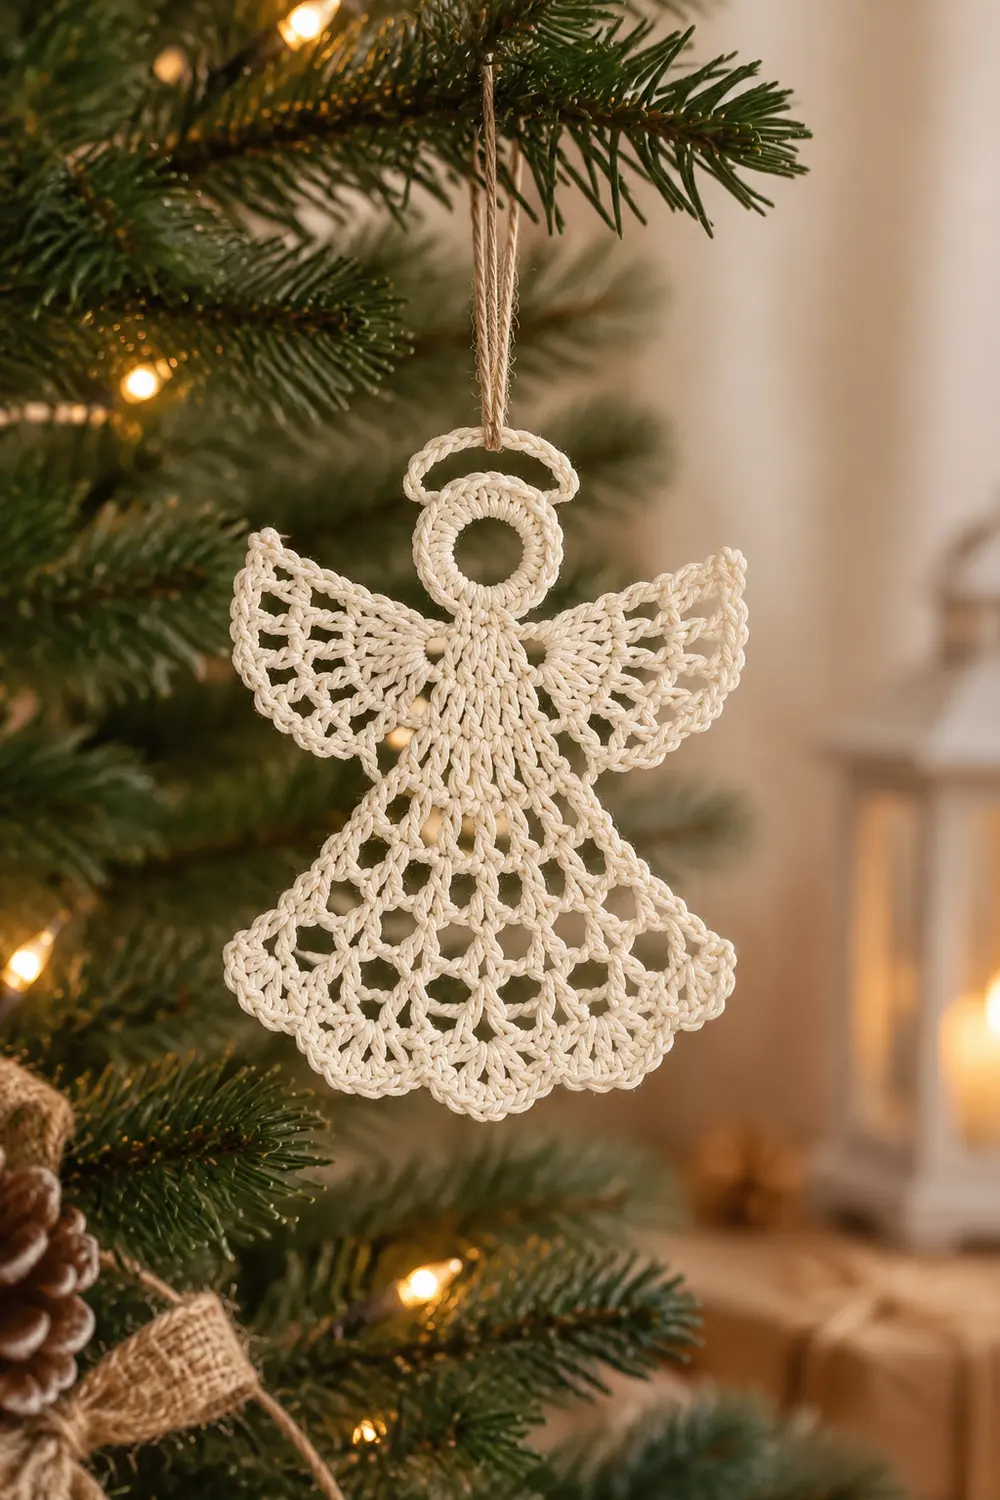
This little angel is a flat, lacy ornament worked in cream cotton thread. She has a rounded head with a small two-loop halo, a triangular mesh skirt that widens toward the hem, and two wings that reach out to the sides. A scalloped shell edge runs along the outer edges of the wings and skirt.
The look is airy and vintage. Open mesh fills the skirt and wings, and the solid yoke under the head gives the design a calm center. In one neutral color, she suits a tree, a gift tag, or a window.
All instructions use US crochet terms. The finished angel measures about 3.25 in (8.3 cm) tall and 4.5 in (11.4 cm) across the wings.
Construction is simple and stays in one piece. You make the head ring first, then work the yoke and skirt in rows downward from it. Next you add the shell border to the skirt, then work each wing outward from the side edges of the yoke and finish it with its own shell edge. The halo is added last at the top of the head.
Finished Size and Construction
- Finished size: 3.25 in (8.3 cm) tall × 4.5 in (11.4 cm) wide at the wings
- Skill level: Easy-intermediate (row-end placement, chain-space mesh)
- Terminology: US crochet terms
- Yarn weight: Size 3 mercerized cotton crochet thread (lace / light fingering)
- Hook: 2.0 mm
- Number of pieces: 1
- Layout: Single angel motif, worked in one piece
- Piece size before border: 3 in (7.6 cm) tall × 4 in (10.2 cm) wide at the wings
- Skirt hem before border: 3.5 in (8.9 cm)
- Border depth: 0.25 in (0.6 cm)
Materials
Yarn advice: Choose a smooth, mercerized cotton thread. It shows the mesh clearly, holds its shape after blocking, and takes starch well. Avoid fuzzy or very stretchy fibers, because the open spaces will blur and the wings will droop.
- Cream / off-white: 10 g (about 30 m / 33 yd)
The angel itself uses about 6 g. The quantity above includes a margin for your gauge swatch and weaving in ends.
Tools:
- 2.0 mm crochet hook
- Tapestry needle
- Small scissors
- Blocking mat or foam board
- Rustproof pins
- Spray bottle
- Optional: fabric starch or a sugar-water stiffener
- Optional: thread or narrow ribbon for hanging
Abbreviations (US Terms)
- ch – chain
- sl st – slip stitch
- sc – single crochet
- dc – double crochet
- st(s) – stitch(es)
- sp – space
- RS – right side
- rep – repeat
Special stitch – Shell: Work 5 dc in the same stitch or space.
Row-end: The side edge of a row. On a dc row, insert your hook around the post of the turning chain or end dc.
Gauge and Checkpoints
Gauge: 8 dc and 4 dc rows = 1 in (2.5 cm). Swatch 16 dc × 8 rows. It should measure 2 in (5.1 cm) square.
This is a single small piece, so the angel acts as its own test. Use the checkpoints below as you go. If one checkpoint is off, fix it before you continue.
- After the head: about 0.75 in (1.9 cm) across
- After yoke Row 2: about 1.6 in (4.1 cm) wide
- After skirt Row 7: hem about 3.5 in (8.9 cm) wide; neck to hem about 1.75 in (4.4 cm)
- After Wing Row 5: each wing reaches about 1.2 in (3.0 cm) out from the yoke
- Before border: about 3 in (7.6 cm) tall including the halo, and 4 in (10.2 cm) across the wings
Too big? Go down to a 1.75 mm hook. Too small? Go up to a 2.25 mm hook. Keep the chains in the mesh the same tension as your dc. Loose chains make the skirt ruffle.
Head
Rnd 1 (RS): Ch 6, sl st in the first ch to form a ring. Ch 3 (counts as dc), work 15 dc in the ring. Sl st to the top of the ch-3. (16 dc)
Pull the starting tail gently to close the center. Do not fasten off.
The ch-3 is st 1, and you count the stitches 2–16 from there. St 2 is the bottom center (neck). St 10 is the top center, where the halo will go.
Yoke
Work in rows from here. Turn at the end of each row.
Row 1 (RS): Ch 3 (counts as dc), dc in the same st as the join. Work 3 dc in st 2, then 2 dc in st 3. Turn. (7 dc)
Row 2: Ch 3 (counts as dc), dc in the first st. Work 2 dc in each of the next 2 sts, dc in the next st, then 2 dc in each of the last 3 sts. Turn. (13 dc)
Check: 2 + 2 + 2 + 1 + 2 + 2 + 2 = 13. The yoke should now fan out as a solid triangle about 1.6 in (4.1 cm) wide.
Skirt
Row 3: Ch 4 (counts as dc + ch 1) and skip the next st. Dc in the next st, ch 1, skip the next st. Rep from * 4 more times (5 times total), then dc in the last st. Turn. (7 dc, 6 ch-1 sps)
The dc land on sts 1, 3, 5, 7, 9, 11 and 13.
Row 4: Ch 4 (counts as dc + ch 1), dc in the first dc (edge increase), ch 1. Dc in the next dc, ch 1. Rep from * 4 more times (5 times total). Work (dc, ch 1, dc) in the 3rd ch of the turning ch-4. Turn. (9 dc, 8 ch-1 sps)
Rows 5–7: Work as Row 4. Each edge dc becomes a V, and the * rep runs once over each inner dc. Turn at the end of each row.
- Row 5: Rep 7 times. (11 dc, 10 ch-1 sps)
- Row 6: Rep 9 times. (13 dc, 12 ch-1 sps)
- Row 7: Rep 11 times. (15 dc, 14 ch-1 sps)
Fasten off after Row 7.
Each row adds 2 mesh units, one at each edge. That keeps both sides of the skirt sloping evenly into a triangle.
Checkpoint: The Row 7 hem is about 3.5 in (8.9 cm) wide. Laid flat, it should not ruffle or cup.
Skirt Border
Border gauge: Use the same hook and tension as the body. Each repeat (sc + shell) uses 2 dc and 2 ch-1 sps of Row 7, which is 4 stitches of width.
With RS facing, join the yarn with a sl st in the row-end of Row 3 on the left side of the skirt, just below the yoke.
Left side (down): Sc in the Row 3 row-end. Shell in the Row 4 row-end. Sc in the Row 5 row-end. Shell in the Row 6 row-end. (2 shells, 2 sc)
Hem: Sc in the corner dc of Row 7. This is dc 1. Skip the ch-1 sp, shell in the next dc, skip the ch-1 sp, sc in the next dc. Rep from * 6 more times (7 times total). The last sc lands in dc 15, the opposite corner. (7 shells, 8 sc including both corners)
Right side (up): Shell in the Row 6 row-end. Sc in the Row 5 row-end. Shell in the Row 4 row-end. Sc in the Row 3 row-end. (2 shells, 2 sc) Fasten off.
Skirt border total: 11 shells and 12 sc.
Why the math works: Row 7 has 15 dc + 14 ch = 29 stitches. The repeat is 4 stitches plus 1 to finish, and 4 × 7 + 1 = 29. Shells sit on the even dc (2–14) and sc sit on the odd dc (1–15). The skirt sides have 4 row-ends below the yoke (Rows 3–6). These alternate sc and shell, and the Row 7 end dc acts as the shared corner sc. Nothing is counted twice.
Wings
Work the right and left wings the same way. Each one is worked outward from the row-ends of yoke Rows 1–2.
Wing Row 1 (RS): With RS facing, join the yarn in the row-end of yoke Row 2. Ch 3 (counts as dc) and work 3 dc in the same row-end. Then work 3 dc in the row-end of yoke Row 1, next to the head. Turn. (7 dc)
Wing Row 2: Ch 4 (counts as dc + ch 1). Dc in the next st, ch 1. Rep from * 4 more times (5 times total), then dc in the top of the turning ch-3. Turn. (7 dc, 6 ch-1 sps)
Wing Row 3: Ch 5 (counts as dc + ch 2). Dc in the next dc, ch 2. Rep from * 4 more times, then dc in the 3rd ch of the turning ch-4. Turn. (7 dc, 6 ch-2 sps)
Wing Row 4: Ch 6 (counts as dc + ch 3). Dc in the next dc, ch 3. Rep from * 4 more times, then dc in the 3rd ch of the turning ch-5. Turn. (7 dc, 6 ch-3 sps)
Wing Row 5: Work as Row 4, ending with dc in the 3rd ch of the turning ch-6. Turn. (7 dc, 6 ch-3 sps)
The dc count stays at 7 while the chains get longer. This opens the wing into a fan, with the dc lines spreading out from the shoulder.
Checkpoint: Each wing reaches about 1.2 in (3.0 cm) beyond the yoke. The wingspan is about 4 in (10.2 cm).
Wing Border
Wing Row 6 (shell edge): Ch 1, sc in the first dc. Shell in the next ch-3 sp, sc in the next dc. Rep from * 5 more times (6 times total). The last sc goes in the 3rd ch of the turning ch-6. Fasten off. (6 shells, 7 sc)
Why the math works: Wing Row 5 has 7 dc separated by 6 ch-3 sps. Each space takes one shell, and each dc takes one sc, so 6 shells sit between 7 sc. This gives a symmetrical scallop with an sc anchor at both ends.
Repeat the Wings and Wing Border on the other side of the yoke. Join at that side’s Row 2 row-end and work toward the head, so the wings mirror each other.
Halo
With RS facing, join the yarn with a sl st in st 9 of the head.
- Loop 1: Ch 8, sl st in st 9. Work 12 sc into the loop, then sl st in st 9.
- Sl st in st 10 and in st 11.
- Loop 2: Ch 8, sl st in st 11. Work 12 sc into the loop, then sl st in st 11.
Fasten off. The two small loops sit on either side of the top center (st 10) and lean apart to form the halo. They rise about 0.5 in (1.3 cm) above the head. Either loop can also hold a hanging thread.
Final Blocking
- Weave in all ends along solid stitches (head, yoke, sc anchors), not through the mesh.
- Mist the angel with water until it is damp but not dripping. If you want a stiff ornament, dip it in starch instead.
- Lay it RS up on the blocking mat.
- Pin the neck, then the hem corners. Measure the hem: 4 in (10.2 cm) including the border.
- Pin each shell point along the hem, opening the mesh into even holes.
- Pin the wing tips so the wingspan is 4.5 in (11.4 cm), with both wings at the same angle.
- Pin each wing shell, and shape the halo loops round and symmetrical.
- Check the height: 3.25 in (8.3 cm) from the halo top to the lowest hem shell.
- Let it dry completely before you unpin it.
Final Quality-Control Checklist
- Head: 16 dc, center closed, about 0.75 in (1.9 cm) across
- Yoke: Row 1 = 7 dc, Row 2 = 13 dc
- Skirt: Row 7 = 15 dc and 14 ch-1 sps
- Skirt border: 11 shells and 12 sc
- Each wing: Rows 1–5 have 7 dc each; Row 6 has 6 shells and 7 sc
- Halo: 2 loops, each with 12 sc
- Finished size: 3.25 in (8.3 cm) × 4.5 in (11.4 cm)
- Both wings mirror each other in angle and length
- All ends are hidden in solid stitches
Troubleshooting
Skirt ruffles: Your chains are too loose, or you added extra stitches. Recount each row against the stated totals and tighten the ch-1s.
Skirt cups or pulls in: Your chains are too tight, or you skipped an edge V. Each row from Row 4 on needs a V at both ends.
Wings curl: This is normal before blocking. Block firmly and starch if needed. If the curl is severe, the ch-3 rows are too tight.
Wings uneven: One wing was probably started in the wrong row-end. Both wings must start at Row 2 and end at Row 1.
Shells crowd or gap: Check that you skipped exactly one ch-1 sp before and after each hem shell.
Halo floppy: Pack the 12 sc firmly, or starch the loops while they are pinned round.
Hole at head center: Pull the starting tail tighter before weaving it in.
Care
Hand wash in cool water with mild soap, then press it in a towel. Reshape, pin, and re-starch if needed, and let it dry flat.
Final Notes
The measurement chain is short and easy to check:
- Gauge of 8 dc and 4 rows = 1 in (2.5 cm)
- Head 0.75 in (1.9 cm)
- Yoke 1.6 in (4.1 cm)
- Hem 3.5 in (8.9 cm)
- Wingspan before border 4 in (10.2 cm)
- Border adds 0.25 in (0.6 cm) at each edge
- Finished size 3.25 in (8.3 cm) × 4.5 in (11.4 cm)
If each checkpoint matches, the finished angel will too.
Optional: For a set, simply make several angels and hang them on matching thread.
Happy crocheting!