

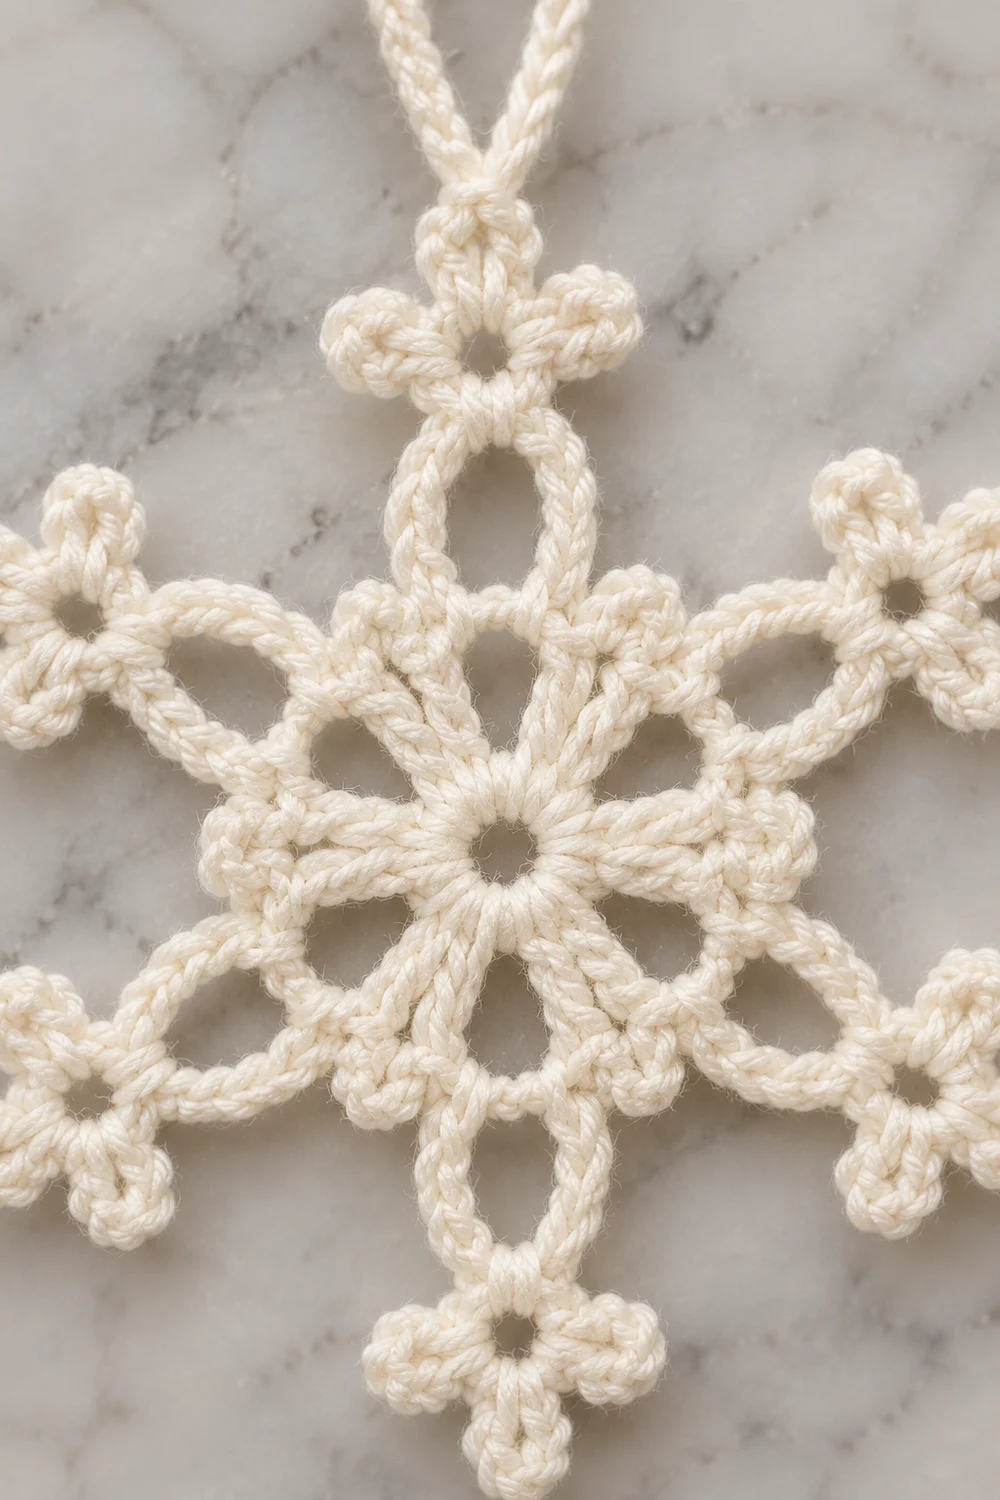
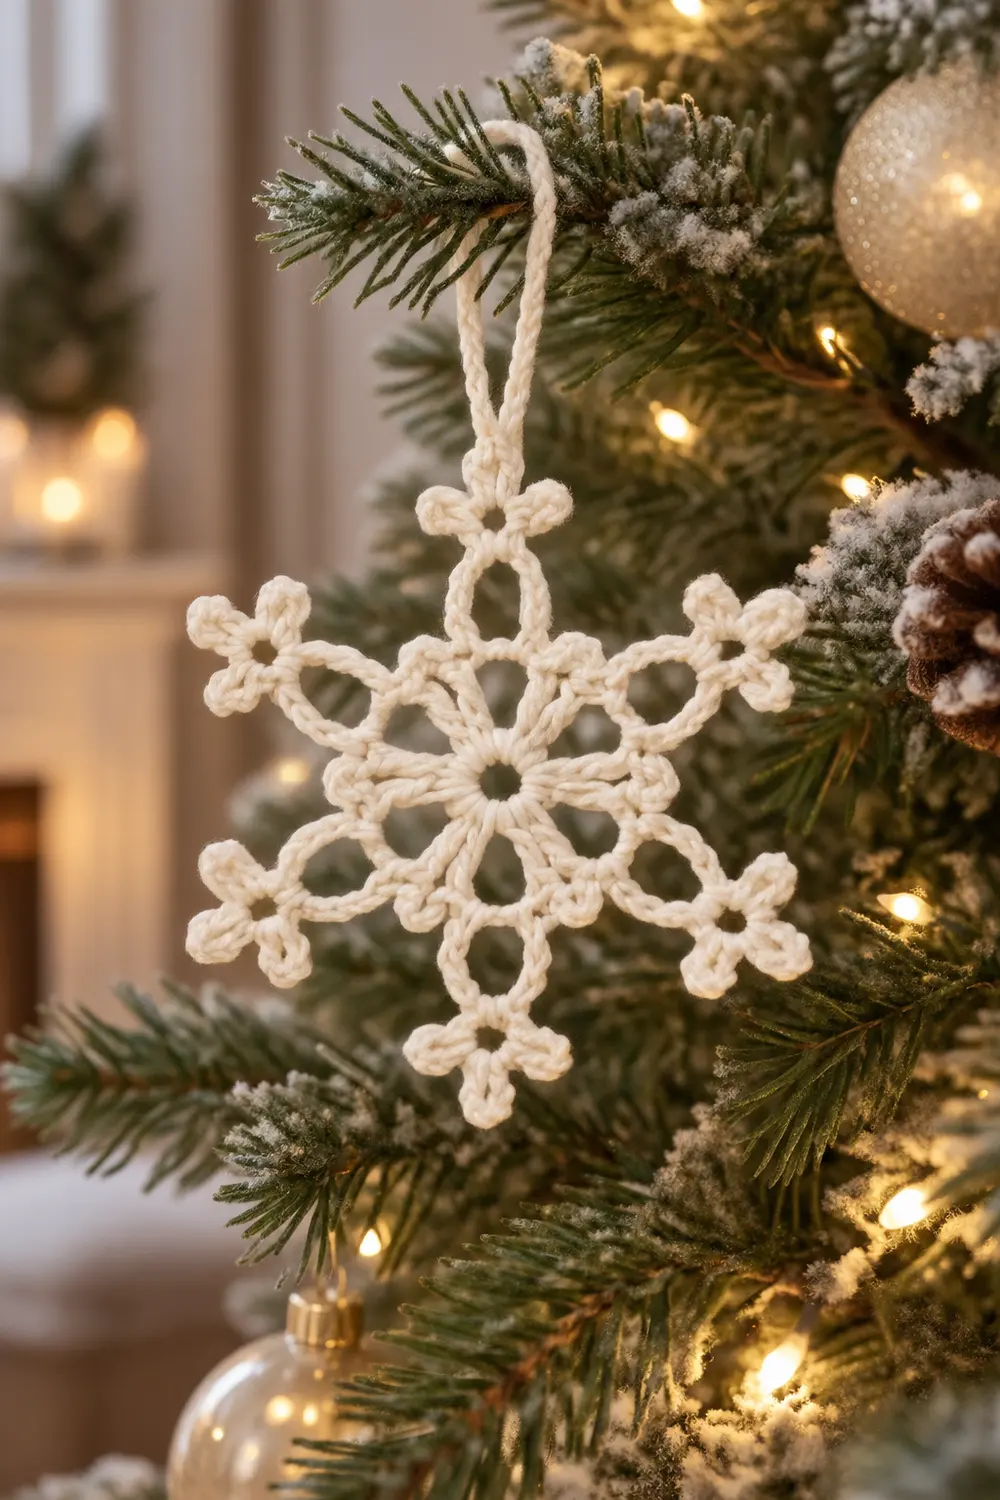
The Frosted Star Snowflake is a single lacy ornament worked in one soft cream yarn. It has a classic six-pointed shape: a small central ring, six branches spaced evenly around it, and a tiny looped motif at the end of every branch. Picots trim the outer loops and branch tips, so the finished piece looks light and frosty.
The style is open and delicate, but the stitches are simple: single crochet, double crochet, chains, and picots. A twisted crochet cord loop at the top makes it ready to hang on a tree, a window, or a gift package.
This pattern uses US crochet terms. The finished snowflake measures 4.5 in (11.4 cm) from tip to tip, not counting the hanging loop.
You work the snowflake in the round from a magic ring. Rounds 1–4 build the center, the fans, and the open arcs. Round 5 adds the six branches with their picot tips and trims each arc with a picot. Finally, you attach the hanging cord and block the piece flat.
Finished Size and Construction
- Finished size: 4.5 in (11.4 cm) tip to tip
- Hanging loop: about 1.5 in (3.8 cm) tall
- Skill level: Easy
- Terminology: US crochet terms
- Yarn weight: DK / light (#3), cotton recommended
- Hook: 3.5 mm (E-4)
- Number of pieces: 1 snowflake plus an attached hanging cord
- Layout: Single motif worked in the round
- Piece size: 4.5 in (11.4 cm) tip to tip
- Size before border (after Round 4): 3 in (7.6 cm) across
- Border depth (Round 5): 0.75 in (1.9 cm) at each branch
Materials
Yarn advice: Choose a smooth, tightly plied cotton or cotton blend in DK weight. Cotton holds picots crisply and takes blocking well. Fuzzy or very soft acrylic will blur the lace.
- Cream / off-white: 8 g, about 20 m (22 yd)
Tools:
- 3.5 mm (E-4) crochet hook
- Tapestry needle
- Scissors
- 1 stitch marker
- Blocking mat or folded towel
- Rust-proof pins
- Spray bottle with water
- Optional: fabric stiffener or diluted craft glue
The yarn amount includes a margin for the gauge swatch, the hanging cord, and weaving in ends.
Abbreviations (US Terms)
- ch – chain
- sl st – slip stitch
- sc – single crochet
- dc – double crochet
- st(s) – stitch(es)
- sp – space
- rep – repeat
- Rnd – round
Special stitch – Picot: Ch 3, sl st into the 3rd ch from hook (the first of the 3 ch just made). The picot does not count as a stitch.
Magic ring: An adjustable ring that pulls closed to leave a small hole in the center.
Gauge and Checkpoints
Lace gauge is easiest to judge by measuring the motif itself. Work Rounds 1–2, then check before going on.
Checkpoints:
- After Rnd 1: 0.75 in (1.9 cm) across
- After Rnd 2: 1.75 in (4.4 cm) across the fans
- After Rnd 3: 2.5 in (6.4 cm) across at the widest point
- After Rnd 4: 3 in (7.6 cm) across
- After Rnd 5 (blocked): 4.5 in (11.4 cm) tip to tip
Measure the piece lying flat, unstretched.
If your piece is too big: Go down to a 3.25 mm (D-3) hook, or work your chains more tightly.
If your piece is too small: Go up to a 3.75 mm (F-5) hook. Loose chains in Rounds 3 and 5 make the biggest difference.
A difference of 0.25 in (0.6 cm) at Round 4 is fine. Blocking will even it out.
Snowflake Pattern
Round 1 – Center Ring
Make a magic ring.
Ch 1, work 12 sc into the ring. Sl st to the first sc to join. Pull the ring snug, but leave a small visible hole in the center.
Count: 12 sc.
Checkpoint: 0.75 in (1.9 cm) across.
Round 2 – Six Fans
Ch 3 (counts as dc), 2 dc in the same st, ch 3, skip next sc.
*3 dc in next sc, ch 3, skip next sc; rep from * 4 more times.
Sl st to the top of the beginning ch-3.
Count: 18 dc in six 3-dc fans, plus six ch-3 sps.
Check: Each fan uses 1 sc and each skip uses 1 sc. That gives 6 + 6 = 12 sc, matching Round 1.
Checkpoint: 1.75 in (4.4 cm) across.
Round 3 – Open Arcs
Sl st in the next dc, which is the center dc of the first fan. Ch 1, sc in the same st. Place a marker in this sc.
*Ch 7, sc in the center dc of the next fan; rep from * 4 more times.
Ch 7, sl st to the first sc.
Count: 6 sc and six ch-7 arcs.
Each sc sits directly above the center of a fan. These 6 sc set the positions of the six branches, so the branches will be spaced at equal angles.
Checkpoint: 2.5 in (6.4 cm) across at the widest point.
Round 4 – Filling the Arcs
This is a conversion round. You cover each arc with sc and work 1 sc into each existing sc.
Ch 1, sc in the same st (the marked sc). This is a branch-anchor sc; move the marker up into it.
*9 sc in the next ch-7 arc, sc in the next sc (branch-anchor sc); rep from * 4 more times.
9 sc in the last arc. Sl st to the first sc.
Count: 6 sc worked 1-per-existing-sc (the branch anchors) + 54 sc worked into the arcs (6 arcs × 9 sc) = 60 sc.
Each arc gets 9 sc over 7 chains. The 2 extra sc per arc keep the curve flat instead of tight.
Checkpoint: 3 in (7.6 cm) across. The piece should lie flat with no cupping.
Border: Branches and Picot Edging (Round 5)
Round 5 is the border. It builds one branch from each branch-anchor sc and adds a picot to the center of each arc.
Border gauge: About 6.5 sc per 1 in (2.5 cm) along the arcs, measured on Round 4. Round 5 keeps this density because it works 1 sc into each existing arc sc.
Think of each “side” as one segment: 1 branch-anchor sc followed by 9 arc sc. That gives 6 segments × 10 sc = 60 sc, matching Round 4.
Round 5
Branch: In the first branch-anchor sc (the joining st), ch 9. Sl st into the 5th ch from hook to form a small tip ring. The 4 ch closest to the snowflake are the stem.
In the tip ring, work: (sc, picot, sc, picot, sc, picot, sc).
Working down the stem, sc in each of the 4 stem ch. Sl st into the same branch-anchor sc at the base.
Arc: Sc in the next 5 sc, picot, sc in the next 4 sc. The picot sits on top of the 5th sc, which is the center of the 9-sc arc.
*Work a Branch in the next branch-anchor sc, then work an Arc; rep from * 4 more times.
Sl st to the base of the first branch. Fasten off, leaving a 6 in (15.2 cm) tail.
Counts per segment:
- Branch: 4 sc + 3 picots in the tip ring, plus 4 sc on the stem
- Arc: 9 sc + 1 picot
Round totals:
- 6 branches
- 24 tip-ring sc and 24 stem sc
- 54 arc sc
- 24 picots (18 on branch tips, 6 on arcs)
Why the math works: Round 4 has 60 sc, made up of 6 branch anchors + 54 arc sc. In Round 5, each anchor holds one branch and each of the 54 arc sc gets exactly 1 new sc. Nothing is added or skipped, so the edge stays flat.
The 3 tip picots plus the stem give each branch its small four-point looped motif.
Checkpoint: About 4.5 in (11.4 cm) tip to tip before blocking. Each branch extends about 0.75 in (1.9 cm) beyond the Round 4 edge.
Hanging Cord
Choose one branch to be the top. Join the yarn with a sl st into the middle picot of that branch’s tip.
Ch 22, then sl st into the same picot to form a loop.
Work 1 sc in each of the 22 ch around the loop, letting the stitches twist slightly as they build. Sl st into the picot to finish.
Fasten off, leaving a 4 in (10.2 cm) tail.
Count: 22 sc around the loop.
Checkpoint: The loop stands about 1.5 in (3.8 cm) tall.
The sc worked over the chain give the cord a firm, twisted look that holds its shape on a hook or branch.
Final Blocking
- Weave in all ends along the back of the sc stitches, following the curve of the arcs. Trim the tails.
- Soak the snowflake in cool water for 5 minutes. Gently press out the water in a towel; do not wring it.
- Lay it face up on the blocking mat.
- Pin the center ring flat with a pin just inside the hole.
- Pin each branch tip straight out. Measure tip to tip on all three axes: each should read 4.5 in (11.4 cm).
- Pin the center picot of each arc so all arcs curve evenly.
- Pin the 3 picots on each tip ring so they open like small petals.
- Pin the hanging cord straight up from the top branch.
- Optional: dab or spray fabric stiffener evenly over the piece for a crisp ornament.
- Let it dry completely, usually 12–24 hours, before removing the pins.
Final Quality-Control Checklist
- [ ] Center hole is small, round, and closed securely
- [ ] Round 2 has six fans of 3 dc each
- [ ] Round 4 has 60 sc (6 anchors + 54 arc sc)
- [ ] Six branches, all the same length
- [ ] Each branch tip has 3 picots
- [ ] Each arc has 1 centered picot
- [ ] All three tip-to-tip measurements are 4.5 in (11.4 cm)
- [ ] Piece lies completely flat
- [ ] Hanging cord is firmly attached and about 1.5 in (3.8 cm) tall
- [ ] All ends are woven in securely
Troubleshooting
The center cups or bulges. Round 1 was pulled too tight, or Round 2 chains are too short. Loosen the magic ring slightly, and make sure each ch-3 sp is a full 3 ch.
The arcs ruffle. Your stitches are loose relative to your chains. Work 8 sc per arc instead of 9 only if you also keep 1 picot centered. Better yet, go down a hook size.
The arcs pull tight and the piece curls. Your chains are too tight. Loosen the ch-7 arcs in Round 3, or use a larger hook for Round 3 only.
The branches are uneven. Count the 9 ch for every branch, and make sure every stem gets exactly 4 sc. Pin firmly to the same measurement during blocking.
The picots look flat or floppy. Pull each picot sl st snug, and pin each picot open while blocking. Fabric stiffener helps the most here.
The hanging cord twists sideways. Pin it straight while drying, or attach it to the exact center picot of the top tip.
Care
Hand wash in cool water with mild soap and dry flat, pinned to shape. If you used stiffener, re-block and re-stiffen after washing.
Final Notes
The measurement chain is simple to follow: 0.75 in (1.9 cm) after Round 1, 1.75 in (4.4 cm) after Round 2, 2.5 in (6.4 cm) after Round 3, and 3 in (7.6 cm) after Round 4. Round 5 adds 0.75 in (1.9 cm) branches on each side, for a finished 4.5 in (11.4 cm) tip to tip.
The stitch counts match the measurements. You start with 12 sc, then make 18 dc in six fans. Next come 6 anchors and 6 arcs, which become 60 sc. The border adds 6 branches and 24 picots.
Check your size at Round 2, block carefully, and you’ll have a crisp six-pointed snowflake ready to hang.
Optional: Make several in different cotton shades for a matching set of tree ornaments.
Happy crocheting!