

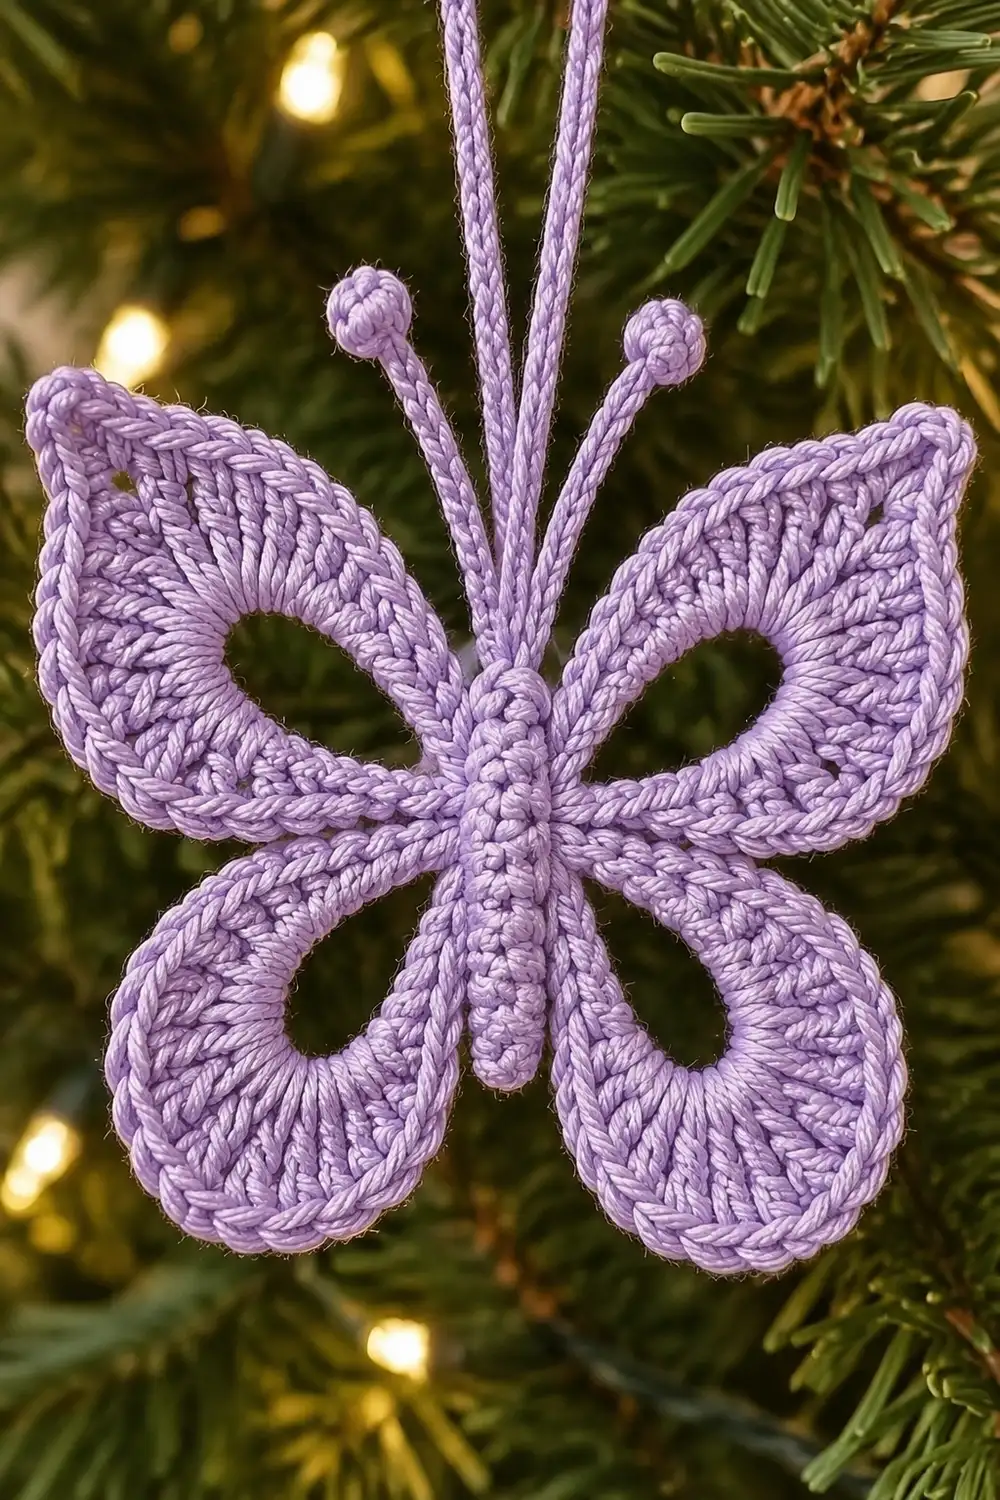
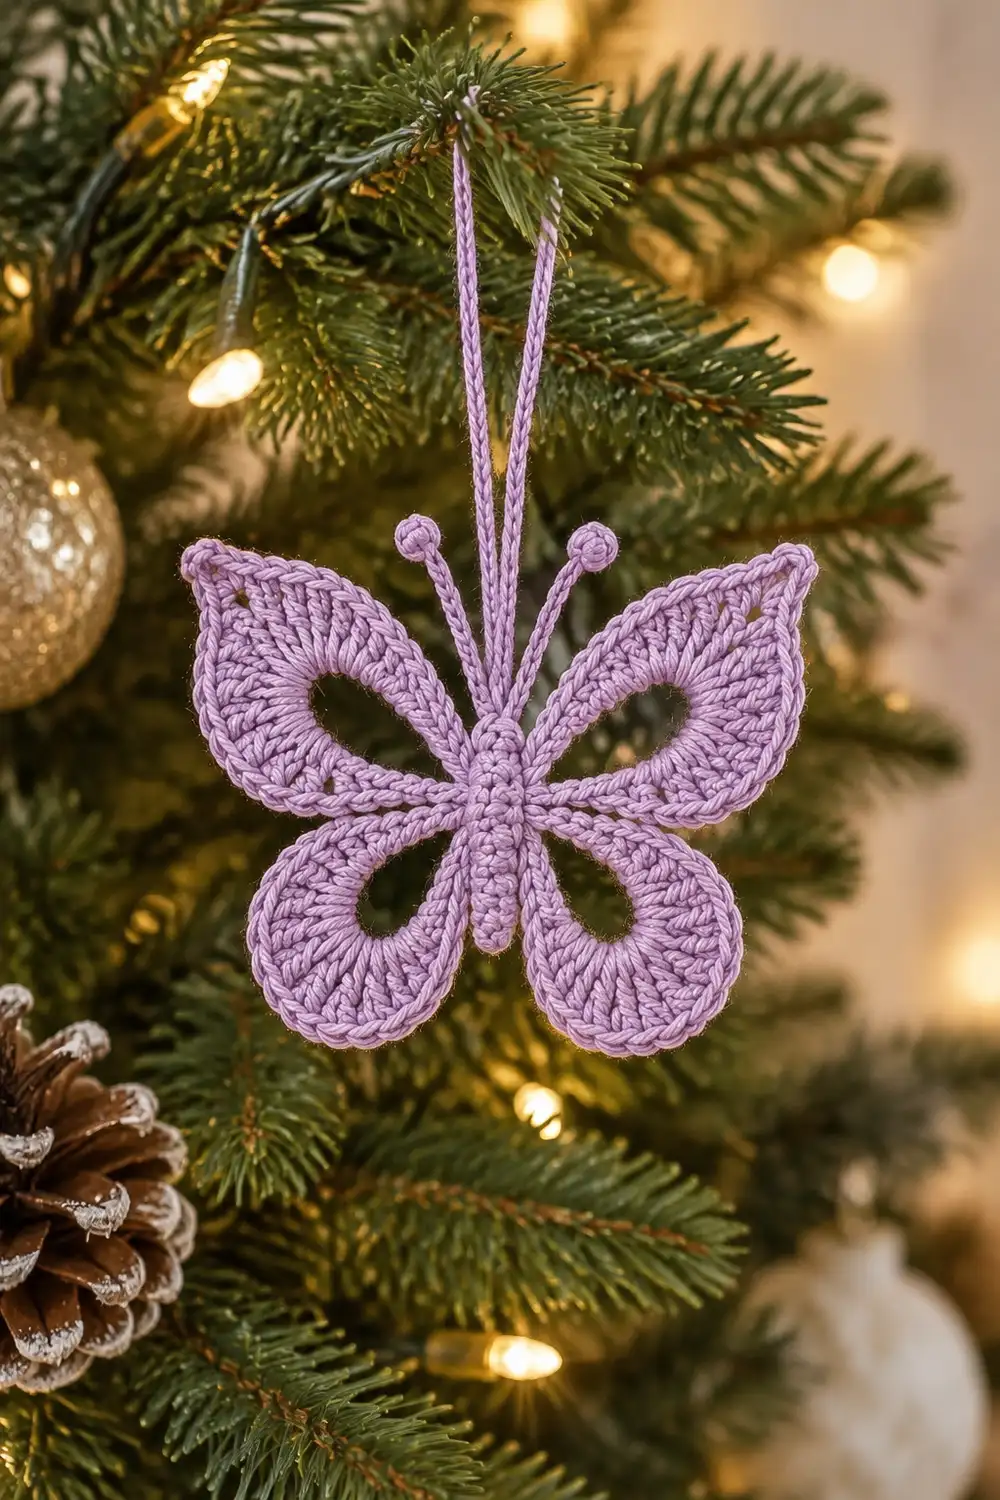
This little butterfly is made for hanging on a tree branch. It has four teardrop wings set in a cross, each with an open lacy center, and a slim ribbed body down the middle. Two thin antennae end in tiny bobbles, and a long crocheted loop lets it hang freely among the lights.
The sample is worked in a soft lavender purple mercerized cotton. The cotton gives crisp stitch definition and a slight sheen. The style is delicate and a little vintage, and it works as well on a Christmas tree as it does on a spring window branch.
The pattern uses US crochet terms. The finished ornament measures 2.75 in (7.0 cm) wide and 2.5 in (6.4 cm) tall, not counting the antennae or the hanging loop.
The ornament is worked as one continuous piece. You start with a short ribbed body strip. Then you travel around the body, building each wing from a chain loop that becomes its open center. A single border round outlines the whole silhouette and forms the head. You finish with the antennae and the hanging loop, all without cutting the yarn.
Finished Size and Construction
- Finished size: 2.75 in (7.0 cm) wide × 2.5 in (6.4 cm) tall
- Skill level: Intermediate (working into chain loops, bobbles, continuous construction)
- Terminology: US crochet terms
- Yarn weight: Sport weight (#2 fine) mercerized cotton
- Hook: 2.5 mm (between US B-1 and C-2)
- Number of pieces: 1
- Layout: One vertical body with two upper wings and two lower wings worked directly off its edges
- Piece size: Body strip 1.6 in (4.1 cm) long × 0.4 in (1.0 cm) wide
- Size before border: 2.5 in (6.4 cm) wide × 2.25 in (5.7 cm) tall
- Border depth: 0.125 in (0.3 cm), one round of sc and sl st
Materials
Yarn: Use a smooth, tightly plied mercerized cotton in sport weight. Cotton holds the pointed wing tips and open centers much better than acrylic or wool, and it takes starch well. Avoid fuzzy or loosely plied yarns, because they blur the lacy openings.
- Lavender purple: 5 g, about 16 m (17 yd) per ornament
The quantity includes a margin. One butterfly uses about 3 g. The extra covers your gauge swatch, the weaving tails, and any ripping back.
Tools:
– 2.5 mm crochet hook
– Tapestry needle
– Scissors
– Rust-proof pins and a foam blocking mat
– Spray bottle
– Fabric stiffener or spray starch (optional but recommended)
Abbreviations (US Terms)
- ch: chain
- sl st: slip stitch
- sc: single crochet
- hdc: half double crochet
- dc: double crochet
- tr: treble crochet
- blo: back loop only
- st(s): stitch(es)
- sp: space
- rep: repeat
Special stitches:
- 3-dc bobble: *Yo, insert hook in the indicated st, yo and pull up a loop, yo and pull through 2 loops. Rep from * 2 more times in the same st (4 loops on hook). Yo and pull through all 4 loops.
- 4-dc bobble: Work as for the 3-dc bobble, but rep 3 more times (5 loops on hook). Yo and pull through all 5 loops.
Gauge and Checkpoints
Gauge: 7 sc and 8 sc rows = 1 in (2.5 cm).
The body strip is your gauge test. Work it first and measure it before you start any wings.
Checkpoints:
1. Body strip (after Row 3): 1.6 in (4.1 cm) long × 0.4 in (1.0 cm) wide.
2. Upper wing (after fill round): about 1.3 in (3.3 cm) from body edge to tip.
3. Lower wing (after fill round): about 1.0 in (2.5 cm) from body edge to tip.
4. Before border: 2.5 in (6.4 cm) wide × 2.25 in (5.7 cm) tall.
5. After border: 2.75 in (7.0 cm) wide × 2.5 in (6.4 cm) tall.
If your body strip is too long (over 1.7 in / 4.3 cm), go down to a 2.25 mm hook.
If your body strip is too short (under 1.5 in / 3.8 cm), go up to a 2.75 mm hook.
Frog the strip and restart after any hook change. A small error in the body carries into every wing.
Part 1: Ribbed Body
The body is a short strip worked in rows. The back-loop-only rows create ridges that run vertically down the butterfly.
Row 1: Ch 12. Sc in 2nd ch from hook and in each ch across. (11 sc)
Row 2: Ch 1, turn. Sc blo in each st across. (11 sc)
Row 3: Ch 1, turn. Sc blo in each st across. (11 sc)
Do not fasten off.
Orientation: The slip-knot end of the strip is the head end. Number the stitches 1 to 11 along each long edge, starting at the head end.
- Edge A is the top edge of Row 3.
- Edge B is the foundation chain edge. Along Edge B, you work into the free loops of the chain.
Measure now: 1.6 in (4.1 cm) × 0.4 in (1.0 cm).
Part 2: Wing Bases
Each wing has two steps. First you make a chain loop, which becomes the open center. Then you work a fill round of graduated stitches over that loop. Work every fill stitch over the chain loop as a bundle, not into individual chains. Push the stitches along as you go so they pack evenly.
You will travel down Edge A, around the bottom end, and up Edge B. This is one continuous direction around the body.
Upper Wing A
Travel: Ch 1, turn. Sl st in Edge A sts 1–3.
Chain loop: Sl st in st 4, ch 16, sl st in st 4 again. (16-ch loop)
Fill round: Work all of the following over the loop:
– 3 sc, 4 hdc, 5 dc, 2 tr
– ch 2 (this is the wing tip)
– 2 tr, 5 dc, 4 hdc, 3 sc
Sl st in Edge A st 5.
Count: 28 sts plus one ch-2 tip space, with 14 sts on each side of the tip.
Plan for the tip to land at the far end of the loop. If you run out of room, push the first half of the stitches closer together.
Lower Wing A
Travel: Sl st in Edge A sts 6–7.
Chain loop: Sl st in st 8, ch 12, sl st in st 8 again. (12-ch loop)
Fill round: Work all of the following over the loop:
– 2 sc, 3 hdc, 4 dc, 1 dc
– ch 2 (wing tip)
– 1 dc, 4 dc, 3 hdc, 2 sc
Sl st in Edge A st 9.
Count: 20 sts plus one ch-2 tip space, with 10 sts on each side.
Around the Bottom
Sl st in Edge A sts 10–11. Sl st in each of the 3 row ends at the bottom end. Sl st in Edge B sts 11, 10, and 9.
Lower Wing B
Make the chain loop at Edge B st 8, the same way as Lower Wing A. Work the fill round exactly as for Lower Wing A. Sl st in Edge B st 7.
Upper Wing B
Travel: Sl st in Edge B sts 6–5.
Make the chain loop at Edge B st 4, the same way as Upper Wing A. Work the fill round exactly as for Upper Wing A. Sl st in Edge B st 3.
Checkpoint: The piece should measure 2.5 in (6.4 cm) wide × 2.25 in (5.7 cm) tall. Each wing should have a clear teardrop-shaped opening.
Border
The border is one continuous round around the whole silhouette. It travels in the same direction as Part 2, so you never turn.
It is worked at the same gauge as the body: 7 sc per in (2.5 cm). On each wing, it starts in the first stitch of that wing’s fill round and ends in its last stitch.
Border Round
Head:
– Sl st in Edge B sts 2–1.
– Across the top end: sc in the end of Row 1, 4-dc bobble in the end of Row 2 (this is the head), sc in the end of Row 3.
– Sl st in Edge A sts 1–3.
Upper Wing A (38 sc):
– Side 1: Sc in next 4 sts, (2 sc in next st, sc in next st) 3 times, sc in next 4 sts. This works 14 sts and makes 17 sc.
– Tip: (2 sc, ch 1, 2 sc) in the ch-2 sp.
– Side 2: Sc in next 4 sts, (sc in next st, 2 sc in next st) 3 times, sc in next 4 sts. This makes 17 sc.
– Total: 17 + 4 + 17 = 38 sc.
Travel: Sl st in Edge A sts 5–7.
Lower Wing A (28 sc):
– Side 1: Sc in next 3 sts, (2 sc in next st, sc in next st) 2 times, sc in next 3 sts. This works 10 sts and makes 12 sc.
– Tip: (2 sc, ch 1, 2 sc) in the ch-2 sp.
– Side 2: Sc in next 3 sts, (sc in next st, 2 sc in next st) 2 times, sc in next 3 sts. This makes 12 sc.
– Total: 12 + 4 + 12 = 28 sc.
Bottom: Sl st in Edge A sts 9–11, in the 3 bottom row ends, and in Edge B sts 11–9.
Lower Wing B: Work as for Lower Wing A. (28 sc)
Travel: Sl st in Edge B sts 7–5.
Upper Wing B: Work as for Upper Wing A. (38 sc)
Finish the round: Sl st in Edge B st 3. Join with a sl st in the first sl st of the round.
Round Totals
- Sc: 2 at the head + 38 + 28 + 28 + 38 = 134 sc
- Bobble: 1 (the head)
- Sl st: 2 + 3 + 3 + 9 + 3 + 1 = 21
- Tip spaces: 4 ch-1 spaces
Why the Math Works
Each wing border is a conversion round. It works 1 sc into each existing fill stitch, adds a few increases on the curves, and adds 4 sc around each tip.
- Upper wing: 28 sts worked one-to-one, plus 6 increases, plus 4 tip sc = 38 sc.
- Lower wing: 20 sts worked one-to-one, plus 4 increases, plus 4 tip sc = 28 sc.
A border that sits 0.125 in (0.3 cm) outside a closed curve needs about 2π × 0.125 = 0.79 in (2.0 cm) of extra perimeter. At 7 sc per inch, that is about 5.5 stitches.
The upper wing gets 6 increases because its treble tips fan out more than the lower wing’s double crochet tips. The tip stitches then sharpen each point. Together, these extra stitches keep the edge flat without ruffling.
Two border depths add 0.25 in (0.6 cm) in each direction. That takes the piece from 2.5 in × 2.25 in (6.4 cm × 5.7 cm) to 2.75 in × 2.5 in (7.0 cm × 6.4 cm).
Antennae and Hanging Loop
After joining the border, sl st in Edge B st 1, then in the first sc of the head, then in the top of the head bobble.
Antenna 1:
1. Ch 8.
2. Work a 3-dc bobble in the 3rd ch from hook.
3. Sl st in each of the next 5 ch.
4. Sl st in the top of the head bobble.
Hanging loop: Ch 40. Sl st in the top of the head bobble. The loop hangs about 2.75 in (7.0 cm).
Antenna 2: Work as for Antenna 1.
Fasten off and weave in all ends through the body. Each antenna should measure about 0.75 in (1.9 cm).
Final Blocking
- Lightly mist the butterfly, or dip it in diluted fabric stiffener and blot it in a towel.
- Lay it right side up on the blocking mat.
- Pin the body straight. It should be 1.6 in (4.1 cm) long.
- Pin each wing tip at its ch-1 space, pulling gently outward to sharpen the points.
- Push a pin into each wing opening and ease it into an even teardrop shape.
- Check the overall size: 2.75 in (7.0 cm) wide × 2.5 in (6.4 cm) tall.
- Angle the antennae outward and pin each bobble in place.
- Before the piece is fully dry, lift the wing edges slightly off the body for a gentle three-dimensional curve.
- Let it dry completely before hanging.
Final Quality-Control Checklist
- Body is 11 sts long, with visible vertical ribs.
- Upper wings have 38 border sc each, and lower wings have 28 each.
- All four openings are clear, even teardrops.
- Wing tips are pointed and point outward in a cross.
- Head bobble is centered at the top.
- Antennae match in length and each ends in a bobble.
- Hanging loop is centered and not twisted.
- Finished size is 2.75 in (7.0 cm) × 2.5 in (6.4 cm).
- All ends are woven into the body and invisible from both sides.
Troubleshooting
- Wings cup or curl: The border is too tight, or increases were missed. Recount to 38 and 28, or loosen your tension.
- Wing edges ruffle: You have too many stitches, or your tension is too loose. Recount, or go down a hook size for the border only.
- Opening closes up: The chain loop is too tight. Chain more loosely, or use a 2.75 mm hook just for the loop.
- Tip lands off-center: Fill stitches were spread unevenly. Pack the first half more tightly before you work the tip.
- Body puckers where the wings attach: The travel sl sts are too tight. Work them loosely.
- Antennae droop: Stiffen them with starch and pin them while drying.
- Overall size is off: Recheck your body gauge. The body controls every later measurement.
Care
Hand wash in cool water and press out the excess in a towel. Reshape and pin to dry, then re-starch if needed.
Final Notes
The measurement chain is simple:
- Body at 1.6 in (4.1 cm).
- Wings before the border at 2.5 in × 2.25 in (6.4 cm × 5.7 cm).
- A 0.125 in (0.3 cm) border.
- Finished size of 2.75 in × 2.5 in (7.0 cm × 6.4 cm).
Check the body first, and the rest of the butterfly will fall into place.
Optional: if you want a matching tree set, simply repeat the pattern as many times as you like. Each ornament stays a single piece.
Happy crocheting!