

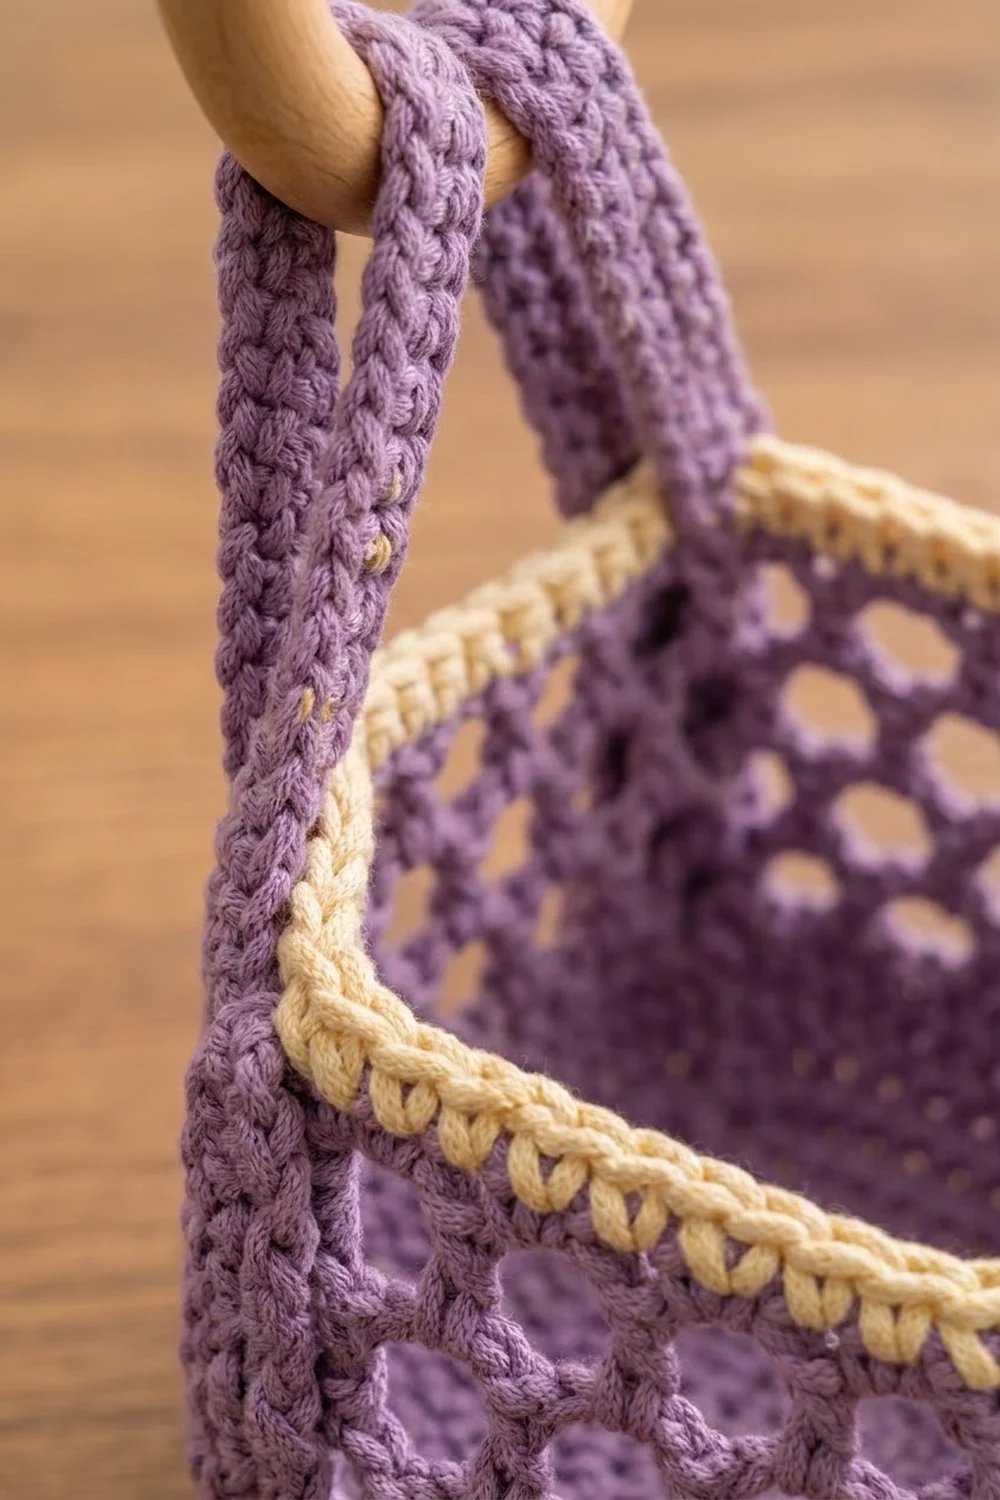
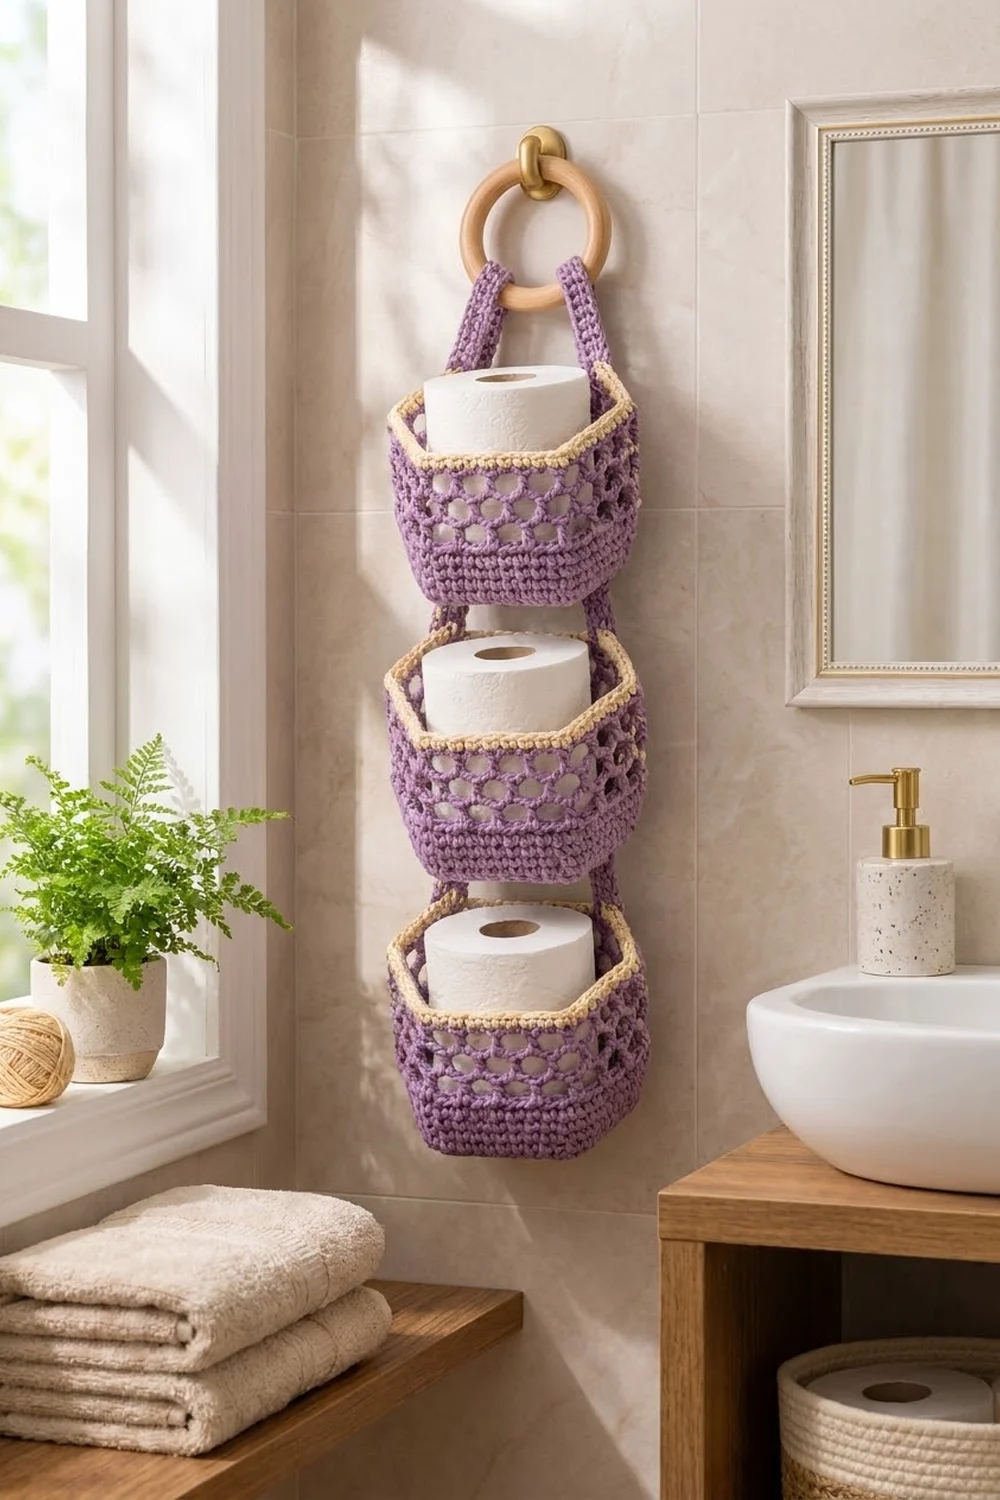
This hanging toilet paper holder keeps three spare rolls in one neat vertical column. Each tier is a six-sided basket. It has a solid, flat hexagon base, a band of solid single crochet at the bottom of the wall, an open honeycomb mesh above that, and a cream rim along the top edge. The whole stack hangs from a natural wooden ring on two purple straps.
The baskets and straps are a soft lavender purple, and the rims are a warm cream. The mesh lets the white rolls show through, so the holder looks light on a bathroom wall without looking busy.
The pattern uses US crochet terms. Each basket measures about 6 in (15.2 cm) from corner to corner, 5.2 in (13.2 cm) from one flat side to the opposite flat side, and 4.5 in (11.4 cm) tall. Hanging from its ring, the finished organizer is about 18.5 in (47.0 cm) long.
You work each base in joined rounds, then turn the wall up with a back-loop round. Next come solid rounds, then mesh rounds, and then a round that converts the mesh back to solid stitches for the cream rim. You make three baskets and two straps. You stack the baskets by sewing their back sides together, then fold the straps over the ring and sew them inside the top basket.
Finished Size and Construction
- Finished size: about 6 in (15.2 cm) wide x 18.5 in (47.0 cm) long, including the ring
- Skill level: Easy-Intermediate
- Terminology: US crochet terms
- Yarn weight: worsted weight (#4) cotton
- Hook: 5.0 mm (H-8)
- Number of pieces: 5 (3 baskets, 2 hanging straps)
- Layout: 1 column of 3 baskets, stacked vertically
- Piece size (one basket): 6 in (15.2 cm) corner to corner x 4.5 in (11.4 cm) tall
- Basket height before the rim: about 4.1 in (10.4 cm)
- Rim (border) depth: about 0.4 in (1.0 cm)
Materials
Choose a smooth, firm worsted cotton or cotton blend. Cotton holds the hexagon shape, stretches very little under the weight of the rolls, and copes well with bathroom humidity. Avoid fuzzy or very soft acrylic, because it makes the mesh droop.
- Color A, lavender purple: 200 g (about 380 m), for the three basket bodies and both straps
- Color B, cream: 30 g (about 57 m), for the three rims
These amounts assume a yarn with about 190 m per 100 g and include a margin of roughly 15 percent. Each basket uses about 55 g of Color A and 6 g of Color B. Each strap uses about 5 g of Color A.
Tools:
- 5.0 mm (H-8) crochet hook
- 1 wooden ring, about 3 in (7.6 cm) outside diameter
- 6 locking stitch markers
- Yarn needle
- Scissors
- Measuring tape
- Pins and a blocking surface
- Spare toilet rolls to use as blocking forms (optional)
Abbreviations (US Terms)
- ch: chain
- sc: single crochet
- sl st: slip stitch
- sk: skip
- sp: space
- st(s): stitch(es)
- BLO: back loop only
- MR: magic ring
- rev sc: reverse single crochet (crab stitch)
Reverse single crochet (rev sc): Work from left to right (right to left if you are left-handed). Insert the hook into the next stitch to the right, yarn over, and pull up a loop. Yarn over again and pull through both loops on the hook. This stitch gives the rim its twisted, rope-like texture.
Joined rounds: Unless stated otherwise, start every round with ch 1 (this does not count as a stitch) and end it with a sl st into the first sc of the round.
How sides are counted: Each side of the hexagon has 12 stitches: 11 plain stitches plus 1 corner stitch at the end of the side. Corner stitches are not shared between sides, so 6 sides x 12 stitches = 72 stitches.
Gauge and Checkpoints
Gauge: 16 sc and 18 rounds = 4 in (10.2 cm) with a 5.0 mm hook.
Mesh gauge: 4 ch-3 loops span one 3 in (7.6 cm) side. 6 mesh rounds measure about 2.25 in (5.7 cm) tall.
Make one complete basket first and check it against these checkpoints before you start the other two. All three baskets must match, or the stack will not line up.
- After Round 6 (36 sts): about 3 in (7.6 cm) corner to corner and 2.6 in (6.6 cm) flat to flat.
- After Round 12 (72 sts): about 6 in (15.2 cm) corner to corner and 5.2 in (13.2 cm) flat to flat. Each side measures 3 in (7.6 cm), and the full perimeter is 18 in (45.7 cm).
- After Round 19: the solid wall is about 1.6 in (4.1 cm) tall, measured from the base fold.
- After Round 26: the wall is about 4.1 in (10.4 cm) tall.
- After Round 28: the basket is about 4.5 in (11.4 cm) tall.
If the base is too big: remake it with a 4.5 mm hook.
If the base is too small: remake it with a 5.5 mm hook. A roll 4.5 in (11.4 cm) wide needs a base at least 5 in (12.7 cm) flat to flat.
If the base ruffles: go down half a hook size. If it cups: go up half a hook size.
Basket (Make 3)
Base
Use Color A. Starting in Round 2, place a marker in the second sc of each increase, and move the markers up as you work. These markers show the 6 corners.
Round 1: MR, ch 1, work 6 sc into the ring, join. (6 sts)
Round 2: 2 sc in each st around. (12 sts)
Round 3: Sc in next st, 2 sc in next st; repeat from * 5 more times. (18 sts)
Round 4: Sc in next 2 sts, 2 sc in next st; repeat 5 more times. (24 sts)
Round 5: Sc in next 3 sts, 2 sc in next st; repeat 5 more times. (30 sts)
Round 6: Sc in next 4 sts, 2 sc in next st; repeat 5 more times. (36 sts)
Check Checkpoint 1 before you continue.
Round 7: (Sc in next 5, 2 sc in next) x 6. (42 sts)
Round 8: (Sc in next 6, 2 sc in next) x 6. (48 sts)
Round 9: (Sc in next 7, 2 sc in next) x 6. (54 sts)
Round 10: (Sc in next 8, 2 sc in next) x 6. (60 sts)
Round 11: (Sc in next 9, 2 sc in next) x 6. (66 sts)
Round 12: (Sc in next 10, 2 sc in next) x 6. (72 sts)
The increases stack directly on top of each other, so the base forms a true hexagon with 6 straight sides of 12 sts each. Check Checkpoint 2.
Solid Wall
Round 13: Sc in the BLO of each st around. (72 sts)
The unused front loops form a crisp ridge where the base turns up into the wall. Leave the corner markers in place.
Rounds 14–19: Sc in each st around. (72 sts each round; 12 per side)
That gives you 7 solid wall rounds. Check Checkpoint 3. Stand the basket on its base and pinch each corner to keep the hexagon sharp.
Honeycomb Mesh
Round 20: Ch 1, sc in the first st, ch 3, sk 2 sts, sc in next st, ch 3, sk 2 sts; repeat from * 22 more times. Join with a sl st into the first sc. (24 sc and 24 ch-3 sps; 4 loops per side)
Every 3 wall stitches become 1 loop: 72 ÷ 3 = 24 loops, and 12 ÷ 3 = 4 loops per side.
Round 21: Sl st into each of the first 2 ch of the next ch-3 sp. Ch 1, sc in the same sp, ch 3, sc in next ch-3 sp, ch 3; repeat from * 22 more times. Join with a sl st into the first sc. (24 sc and 24 ch-3 sps)
Each new sc sits in the middle of a loop from the round below, so the cells shift by half a cell each round. That offset creates the honeycomb.
Rounds 22–25: Repeat Round 21. (24 sc and 24 ch-3 sps each round)
That gives you 6 mesh rounds, about 2.25 in (5.7 cm) tall. Keep all the chains the same size, because loose chains make the upper wall flare out.
Conversion Round
Round 26: Ch 1, sc in the same st as the join, 2 sc in next ch-3 sp, sc in next sc, 2 sc in next ch-3 sp; repeat from * 22 more times, join. Count: 24 sc worked 1-per-existing-sc + 48 sc worked into the 24 ch-3 sps = 72 sts.
This brings the count back to 72 sts (12 per side), the same as the base. Line up the 6 corners with the base corners and put the markers back in. Check Checkpoint 4, then fasten off Color A.
Hanging Strap (Make 2)
Use Color A.
Foundation: Ch 6.
Row 1: Sc in the 2nd ch from the hook and in each ch across. (5 sts)
Rows 2–32: Ch 1, turn, sc in each st across. (5 sts)
Fasten off, leaving a 12 in (30.5 cm) tail for sewing. Each strap should be about 1.25 in (3.2 cm) wide and 7 in (17.8 cm) long.
Make All Pieces
- Baskets: 3, each with a Color A body and a Color B rim
- Straps: 2, Color A only
        (  ring  )
        |        |      <- 2 straps
   [ Basket 1 - top    ]
   [ Basket 2 - middle ]
   [ Basket 3 - bottom ]
Before joining, choose one side of each basket to be the back side, and mark both of its corners.
Rim (Border)
Work the rim on each basket before you join them.
Rim gauge: The cream sc should match the body gauge of 16 sts = 4 in (10.2 cm). If your cream yarn is thicker than the purple, use a hook half a size smaller for the rim.
Round 27: Join Color B in any corner stitch. Ch 1, sc in each st around, join. (72 sts; 12 per side x 6 sides)
Round 28: Ch 1, rev sc in each st around, join. (72 sts; 12 per side x 6 sides)
Fasten off and weave in the ends.
Why the math works: Round 26 gives exactly 72 sts. Round 27 places 1 sc in each of them, with nothing added or skipped, so the rim keeps the 18 in (45.7 cm) perimeter of the base. Each 3 in (7.6 cm) side stays at 12 sts, and the corners stay lined up with the base corners. Round 28 again works 1 stitch into each stitch. Reverse sc is a little firmer than sc, so it stiffens the top edge and helps it hold the hexagon shape. The rim adds about 0.4 in (1.0 cm), taking the basket from 4.1 in (10.4 cm) to 4.5 in (11.4 cm).
Joining
Stacking the baskets: Stand Basket 2 upright. Set Basket 1 on top of it with the back sides aligned and the corners matched.
- Thread a yarn needle with 24 in (61.0 cm) of Color A.
- Along the back side, whipstitch the 12 free front loops from Round 13 of the upper basket to the 12 sts of Round 27 of the lower basket. Go through the stitch just below the rev sc. This seam joins 12 sts to 12 sts, with no stitches added or skipped.
- At each of the two front side corners, tack the upper basket’s base corner to the lower basket’s rim corner with 3 small stitches.
- Join Basket 3 under Basket 2 the same way.
Tension: Pull each whipstitch snug, but not so tight that the rim puckers. This seam carries the weight of the rolls, so always go through both loops of the rim stitch.
Size checkpoint: The three joined baskets should measure about 13.5 in (34.3 cm) from the bottom of the lowest base to the top rim. The back sides should form one straight, flat plane.
Attaching the straps: Fold each strap in half over the bottom of the wooden ring. Bring both ends of the strap inside the top basket and lay them against one back corner, with one strap at each back corner. Let the ends overlap the wall by about 1.25 in (3.2 cm). Whipstitch around the doubled ends through the solid wall rounds. About 2.25 in (5.7 cm) of doubled strap should show above the rim.
Final Blocking
- Mist the organizer until it is damp but not soaked.
- Slide a toilet roll into each basket to act as a form.
- On each basket, pinch all 6 corners into sharp vertical creases from base to rim.
- Lay the organizer on its back on a towel and gently open the honeycomb cells so they look even.
- Check that each base measures 5.2 in (13.2 cm) flat to flat.
- Let it dry completely, usually 12–24 hours, before removing the forms.
Final Quality-Control Checklist
- Each base has 72 sts, with 12 sts on each of the 6 sides.
- The fold ridge from Round 13 is even on all three baskets.
- Each basket has 7 solid wall rounds and 6 mesh rounds of 24 loops.
- Round 26 and both rim rounds have 72 sts each.
- All three baskets are 4.5 in (11.4 cm) tall, give or take 0.25 in (0.6 cm).
- The back seams join 12 sts to 12 sts and lie flat.
- Both straps are the same length, so the organizer hangs level.
- All ends are woven in securely, especially at the seams.
Troubleshooting
The base is round instead of hexagonal: Your increases are drifting. Place each increase directly above the marker from the round before.
The mesh flares out: Your chains are too loose. Work ch 2 instead of ch 3 in the mesh rounds, and still work 2 sc into each space in Round 26.
Round 26 has the wrong count: Count the loops in Round 25. There must be 24. If there are not, unravel back to the round where the count changed.
The stack leans forward: Tighten the tacks at the front corners.
The rim waves: The cream yarn is thicker than the purple. Rework the rim with a smaller hook.
Care
Hand wash in cool water with mild soap, press out the water, and dry flat with forms inside the baskets. Do not tumble dry, because heat can shrink the cotton and distort the hexagons.
Final Notes
The whole design is built around one number: 72 stitches, which is 12 per side and 18 in (45.7 cm) around. The base reaches 72 stitches at Round 12, and the wall stays at 72 through Round 19. The mesh turns those 72 stitches into 24 loops, and Round 26 turns the 24 loops back into 72 stitches. The cream rim keeps 72 stitches on both of its rounds. The result is three matching baskets, each 6 in (15.2 cm) across and 4.5 in (11.4 cm) tall. Stacked, they measure 13.5 in (34.3 cm), and with the straps and ring the organizer hangs about 18.5 in (47.0 cm) long. Check the first basket carefully, and the other two will match it.
Happy crocheting!