

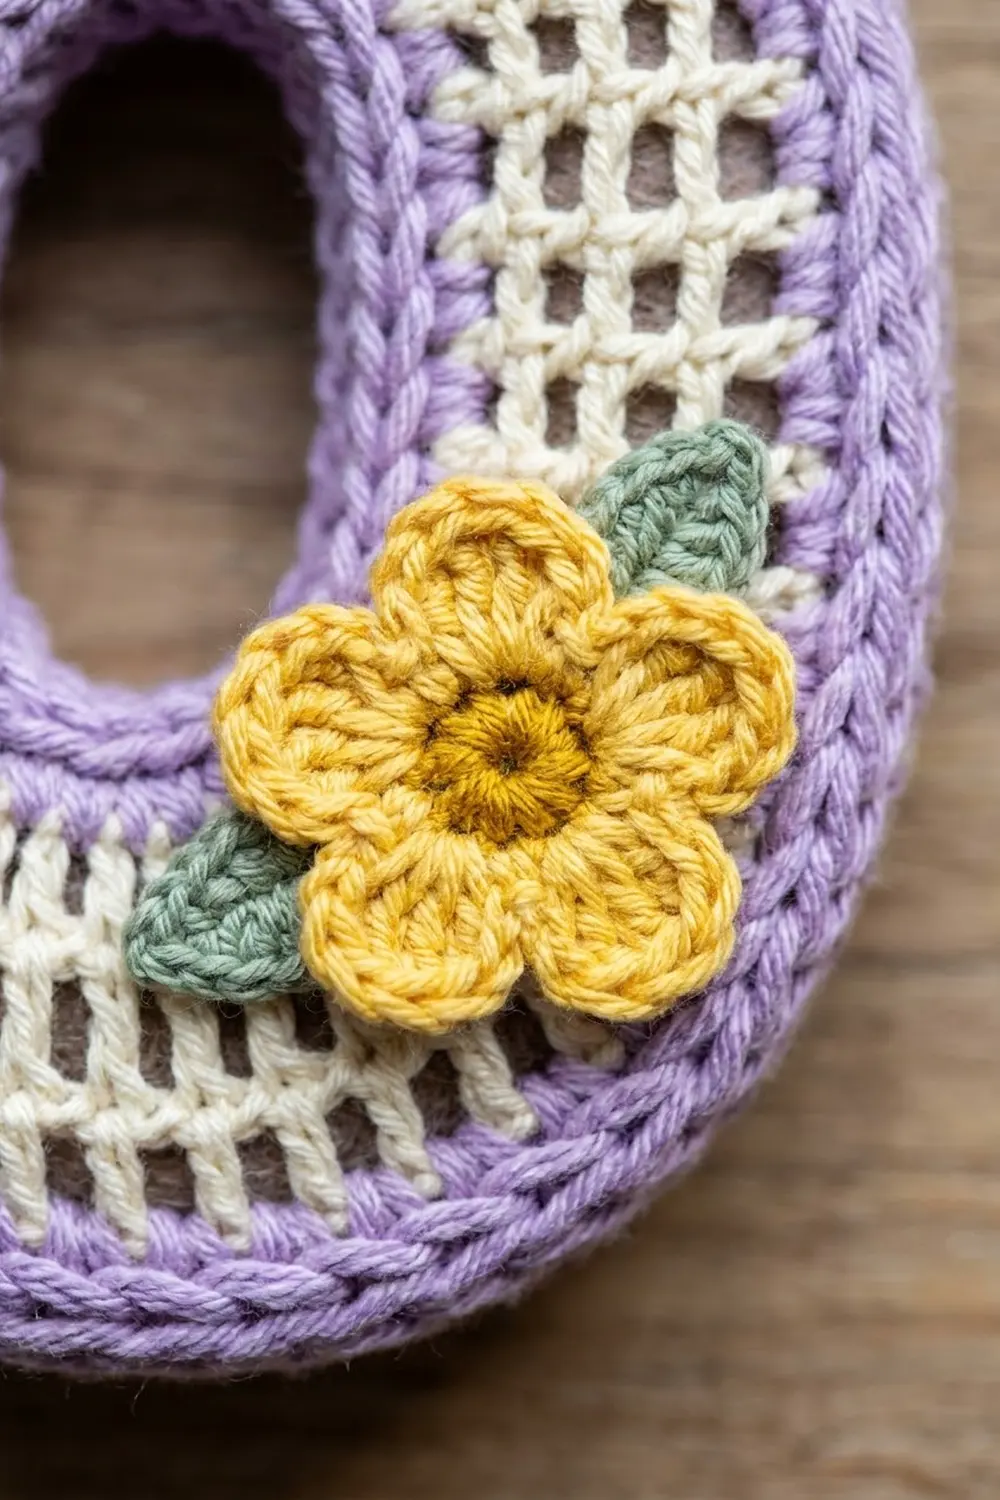
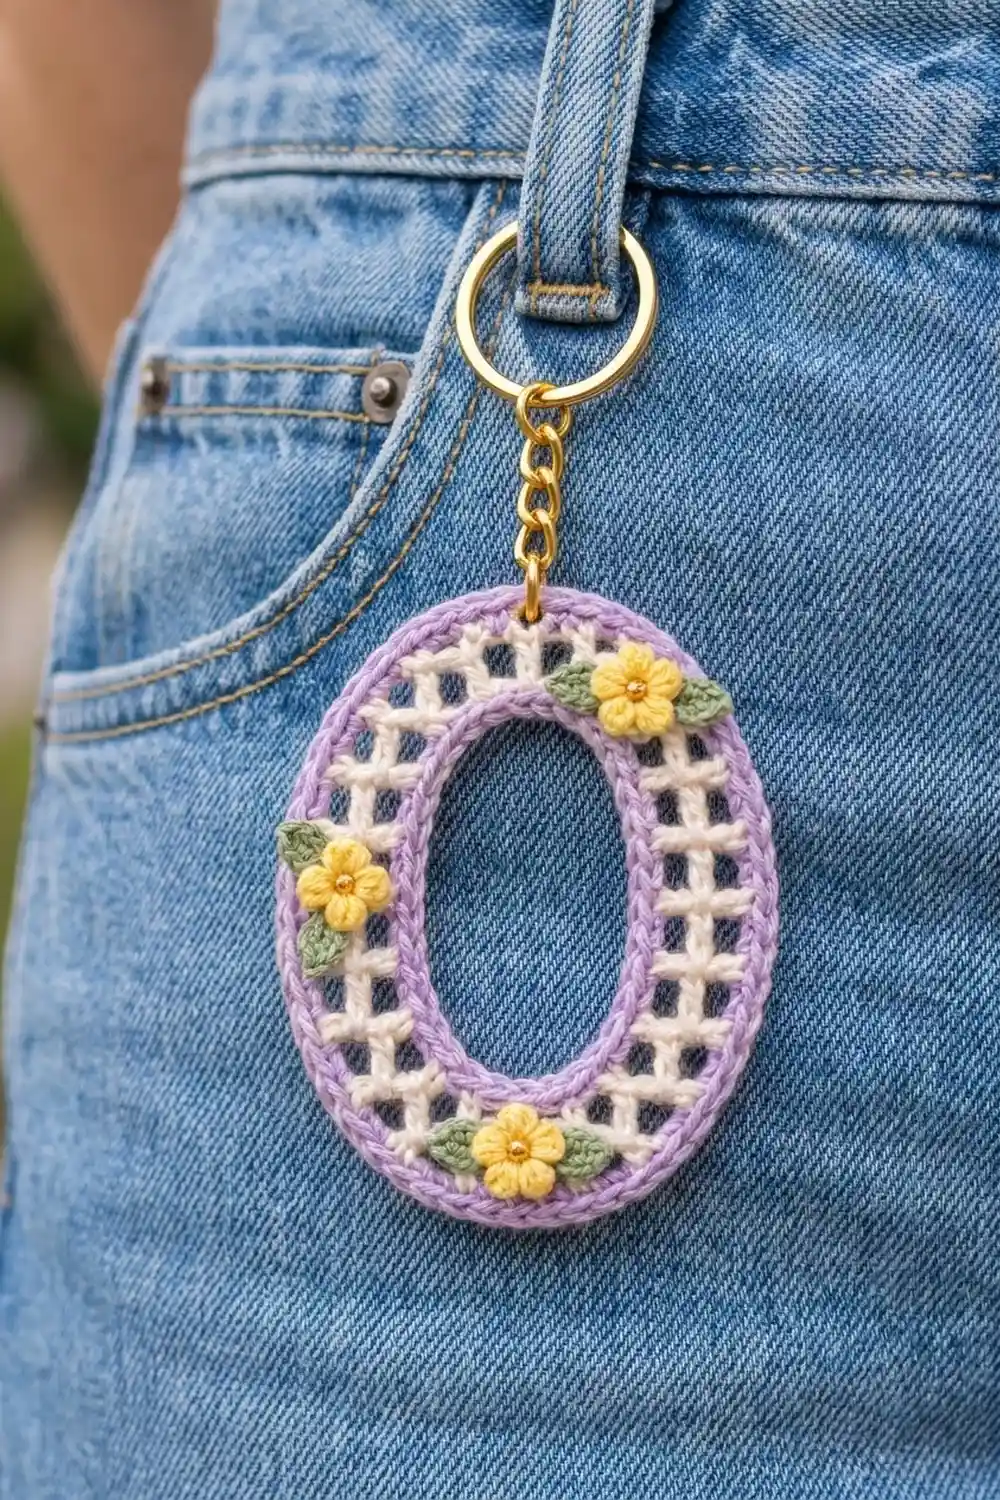
This little keychain is a letter “O” made from an airy lattice. A cream filet mesh is framed by soft lavender edges on the inside and outside, and three tiny yellow flowers with green leaves sit on top. It’s a sweet monogram charm for keys, a backpack zipper, or a belt loop.
The palette is fresh and springy: lavender, cream, sunflower yellow, sage green, and a golden center for each flower. Gold hardware finishes it off. The open mesh keeps it light, and it looks the same from a distance as it does up close.
This pattern uses US crochet terms. The finished charm measures 2.5 in wide x 3.25 in tall (6.4 x 8.3 cm), not counting the hardware. The center opening is about 1 in x 1.75 in (2.5 x 4.4 cm).
You make the “O” in one piece, working in rounds outward from a chain ring. First comes a lavender single crochet round, then two cream mesh rounds, then a lavender edge. All the increases go at the two curved ends, so the long sides stay straight. Last, you crochet three flowers and six leaves, sew them on, and add the key ring.
Finished Size and Construction
- Finished size: 2.5 in x 3.25 in (6.4 x 8.3 cm)
- Skill level: Easy to intermediate
- Terminology: US crochet terms
- Yarn weight: Super fine (#1) fingering-weight cotton
- Hook: 2.25 mm (US B-1)
- Number of pieces: 1 main oval + 3 flowers + 6 leaves (appliqués)
- Layout: Single piece. There is no grid and no joining.
- Piece size before edging: 2.25 in x 3 in (5.7 x 7.6 cm) after Round 3
- Edging depth: 0.125 in (0.3 cm), Rounds 4–5
- Band width: 0.75 in (1.9 cm) from the inner edge to the outer edge
Materials
Use a smooth, tightly plied mercerized cotton. It shows off the mesh and holds its shape when a keychain gets handled a lot. Fuzzy or very soft yarn will blur the open squares.
- Lavender: 3 g, about 12 m (13 yd), for the inner and outer edges
- Cream/ivory: 3 g, about 12 m (13 yd), for the mesh
- Sunflower yellow: 1 g, about 4 m (4.4 yd), for the flowers
- Sage green: 1 g, about 4 m (4.4 yd), for the leaves
- Golden orange: 1 m (1.1 yd) of yarn or 6-strand embroidery floss for the flower centers
Tools:
- 2.25 mm (US B-1) crochet hook
- Tapestry needle with a small eye
- Locking stitch markers (4)
- Gold split key ring, 1 in (2.5 cm) across
- Gold chain, about 1 in (2.5 cm) long, plus 2 gold jump rings, 0.25 in (0.6 cm)
- 2 pairs of flat-nose pliers
- Scissors, rust-proof pins, a blocking mat, and a spray bottle
All yarn amounts include a safety margin of about 30%.
Abbreviations (US Terms)
- ch – chain
- sl st – slip stitch
- sc – single crochet
- hdc – half double crochet
- dc – double crochet
- sk – skip
- sp – space
- st(s) – stitch(es)
- rnd – round
Special terms:
- Mesh unit: one dc plus one ch-1 sp. Each mesh unit counts as 2 sts.
- Regular unit (Rnd 2): dc in next sc, ch 1, sk next sc. Uses 2 sc.
- Increase unit (Rnd 2): dc in next sc, ch 1. Uses 1 sc.
- Regular unit (Rnd 3): dc in next dc, ch 1. Uses 1 mesh unit.
- Increase unit (Rnd 3): dc in next dc, ch 1, dc in next ch-1 sp, ch 1. Uses 1 mesh unit and makes 2.
Gauge and Checkpoints
Gauge: 8 sc and 8 sc rows = 1 in (2.5 cm). One mesh unit is 0.25 in (0.6 cm) wide and one dc round is 0.25 in (0.6 cm) tall, so every mesh opening is square.
The whole charm is only one piece, so treat the first one you make as your swatch. Measure it at each checkpoint, laid flat and not stretched:
- After Rnd 1: opening about 1 in x 1.75 in (2.5 x 4.4 cm). Outer edge about 1.25 in x 2 in (3.2 x 5.1 cm).
- After Rnd 2: about 1.75 in x 2.5 in (4.4 x 6.4 cm).
- After Rnd 3: about 2.25 in x 3 in (5.7 x 7.6 cm).
- After Rnd 5: 2.5 in x 3.25 in (6.4 x 8.3 cm).
Too big? Try a 2.0 mm hook, or pull each dc snug before you make the ch 1.
Too small or cupping? Try a 2.5 mm hook and keep the ch-1 spaces relaxed.
If you’re off by 0.125 in (0.3 cm) or less, that’s fine. Blocking will even it out.
Main Pattern: The Letter O
Section map: The oval has four sections that you work in this order: bottom end, right side, top end, left side. The two ends are the curved parts and the two sides are the straighter parts. Put a marker at the first stitch of each section on Rnd 1 and move the markers up as you go.
Foundation (lavender): Ch 36 and sl st to the first ch to form a ring. Don’t twist it. Mentally divide it into bottom end 8 ch, right side 10 ch, top end 8 ch, left side 10 ch (8 + 10 + 8 + 10 = 36).
Rnd 1 (lavender) – conversion round: Ch 1. Then:
– Bottom end: sc in next 2 ch, 2 sc in next ch, sc in next 2 ch, 2 sc in next ch, sc in next 2 ch (10 sc).
– Right side: sc in next 10 ch (10 sc).
– Top end: repeat the bottom end (10 sc).
– Left side: sc in next 10 ch (10 sc).
Sl st to the first sc. Count: 36 + 4 = 40 sc (one sc in each ch plus 4 extra, 2 at each end). Fasten off lavender.
Rnd 2 (cream) – growth round: Join cream in the first sc of the bottom end. Ch 4 (counts as dc + ch 1), and treat it as the first increase unit. Then:
– Bottom end: increase unit 2 more times, regular unit 2 times, increase unit 3 times (8 units from 10 sc).
– Right side: regular unit 5 times (5 units from 10 sc).
– Top end: increase unit 3 times, regular unit 2 times, increase unit 3 times (8 units).
– Left side: regular unit 5 times (5 units).
Sl st to the 3rd ch of the beginning ch-4. Rnd 2 total: 26 mesh units = 52 sts (26 dc and 26 ch-1 sps). Per section: 8 / 5 / 8 / 5 units.
At the ends, the dc fan out because there are no skipped stitches. On the sides, they stand straight up. That’s what gives the band its radiating bars.
Rnd 3 (cream) – growth round: Sl st into the first ch-1 sp, then sl st back into the top of the first dc so you start straight above it. Ch 4 (counts as the first regular unit). Then:
– Bottom end: increase unit, regular unit 2 times, increase unit, regular unit, increase unit, regular unit (8 units become 11).
– Right side: regular unit 5 times (5 units).
– Top end: regular unit, increase unit, regular unit 2 times, increase unit, regular unit, increase unit, regular unit (11 units).
– Left side: regular unit 5 times (5 units).
Sl st to the 3rd ch of the beginning ch-4. Rnd 3 total: 32 mesh units = 64 sts. Per section: 11 / 5 / 11 / 5 units, or 22 / 10 / 22 / 10 sts. Fasten off cream.
You now have two rows of open squares around the oval. Check that it measures 2.25 in x 3 in (5.7 x 7.6 cm).
Border: Lavender Outer Edge
Border gauge: 8 sc = 1 in (2.5 cm) along the outer curve. Each mesh unit takes 2 sc, one in the dc and one in the ch-1 sp, so 2 sc fill one 0.25 in (0.6 cm) square exactly.
Rnd 4 (lavender) – trim round: Join lavender in the first dc of the bottom end. Ch 1. Work 1 sc in each dc and 1 sc in each ch-1 sp, with these increases:
– Bottom end (22 sts): sc in next 7, 2 sc in next, sc in next 6, 2 sc in next, sc in next 7 (24 sc).
– Right side (10 sts): sc in next 10 (10 sc).
– Top end (22 sts): repeat the bottom end (24 sc).
– Left side (10 sts): sc in next 10 (10 sc).
Sl st to the first sc. Count: 64 + 4 = 68 sc. Per section: 24 / 10 / 24 / 10.
Rnd 5 (lavender) – corded finish: Ch 1. Sl st loosely in each sc around: 68 sl sts, the same as Rnd 4 (24 / 10 / 24 / 10). Fasten off and weave in the end.
Inner trim (lavender): Join lavender in any free loop on the underside of the foundation chain. Sl st loosely in each free loop around: 36 sl sts. Join and fasten off. This makes the inner edge look just as corded as the outer edge.
Why the math works: The oval has no corners, and the sections don’t share stitches, so nothing gets counted twice. The sides stay at 10 sts (5 units) in every round, which keeps them straight. All the growth happens at the curved ends: 10 to 16 to 22 to 24 sts on each end, which adds up to 40, 52, 64, and 68 for the whole round. Each dc round adds 12 sts, about the 0.25 in (0.6 cm) of extra curve length it needs. Each sc round adds 4. So the piece lies flat instead of ruffling or cupping.
Flowers and Leaves (Appliqués)
Flower (make 3, yellow): Make a magic ring with 5 sc and pull it closed. In each sc: (sl st, ch 2, dc, ch 2, sl st). 5 petals. Fasten off and leave a 6 in (15.2 cm) tail. Each flower measures about 0.5 in (1.3 cm) across.
Center: Use golden orange to make a French knot (wrap 2 times) in the middle of each flower.
Leaf (make 6, green): Ch 4. Starting in the 2nd ch from the hook: sc, hdc, sl st. 3 sts. Fasten off and leave a 4 in (10.2 cm) tail. Each leaf is about 0.375 in (1.0 cm) long.
Final Blocking
- Weave in all the ends on the main oval before you block. Keep the flowers off for now.
- Lightly mist the oval with water until it’s damp but not dripping.
- Pin it on the mat to 2.5 in x 3.25 in (6.4 x 8.3 cm), placing pins in the outer edge at the top, bottom, and both sides.
- Shape the opening to 1 in x 1.75 in (2.5 x 4.4 cm). Pin through the inner trim.
- Line up the mesh bars so they point outward from the center, and open each square evenly.
- Let it dry completely, then unpin.
- Sew on the appliqués. Tuck 2 leaves under each flower, pointing away from each other. Sew one flower at the upper right, one at the middle of the left side, and one at the bottom center. Stitch through the cream mesh bars.
- Hardware: Open a jump ring with pliers and put it through Rnds 4–5 at the center of the top end. Hook on one end of the chain and close the ring. Use the second jump ring to attach the split key ring to the other end of the chain.
Final Quality-Control Checklist
- Outer size is 2.5 in x 3.25 in (6.4 x 8.3 cm).
- The opening is a smooth oval, 1 in x 1.75 in (2.5 x 4.4 cm).
- Stitch counts: Rnd 1 = 40, Rnd 2 = 52 (26 units), Rnd 3 = 64 (32 units), Rnds 4 and 5 = 68, inner trim = 36.
- Each side has 5 mesh units in a straight line.
- The piece lies flat with no ruffles or cupping.
- The flowers are spaced evenly and the leaves sit flat.
- The jump rings are fully closed and the chain is centered at the top.
- All ends are woven in securely.
Troubleshooting
The ends ruffle: You probably added extra increases. Recount Rnd 3 by section: 11 / 5 / 11 / 5.
The piece cups into a bowl: Your dc are too short or your ch-1 sps are too tight. Go up a hook size for Rnds 2–3.
The squares are crooked on the sides: Make sure Rnd 3 starts straight above the first dc, as written.
The opening stretches out of shape: Work the inner trim more firmly, or reblock it.
The flowers flop forward: Add 2 extra tacking stitches through each leaf tip.
The key ring pulls the edge: Put the jump ring through both Rnd 4 and Rnd 5, not just the sl sts.
Care
Hand-wash in cool water with mild soap, press out the water in a towel, and dry flat. Don’t put it through the dryer, because the hardware can tarnish and the mesh can lose its shape.
Final Notes
The measurements build step by step. The 36-ch ring gives a 1 in x 1.75 in (2.5 x 4.4 cm) opening. Rnd 1 adds 0.125 in (0.3 cm) all around. Each mesh round adds 0.25 in (0.6 cm). Rnds 4–5 add the last 0.125 in (0.3 cm). That makes a 0.75 in (1.9 cm) band and a finished “O” of 2.5 in x 3.25 in (6.4 x 8.3 cm).
If your gauge is right, the stitch counts will produce that shape. Make one for yourself and one for a friend whose name starts with O.
Happy crocheting!