
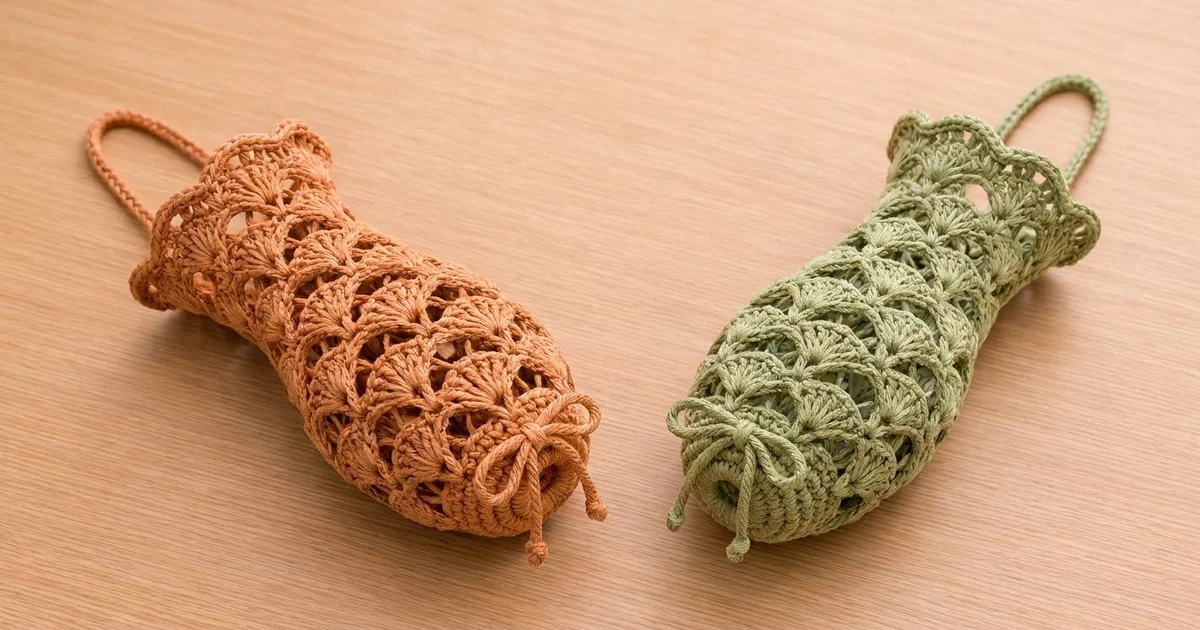
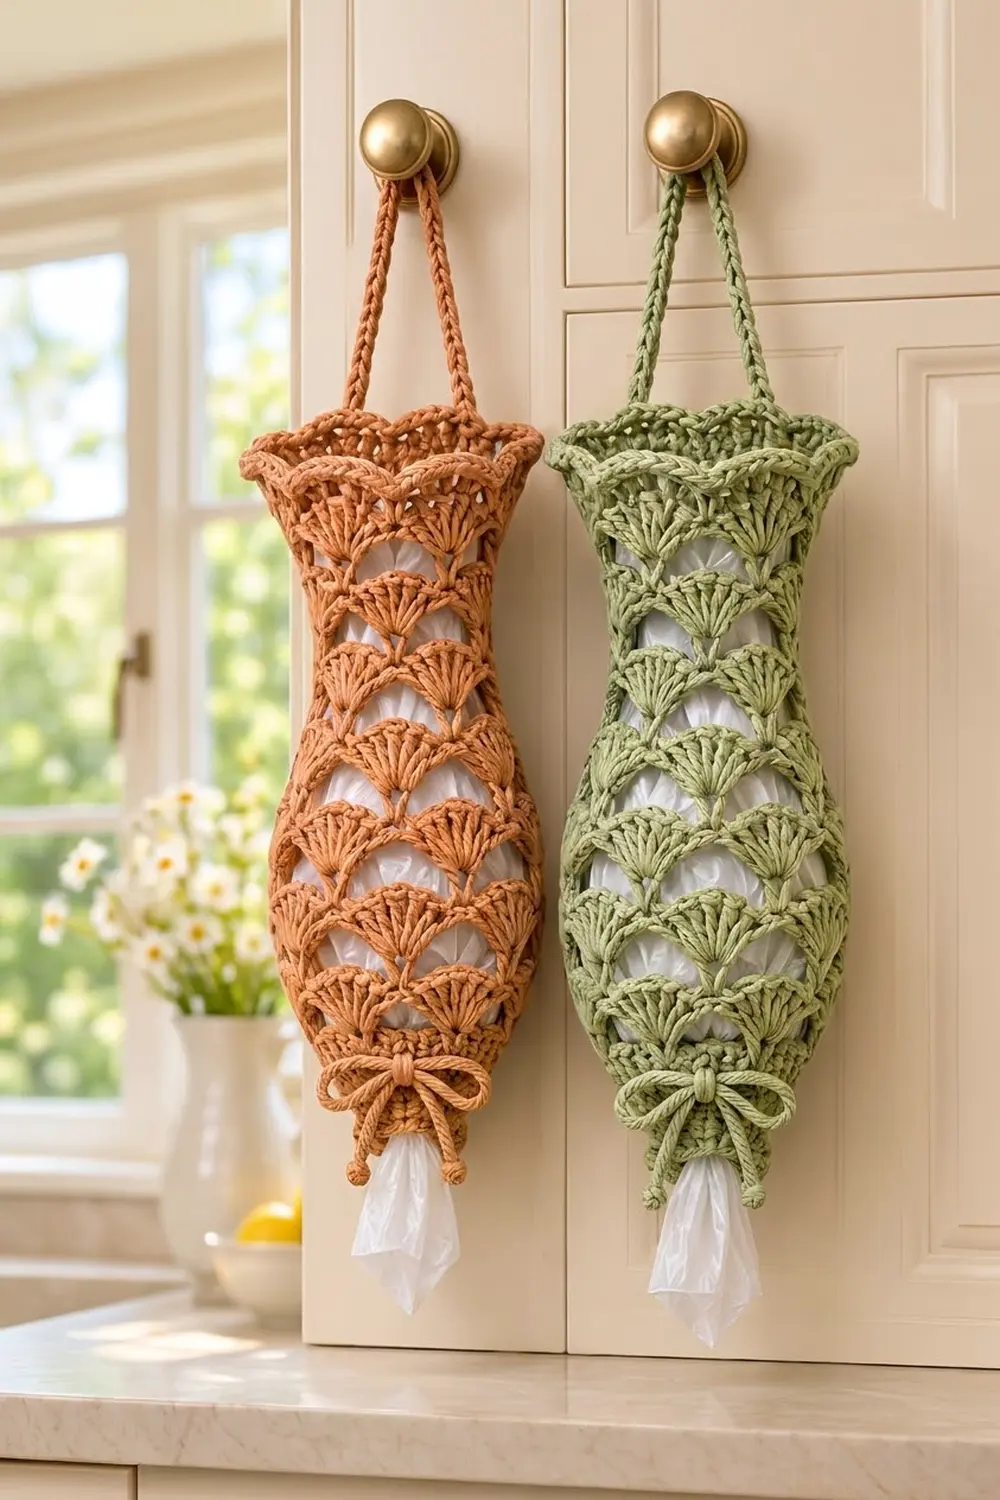
This Seashell Vase Plastic Bag Holder is a tall, lacy tube that hangs from a cabinet knob and keeps loose grocery bags tidy. You push bags in at the scalloped top and pull them out one at a time through the small opening at the bottom.
The sample is worked in a warm terracotta cotton, and the same pattern looks just as fresh in sage green. Staggered fan shells with open chain arches between them cover the whole surface, so the bags show through softly. A drawstring bow at the base and a slim cord handle give it a vintage-kitchen look.
The pattern uses US crochet terms. The finished holder is about 13.5 in (34.3 cm) tall without the handle. Laid flat, it measures 7 in (17.8 cm) across the belly, 5.5 in (14.0 cm) at the neck and 8 in (20.3 cm) across the flared rim.
You work the body in one piece from the bottom opening up, in joined rounds without turning. A few solid rounds form the rounded base. After that, shell rounds and arch rounds alternate, and changing the shell size shapes the belly, neck and flared rim. A single crochet trim, a slip-stitch handle and a drawstring cord finish the holder.
Finished Size and Construction
- Finished size: 13.5 in (34.3 cm) tall; the handle adds a 6 in (15.2 cm) drop
- Widest point (flat): 7 in (17.8 cm) at the belly
- Skill level: Easy-intermediate
- Terminology: US
- Yarn weight: Worsted (#4) cotton
- Hook: 5.0 mm (H-8)
- Number of pieces: 1 body, plus 1 handle cord and 1 drawstring cord
- Layout: A single tube worked bottom-up in the round
- Size before rim trim: 13.25 in (33.7 cm) tall after Round 22
- Rim trim depth: about 0.25 in (0.6 cm)
Materials
Choose a smooth, firm cotton or cotton blend. Cotton holds the shell shapes crisply and won’t stretch out under the weight of the bags. Acrylic also works, but the holder will be softer and may get longer over time.
- Main color (terracotta or sage green): 100 g, about 170 m (186 yd) of worsted cotton
- 5.0 mm (H-8) crochet hook
- Tapestry needle
- 1 locking stitch marker
- Measuring tape
- Rust-proof pins
- Spray bottle
- A rolled towel or a 2 L plastic bottle for shaping
The quantity includes a margin of about 15% for your test rounds and small differences in tension. The body uses about 80 g and the two cords about 8 g. To make a matching pair, as in the photo, buy the full amount for each color.
Abbreviations (US Terms)
- ch: chain
- sl st: slip stitch
- sc: single crochet
- dc: double crochet
- st(s): stitch(es)
- sp: space
- rep: repeat
Special stitch (Shell): Work the stated number of dc (7, 9 or 11) into the same stitch or space. The center dc is the 4th dc of a 7-dc shell, the 5th dc of a 9-dc shell and the 6th dc of an 11-dc shell.
Gauge and Checkpoints
Basic gauge: 16 dc and 8 rows = 4 in (10.2 cm). 16 sc = 4 in (10.2 cm).
Pattern gauge: one shell round plus one arch round = 1.25 in (3.2 cm) tall.
Test before you commit. Work Rounds 1–7, then lay the piece flat and measure. Because the body is one piece, this test simply becomes the start of your holder if it matches.
Measure height from the bottom edge of Round 1 to the top of the most recent round. Measure width straight across the flattened tube at its widest point. Don’t stretch the lace while you measure.
Checkpoints (measured flat):
- After Round 3: 1 in (2.5 cm) tall, 4 in (10.2 cm) wide
- After Round 11: 6 in (15.2 cm) tall, 7 in (17.8 cm) wide
- After Round 17: 9.75 in (24.8 cm) tall, 5.5 in (14.0 cm) wide at the neck
- After Round 21: 12.25 in (31.1 cm) tall
- After Round 22: 13.25 in (33.7 cm) tall
- After Round 23: 13.5 in (34.3 cm) tall, 8 in (20.3 cm) across the rim
If your piece is too big, go down to a 4.5 mm (7) hook. If it is too small, go up to a 5.5 mm (I-9) hook. Change hooks rather than your tension, because the arches lose their shape if you pull them tight.
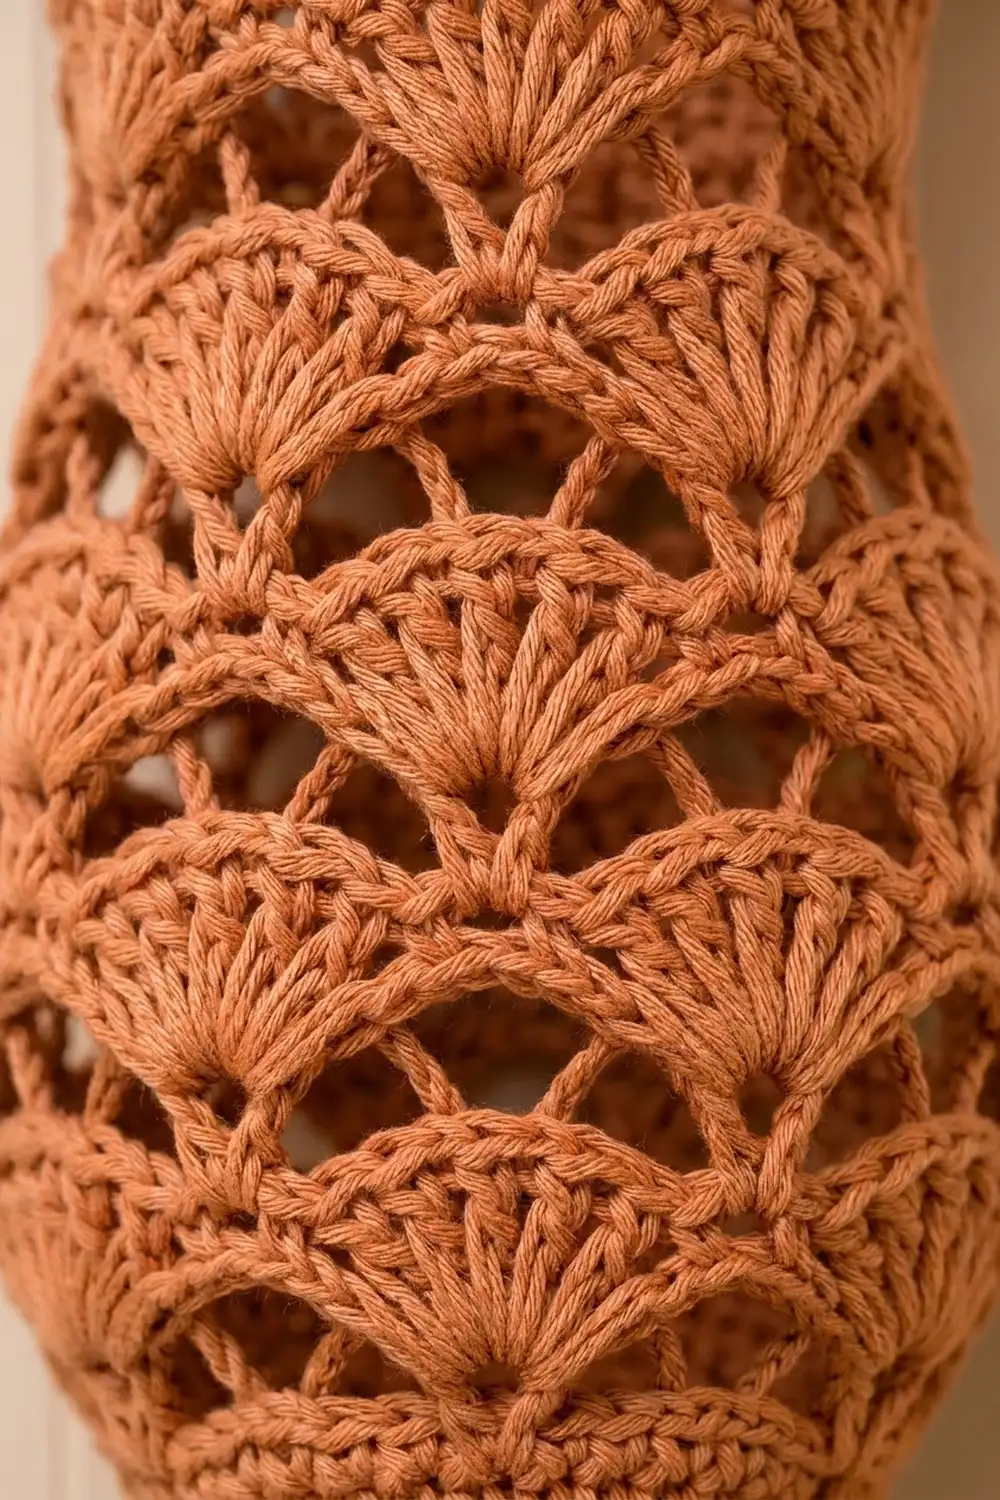
Pattern: Body
Work in joined rounds with the right side always facing. Do not turn. The beginning ch 1 does not count as a stitch. Place a marker in the first st of each round.
Base
Round 1: Ch 16 and sl st to the first ch to form a ring, taking care not to twist it. Ch 1, sc in each ch around, join with sl st to first sc. (16 sc)
This ring is the opening the bags come out of, about 1.25 in (3.2 cm) across. It stretches when you pull a bag through, then springs back.
Round 2: Ch 3 (counts as dc), dc in same st, dc in next st, 2 dc in next st, dc in next st, rep from * around, join to top of ch-3. (24 dc)
Round 3: Ch 1, sc in same st, sc in next st, 2 sc in next st, sc in next 2 sts, 2 sc in next st, rep from * around, join. (32 sc)
Round 2 is the drawstring round. Its taller dc posts give you room to weave the cord through later.
Shell Section
Round 4 (first shell round): Ch 1, sc in first st, skip 1 st, 7 dc in next st, skip 1 st, sc in next st, rep from * 6 more times, skip 1 st, 7 dc in next st, skip 1 st, join to first sc. (8 shells: 56 dc + 8 sc = 64 sts)
Each repeat uses 4 base sts, and 8 repeats × 4 sts = 32 sts, so the round fits Round 3 exactly.
Round 5 (arch round): Sl st in next 4 dc to reach the center dc of the first shell. Ch 1, sc in same dc, ch 5, sc in center dc of next shell, rep from * 6 more times, ch 5, join to first sc. (8 sc + 8 ch-5 arches)
Round 6 (shell round): Ch 1, sc in same sc, 9 dc in next ch-5 sp, sc in next sc, rep from * 6 more times, 9 dc in last ch-5 sp, join to first sc. (8 shells: 72 dc + 8 sc = 80 sts)
The new shells sit in the arches, directly above the sc of Round 4. This staggers the fans like brickwork.
From here on, every arch round starts with sl sts across to the center dc of the first shell: 4 sl sts for 7-dc shells, 5 for 9-dc shells. Then ch 1 and sc in that same dc. Every shell round starts with ch 1 and sc in the same sc as the join.
Belly
Round 7: Arch round with ch-6 arches. (8 sc + 8 ch-6 arches)
Round 8: Shell round, 9 dc in each ch-6 sp. (72 dc + 8 sc = 80 sts)
Round 9: Arch round with ch-6 arches. (8 sc + 8 ch-6 arches)
Round 10: Shell round, 9 dc in each sp. (80 sts)
Round 11: Arch round with ch-6 arches. (8 sc + 8 ch-6 arches)
Checkpoint: 6 in (15.2 cm) tall and 7 in (17.8 cm) wide when flat.
Round 12: Shell round, 9 dc in each sp. (80 sts)
Neck
Round 13: Arch round with ch-5 arches. (8 sc + 8 ch-5 arches)
Round 14: Shell round, 7 dc in each sp. (8 shells: 56 dc + 8 sc = 64 sts)
Round 15: Arch round with ch-5 arches. (8 sc + 8 ch-5 arches)
Round 16: Shell round, 7 dc in each sp. (64 sts)
Round 17: Arch round with ch-4 arches. (8 sc + 8 ch-4 arches)
Checkpoint: 9.75 in (24.8 cm) tall and 5.5 in (14.0 cm) wide at the neck.
Round 18: Shell round, 7 dc in each sp. (64 sts)
The shorter ch-4 arches pull the 7-dc shells in tight, which creates the waist of the vase.
Flared Top
Round 19: Arch round with ch-5 arches. (8 sc + 8 ch-5 arches)
Round 20: Shell round, 9 dc in each sp. (80 sts)
Round 21: Arch round with ch-6 arches. (8 sc + 8 ch-6 arches)
Checkpoint: 12.25 in (31.1 cm) tall.
Round 22: Shell round, 11 dc in each ch-6 sp. (8 shells: 88 dc + 8 sc = 96 sts)
These large shells form the scalloped rim. Don’t fasten off; go straight to the rim trim in the Border section.
Pattern: Handle Cord
Ch 61. Sl st in the back bump of the 2nd ch from the hook and in each ch across. (60 sl st) Fasten off, leaving a 6 in (15.2 cm) tail at each end.
The cord measures about 14 in (35.6 cm). Lay the holder flat with 4 scallops on each side. Sew one end inside the rim at the left fold and the other end at the right fold, stitching through Rounds 21–23 for strength. This gives a handle drop of about 6 in (15.2 cm).
Pattern: Drawstring Cord
Ch 101. Sl st in the back bump of the 2nd ch from the hook and in each ch across. (100 sl st) Fasten off. The cord measures about 24 in (61.0 cm).
Starting at the center front, weave the cord around Round 2, going over 2 dc and under 2 dc. With 24 dc, that makes 6 full over-under repeats, and both ends come out at the front. Tie an overhand knot about 0.5 in (1.3 cm) from each tip, trim the tips and tie a bow. Leave the bow loose enough that only one bag slides out at a time.
Border: Scalloped Rim Trim
Border gauge: 16 sc = 4 in (10.2 cm), the same as Round 3.
Round 23 (trim round): Ch 1, sc in same sc as join, sc in each of next 5 dc, 2 sc in center dc, sc in each of next 5 dc, sc in next sc, rep from * 6 more times, sc in each of next 5 dc, 2 sc in center dc, sc in each of next 5 dc, join to first sc. Fasten off.
Count: 96 sts worked one per stitch + 8 extra sc (one per center dc) = 104 sc.
Per scallop: 11 dc + 1 sc = 12 sts, plus 1 extra = 13 sc.
Per flat side: 4 scallops × 13 sc = 52 sc, and 2 sides × 52 sc = 104 sc.
Why the math works: The extra sc at each shell tip gives the curve room to spread, so the scallop stays round instead of cupping. The sc between shells gets no increase, so the dips between scallops stay sharp. Nothing is added where the handle attaches, so both sides match.
Final Blocking
- Weave in all ends on the inside, following the stitch posts so they stay hidden.
- Spray the holder evenly until it is damp but not soaking.
- Slide a rolled towel or a 2 L plastic bottle inside to fill out the belly.
- Ease the belly to 7 in (17.8 cm) and the neck to 5.5 in (14.0 cm), measured flat.
- Pin each rim scallop open so the rim measures 8 in (20.3 cm) across.
- Check the height: 13.5 in (34.3 cm) from the base to the scallop tips.
- Let it dry completely, then remove the pins and the form.
Final Quality-Control Checklist
- The Round 1 opening is about 1.25 in (3.2 cm) across and not twisted
- Every shell round has 8 shells and 8 sc
- The fans are staggered, with each shell centered over the sc below
- Belly 7 in (17.8 cm), neck 5.5 in (14.0 cm) and rim 8 in (20.3 cm), all measured flat
- Height is 13.5 in (34.3 cm)
- Round 23 has 104 sc, with 13 sc per scallop
- The handle ends sit at opposite folds, with 4 scallops on each side
- The drawstring ends come out at center front, with knotted tips
- All ends are woven in securely
Troubleshooting
Shells lean in a spiral: You are starting the arch round in the wrong dc. Count the sl sts carefully so each sc lands on the center dc.
Arches look baggy: Your chains are looser than your dc. Work the chains a little tighter, or go down a hook size for the arch rounds only.
Belly is too narrow: Lengthen the belly arches in Rounds 7, 9 and 11 to ch 7. The 9-dc shells will spread wider.
Rim ruffles: Leave out the extra sc at the shell tips in Round 23 and work 96 sc.
Bags fall out too fast: Tighten the drawstring bow, or weave the cord through Round 1 instead.
Handle stretches: Make the cord with a doubled strand, or work a row of sc into the back of the sl sts.
Care
Hand wash in cool water with mild soap, press out the water in a towel and dry flat over a form. Don’t hang it while it’s wet, because the weight of the water will stretch the body.
Final Notes
Here is how the measurements build up:
- The 16-st ring opens to 32 sc, which fits 8 shell repeats.
- Each shell-and-arch pair adds 1.25 in (3.2 cm) of height.
- The 9-dc shells build the 7 in (17.8 cm) belly.
- The 7-dc shells and short arches pull in the 5.5 in (14.0 cm) neck.
- The 11-dc shells flare out to the 8 in (20.3 cm) rim.
- Round 23 adds 8 sc for 104 sc in total, and the finished holder stands 13.5 in (34.3 cm) tall.
Check your piece at each checkpoint and change hook size early if you need to. Once the body matches, the cords and blocking go quickly, and you’ll have a useful kitchen holder ready to hang.
Happy crocheting!