

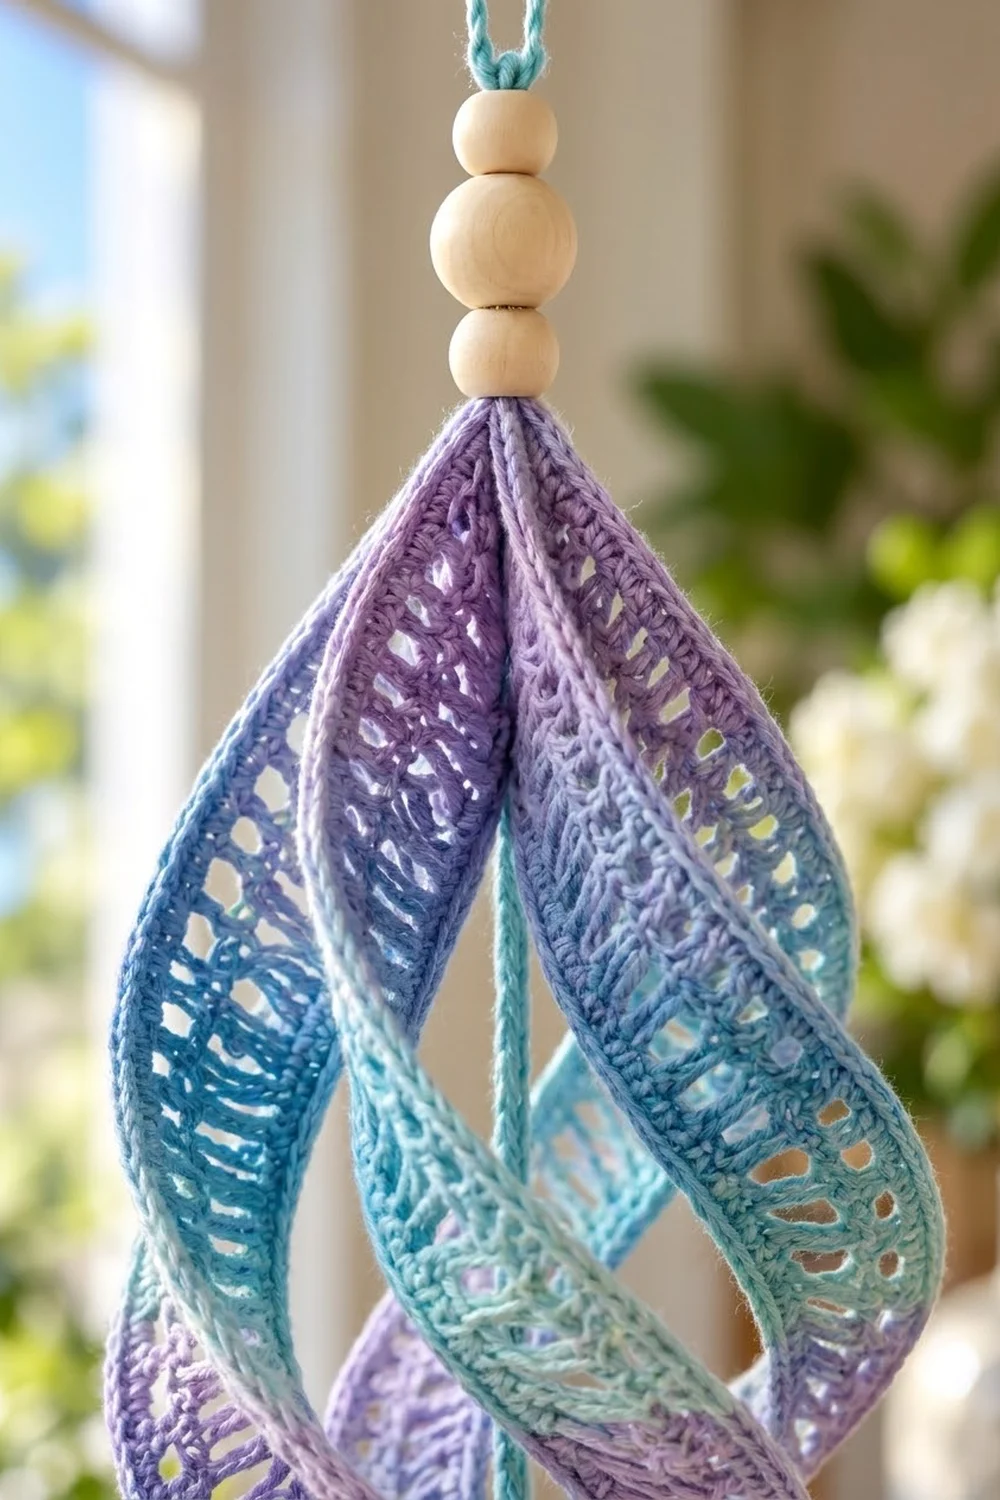
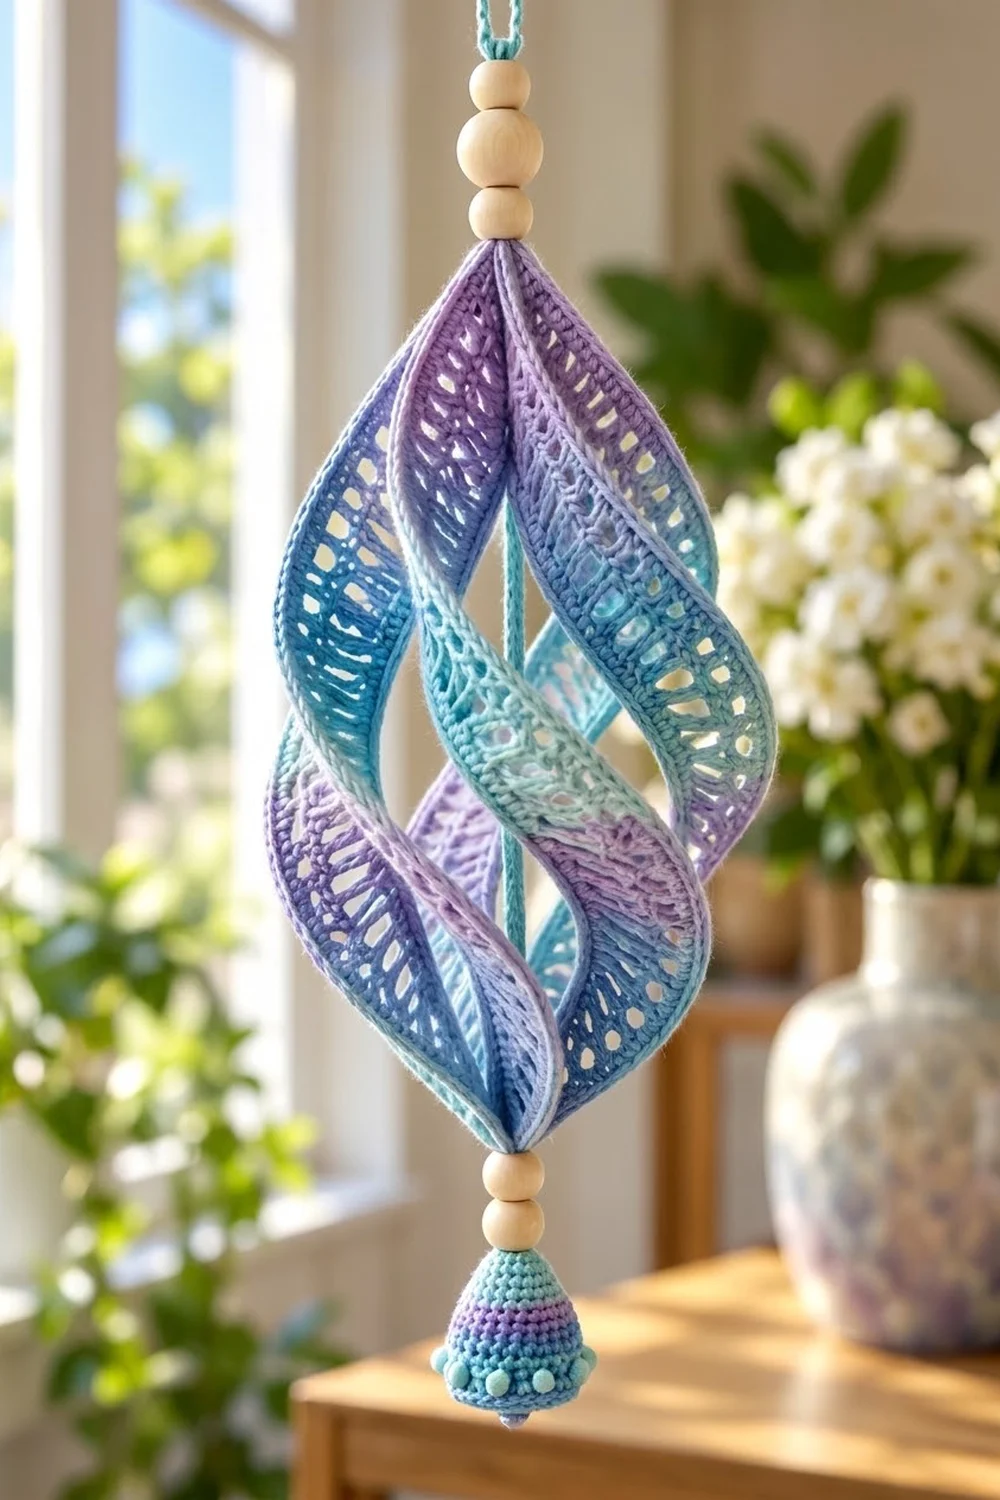
The Lavender Tide Spiral Wind Spinner is a hanging ornament made from six lacy strips. The strips meet at the top and bottom and twist around a slim center cord. Each strip curves outward and turns as it goes down, so the finished piece looks like a soft, swirling teardrop. It moves gently in a breeze.
The strips use a variegated cotton that shifts between lavender, deep purple, periwinkle blue and aqua. The center cord and the little bell at the bottom use small amounts of solid aqua, purple and blue. Wooden beads at both ends give it a natural, boho finish.
This pattern uses US crochet terms. The body of the finished spinner is about 10 in (25.4 cm) tall from collar tip to collar tip and 3.5 in (8.9 cm) wide at its widest point. The whole ornament, including the hanging loop, beads and bell, is about 17 in (43.2 cm) long.
Construction is simple and modular. You crochet six identical lace strips in rows, a slip-stitch center cord and a small cone-shaped bell. Then you join the strip ends into rings, close each ring with a short decreasing collar, and thread everything onto the cord.
Finished Size and Construction
- Finished size: body 10 in (25.4 cm) tall x 3.5 in (8.9 cm) wide; overall length about 17 in (43.2 cm)
- Skill level: Intermediate
- Terminology: US crochet terms
- Yarn weight: Sport (#2) cotton
- Hook: 3.25 mm (US D/3)
- Number of pieces: 6 lace strips, 1 center cord, 1 bell
- Layout: 6 strips arranged in a ring, each given one half-twist, gathered at the top and bottom
- Piece size: each strip is 1.5 in (3.8 cm) wide x 13 in (33.0 cm) long
- Size before border: each joined end ring has 54 sts and measures about 9 in (22.9 cm) around
- Border depth: each gathering collar is 3 rounds, about 0.6 in (1.5 cm) deep
Materials
Choose a smooth mercerized or combed sport-weight cotton. Cotton holds the twist and keeps the eyelets crisp better than acrylic does. For the strips, look for a long-repeat variegated yarn so the colors change slowly along each strip.
- Color A (variegated lavender, purple, periwinkle, aqua): 60 g, about 186 m
- Color B (aqua): 10 g, about 31 m
- Color C (purple): 5 g, about 16 m
- Color D (periwinkle blue): 5 g, about 16 m
Tools and notions:
- 3.25 mm (US D/3) crochet hook
- 5 wooden beads, 16 mm, with holes at least 4 mm wide
- 1 small bead, 6 mm, for the bell tip
- Tapestry needle
- Scissors
- Stitch markers
- Rustproof pins and a blocking mat
- Spray bottle
The yarn amounts include a margin of about 15 percent for swatching and color matching.
Abbreviations (US Terms)
- ch = chain
- sl st = slip stitch
- sc = single crochet
- dc = double crochet
- sc2tog = single crochet 2 together
- sc3tog = single crochet 3 together
- inc = 2 sc in the same stitch
- FPdc = front post double crochet
- BPdc = back post double crochet
- ch-sp = chain space
- st(s) = stitch(es)
- RS / WS = right side / wrong side
Special stitch: 3-dc bobble. (Yarn over, insert hook in stitch, pull up a loop, yarn over, pull through 2 loops) 3 times in the same stitch, then yarn over and pull through all 4 loops.
Special stitch: ball picot (bp). Ch 3, work a 3-dc bobble in the 3rd ch from hook, then sl st in the same base stitch.
Gauge and Checkpoints
Gauge in the strip pattern: 24 sts and 12 rows = 4 in (10.2 cm). That works out to 6 sts and 3 rows per 1 in (2.5 cm).
Make one strip first. A full strip works as your gauge swatch and shows whether the other five will match.
Checkpoints for one strip:
- After Row 1: width 1.5 in (3.8 cm)
- After Row 12: length 4 in (10.2 cm)
- After Row 24: length 8 in (20.3 cm)
- After Row 39: length 13 in (33.0 cm)
Checkpoint for the cord: 22 in (55.9 cm) long, lightly stretched.
Checkpoint for the bell: about 1.6 in (4.1 cm) across the open edge and 2 in (5.1 cm) tall.
If your strip is too big (wider than 1.6 in / 4.1 cm), switch to a 3.0 mm hook. If it is too small (narrower than 1.4 in / 3.6 cm), switch to a 3.5 mm hook. You can fix the strip length by adding or removing rows, but always end on an odd (RS) row and make all six strips the same.
Lace Strip (make 6)
Each strip has a solid 2-dc edge on both sides, a column of eyelets inside each edge and a raised center spine. The post stitch in the middle makes the spine, and the ch-1 spaces make the column of open eyelets.
With Color A, ch 11.
Row 1 (RS): dc in 4th ch from hook (the skipped ch count as the first dc), ch 1, skip next ch, dc in next 3 ch, ch 1, skip next ch, dc in last 2 ch. Turn. (9 sts: 7 dc + 2 ch-sp)
Row 2 (WS): ch 3 (counts as dc throughout), dc in next dc, ch 1, skip ch-sp, dc in next dc, BPdc around next dc, dc in next dc, ch 1, skip ch-sp, dc in next dc, dc in top of turning ch. Turn. (9 sts: 6 dc + 1 BPdc + 2 ch-sp)
Row 3 (RS): ch 3, dc in next dc, ch 1, skip ch-sp, dc in next dc, FPdc around next st, dc in next dc, ch 1, skip ch-sp, dc in next dc, dc in top of turning ch. Turn. (9 sts: 6 dc + 1 FPdc + 2 ch-sp)
Rows 4–39: Repeat Rows 2 and 3 eighteen more times. Every row has 9 sts. The post stitch always sits in the center, so the spine stands out on the RS.
After Row 39 (RS), fasten off and leave a 6 in (15.2 cm) tail. Weave in only the starting tail. Check that the strip is 13 in (33.0 cm) long.
Center Cord (make 1)
With Color B, ch 100.
Row 1: sl st in the back bump of the 2nd ch from hook and in the back bump of each ch across. (99 sl st)
Fasten off and leave 6 in (15.2 cm) tails at both ends. The cord should measure 22 in (55.9 cm). It is firm and round, and slim enough to pass through the beads. You will trim any extra length at the end.
Bell (make 1)
Work in continuous rounds, with a marker in the first stitch of each round. The bell starts at its narrow top.
With Color B:
Rnd 1: 6 sc in a magic ring. (6)
Rnd 2: sc in each st around. (6)
Rnd 3: (sc in next st, inc) 3 times. (9)
Rnd 4: (sc in next 2 sts, inc) 3 times. (12)
Rnd 5: (sc in next st, inc) 6 times. (18)
Change to Color C.
Rnd 6: (sc in next 2 sts, inc) 6 times. (24)
Rnd 7: sc in each st around. (24)
Change to Color D.
Rnd 8: (sc in next 3 sts, inc) 6 times. (30)
Rnd 9: sc in each st around. (30)
Rnd 10: sc in each st around. (30)
Change to Color B.
Rnd 11 (trim): (sl st in next 4 sts, sl st in next st and work bp) 6 times. (30 sl st, 1 in each existing st, + 6 ball picots added)
Fasten off and weave in the ends. Leave the magic ring slightly open so the cord can pass through it.
Make All Pieces
Before you assemble the spinner, you should have:
- Color A: 6 lace strips, each 9 sts wide and 39 rows long
- Color B: 1 center cord of 99 sl st
- Colors B, C and D: 1 bell with 30 sts at the open edge plus 6 ball picots
Ring layout seen from below, with the strips numbered in joining order:
        [1]
   [6]       [2]
   [5]       [3]
        [4]
Lay the six strips side by side and compare them. Their lengths should match within 0.25 in (0.6 cm). Lightly block each strip flat now (see Final Blocking) so the eyelets open evenly.
Joining
You join the strip ends into two rings with slip stitches. Each strip end has exactly 9 stitch positions, and you work exactly 1 sl st in each one. No stitches are added between strips.
Bottom ring: Hold strip 1 with the RS facing out and the foundation edge at the top. With Color A, join with a sl st in the first foundation position. Work 1 sl st in each of the 9 foundation positions (each dc base and each skipped ch counts as 1). Without turning, go straight on to strip 2 and work 9 sl st across its foundation edge. Continue the same way through strip 6, then sl st into the first sl st to close the ring. (54 sl st = 6 strips x 9 sts)
Keep your tension loose and even. A tight ring pulls the strip edges inward and makes the bottom collar pucker.
Add the twist: Lay the piece down with the strips spread out. Give each strip one half-turn (180 degrees), all in the same direction, and keep the strips in order 1 through 6. If one strip twists the other way, the spiral will look uneven.
Top ring: Keeping the twists in place, join the last-row ends in the same order. Work 9 sl st across Row 39 of each strip, from strip 1 to strip 6, and close the ring. (54 sl st)
Size checkpoint: before you add the collars, each ring should measure about 9 in (22.9 cm) around.
Don’t cut the yarn after the top ring, because you will work the top collar from it. Rejoin Color A at the bottom ring for the bottom collar later.
Border: Gathering Collars
Both ends get the same 3-round collar. Border gauge is about 5 sc rounds per 1 in (2.5 cm), so 3 rounds make about 0.6 in (1.5 cm).
Each strip end counts as one “side” of the ring and has 9 sts.
Rnd 1: Working into the sl st ring, sc3tog 3 times across each strip. (54 sts worked as 18 sc3tog: 3 per strip, 18 total)
Rnd 2: (sc in next st, sc2tog) 6 times. (12)
Before you work Rnd 3 of the top collar, thread the cord through the center of the spinner. Use a tapestry needle to pull it in through the bottom ring, up through the inside and out through the top ring. Leave 4 in (10.2 cm) of cord below the bottom ring.
Rnd 3: sc2tog 6 times, working snugly around the cord. (6)
Fasten off. Thread the tail through the 6 remaining sts and pull them tight around the cord. Stitch the tail through the cord twice to lock it in place.
Repeat the 3-round collar on the bottom ring. Before you pull it tight, slide the cord until the length inside the body, between the bases of the two collars, is 9 in (22.9 cm). This holds the strips bowed outward.
Why the math works: 54 divides evenly by 3, so Rnd 1 takes each strip from 9 sts to 3, with no leftover stitches at the seams. 18 also divides evenly by 3, which gives 6 even repeats in Rnd 2. The last 6 sts close evenly around the cord, which is about 0.15 in (0.4 cm) thick.
Beads and bell: Above the top collar, thread 3 wooden beads onto the cord. Fold the cord above the beads into a 2 in (5.1 cm) hanging loop and sew the end firmly down into the hole of the top bead, then trim any extra. Below the bottom collar, thread on 2 wooden beads. Then pass the cord through the magic ring of the bell and through the 6 mm bead. Tie a firm knot under the small bead, trim, and stitch through the knot to secure it.
Final Blocking
- Lightly mist the strips with water until they are damp but not soaked.
- Hang the spinner from its loop on a hook.
- With your fingers, smooth each strip so its half-twist runs evenly from top to bottom.
- Gently pull each strip outward at its widest point until the body measures 3.5 in (8.9 cm) across.
- Open up the eyelets along each strip with a fingertip.
- Shape the bell around a small cone or a rolled paper tube.
- Let everything dry completely while it hangs, about 6 to 8 hours.
Final Quality-Control Checklist
- All 6 strips are 9 sts wide and 39 rows long.
- Each strip measures 1.5 in (3.8 cm) wide and 13 in (33.0 cm) long.
- Each ring has exactly 54 sl st, 9 per strip.
- All the strips twist in the same direction.
- Each collar ends with 6 sts pulled tight around the cord.
- The body measures 10 in (25.4 cm) tall and 3.5 in (8.9 cm) wide.
- The bell has 30 sts at the open edge and 6 evenly spaced ball picots.
- The overall length is about 17 in (43.2 cm).
- All ends are woven in and the knot is secure.
Troubleshooting
Strips are different lengths: Count the rows. Add or remove rows in pairs so that each strip still ends on a RS row.
Center spine leans to one side: Make sure you always work the post stitch around the center dc, never around the dc beside it.
Spinner looks flat instead of rounded: The cord inside the body is too long. Shorten the distance between the collars to 9 in (22.9 cm).
Strips look crumpled: The cord inside the body is too short. Lengthen it slightly and block again.
Collar has a gap or bump: Redo Rnd 1 and make sure each sc3tog stays within one strip.
Bell flares too much: Use a hook one size smaller for Rnds 8–11.
Beads won’t fit: Use a loop of thread as a needle threader to pull the cord through.
Care
Hand wash in cool water with mild soap, roll the spinner in a towel to remove water, and hang it to dry in shape. Keep it out of strong direct sun for long periods so the colors don’t fade.
Final Notes
Each measurement leads to the next. A 9-st strip at 6 sts per inch is 1.5 in (3.8 cm) wide, and 39 rows at 3 rows per inch make it 13 in (33.0 cm) long. Six strips of 9 sts form a 54-st ring, which the collar decreases to 18, then 12, then 6 sts. The 9 in (22.9 cm) of cord inside the body holds the 13 in (33.0 cm) strips in a bowed spiral, so the finished body is 10 in (25.4 cm) tall and 3.5 in (8.9 cm) wide. Check each number as you go, and your spinner will hang straight and turn smoothly.
Happy crocheting!