

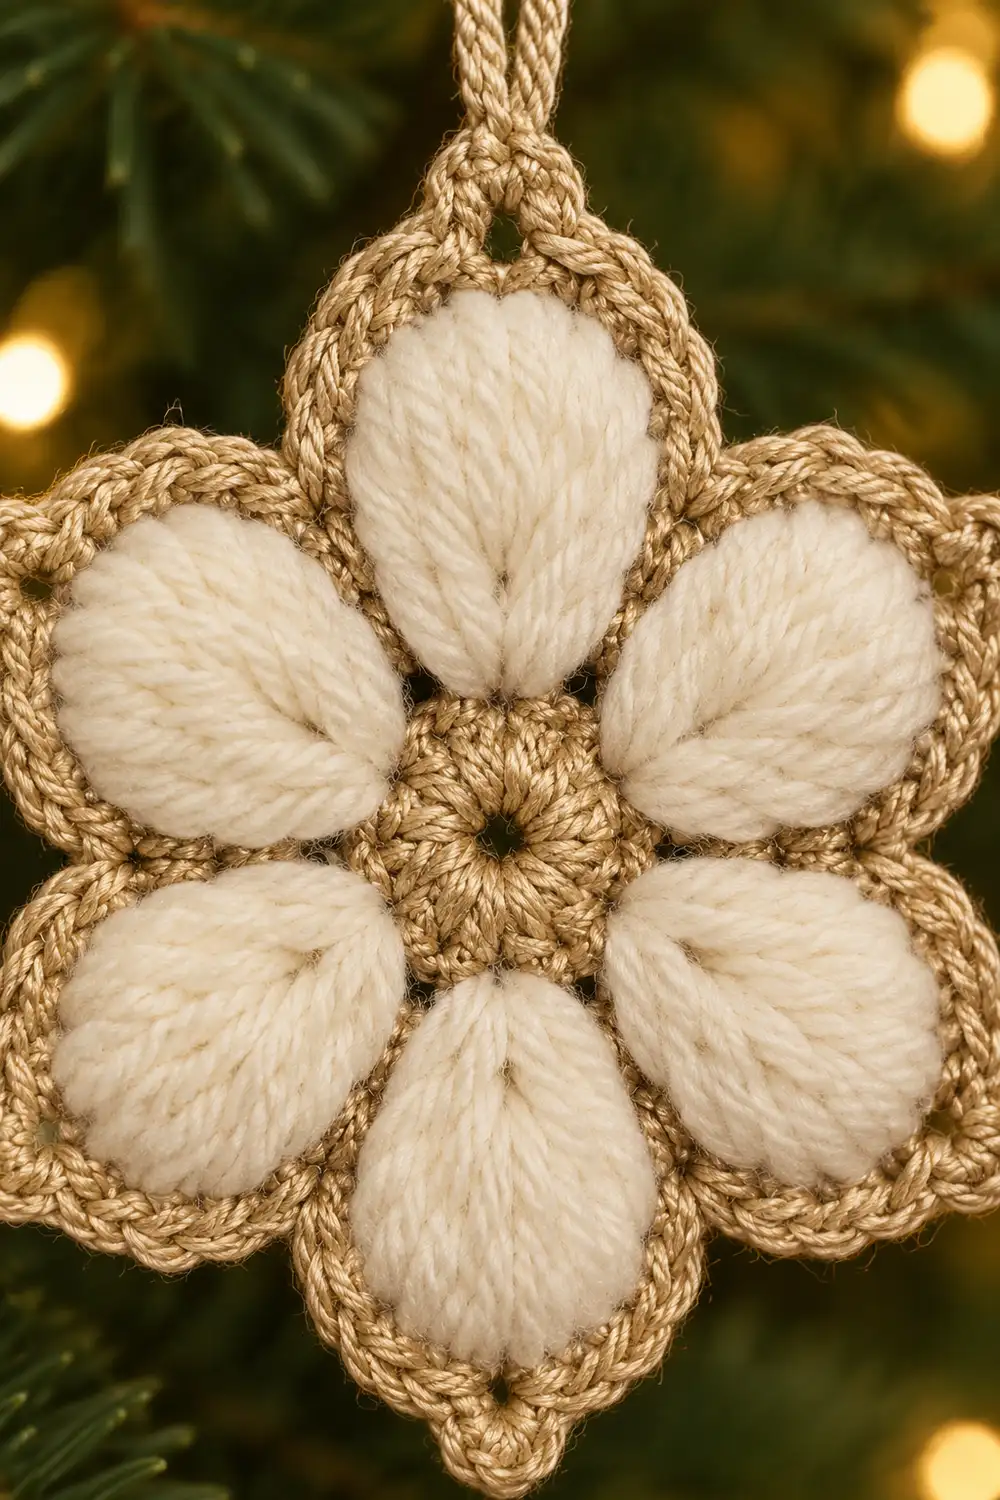
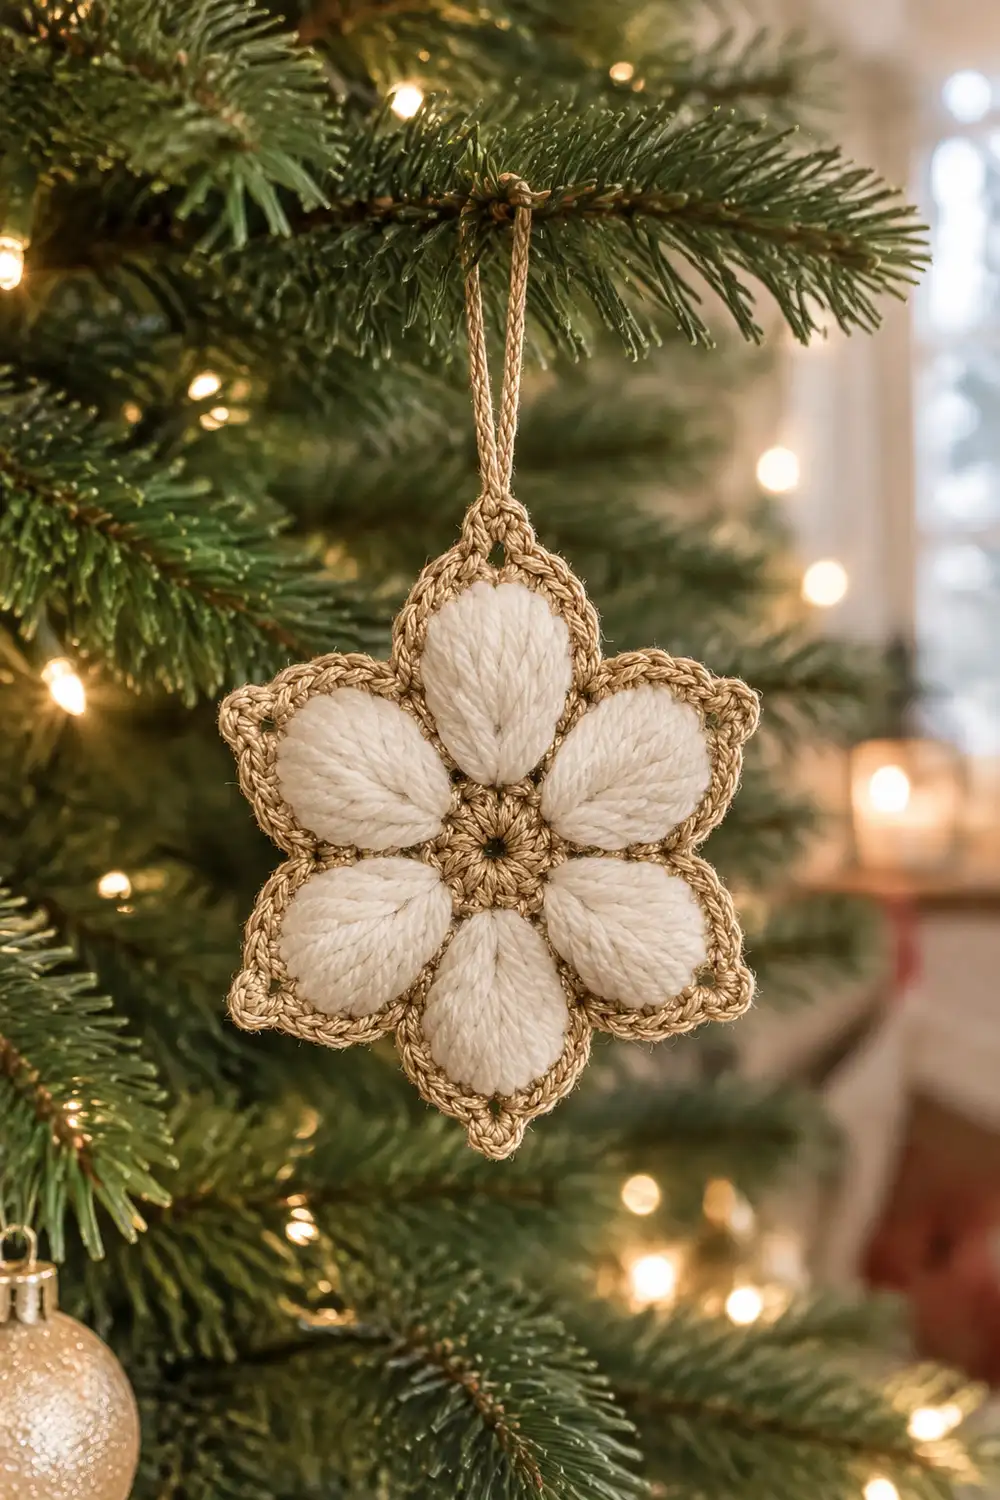
This six-petal flower ornament has soft cream petals around a small tan center. Each petal is outlined in a corded tan border that comes to a neat point at the tip. It looks like a snowflake and a winter bloom at once, and it suits a natural or rustic Christmas tree.
The petals use puff stitches in alternating rows. This gives them a raised, quilted texture that catches the light. The tan center and border keep the shape crisp. A twisted cord in the same tan yarn makes the hanging loop.
This pattern uses US crochet terms. The finished ornament measures about 5.5 in (14.0 cm) from petal tip to opposite petal tip, plus the hanging loop.
The ornament is a single piece. You work a small tan circle in the round, then work six cream petals in short flat rows directly off the center. Two tan border rounds then outline every petal in one continuous pass. A twisted cord finishes the piece.
Finished Size and Construction
- Finished size: 5.5 in (14.0 cm) tip to tip
- Skill level: Easy-intermediate (puff stitch, row-end edging, reverse sc)
- Terminology: US crochet terms
- Yarn weight: DK (light, #3)
- Hook: 3.5 mm (E-4)
- Number of pieces: 1
- Layout: Center circle with 6 petals arranged in a symmetrical star
- Center size: 1 in (2.5 cm) diameter
- Petal size: 2 in (5.1 cm) long × 1.75 in (4.4 cm) at the widest point
- Size before border: 5 in (12.7 cm) tip to tip
- Border depth: 0.25 in (0.6 cm), 2 rounds
- Hanging loop: about 3 in (7.6 cm) tall
Materials
Choose a smooth cotton or cotton-blend DK yarn. Cotton shows puff stitches clearly and holds the petal points after blocking. For a warmer glow, you can hold a fine metallic thread together with the tan yarn in the border rounds.
Yarn:
– Cream (petals): 10 g, about 23 m
– Tan / natural linen (center, border, cord): 8 g, about 18 m
These quantities include a margin for your gauge swatch and for tension differences.
Tools:
– 3.5 mm (E-4) crochet hook
– Tapestry needle
– Scissors
– Stitch markers (2–3)
– Rust-proof pins and a foam blocking mat
– Spray bottle or steam iron
Abbreviations (US Terms)
- ch – chain
- sl st – slip stitch
- sc – single crochet
- sc2tog – single crochet 2 together
- sc3tog – single crochet 3 together
- rev sc – reverse single crochet (crab stitch)
- MR – magic ring
- st(s) – stitch(es)
- sp – space
- RS / WS – right side / wrong side
Special stitch – Puff stitch (puff): (Yarn over, insert hook in st, yarn over, pull up a loop to about hdc height) 3 times. You now have 7 loops on the hook. Yarn over and pull through all 7 loops. Ch 1 to close. The closing ch 1 does not count as a stitch.
Reverse sc (rev sc): Working from left to right (right-handed), insert hook in the next st to the right, pull up a loop, yarn over, and pull through both loops.
Gauge and Checkpoints
Gauge: 20 sc and 24 rows = 4 in (10.2 cm) in plain sc rows.
Small items depend heavily on gauge. Test first by making the center and one petal before committing to the full ornament.
Checkpoints:
– After center Rnd 1: about 0.4 in (1.0 cm) across
– After center Rnd 2: about 0.75 in (1.9 cm) across
– After center Rnd 3: 1 in (2.5 cm) across
– After petal Row 5: petal is 1.75 in (4.4 cm) wide
– After petal Row 12: petal is 2 in (5.1 cm) long from the center edge
– Before border: 5 in (12.7 cm) tip to tip
– After border: 5.5 in (14.0 cm) tip to tip
If your test petal is too big: go down to a 3.25 mm hook, or pull the puff loops up shorter.
If your test petal is too small: go up to a 3.75 mm hook.
If neighboring petals overlap or ruffle: your petals are too wide for the center. Go down a hook size for the petals only.
Center (Tan)
Rnd 1: With tan, make a MR. Ch 1, 6 sc in ring. Sl st to first sc to join. (6 sts)
Rnd 2: Ch 1, 2 sc in each st around. Sl st to first sc. (12 sts)
Rnd 3: Ch 1, (sc in next st, 2 sc in next st) 6 times. Sl st to first sc. (18 sts)
Fasten off and weave in the tail. Pull the MR tight, leaving only a tiny center dot.
Checkpoint: The circle lies flat and measures 1 in (2.5 cm) across.
Place a marker in every third stitch of Rnd 3 (sts 1, 4, 7, 10, 13, 16) to mark the start of each petal. Each petal uses 3 stitches: 6 petals × 3 sts = 18 sts, which uses the full round with no gaps.
Petals (Cream, Make 6 on the Center)
Each petal is worked in flat rows directly into 3 stitches of center Rnd 3. Odd rows are RS rows, and they carry the puff texture. Turn at the end of every row.
The ch 1 at the start of sc rows and the ch 2 at the start of puff rows are turning chains. They do not count as stitches.
Row 1 (RS): With RS of center facing, join cream with a sl st in a marked st. Ch 1, 2 sc in same st, sc in next st, 2 sc in next st. Turn. (5 sts)
Row 2 (WS): Ch 1, 2 sc in first st, sc in next 3 sts, 2 sc in last st. Turn. (7 sts)
Row 3 (RS): Ch 2, puff in first st, (sc in next st, puff in next st) 3 times. Turn. (7 sts: 4 puffs, 3 sc)
Row 4 (WS): Ch 1, 2 sc in first st, sc in next 5 sts, 2 sc in last st. Turn. (9 sts)
Row 5 (RS): Ch 2, puff in first st, (sc in next st, puff in next st) 4 times. Turn. (9 sts: 5 puffs, 4 sc)
Checkpoint: The petal measures 1.75 in (4.4 cm) wide.
Row 6 (WS): Ch 1, sc in each st across. Turn. (9 sts)
Row 7 (RS): Ch 2, puff in first st, (sc in next st, puff in next st) 4 times. Turn. (9 sts)
The puffs stack directly above the Row 5 puffs. This creates the vertical ridges seen on the finished petals.
Row 8 (WS): Ch 1, sc2tog, sc in next 5 sts, sc2tog. Turn. (7 sts)
Row 9 (RS): Ch 2, puff in first st, (sc in next st, puff in next st) 3 times. Turn. (7 sts)
Row 10 (WS): Ch 1, sc2tog, sc in next 3 sts, sc2tog. Turn. (5 sts)
Row 11 (RS): Ch 1, sc2tog, sc in next st, sc2tog. Turn. (3 sts)
Row 12 (WS): Ch 1, sc3tog. (1 st)
Fasten off, leaving a 6 in (15.2 cm) tail. The single stitch from Row 12 is the petal tip.
Checkpoint: The petal measures 2 in (5.1 cm) from the center edge to the tip and has 12 rows. That means each side edge has 12 row-ends.
Repeat Rows 1–12 in each of the remaining 5 marked groups of 3 stitches. Work around the center in order, joining each new petal in the next marked stitch.
Weave in all petal tails along the petal edges, not across the puffs. This keeps the RS texture clean.
Checkpoint: All 6 petals sit evenly around the center. Neighboring petals touch at their widest points without overlapping. The flower measures 5 in (12.7 cm) tip to tip.
Border (Tan)
Border gauge: Along the petal sides, work 1 sc per row-end. That comes to about 6 sc per inch, slightly denser than the 5 sc per inch of the petal fabric. The extra density pulls the edge firm and keeps the petals from flaring.
Each petal side has 12 row-ends:
– The Row 1 row-end is shared in a valley decrease between petals.
– Rows 2–11 get 1 sc each (10 sc).
– Row 12 is the tip stitch itself.
Border Rnd 1
With RS facing, join tan with a sl st in the Row 1 row-end on the left side of Petal 6, at the valley between Petal 6 and Petal 1.
Ch 1, then work the following for each petal:
- Valley: sc2tog over the Row 1 row-end of the previous petal and the Row 1 row-end of the current petal.
- Up the right side: sc in each row-end of Rows 2–11 (10 sc).
- Tip: (sc, ch 2, sc) in the top of the Row 12 stitch.
- Down the left side: sc in each row-end of Rows 11–2 (10 sc).
Repeat for all 6 petals. On the last petal, the left-side 10 sc end next to the starting point. Sl st to the first sc2tog to join.
Count per petal: 1 valley + 10 + 2 tip sc + 10 = 23 sc, plus 1 ch-2 tip sp.
Total: 6 × 23 = 138 sc, plus 6 ch-2 sps.
The valley sc2tog draws the border tight into the center. It creates the defined tan line between each pair of petals.
Border Rnd 2 (Corded Edge)
This is a conversion round. Each existing sc gets 1 rev sc, and each tip gets extra stitches.
Ch 1, then work rev sc in each sc and sc2tog around, including each valley stitch. In each ch-2 tip sp, work 3 rev sc. Sl st to the first rev sc to join.
Count: 138 (1 rev sc per existing st) + 18 (3 per tip sp × 6 tips) = 156 rev sc.
Per petal: 23 + 3 = 26 rev sc. Check: 6 × 26 = 156.
Fasten off and weave in the ends.
Why the Math Works
Every petal has the same 12 rows, so every side gets the same 10 sc. The single valley decrease shares the Row 1 row-ends between neighbors. That means no stitch is counted twice, and none is skipped. The tips are the only places where stitches are added, so all 6 petals stay identical. The two border rounds add 0.25 in (0.6 cm) on each side, taking the flower from 5 in (12.7 cm) to 5.5 in (14.0 cm).
Hanging Loop (Twisted Cord)
- Cut a 24 in (61.0 cm) strand of tan.
- Fold it in half to 12 in (30.5 cm).
- Anchor the fold, and twist the two loose ends together tightly in one direction until the strand kinks.
- Fold the twisted strand in half again and let it twist back on itself. You now have a cord about 6 in (15.2 cm) long.
- Knot the loose ends together.
- Thread the cord’s folded end through the Rnd 1 ch-2 tip sp of the top petal, just under the Rnd 2 rev sc.
- Pass the knotted end through the fold and pull it snug.
The finished loop stands about 3 in (7.6 cm) tall.
Final Blocking
- Lightly mist the ornament with water until it is damp, not soaked.
- Place it RS up on the blocking mat.
- Pin each petal tip at the Rnd 2 tip stitches so the tips sit 5.5 in (14.0 cm) apart across the flower.
- Pin each valley gently toward the center so the tan outlines sit straight.
- Check that all 6 petals are the same length and evenly spaced, like spokes.
- Do not press the puffs flat. If you use steam, hover the iron above the piece without touching it.
- Let it dry completely before unpinning.
Final Quality-Control Checklist
- Center circle is flat, with the MR pulled closed
- 6 petals, each with 12 rows and stacked puff ridges
- Petals touch but do not overlap
- Border Rnd 1: 138 sc + 6 ch-2 sps
- Border Rnd 2: 156 rev sc
- Each tip comes to a clean point
- Valleys pull neatly toward the center
- Tip-to-tip measurement is 5.5 in (14.0 cm)
- Hanging loop is centered on the top petal and about 3 in (7.6 cm) tall
- All ends are woven in invisibly
Troubleshooting
Petals overlap or wave: The petals are too wide. Use a smaller hook for the petals, or make the puff loops shorter.
Gaps between petals: The petals are too narrow. Go up half a hook size for the petals.
Puffs look flat: Pull each loop up to full hdc height, and remember the closing ch 1.
Border cups the ornament: Your tension is too tight on Rnd 1. Loosen it, or go up half a hook size for the border only.
Border ruffles: Check that you worked 10 sc per side, not 11 or 12.
Tips are rounded: Make sure the tip uses (sc, ch 2, sc) in Rnd 1 and 3 rev sc in Rnd 2. Then pin the tips firmly during blocking.
Ornament hangs crooked: Re-center the cord in the top tip sp.
Care
Spot clean with cool water and mild soap, then reshape and dry flat. Store the ornament flat, away from heavy items, so the puffs keep their shape.
Final Notes
The measurement chain is simple. The center measures 1 in (2.5 cm). Each petal adds 2 in (5.1 cm), bringing the flower to 5 in (12.7 cm) before the border. The two border rounds add 0.25 in (0.6 cm) per side, for a finished size of 5.5 in (14.0 cm).
The stitch counts follow the same steady progression: 18 center stitches, 6 identical 12-row petals, 138 sc in the first border round, and 156 rev sc in the second. Check each stage as you go, and the ornament will come together cleanly.
Happy crocheting!