

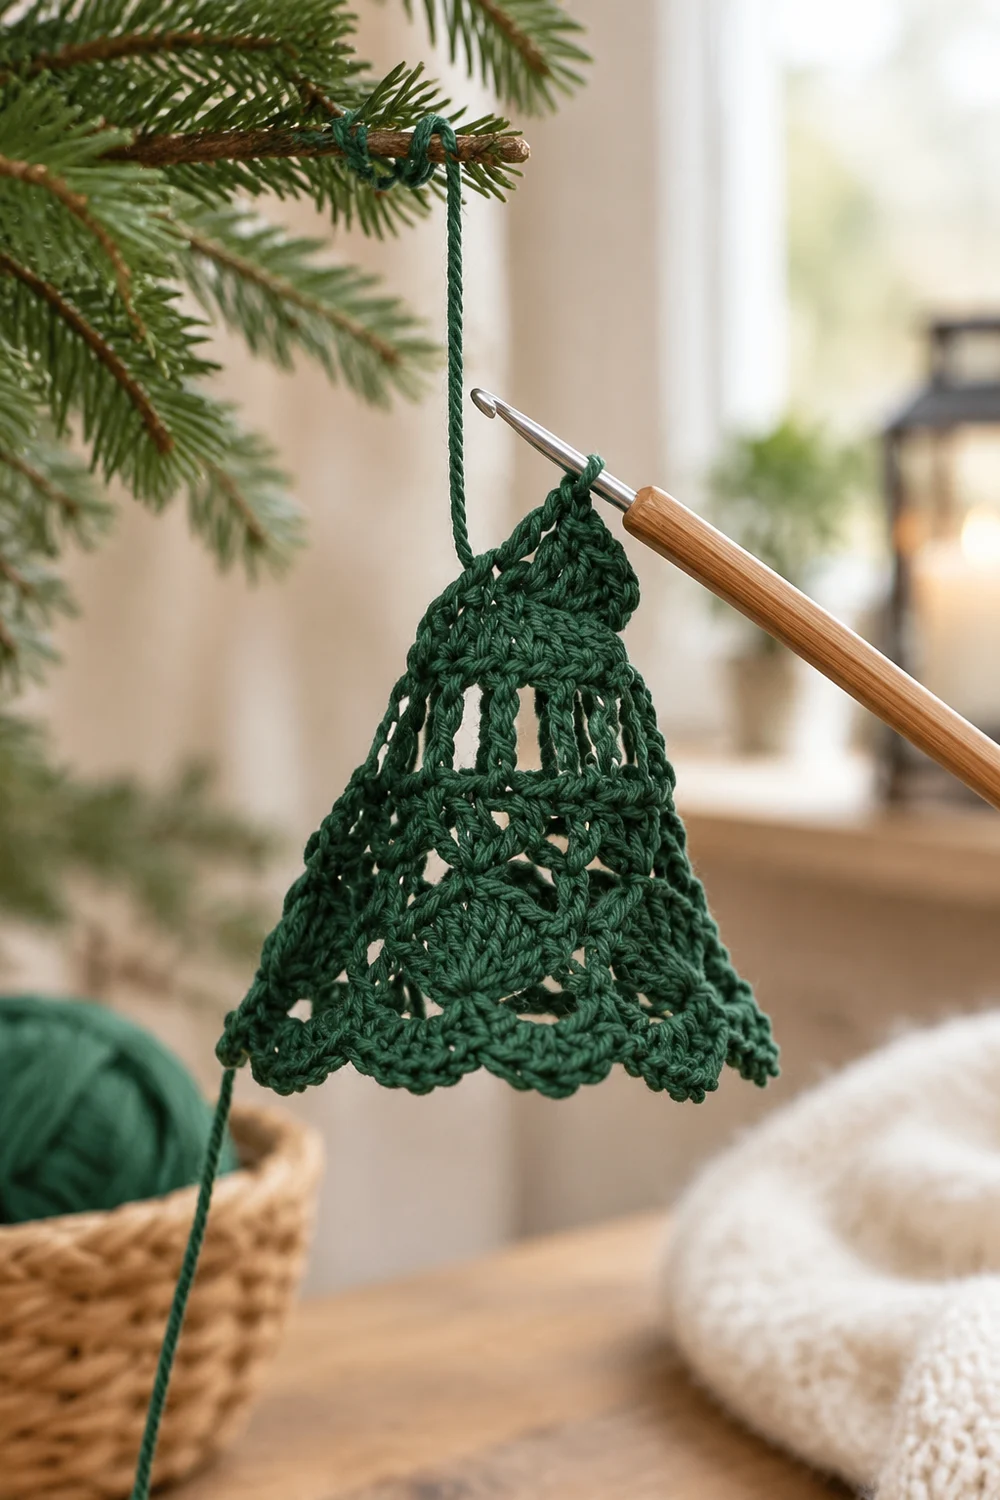
This little bell is a single lacy motif worked in dark forest green. It has a small rounded crown, a row of tall open “pillar” stitches, two bands of shell fans, and a lower edge finished with pointed picot scallops. It looks delicate, but it is built from basic stitches.
The deep green and open texture suit Christmas. Use it as an ornament, gift-tag topper, card embellishment, or appliqué. The look is classic and airy, with clear stitch definition from mercerized cotton.
This pattern uses US crochet terms. The finished bell measures 2.75 in (7.0 cm) wide at the scalloped lower edge and about 2.5 in (6.4 cm) tall.
The construction is simple. You work the bell flat in turned rows from the top down. Sc rows shape the crown, a tr row flares the shoulders, and three rows of shells form the skirt. A two-round border finishes it: one sc round around the whole bell, then picot scallops along the lower edge only.
Finished Size and Construction
- Finished size: 2.75 in (7.0 cm) wide at the scallops, about 2.5 in (6.4 cm) tall
- Skill level: Easy
- Terminology: US crochet terms
- Yarn weight: Super fine (fingering) mercerized cotton
- Hook: 2.5 mm
- Number of pieces: 1
- Layout: Single flat motif, worked top down in turned rows
- Piece size before border: 2.375 in (6.0 cm) wide at Row 9, 2 in (5.1 cm) tall
- Border depth: 0.125 in (0.3 cm) on the sides and top; 0.5 in (1.3 cm) along the lower edge, including the scallops
Materials
Yarn: Use a smooth, tightly plied mercerized cotton in fingering weight. Cotton holds the shell shapes and picot points well and blocks crisply. Avoid fuzzy or very soft yarns, which blur the openwork.
- Dark forest green: 5 g (about 17 m)
Tools:
- 2.5 mm crochet hook
- Tapestry needle
- Scissors
- Rust-proof pins and a blocking mat or folded towel
- Spray bottle with water
- Ruler or tape measure
The yarn quantity includes a margin of about 30% for your gauge swatch, tails, and any frogging.
Abbreviations (US Terms)
- ch: chain
- sl st: slip stitch
- sc: single crochet
- dc: double crochet
- tr: treble crochet
- sk: skip
- st(s): stitch(es)
- sp: space
- RS / WS: right side / wrong side
Special stitches:
- Shell: 5 dc in the same stitch.
- Half shell: 3 dc in the same stitch. At a row start, “ch 3, 2 dc in the same stitch” counts as a half shell.
- Picot: ch 3, sl st in the 3rd ch from the hook.
- Picot shell: (2 dc, picot, 2 dc) in the same stitch. This makes one pointed scallop.
The turning ch-1 never counts as a stitch. The turning ch-3 and ch-4 always count as the first stitch.
Gauge and Checkpoints
Gauge: 8 sc and 9 sc rows = 1 in (2.5 cm).
This is a single small piece, so the crown is your gauge test. Work Rows 1–5, then measure before going on. If the crown is off, the whole bell will be off.
Checkpoints:
- After Row 3: 7 sc, 0.875 in (2.2 cm) wide
- After Row 5: 9 sc, 1.125 in (2.9 cm) wide
- After Row 6: 13 tr, 1.625 in (4.1 cm) wide
- After Row 9: 19 sts, 2.375 in (6.0 cm) wide and 2 in (5.1 cm) tall
- After Border Round 1: 2.5 in (6.4 cm) wide
- After Border Round 2 and blocking: 2.75 in (7.0 cm) wide, 2.5 in (6.4 cm) tall
A tolerance of 0.125 in (0.3 cm) at any checkpoint is fine.
If your piece is too big, go down to a 2.25 mm hook, or tighten your tension slightly.
If your piece is too small, go up to a 2.75 mm hook. Check that your tr stitches are fully pulled up. Short tr stitches are the most common reason the shoulders come out narrow.
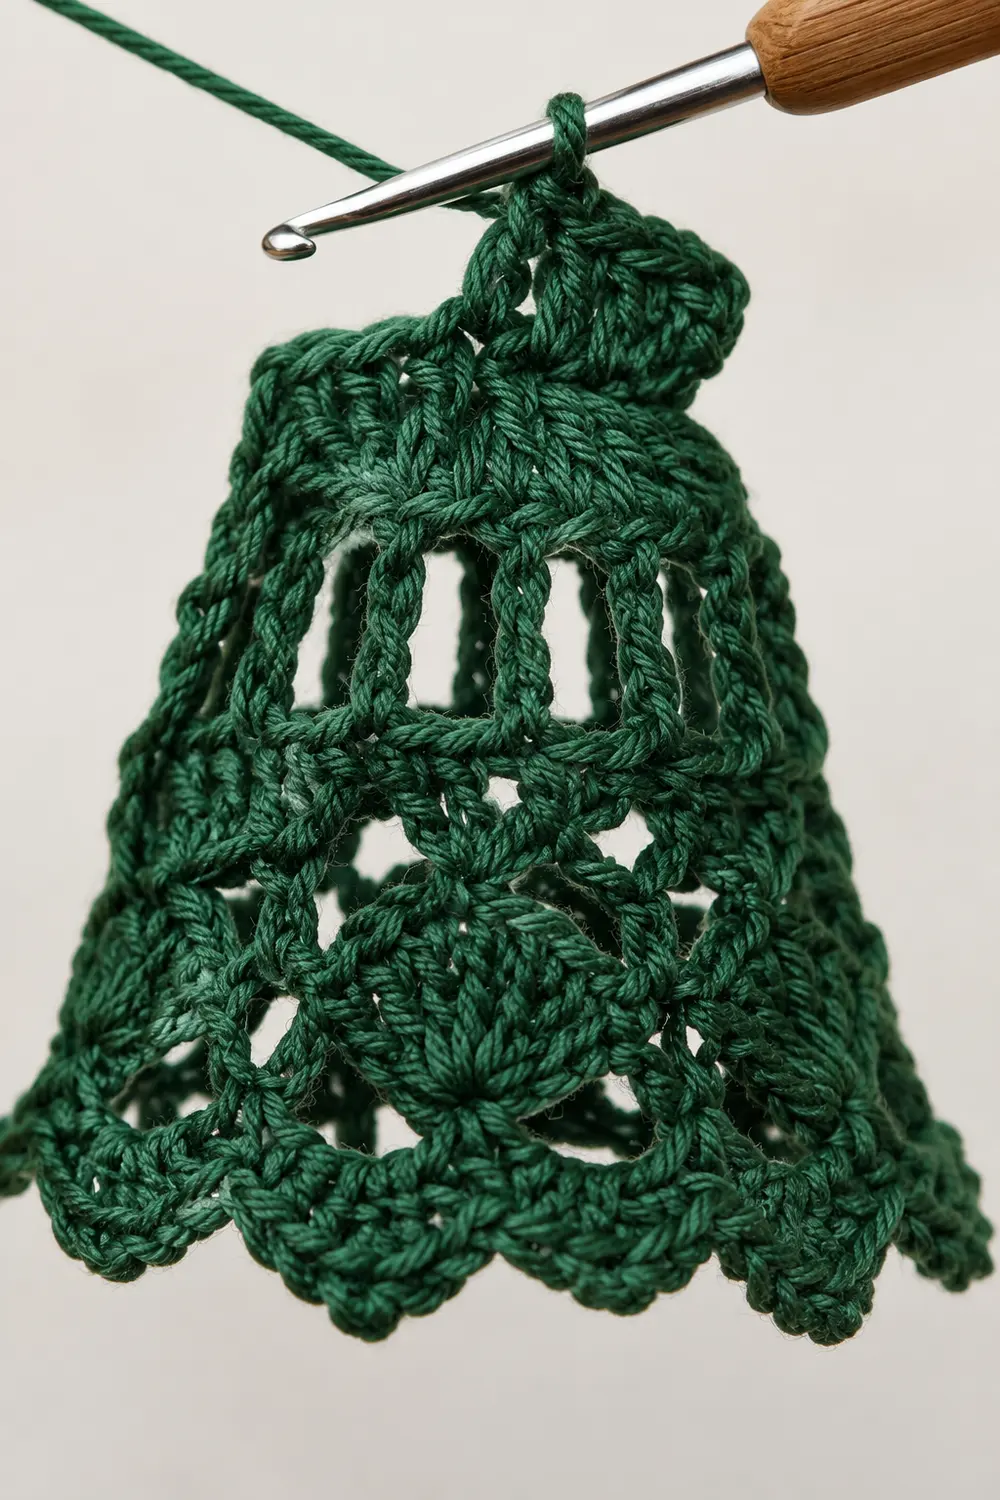
Pattern: Crown (Rows 1–5)
Leave a 6 in (15.2 cm) tail at the start.
Row 1: Ch 4. Sc in the 2nd ch from the hook and in the next 2 ch. Turn. (3 sc)
Row 2: Ch 1. 2 sc in the first st, sc in the next st, 2 sc in the last st. Turn. (5 sc)
Row 3: Ch 1. 2 sc in the first st, sc in the next 3 sts, 2 sc in the last st. Turn. (7 sc)
Row 4: Ch 1. Sc in each st across. Turn. (7 sc)
Row 5: Ch 1. 2 sc in the first st, sc in the next 5 sts, 2 sc in the last st. Turn. (9 sc)
Increasing at both edges in Rows 2, 3, and 5, with a straight row between, gives the crown its rounded top. Checkpoint: 1.125 in (2.9 cm) wide.
Pattern: Pillar Row (Row 6)
Row 6: Ch 4 (counts as first tr). Tr in the same st. 2 tr in the next st, tr in the next 5 sts, 2 tr in the next st, 2 tr in the last st. Turn. (13 tr)
Count check: 2 + 2 + 5 + 2 + 2 = 13. The four increases sit near the edges, so the bell flares at the shoulders. The tall stitches leave small gaps between them, which form the vertical bars.
Checkpoint: 1.625 in (4.1 cm) wide.
Pattern: Shell Skirt (Rows 7–9)
Row 7: Ch 1. Sc in the first tr. Sk 1 tr, shell in the next tr, sk 1 tr, sc in the next tr. Repeat from * to * 2 more times, ending in the last tr (the top of the turning ch-4). Turn. (19 sts: 3 shells, 4 sc)
Count check: 1 + 3 × (5 + 1) = 19. Each repeat uses 4 of the 13 tr, plus the first stitch: 1 + 3 × 4 = 13.
Row 8: Ch 3 (counts as dc). 2 dc in the first sc (half shell). Sk 2 dc, sc in the center dc of the next shell, sk 2 dc, shell in the next sc. Repeat from * to * once more. Sk 2 dc, sc in the center dc of the last shell, sk 2 dc, 3 dc in the last sc (half shell). Turn. (19 sts: 2 shells, 2 half shells, 3 sc)
Count check: 3 + 2 × (1 + 5) + 1 + 3 = 19. The shells now sit offset from Row 7, which gives the fan texture.
Row 9: Ch 1. Sc in the first dc. Sk 2 dc, shell in the next sc, sk 2 dc, sc in the center dc of the next shell. Repeat from * to * once more. Sk 2 dc, shell in the next sc, sk 2 dc, sc in the top of the turning ch-3. Turn. (19 sts: 3 shells, 4 sc)
Count check: 1 + 5 + 1 + 5 + 1 + 5 + 1 = 19. Row 9 lines up with Row 7 and gives the widest part of the body.
Do not fasten off. Checkpoint: 2.375 in (6.0 cm) wide and 2 in (5.1 cm) tall.
Border
Border gauge: The sc border is worked at the same 8 sc per 1 in (2.5 cm) as the crown. On the lower edge, the border is one sc per Row 9 stitch, plus one extra stitch at each corner. This keeps the edge flat and does not pull in the shells.
Round 1: Sc Edging (Conversion Round)
Ch 1 and turn after Row 9, so you are ready to work back across Row 9.
Lower edge: 2 sc in the first st, sc in the next 17 sts, 2 sc in the last st.
Count: 19 sts worked one-per-stitch + 2 extra corner sc = 21 sc. The first and last of these 21 are the two corner stitches.
First side: Rotate and work down the row ends toward the crown:
- 2 sc in the end of Row 9
- 2 sc in the end of Row 8
- 2 sc in the end of Row 7
- 3 sc in the end of Row 6
- 1 sc in the end of each of Rows 5, 4, 3, 2, and 1
Count: 2 + 2 + 2 + 3 + 5 = 14 sc.
Top: Sc in each of the 3 foundation chains on the underside of Row 1. (3 sc)
Second side: Work the row ends in reverse order. Use 1 sc in each of Rows 1–5, 3 sc in Row 6, and 2 sc in each of Rows 7, 8, and 9. (14 sc)
Join with a sl st to the first sc of the round.
Round 1 total: 21 + 14 + 3 + 14 = 52 sc.
Why it works: The row-end counts follow stitch height. Each sc row end takes 1 sc. Each dc-height row end takes 2 sc. The tall tr row end takes 3 sc. This keeps the sides flat with no ruffling or cupping. Checkpoint: 2.5 in (6.4 cm) wide.
Round 2: Picot Scallops (Lower Edge Only)
Ch 1 and do not turn. Work only across the 21 lower-edge sc.
Sc in the same st as the join. Sk 1 st, picot shell in the next st, sk 1 st, sc in the next st. Repeat from * to * 4 more times. The last sc lands in the final corner sc. (5 picot shells, 6 sc)
Fasten off, leaving a 6 in (15.2 cm) tail.
The sides and top keep the 14 + 3 + 14 = 31 sc from Round 1.
Why the math works: Each scallop repeat uses 4 stitches, and the row starts with 1 sc. The edge must therefore hold 4 × 5 + 1 = 21 stitches, which matches Round 1 exactly. Each scallop also lines up roughly under a Row 9 shell or sc, so the points space evenly. The picot gives each scallop its pointed tip.
Checkpoint: about 2.75 in (7.0 cm) wide across the scallops, before blocking.
Final Blocking
- Weave in both tails along the sc edging on the WS. Do not trim them yet.
- Lay the bell RS up on a blocking mat or folded towel.
- Spray it evenly until damp, but not dripping.
- Pin the crown first, centered at the top.
- Pin each lower corner so the scalloped edge measures 2.75 in (7.0 cm) across.
- Pin each picot point downward so the 5 scallops sit evenly spaced.
- Ease the shells open with your fingertip so the fan shapes are clear.
- Check that the overall height is 2.5 in (6.4 cm) and that both sides curve the same way.
- Let it dry completely, then remove the pins and trim the tails close.
Final Quality-Control Checklist
- Crown has 9 sc at Row 5, and both shoulder curves match.
- Row 6 has 13 tr with visible open bars.
- Rows 7 and 9 each have 3 shells; Row 8 has 2 shells and 2 half shells.
- Border Round 1 has 52 sc: 21 lower, 14 per side, 3 top.
- The lower edge has exactly 5 picot scallops with sharp points.
- The sides lie flat with no ripples.
- Finished size is 2.75 in (7.0 cm) wide and 2.5 in (6.4 cm) tall, within 0.125 in (0.3 cm).
- Tails are secure and invisible from the RS.
Troubleshooting
Shells don’t line up in Row 8 or 9. You probably skipped the wrong number of stitches. Always skip 2 dc on each side of a center dc.
Wrong stitch count after Row 7. Check that the turning ch-4 counted as a tr in Row 6. The final sc goes into its top.
Sides ruffle after Border Round 1. You have too many sc in the row ends. Recheck the row-end counts (2, 2, 2, 3, then 1 each).
Sides pull in or cup. You have too few sc in the row ends, or your tension is too tight. Loosen up, and make sure Row 6 gets 3 sc.
Scallops are crowded or uneven. Count the lower edge again; it must be 21 sc. Skip exactly 1 stitch on each side of every picot shell.
Picots look round, not pointed. Make the ch-3 snug and pull the sl st firmly. Pin each point during blocking.
Bell is too flat at the top. Your Row 6 tr are short. Pull up each loop fully to the height of a tr.
Care
Hand wash in cool water with mild soap, press out the water in a towel, and dry flat, reshaping the scallops. If the piece softens over time, re-block it as above.
Final Notes
The size of this bell comes from one measurement chain:
- A 0.875 in (2.2 cm) crown at Row 3
- 1.125 in (2.9 cm) at Row 5
- 1.625 in (4.1 cm) after the pillar row
- 2.375 in (6.0 cm) across the shell skirt
- 2.5 in (6.4 cm) after the sc edging
- 2.75 in (7.0 cm) across the picot scallops
If each checkpoint matches, the finished bell will too.
The stitch counts follow the same chain: 3, 5, 7, 7, and 9 sc in the crown; 13 tr; then 19 sts in each shell row. Border Round 1 has 52 sc, and Border Round 2 adds 5 scallops across 21 stitches. Count after every row, and the bell will come out right the first time.
Happy crocheting!