

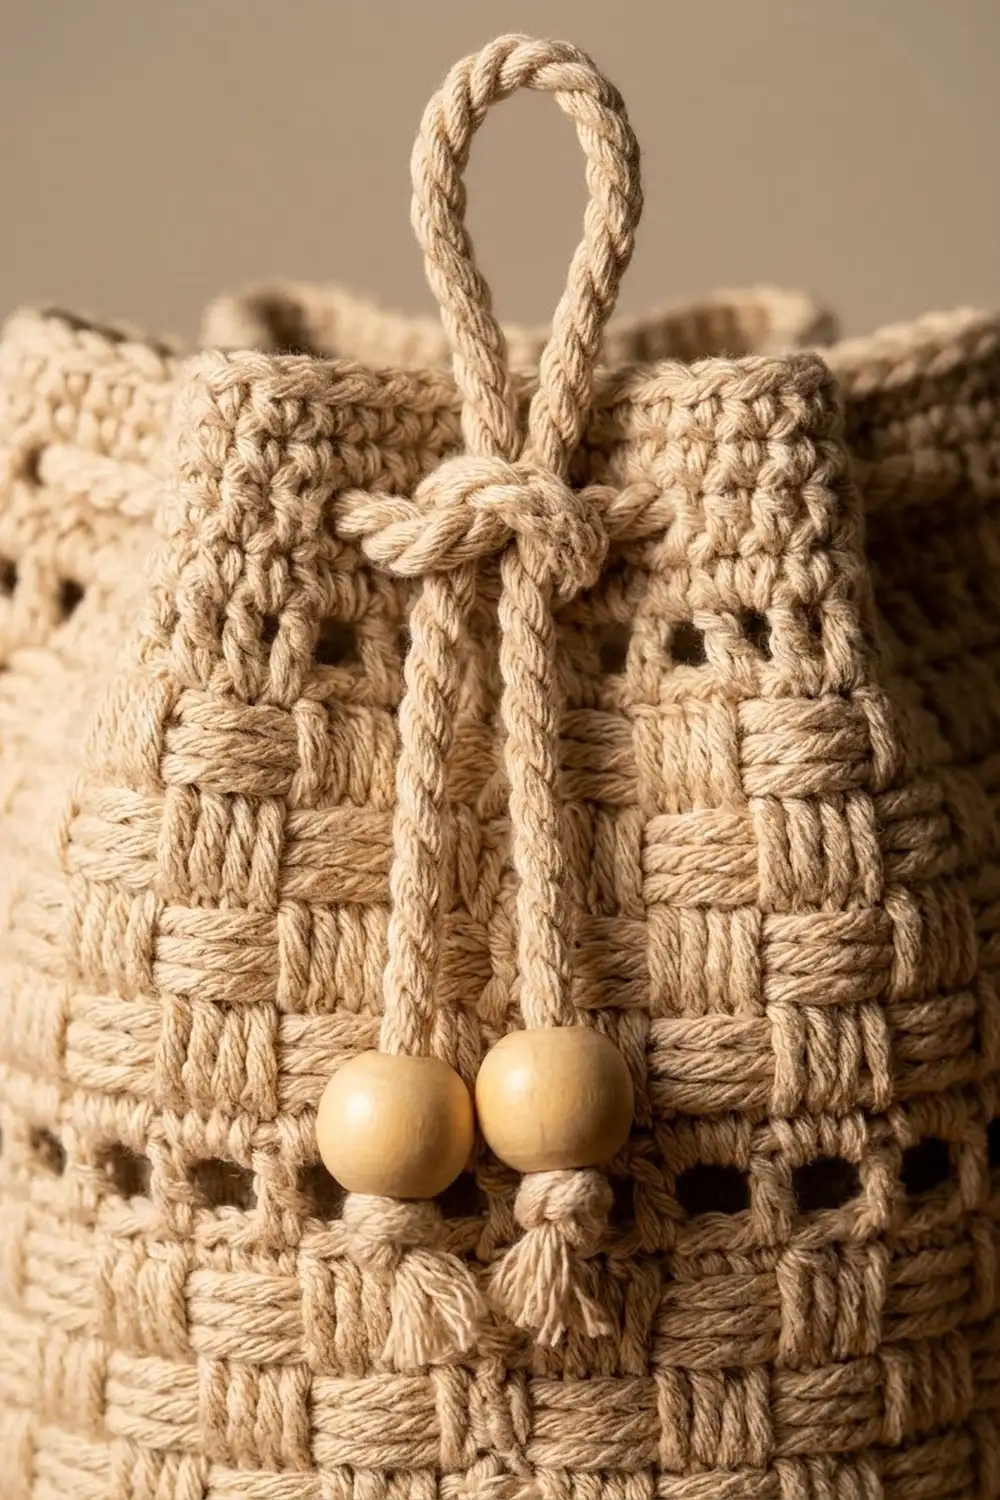
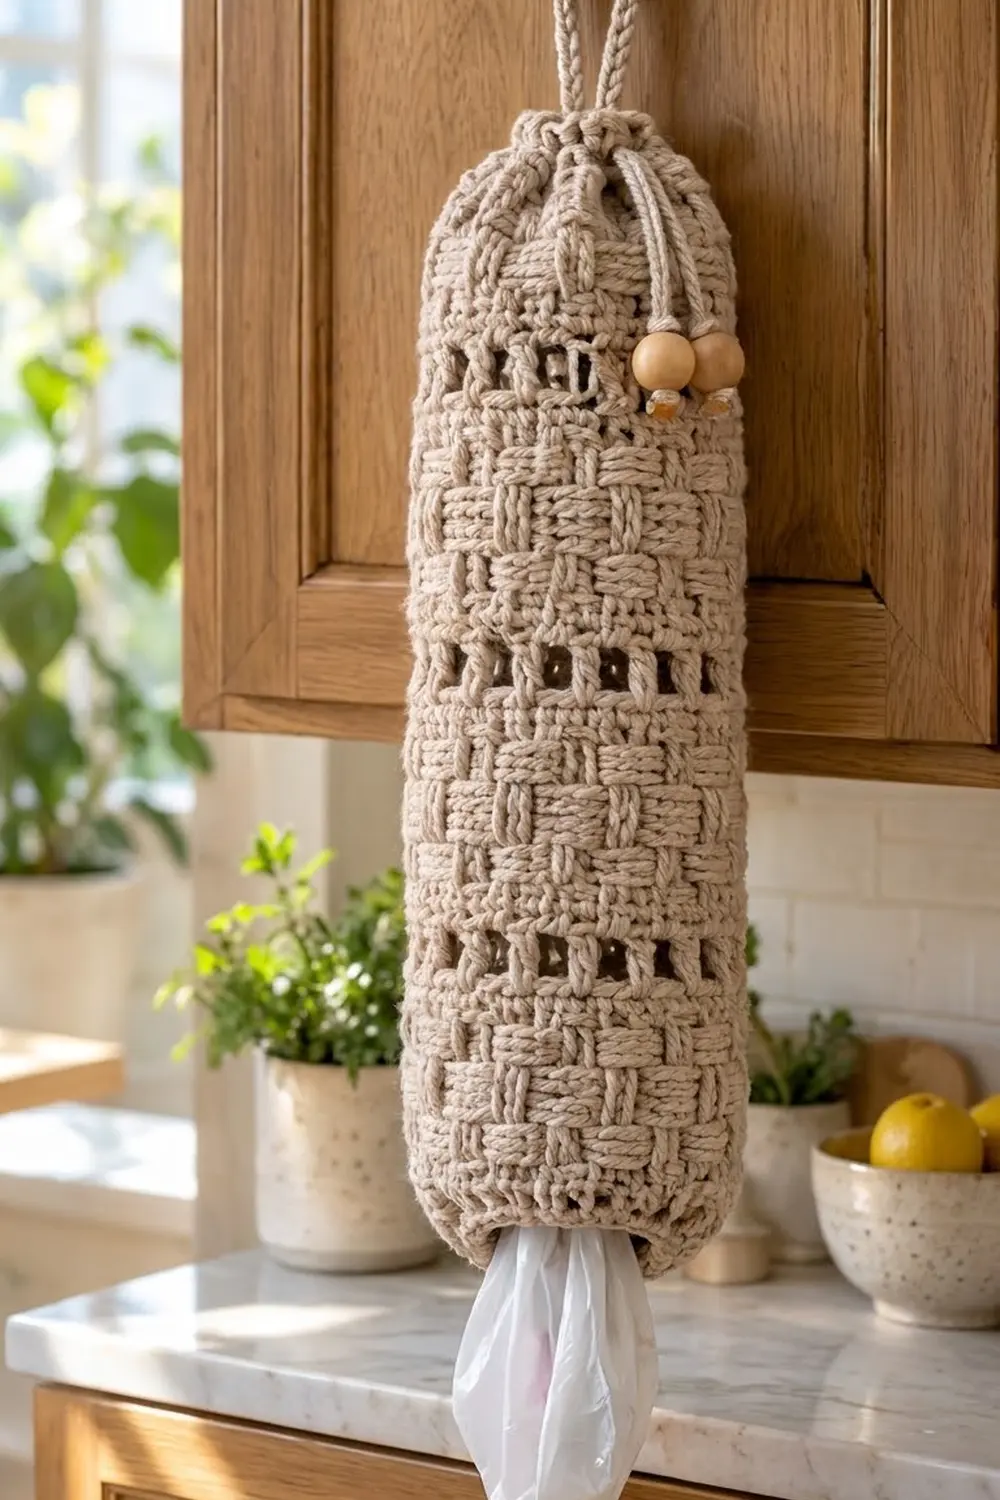
The Pantry Weave Bag Holder is a tidy, textured tube that keeps your plastic grocery bags off the counter. You push bags in at the top and pull them out one at a time from the bottom. A raised basketweave covers most of the body, and narrow bands of rectangular eyelets break it up so it looks lighter.
The sample is a soft oatmeal beige with natural wooden beads, which suits wood cabinets and stone counters. Cream, warm white or pale gray also work well. The style is simple and farmhouse-friendly: one color, lots of texture, and no fussy shaping.
This pattern uses US crochet terms. The finished holder is 12.5 in (31.8 cm) around, or 6.25 in (15.9 cm) wide when flat, and 17.5 in (44.5 cm) tall without the hanging loop.
You work one flat rectangle back and forth in rows, then seam it into a tube. Three rounds of single crochet narrow the bottom into a dispensing opening, and a slip stitch round finishes the top. A twisted cord drawstring with wooden beads gathers the top, and a matching cord makes the hanging loop.
Finished Size and Construction
- Finished size: 12.5 in (31.8 cm) around × 17.5 in (44.5 cm) tall; 6.25 in (15.9 cm) wide when flat
- Skill level: Intermediate (post stitches, simple seaming)
- Terminology: US crochet terms
- Yarn weight: Worsted (#4), cotton or cotton blend
- Hook: 5.0 mm (H-8)
- Number of pieces: 1 body panel, plus 2 cords (drawstring and hanging loop)
- Layout: Single rectangle seamed into a tube; no motif grid
- Panel size: 12.5 in (31.8 cm) wide × 16.75 in (42.5 cm) tall
- Size before border: 16.75 in (42.5 cm) tall tube
- Border depth: 0.75 in (1.9 cm) at the bottom; the top slip stitch round adds almost no height
Materials
Yarn advice: Choose a smooth worsted-weight cotton or cotton blend. Cotton holds its shape, shows post-stitch texture clearly, and won’t stretch out under the weight of a full load of bags. Avoid fuzzy or very splitty yarns, because post stitches are hard to read in them.
- Main color (oatmeal beige): 220 g, about 375 m (410 yd)
- Optional second colorway (cream): the same amount if you’re making a matching pair
Tools:
- 5.0 mm (H-8) crochet hook
- 4 wooden beads, 5/8 in (1.6 cm), with holes at least 5 mm wide
- Yarn needle
- 2 locking stitch markers
- Measuring tape
- Blocking mat and rust-proof pins
- Spray bottle
The yarn amounts include roughly a 10% margin for your gauge swatch, the seam and the cords.
Abbreviations (US Terms)
- ch – chain
- sl st – slip stitch
- sc – single crochet
- sc2tog – single crochet 2 together
- dc – double crochet
- FPdc – front post double crochet
- BPdc – back post double crochet
- sk – skip
- st(s) – stitch(es)
- sp – space
- RS / WS – right side / wrong side
- rep – repeat
Special stitches:
- FPdc: Yarn over, insert the hook from front to back to front around the post of the next stitch, yarn over and pull up a loop, then (yarn over, pull through 2 loops) twice.
- BPdc: Yarn over, insert the hook from back to front to back around the post of the next stitch, then finish like a dc.
- Twisted cord: Chain the stated number, then sl st into the back bump of the 2nd ch from the hook and of each ch across. This gives a firm, slightly twisted cord.
Gauge and Checkpoints
Gauge: 16 sts and 8 rows = 4 in (10.2 cm) in the basketweave pattern. In sc rounds, 16 sts = 4 in (10.2 cm).
Test first: Make a small test panel before starting the full holder. Ch 20, dc in the 4th ch from the hook and in each ch across (18 sts). Then work Rows 2–11 of the pattern using 2 repeats of the blocks. The swatch should measure 4.5 in (11.4 cm) wide and 5.5 in (14.0 cm) tall. Steam it lightly before you measure.
Checkpoints on the main panel:
- After Row 1: 12.5 in (31.8 cm) wide
- After Row 5: 2.5 in (6.4 cm) tall
- After Row 11: 5.5 in (14.0 cm) tall
- After Row 29: 14.5 in (36.8 cm) tall
- After Row 34: 16.75 in (42.5 cm) tall
If your swatch is too big, go down one hook size. If it’s too small, go up one size. Post stitches pull in, so if only your height is short, check that you’re pulling the first loop of each stitch up to full height.
Body Panel
Turning chains: In Row 1, the skipped chains count as a stitch. In every other row, the ch 2 does not count as a stitch. Always work the first dc into the first stitch, at the base of the ch 2.
Edge stitches: The first and last stitch of every row is a plain dc (or sc in Row 34). These 2 edge stitches become the seam allowance.
Row 1 (foundation): Ch 52. Dc in the 4th ch from the hook (the skipped chs count as the first dc) and in each ch across. Turn. (50 sts)
Row 2 (RS, Block A): Ch 2, dc in the first st. FPdc in the next 4 sts, BPdc in the next 4 sts; rep from * 5 more times. Dc in the last st (the top of the turning chain). Turn. (50 sts: 2 edge dc + 6 repeats of 8)*
Row 3 (WS, Block A): Ch 2, dc in the first st. FPdc in the next 4 sts, BPdc in the next 4 sts; rep from * 5 more times. Dc in the last st. Turn. (50 sts)*
The instruction is the same on both sides. That’s because 6 even repeats read the same in both directions, so the raised blocks stay raised on the RS.
Row 4 (RS, Block B): Ch 2, dc in the first st. BPdc in the next 4 sts, FPdc in the next 4 sts; rep from * 5 more times. Dc in the last st. Turn. (50 sts)*
This row swaps the blocks: the stitches that were raised now sink, and the sunken ones rise.
Row 5 (WS, Block B): Work as for Row 4. Turn. (50 sts)
Row 6 (RS, eyelet): Ch 2, dc in the first st. Ch 1, sk the next st, dc in the next st; rep from * 23 more times. Dc in the last st. Turn. (50 sts: 26 dc + 24 ch-1 sps)*
Check the math: 1 + (24 × 2) + 1 = 50.
Row 7 (WS, plain): Ch 2, dc in the first st, then dc in each dc and each ch-1 sp across. Turn. (50 dc)
Rows 8–11: Work Rows 2–5 again. (50 sts in each row)
Rows 12–29: Work Rows 6–11 three more times. (50 sts in each row)
You now have eyelet bands at Rows 6, 12, 18 and 24, each followed by a full basketweave band.
Row 30 (RS, drawstring eyelet): Work as for Row 6. (50 sts: 26 dc + 24 ch-1 sps) The drawstring will run through this row.
Row 31 (WS, plain): Work as for Row 7. (50 dc)
Rows 32–33 (Block A): Work as for Rows 2–3. (50 sts in each row)
Row 34 (RS, top edge): Ch 1, sc in each st across. (50 sc) Fasten off and leave a 24 in (61.0 cm) tail for seaming.
The panel should measure 12.5 in (31.8 cm) × 16.75 in (42.5 cm).
Seam the Tube
- Fold the panel with the RS facing in so that the two side edges line up. Make sure the eyelet bands match row for row, and clip the top and bottom with stitch markers.
- Using the tail, sl st the edges together, working through both edge stitches at once. Work 2 sl sts in each dc row end and 1 sl st in the sc row end, for 67 sl sts in total (33 × 2 + 1).
- Keep the slip stitches loose enough to match the stretch of the fabric. If the seam puckers, pull it out and redo it with a larger hook.
- Fasten off, weave in the end, and turn the tube RS out.
Checkpoint: flat and seam-side down, the tube should be 6.25 in (15.9 cm) wide.
Border
The edges of the tube act as its border. To work out side counts, think of the tube laid flat: each “side” is half the round. The 2 edge stitches that met in the seam still count as 2 separate stitches, so one round holds 50 stitch bases with nothing added at the seam.
Border gauge: 16 sc = 4 in (10.2 cm); 4 sc rounds = 1 in (2.5 cm).
Bottom edge
Round 1: With the RS facing, join the yarn at the seam in the bottom loops of the foundation chain. Ch 1, sc in each foundation loop around. Join with a sl st to the first sc. (50 sc: 25 per flat side)
Round 2: Ch 1, sc in the next 3 sts, sc2tog; rep from * 9 more times. Join. (40 sts = 30 sc + 10 sc2tog; 20 per flat side)*
Round 3: Ch 1, sc in the next 2 sts, sc2tog; rep from * 9 more times. Join. (30 sts = 20 sc + 10 sc2tog; 15 per flat side)* Fasten off.
Why the math works: 50 divides evenly into 10 repeats of 5, and 40 divides evenly into 10 repeats of 4. Each round takes away exactly 10 stitches spread evenly around, so the bottom narrows smoothly with no corners or flat spots.
The opening shrinks from 12.5 in (31.8 cm) to 10 in (25.4 cm) to 7.5 in (19.1 cm) around. That’s narrow enough to hold the bags in but wide enough to pull one out easily. The three rounds add 0.75 in (1.9 cm), so the tube is now 17.5 in (44.5 cm) tall.
Top edge
Round 1: With the RS facing, join the yarn at the seam in the top of Row 34. Ch 1, sl st loosely in each sc around. Join. (50 sl sts: 25 per flat side) Fasten off.
This round firms up the top edge without adding any height.
Drawstring
Ch 105 and make a twisted cord. (104 sl sts, about 26 in / 66.0 cm)
- Starting at the front, weave the cord over and under through the 24 ch-1 spaces of Row 30, so both ends come out on the outside of the tube from two neighboring spaces.
- Thread 2 beads onto each end and tie an overhand knot about 1 in (2.5 cm) from each tip. Trim the tails neatly.
Hanging loop
Ch 49 and make a twisted cord. (48 sl sts, about 12 in / 30.5 cm)
- Fold the cord in half and sew both ends securely to the inside of the tube at the seam, 1 in (2.5 cm) below the top edge.
- When the drawstring is pulled closed, the loop stands up from the center of the gathered top. It should rise about 5 in (12.7 cm) above the top.
Final Blocking
- Weave in every end along the seam or through the post stitches on the WS.
- Slide a rolled towel or a 2.5 in (6.4 cm) wide tube, such as a paper towel roll wrapped in plastic, inside the holder.
- Mist it evenly until it’s damp but not soaked.
- Smooth the eyelet bands so they run straight and level. Gently push each raised block forward with your fingertips.
- Check that the tube is 6.25 in (15.9 cm) wide flat and 17.5 in (44.5 cm) tall, and ease it into shape if it isn’t.
- Leave it to dry completely on its form. Don’t steam the beads.
Final Quality-Control Checklist
- Every block row has 50 sts: 2 edge dc plus 6 repeats of 8.
- There are 5 eyelet rows in total (Rows 6, 12, 18, 24 and 30), each with 24 ch-1 spaces.
- The raised blocks alternate in a checkerboard on the RS, with no columns raised twice in a row.
- The seam lies flat, and the eyelet bands line up across it.
- The bottom finishes with 30 sts, and the opening is about 7.5 in (19.1 cm) around.
- The drawstring gathers the top fully closed, and the beads stay on because of the knots.
- The hanging loop is sewn on securely and can hold the full holder plus bags.
Troubleshooting
- The blocks don’t alternate: You probably mixed up Block A and Block B. Rows 2–3 always start with FPdc, and Rows 4–5 always start with BPdc.
- The panel narrows toward the top: You’re missing an edge dc. Count to 50 at the end of every row, and remember that the ch 2 doesn’t count.
- The eyelets are uneven: Keep each ch 1 the same size as your working loop, and always skip exactly one stitch.
- The fabric is too stiff: Go up a hook size for the post rows only.
- Bags fall out of the bottom: Add a 4th round: sc 1, sc2tog 10 times (20 sts).
- The seam is bulky: Seam through the back loops of the edge stitches only.
Care
Hand wash in cool water, press out the extra water in a towel, and dry flat over a form. Take the beads off before machine washing, or tie them inside a mesh bag.
Final Notes
The measurement chain is short: 16 sts = 4 in (10.2 cm), so 50 sts gives a 12.5 in (31.8 cm) panel width. 34 rows give 16.75 in (42.5 cm) of height, and 3 bottom rounds add 0.75 in (1.9 cm) for a finished height of 17.5 in (44.5 cm). The bottom steps down evenly from 50 to 40 to 30 stitches. If your swatch matches the gauge, every number after it will match too.
Happy crocheting!