

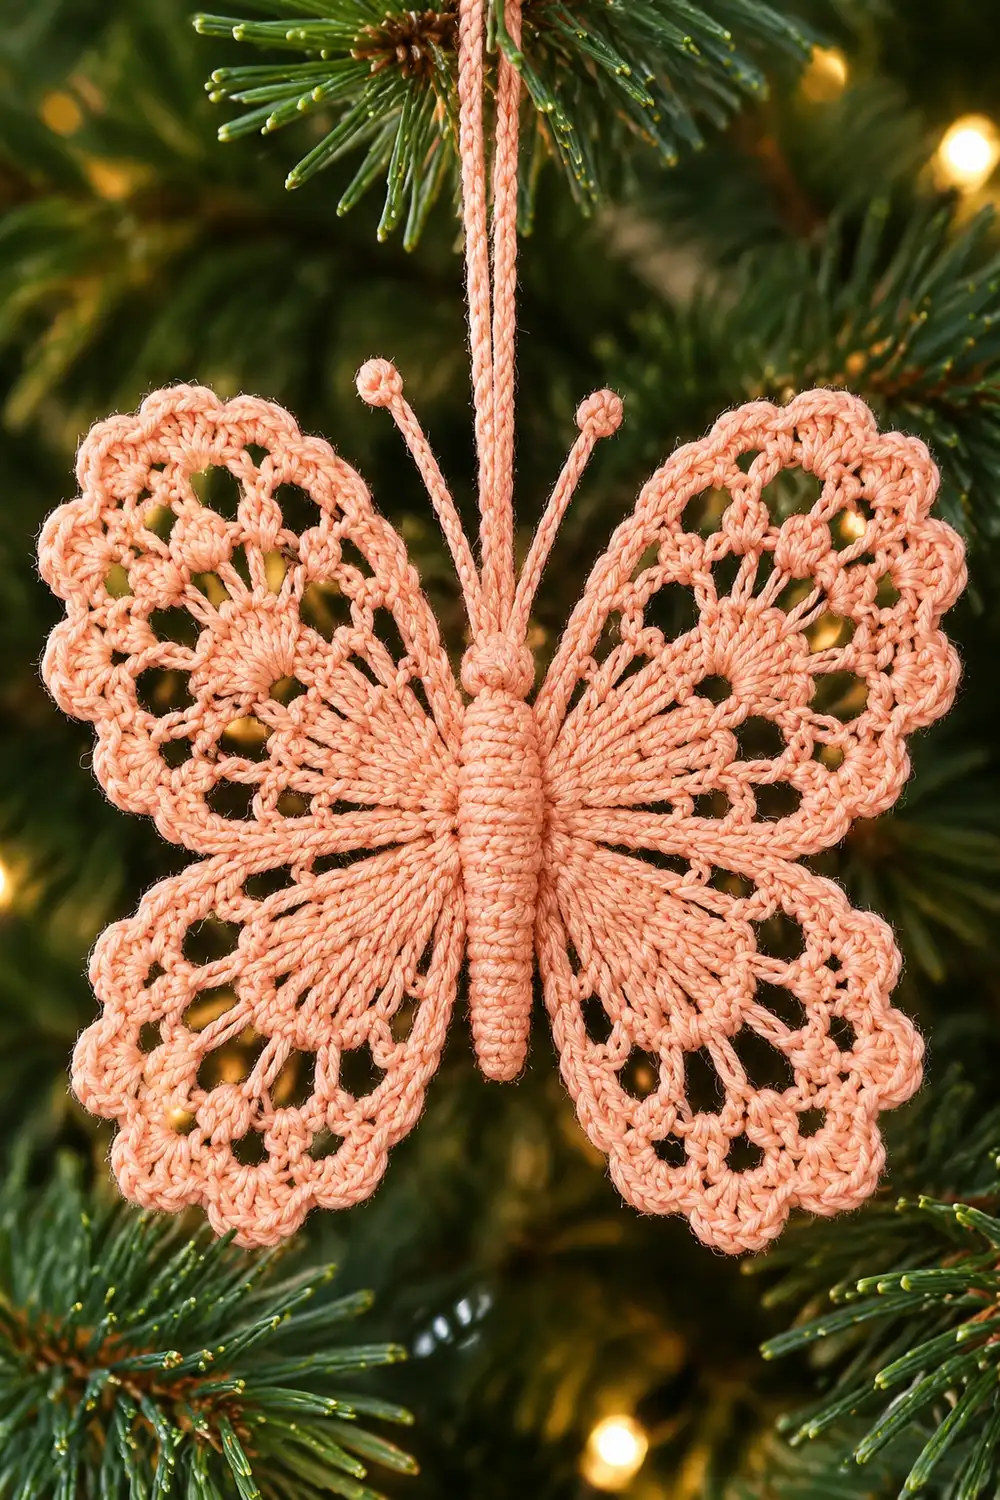
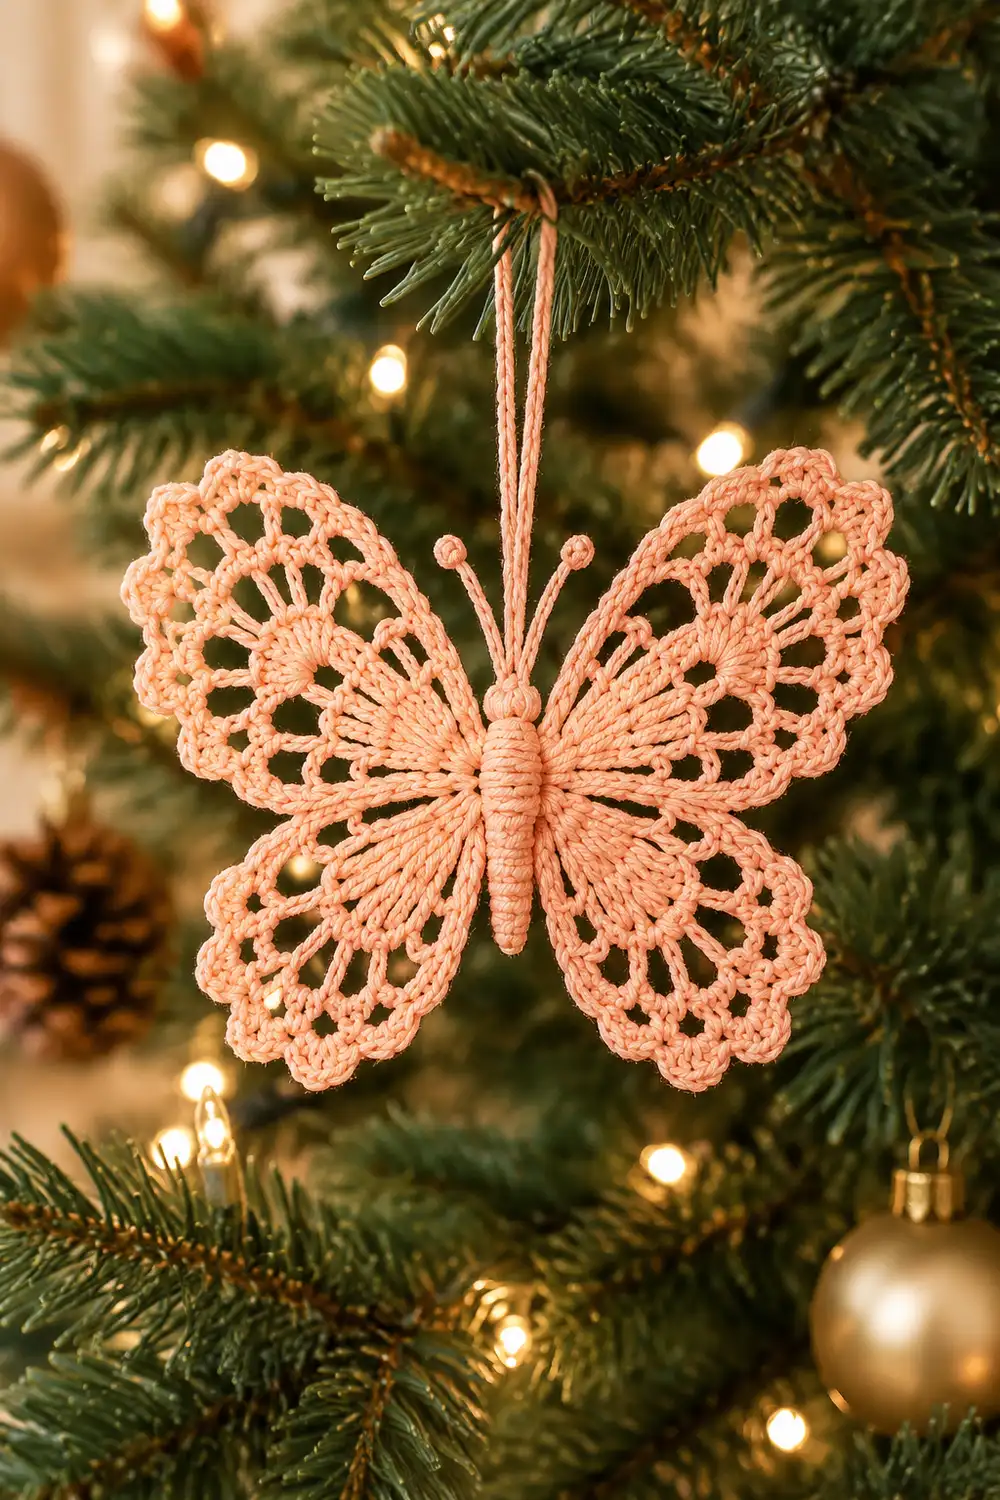
This lacy butterfly ornament has four openwork wings and a solid, ridged body. Each wing is built from fan clusters that radiate out from the body and end in a soft scalloped edge. Hung on an evergreen branch with warm lights behind it, the lace catches the glow and the butterfly looks like it has just landed.
The sample is worked in a peachy-coral cotton. Any soft blush, apricot, or coral shade gives the same warm look. Mercerized cotton shows the lace best because each stitch stays crisp.
The pattern uses US crochet terms. The finished butterfly measures 3 1/2 in (8.9 cm) across the wings and 2 3/4 in (7.0 cm) tall after blocking.
The butterfly is one continuous piece. You crochet a small solid body strip first. Then you work each of the four wings directly off the long edges of the body, with no sewing. A scalloped edging finishes each wing, and a chain loop at the head turns the motif into an ornament.
Finished Size and Construction
- Finished size: 3 1/2 in (8.9 cm) wingspan × 2 3/4 in (7.0 cm) tall, blocked
- Skill level: Intermediate (lace rows, working into free loops of a foundation chain)
- Terminology: US crochet terms
- Yarn weight: Fingering / Size 3 cotton crochet thread
- Hook: 2.25 mm (US B-1)
- Number of pieces: 1 (body and four wings worked as one piece)
- Layout: 2 upper wings and 2 lower wings, mirrored on either side of the body
- Body size: 2 in (5.1 cm) long × 1/2 in (1.3 cm) wide
- Size before border: 2 3/4 in (7.0 cm) wingspan
- Border depth: 3/8 in (1.0 cm) scallop added to the outer edge of each wing
Materials
Yarn advice: Choose a smooth, mercerized cotton in fingering weight or Size 3 crochet thread. Avoid fuzzy or highly elastic yarns. They blur the holes and will not hold a starched shape.
- Peach / coral: 6 g, about 20 m (22 yd)
This quantity includes a margin of about 50% for the gauge swatch and weaving in ends.
Tools:
– 2.25 mm (US B-1) crochet hook
– Tapestry needle
– Small scissors
– 2 stitch markers
– Rustproof pins and a foam blocking board
– Spray starch or fabric stiffener (recommended for a dimensional ornament)
Abbreviations (US Terms)
- ch – chain
- sl st – slip stitch
- sc – single crochet
- dc – double crochet
- BLO – back loop only
- st(s) – stitch(es)
- sp(s) – space(s)
- RS – right side
Special stitches:
– Fan: 5 dc worked into the same ch-sp.
– Shell: 7 dc worked into the same st. This is the scallop stitch.
Gauge and Checkpoints
Gauge: 7 sc and 8 rows = 1 in (2.5 cm) in sc.
You do not need a separate swatch, because the body acts as your gauge test. Make the body first and measure it before you start any wing.
Checkpoint 1 – Body: 2 in (5.1 cm) long × 1/2 in (1.3 cm) wide.
Checkpoint 2 – After Row 3 of the first upper wing: The wing reaches 1 1/8 in (2.9 cm) out from the body edge when gently flattened.
Checkpoint 3 – After the scalloped border on that wing: The wing reaches 1 1/2 in (3.8 cm) out from the body edge.
Checkpoint 4 – Finished, blocked: 3 1/2 in (8.9 cm) wingspan.
Unblocked lace usually measures about 1/4 in (0.6 cm) smaller than these blocked targets. That is normal.
If your body is too long: go down to a 2.0 mm hook.
If your body is too short: go up to a 2.5 mm hook.
Re-check the body before continuing. Every wing measurement depends on it.
Body
The body is a solid strip worked lengthwise. Working in the back loop gives it fine ridges and a firm, compact feel.
Ch 15.
Row 1 (RS): Sc in 2nd ch from hook and in each ch across. Turn. (14 sc)
Row 2: Ch 1 (does not count as a st), sc in BLO of each st across. Turn. (14 sc)
Rows 3–4: Repeat Row 2. (14 sc each row)
Fasten off and weave in ends. Check against Checkpoint 1.
Mark the head end: Choose one short end as the head and place a stitch marker there. On both long edges, count stitches starting from the head end:
– Edge A is the top of Row 4 (14 sts).
– Edge B is the free loops of the foundation chain (14 loops).
Each edge is divided the same way:
– Sts 1–8 carry the upper wing.
– St 9 is skipped to make a small notch between the wings.
– Sts 10–14 carry the lower wing.
Upper Wing (make 2: one on Edge A, one on Edge B)
Each wing is worked in turned rows outward from the body. Every row is longer than the one before, so the wing fans open as it grows.
Row 1: With RS facing, join yarn with a sl st in st 1 of the edge. Ch 5 (counts as dc + ch 2). [Dc in next st, ch 2] 6 times. Dc in next st (st 8). Turn. (8 dc, 7 ch-2 sps)
Row 2: Ch 1, sc in first dc. [Ch 4, sc in next dc] 7 times, working the last sc into the 3rd ch of the beginning ch-5. Turn. (8 sc, 7 ch-4 loops)
Row 3: Sl st in first sc and into the first ch-4 loop. Ch 3 (counts as dc), 4 dc in same loop to complete the first fan. [Ch 1, fan in next ch-4 loop] 6 times. Turn. (7 fans = 35 dc, 6 ch-1 sps)
Do not fasten off. The scalloped border (see Border) is worked as Row 4 of this wing.
The holes come from the ch-2 spokes in Row 1 and the ch-4 loops in Row 2. The solid fans in Row 3 are the radiating clusters.
Lower Wing (make 2: one on Edge A, one on Edge B)
Row 1: With RS facing, skip st 9. Join yarn with a sl st in st 10. Ch 5 (counts as dc + ch 2). [Dc in next st, ch 2] 3 times. Dc in next st (st 14). Turn. (5 dc, 4 ch-2 sps)
Row 2: Ch 1, sc in first dc. [Ch 4, sc in next dc] 4 times, working the last sc into the 3rd ch of the beginning ch-5. Turn. (5 sc, 4 ch-4 loops)
Row 3: Sl st in first sc and into the first ch-4 loop. Ch 3 (counts as dc), 4 dc in same loop. [Ch 1, fan in next ch-4 loop] 3 times. Turn. (4 fans = 20 dc, 3 ch-1 sps)
Do not fasten off. Continue with the border.
Working order: Upper Wing A, Lower Wing A, Upper Wing B, Lower Wing B. Working all four wings in the same direction from the head keeps them mirrored. Measure Upper Wing A against Checkpoint 2 before continuing.
Border: Scalloped Wing Edge
The border is Row 4 of each wing. It places one 7-dc shell on the center dc of each fan, which creates the gently scalloped outer edge.
Border gauge: 1 shell repeat (one shell plus its anchoring sc) = about 1/4 in (0.6 cm) along the outer edge. The border adds 3/8 in (1.0 cm) of depth to each wing.
Upper Wing, Row 4
Ch 1, sc in first dc.
[Skip 1 dc, shell in next dc, skip 1 dc, sc in next dc, sc in ch-1 sp, sc in next dc] 6 times.
Skip 1 dc, shell in next dc, skip 1 dc, sc in top of beginning ch-3.
Fasten off.
Count: 7 shells (49 dc) and 20 sc (1 + 6 × 3 + 1).
Outer edge length: 7 × 1/4 in = 1 3/4 in (4.4 cm).
Lower Wing, Row 4
Ch 1, sc in first dc.
[Skip 1 dc, shell in next dc, skip 1 dc, sc in next dc, sc in ch-1 sp, sc in next dc] 3 times.
Skip 1 dc, shell in next dc, skip 1 dc, sc in top of beginning ch-3.
Fasten off.
Count: 4 shells (28 dc) and 11 sc (1 + 3 × 3 + 1).
Outer edge length: 4 × 1/4 in = 1 in (2.5 cm).
Why the Math Works
Each fan has 5 dc, and the border uses every one of them:
– 1st dc: sc
– 2nd dc: skipped
– 3rd (center) dc: shell
– 4th dc: skipped
– 5th dc: sc
The ch-1 sp between fans takes one more sc. Every repeat therefore lands on a fan center, and the row always ends on the turning chain.
The counts chain together cleanly:
– Body sts per wing (8 or 5)
– minus 1 = ch-4 loops (7 or 4)
– = fans (7 or 4)
– = shells (7 or 4)
If you change the body length, the shell count adjusts automatically. Measure against Checkpoint 3.
Hanging Loop
- Join yarn with a sl st in the row-end space between Rows 2 and 3 at the marked head end of the body.
- Ch 32. The chain should measure about 4 in (10.2 cm).
- Sl st into the same row-end space to close the loop.
- Fasten off and weave in ends securely through the solid body. The body holds ends invisibly.
The finished loop hangs about 2 in (5.1 cm) above the body.
Final Blocking
- Weave in all remaining ends through the body or along the solid fans, never through the open loops.
- Soak the butterfly in cool water for 5 minutes. Press out the water in a towel; do not wring.
- Lay it RS up on the foam board. Pin the body straight at 2 in (5.1 cm) long.
- Pin each wing tip outward until the wingspan measures 3 1/2 in (8.9 cm) and the height measures 2 3/4 in (7.0 cm).
- Put one pin in the center of every shell to open the scallops. Open the ch-4 loops with your fingertip so the holes are round.
- Spray with starch or brush on fabric stiffener. Let it dry until just damp.
- For a dimensional ornament, unpin the wings. Lift them slightly so they form a shallow V along the body, about 3/4 in (1.9 cm) higher at the tips than at the body. Prop with folded paper towels until fully dry.
- Hang it by the loop and check that it hangs level. Re-mist and adjust if one side droops.
Final Quality-Control Checklist
- [ ] Body: 14 sc × 4 rows, 2 in (5.1 cm) × 1/2 in (1.3 cm)
- [ ] Each upper wing: 8 dc, 7 loops, 7 fans, 7 shells
- [ ] Each lower wing: 5 dc, 4 loops, 4 fans, 4 shells
- [ ] One skipped st (st 9) between the upper and lower wing on each edge
- [ ] Wings on Edge A and Edge B mirror each other
- [ ] Wingspan 3 1/2 in (8.9 cm); height 2 3/4 in (7.0 cm)
- [ ] Hanging loop secure at the head end, about 2 in (5.1 cm) drop
- [ ] All ends hidden in solid areas
- [ ] Butterfly hangs level, with wings slightly lifted
Troubleshooting
Wings ruffle or wave: The shells are too loose, or the hook is too large. Go down 0.25 mm and rework Row 4.
Wings cup forward: The ch-4 loops are too tight. Chain more loosely or make each loop ch 5. The fan count does not change.
Body curls lengthwise: BLO rows often curl a little. Blocking flattens them. If the curl is strong, work the body with a 2.0 mm hook.
Upper and lower wings overlap: Check that you skipped st 9 on that edge.
Last shell has nowhere to go: You probably missed a fan in Row 3. Count fans (7 upper, 4 lower) before starting the border.
Ornament tilts on the tree: The loop is off-center. Re-attach it at the middle row-end space of the head.
Care
Hand wash in cool water with mild soap, press dry in a towel, and re-pin to shape. Re-starch after washing to restore the dimensional wings.
Final Notes
The measurement chain is short and reliable:
1. The body sets the gauge at 2 in (5.1 cm) × 1/2 in (1.3 cm).
2. Rows 1–3 bring each wing out 1 1/8 in (2.9 cm), for a 2 3/4 in (7.0 cm) span before the border.
3. The scalloped border adds 3/8 in (1.0 cm) per wing.
4. Blocking gives a final wingspan of 3 1/2 in (8.9 cm).
Check the body first and count your fans before each border. The shells will then fall into place on every wing.
Optional: For a fuller tree, repeat the same single motif in several shades of peach and coral.
Happy crocheting!