

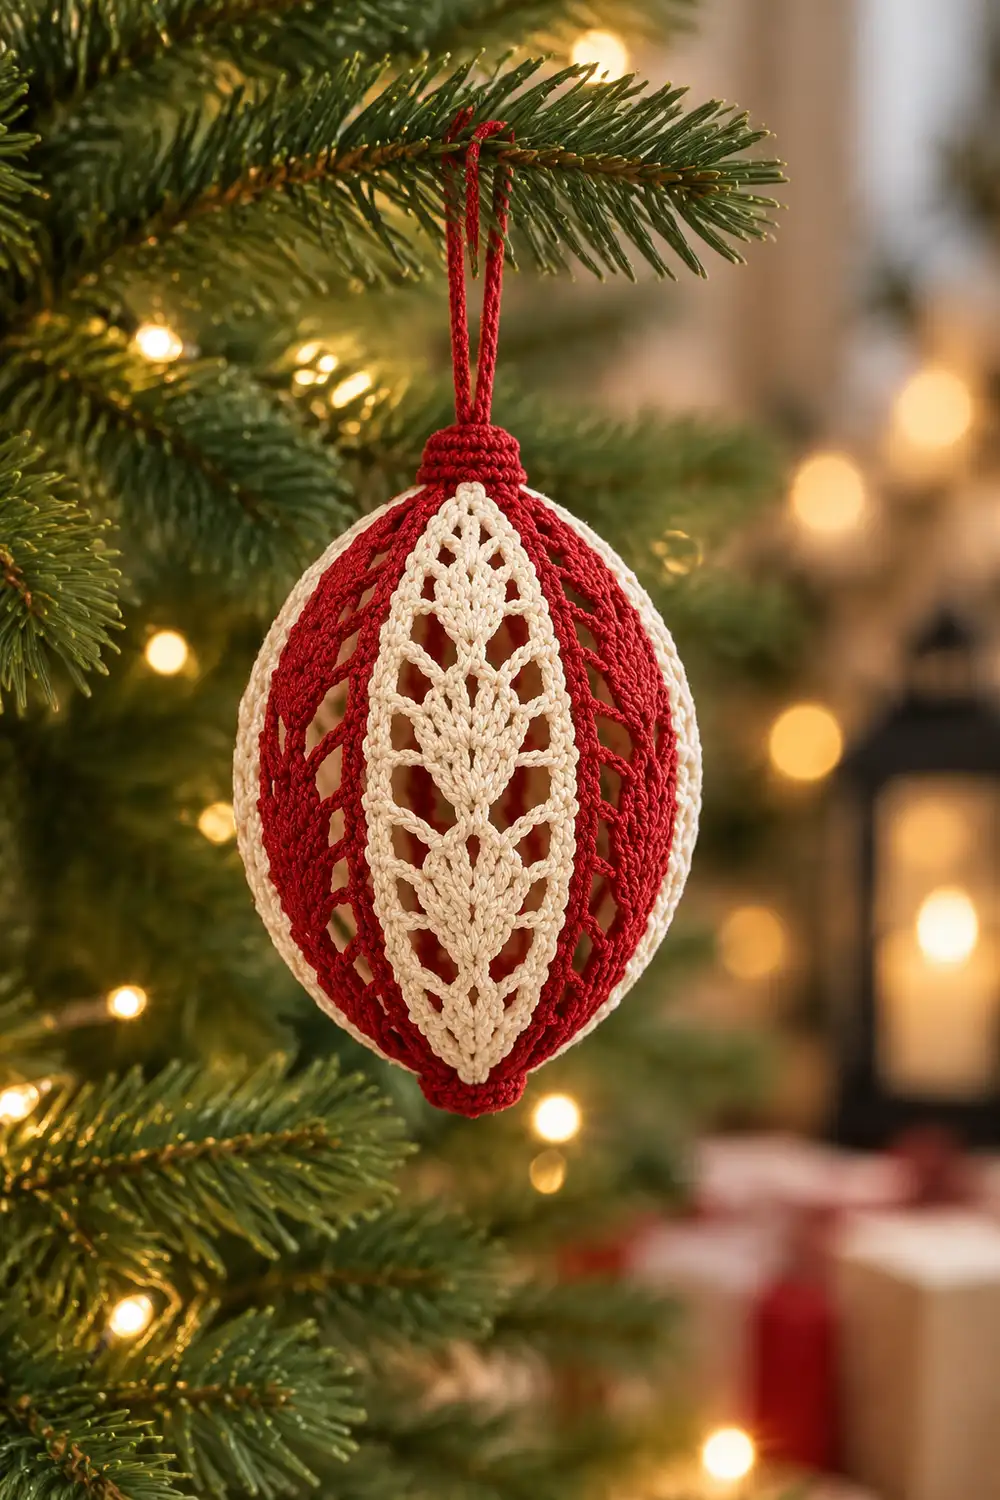
This ornament is a small, three-dimensional oval ball covered in vertical stripes of deep red and cream. Each stripe carries the same lacy leaf motif: stacked shells flanked by open chain “veins,” tapering to a point at each pole. The cream stripes show the leaf shapes most clearly. The red stripes repeat the identical lace in the darker color.
The style is classic heirloom Christmas: crisp mercerized cotton, a solid red cap at the top, and a wrapped red hanging loop. It looks delicate on the tree, but the structure is simple once you see how one half works.
This pattern uses US crochet terms. The finished ornament measures 3 in (7.6 cm) in diameter at the widest point and about 3.5 in (8.9 cm) tall, not counting the hanging loop.
The ornament is made of two identical halves. Each half starts at a pole with a small red cap and is then worked in joined, turned rounds with six color segments (red, cream, red, cream, red, cream). The two halves are whipstitched together at the equator with stripes aligned, so each leaf runs pole to pole. A color-matched surface trim covers the center seam, and a starch blocking sets the oval shape.
Finished Size and Construction
- Finished size: 3 in (7.6 cm) diameter, 3.5 in (8.9 cm) tall
- Skill level: Intermediate (intarsia color changes in turned rounds)
- Terminology: US crochet terms
- Yarn weight: Super fine (#1), size 3 mercerized cotton thread
- Hook: 2.25 mm (US B-1)
- Number of pieces: 2 (top half and bottom half)
- Layout: Top half over bottom half, joined at the equator, segments matched color to color
- Piece size: Each half is 3 in (7.6 cm) across the opening and 2.4 in (6.1 cm) deep, measured along the curve from pole to edge
- Size before border: 3 in (7.6 cm) diameter, 3.5 in (8.9 cm) tall
- Border depth: The surface trim adds no width; it forms a ridge about 0.1 in (0.3 cm) high
Materials
Use a smooth, mercerized cotton thread in size 3 (about 170 m per 50 g). Cotton holds starch well and shows lace clearly. Avoid fuzzy or very stretchy fibers, since the leaves will blur and the ball will sag.
- Deep red: 10 g, about 34 m (37 yd)
- Cream/off-white: 8 g, about 27 m (30 yd)
These quantities include a margin for bobbin tails and gauge swatching.
Tools:
– 2.25 mm (US B-1) crochet hook
– Tapestry needle
– Scissors
– 6 small bobbins or clips per half (optional but helpful)
– Stitch marker
– Fabric stiffener or starch
– A small balloon, or a 3 in (7.6 cm) shatterproof ball to leave inside (optional)
Abbreviations (US Terms)
- ch – chain
- sl st – slip stitch
- sc – single crochet
- dc – double crochet
- sp – space
- st(s) – stitch(es)
- MR – magic ring
- Rnd – round
- RS / WS – right side / wrong side
Special stitches:
– V-st: (dc, ch 1, dc) in the same st.
– Small shell: (2 dc, ch 1, 2 dc) in the same sp.
– Shell: (3 dc, ch 1, 3 dc) in the same sp.
Counting rule: Every ch 1 inside a segment counts as 1 st in the totals. The ch 1 at the start of a round never counts.
Gauge and Checkpoints
Gauge: 14 sc = 2 in (5.1 cm). One dc round is about 0.3 in (0.8 cm) tall.
Make one complete half before cutting bobbins for the second. It doubles as your gauge test.
Checkpoints:
– After Rnd 3: the red cap measures 0.8 in (2.0 cm) across.
– After Rnd 7: the opening measures 9.4 in (23.9 cm) around, about 3 in (7.6 cm) across.
– After Rnd 10: the half is 2.4 in (6.1 cm) deep along the curve, and each segment is 1.6 in (4.1 cm) wide at the edge.
A tolerance of 0.25 in (0.6 cm) is fine. If the half is too big, go down to a 2.0 mm hook. If it is too small, go up to a 2.5 mm hook. Stitch counts stay the same.
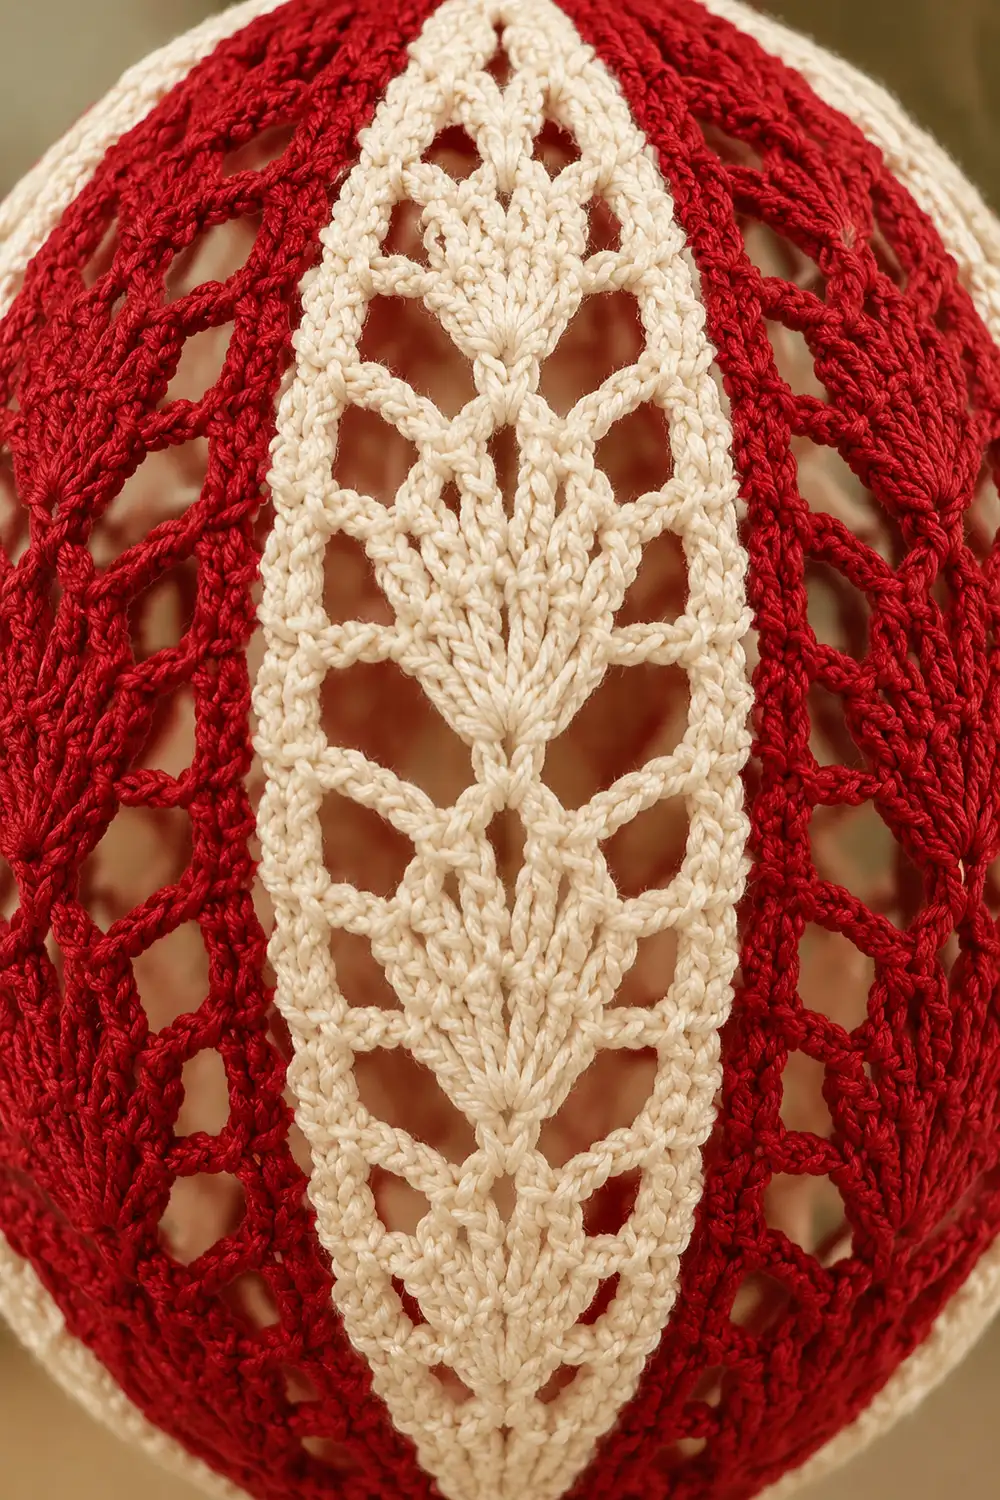
Pattern: Ornament Half (Make 2)
Color Changes
On the last sc of each segment, work until 2 loops remain. Drop the old strand to the inside of the cup, bring the new color up from under it, then yarn over and pull through. Working under the old strand twists the yarns and closes the gap. Keep all strands on the inside of the cup. On WS rounds, that is the side facing you.
Each segment keeps its own strand. Because the rounds are turned, each strand is waiting at the right spot when you return to it.
Red Cap (joined rounds, not turned)
Rnd 1: With red, MR, ch 1, 6 sc in ring. Join with sl st to first sc. (6 sts)
Rnd 2: Ch 1, 2 sc in each st around. Join. (12 sts)
Rnd 3: Ch 1, sc in next st, 2 sc in next st; repeat from * 5 more times. Join. (18 sts)
Check: 0.8 in (2.0 cm) across. Each segment now sits over 3 sc.
Striped Lace (joined, turned rounds)
Rnd 4 (RS): Ch 1, do not turn. Work 6 segments, alternating red (continue the cap strand) and cream (attach new strands):
Sc in next st, V-st in next st, sc in next st. Change color on that last sc.
Segment order: red, cream, red, cream, red, cream. Each segment has 5 sts. Join with sl st to first sc using the current (cream) strand. Turn. (30 sts)
From here on: Ch 1 at the start of each round (does not count). The first st you work into is the last st of the previous round. The st holding the join is worked last. Join with sl st to first sc using the current strand, then turn. Odd rounds run segments 6 to 1; even rounds run 1 to 6.
Rnd 5 (WS): In each segment: sc in sc, skip dc, small shell in ch-1 sp, skip dc, sc in sc. (7 sts per segment, 42 sts)
Rnd 6 (RS): In each segment: sc in sc, skip 2 dc, shell in ch-1 sp, skip 2 dc, sc in sc. (9 sts per segment, 54 sts)
Rnd 7 (WS): In each segment: sc in sc, ch 1, skip 3 dc, shell in ch-1 sp, ch 1, skip 3 dc, sc in sc. (11 sts per segment, 66 sts)
Check: the opening is 9.4 in (23.9 cm) around.
Rnd 8 (RS): In each segment: sc in sc, ch 1, skip ch-1 sp and 3 dc, shell in center ch-1 sp, ch 1, skip 3 dc and ch-1 sp, sc in sc. (11 sts per segment, 66 sts)
Rnd 9 (WS): Repeat Rnd 8. (11 sts per segment, 66 sts)
Rnds 8 and 9 add no stitches, so the sides curve down instead of flaring out.
Rnd 10 (RS, edge round): This is a conversion round with no increases. In each segment, work 1 sc into each existing st and ch-1 sp. That is 11 sts worked into, giving 11 sc + 0 extra = 11 sc per segment. Join. (66 sc)
Fasten off:
– Top half: Cut each of the 6 strands with a 12 in (30.5 cm) tail. You will use these for joining.
– Bottom half: Cut each strand short and weave it in along its own segment’s edge sc column.
Check: the half is 2.4 in (6.1 cm) deep and each segment is 1.6 in (4.1 cm) wide.
Make All Pieces
Make 2 identical halves. For each half you need:
- Red: 1 strand from the ball (cap plus segment 1), plus 2 bobbins of 3.5 m (3.8 yd) each
- Cream: 3 bobbins of 3.5 m (3.8 yd) each
Segment layout (Rnds 4–10), viewed from the RS:
TOP HALF: RED CREAM RED CREAM RED CREAM
BOTTOM HALF: RED CREAM RED CREAM RED CREAM
Both caps are solid red. When joined, each top segment sits directly over the bottom segment of the same color, so each stripe runs unbroken from pole to pole.
Joining
Method: Whipstitch with matching colors.
- Hold the halves with WS together and the edges (Rnd 10) touching. Line up the round-join columns, then confirm every red segment meets a red segment and every cream segment meets a cream segment.
- Thread the top half’s tail for one segment. Whipstitch through both loops of the top half’s edge sc and the matching bottom half’s edge sc.
- Work 1 whipstitch per stitch pair, which is 11 whipstitches per segment. Fasten off and weave the tail into the same color.
- Repeat for 5 of the 6 segments.
- Before closing the last segment, insert a deflated balloon with its neck poking out through a lace space near the bottom pole. Alternatively, insert a 3 in (7.6 cm) shatterproof ball.
- Close the final segment.
The stitch logic is 66 sts on each half, joined 1-to-1, giving 66 whipstitches with nothing skipped or doubled.
Tension: Pull each whipstitch snug enough that the edges meet, but not so tight that the seam puckers. The seam should stretch as much as the lace does.
Checkpoint: The equator measures 9.4 in (23.9 cm) around, or 3 in (7.6 cm) across.
Border
The border is a color-matched surface slip-stitch trim along the center seam. It hides the whipstitches and keeps the stripes continuous.
Border gauge: 7 sts per 1 in (2.5 cm), the same as the edge round. It is not worked tighter or looser.
Trim round:
1. Cut 6 lengths of 16 in (40.6 cm): 3 red and 3 cream.
2. Start at the right edge of a segment. Hold its matching color inside the ball and work 1 surface sl st into the seam under each whipstitched stitch pair.
3. Work 11 surface sl sts per segment. Fasten off, then start the next segment in its own color.
That gives 6 segments × 11 = 66 surface sl sts.
Why the math works: Each half ends with exactly 66 edge sc, joined 1-to-1 into 66 pairs. The trim places 1 st per pair, so it equals the seam circumference of 9.4 in (23.9 cm). Because there are no extra or skipped stitches, the trim lies flat without rippling or cinching.
Hanging loop and pole finish:
1. At the top pole, attach red at the MR center and ch 30, about 4 in (10.2 cm).
2. Sl st back into the MR center to form a 2 in (5.1 cm) folded loop.
3. Wrap the red yarn 10 times around the loop base to make a 0.4 in (1.0 cm) cap. Secure it with the needle and bury the tail inside.
4. At the bottom pole, pull the MR tail tight and weave it in.
Final Blocking
- Mix the fabric stiffener per its label, or use heavy starch.
- Dip the ornament briefly and press out the excess with a towel. Do not wring it.
- Inflate the balloon through its neck until the ball is 3 in (7.6 cm) across, then tie it off. If you used a plastic ball, skip this step.
- Nudge the shape into a gentle oval, 3.5 in (8.9 cm) tall.
- Straighten each segment so the edge sc columns run straight from pole to pole.
- Open each shell and ch-1 space with a toothpick so the leaves read clearly.
- Hang the ornament by its loop and let it dry for 24 hours.
- Pop the balloon and pull it out gently through a lace space.
Final Quality-Control Checklist
- Diameter is 3 in (7.6 cm) and height is 3.5 in (8.9 cm).
- Each half has 66 edge sts and 11 sts per segment.
- Stripes alternate red and cream all the way around, 3 of each.
- Top and bottom segments line up color to color at the seam.
- There are no gaps at color boundaries.
- The surface trim has 11 sts per segment, all color-matched.
- The hanging loop is secure, and the wrapped cap is neat.
- All tails are woven into their matching color.
Troubleshooting
Holes at color changes: Always pick up the new strand from under the old one so the yarns twist.
Bobbins tangling: Turning the work reverses the direction of the twist each round. Untwist the strands at the end of every round.
Half is too flat or flares: Check that Rnds 8 and 9 have no added stitches. If your counts are correct, try a hook 0.25 mm smaller.
Half is too pointed or deep: Your dc may be tall. Go up a hook size, or work slightly shorter dc.
Stripes won’t line up at the seam: Count 11 sts per segment on both halves. A miscount usually comes from treating the starting ch 1 as a stitch.
Seam puckers: Remove the trim, loosen the whipstitches, and redo the trim at a relaxed tension.
Leaves look blurry: Re-block with fresh starch and open each space while the ornament is damp.
Care
Spot clean only with cool water, then reshape and re-stiffen if needed. Store flat in a box so the ornament keeps its shape.
Final Notes
The measurement chain is short and checkable. The cap is 0.8 in (2.0 cm) across at Rnd 3. The opening reaches 9.4 in (23.9 cm) at Rnd 7. Each finished half is 2.4 in (6.1 cm) deep with 66 edge sts. Joining 66 to 66 gives a 3 in (7.6 cm) ball, and the 66-stitch trim keeps that circumference exactly. Blocking sets the final 3.5 in (8.9 cm) oval.
Optional: make several in different color pairs for a matching tree set.
Happy crocheting!