

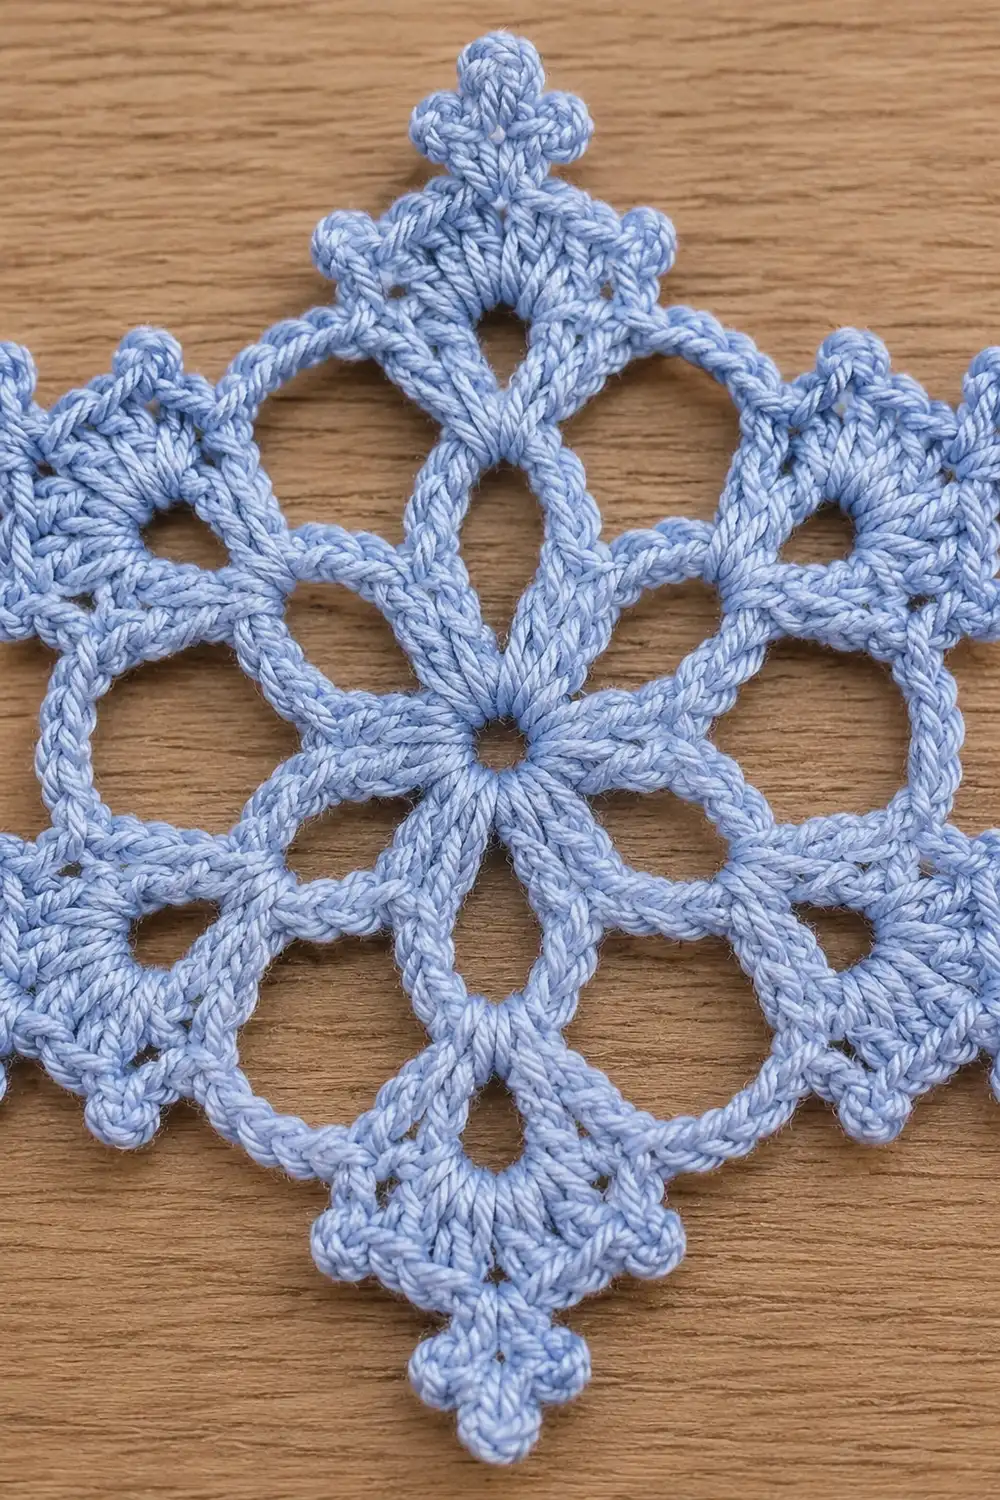
The Periwinkle Frost Snowflake is a single six-pointed lace motif worked in soft light periwinkle blue. It has a solid medallion of dense clusters at the center. Six treble-stitch spokes radiate from it, and each point ends in a small picot.
Between the points, open chain loops frame little windows of space. Small popcorn bobbles sit in the valleys between the points, giving the edge a crisp, dimensional, crystalline look. It is a classic festive snowflake silhouette that lies flat after blocking.
This pattern uses US crochet terms throughout. The finished snowflake measures about 3.5 in (8.9 cm) from point to point and about 3 in (7.6 cm) from flat edge to flat edge after blocking.
Construction is simple. You work one piece in the round, in four rounds, from a magic ring outward. Rounds 1 and 2 form the cluster medallion. Round 3 sets up six treble V-stitch spokes with chain spaces between them. Round 4 is the edging round: it builds the treble fans, picot tips, chain loops, and popcorns. There is no sewing and no joining of separate pieces.
Finished Size and Construction
- Finished size: 3.5 in (8.9 cm) point to point; 3 in (7.6 cm) flat edge to flat edge
- Skill level: Advanced beginner to intermediate
- Terminology: US crochet terms
- Yarn weight: Size 3 crochet thread (Weight 1, super fine cotton)
- Hook: 2.25 mm (US B-1)
- Number of pieces: 1
- Layout: Single motif, worked in joined rounds
- Piece size: 3.5 in (8.9 cm) point to point
- Size before border (after Round 3): 2.25 in (5.7 cm) V-tip to V-tip
- Border depth (Round 4): about 0.625 in (1.6 cm) added at each point
Materials
Yarn advice: Use a smooth, tightly twisted mercerized cotton thread. Cotton holds its shape after starching and shows off picots and popcorns clearly. Avoid fuzzy or very soft acrylics, because they blur the lace and do not block crisply.
Color:
- Light periwinkle blue: 5 g (approximately 16 m / 17.5 yd)
The snowflake itself uses about 3 g. The quantity above includes a margin for your gauge swatch, weaving in ends, and one restart if needed.
Tools:
- 2.25 mm (US B-1) crochet hook
- Small tapestry needle
- Sharp scissors
- 1 stitch marker
- Blocking mat or foam board
- Rust-proof pins (at least 12)
- Spray starch or fabric stiffener
- Ruler or tape measure in inches and cm
Abbreviations (US Terms)
- MR: magic ring
- ch: chain
- sl st: slip stitch
- sc: single crochet
- dc: double crochet
- tr: treble crochet
- sp: space
- st(s): stitch(es)
- rep: repeat
Special stitches:
- Beginning cluster (beg-cl): Ch 2. (Yo, insert hook in same st, pull up a loop, yo, pull through 2 loops) twice. Yo and pull through all 3 loops on hook.
- 3-dc cluster (cl): (Yo, insert hook in st, pull up a loop, yo, pull through 2 loops) 3 times in the same st. Yo and pull through all 4 loops on hook.
- V-stitch (V): (Tr, ch 2, tr) in the same sp.
- Picot: Ch 3, sl st in 3rd ch from hook.
- 4-dc popcorn (pc): Work 4 dc in the same st. Remove hook from the loop. Insert hook from front to back into the top of the first dc of the group. Pick up the dropped loop and pull it through. Ch 1 to close.
Gauge and Checkpoints
Lace is forgiving in shape but not in size. Make the full motif once as your test piece and measure at each stage below.
Gauge: Rounds 1–2 = 1.25 in (3.2 cm) across, measured flat and unstretched.
Checkpoints:
- After Round 1: about 0.75 in (1.9 cm) across
- After Round 2: 1.25 in (3.2 cm) across
- After Round 3: 2.25 in (5.7 cm) from V-tip to opposite V-tip
- After Round 4, before blocking: about 3.25 in (8.3 cm) point to point
- After blocking: 3.5 in (8.9 cm) point to point
If your piece is too big: Go down to a 2.0 mm hook, or tighten your tension on the yo for the tall stitches.
If your piece is too small: Go up to a 2.5 mm hook. Also make sure you pull the first loop of each tr up to full height.
A finished size anywhere between 3 in (7.6 cm) and 4 in (10.2 cm) still matches the design. Measure first and adjust only if you are outside that range.
Pattern
Round 1 – Center Ring
Make a MR.
Ch 3 (counts as first dc). Work 11 dc into the ring. Pull the ring closed tightly. Join with a sl st to the top of the beginning ch-3.
Stitch count: 12 dc.
Check that the ring is fully closed with no hole in the center. The piece should measure about 0.75 in (1.9 cm) across.
Round 2 – Cluster Medallion
Work beg-cl in the same st as the join. Ch 2. Cl in next dc, ch 2. Rep from * to * 10 more times. Join with a sl st to the top of the beg-cl.
Stitch count: 12 clusters (1 worked into each of the 12 existing dc) + 12 ch-2 sps.
This is a conversion round. You do not add stitches to the base. Each dc becomes a cluster, with a chain space between clusters. The result is a dense, solid medallion. It should measure 1.25 in (3.2 cm) across.
Place a stitch marker in the joining sl st if you find the clusters hard to count. You need all 12 ch-2 sps for the next round.
Round 3 – Treble Spokes and Chain Spaces
Sl st into the next ch-2 sp.
Ch 4 (counts as first tr), ch 2, tr in the same sp. This is the first V-stitch.
Ch 3, sc in the next ch-2 sp, ch 3.
V in next ch-2 sp, ch 3, sc in next ch-2 sp, ch 3. Rep from * to * 4 more times. Join with a sl st to the 4th ch of the beginning ch-4.
Stitch count: 6 V-stitches (12 tr and 6 ch-2 sps) + 6 sc + 12 ch-3 sps.
The 12 ch-2 sps from Round 2 alternate: 6 receive a V-stitch and 6 receive a sc. Each V-stitch becomes the base of a point. Each sc becomes the base of a valley. The ch-3 sps on either side of each sc create the open windows around the medallion.
Checkpoint: 2.25 in (5.7 cm) from V-tip to opposite V-tip. Lay it flat. All six spokes should look the same length.
Round 4 – Points, Picots, Loops and Popcorns (Border)
This round is the border. It builds every visible edge detail in one pass. See the Border section below for the full per-side breakdown, gauge, and math.
Sl st into the next tr, then sl st into the ch-2 sp of the first V.
Ch 4 (counts as first tr). Work 2 tr in the same sp. Picot. Work 3 tr in the same sp. This completes the first point.
Ch 4. Skip the ch-3 sp. Pc in the next sc. Ch 4. Skip the next ch-3 sp.
In the ch-2 sp of the next V: 3 tr, picot, 3 tr. Ch 4. Skip the ch-3 sp. Pc in the next sc. Ch 4. Skip the next ch-3 sp. Rep from * to * 4 more times.
Join with a sl st to the 4th ch of the beginning ch-4. Fasten off, leaving a 6 in (15.2 cm) tail.
Stitch count: 36 tr + 6 picots + 6 popcorns + 12 ch-4 loops.
Border
Round 4 is the border round. On a hexagonal motif, one “side” means one point plus one valley. There are 6 identical sides.
Border gauge: One tr in this thread and hook stands about 0.4 in (1.0 cm) tall. A 3-tr fan topped by a picot extends about 0.625 in (1.6 cm) beyond the Round 3 V-tip.
Per side (exact counts):
- 3 tr into the V’s ch-2 sp
- 1 picot (tip of the point)
- 3 tr into the same ch-2 sp
- 1 ch-4 loop
- 1 popcorn, worked in the Round 3 sc
- 1 ch-4 loop
So each side holds 6 tr, 1 picot, 1 popcorn, and 2 ch-4 loops.
Totals across 6 sides:
- 6 tr × 6 sides = 36 tr
- 1 picot × 6 = 6 picots
- 1 popcorn × 6 = 6 popcorns
- 2 loops × 6 = 12 ch-4 loops
Why the math works: Round 1 has 12 dc. Round 2 turns each into a cluster, giving 12 ch-2 sps. Since 12 divides evenly by 2, the spaces split cleanly into 6 V-stitch bases and 6 sc bases in Round 3. Round 4 then places one point on each V and one popcorn on each sc. This gives exactly six points and six valleys with perfect six-fold symmetry.
The ch-4 loops work for a clear reason. Each one spans a Round 3 ch-3 sp, so it is slightly longer than the space it bridges. That extra chain lets the loop arch gently and lie flat instead of pulling the points inward. The fan’s 6 tr sharing one ch-2 sp splay outward, and that splay is what forms the pointed tip.
Final Blocking
- Weave in both ends before blocking. Work the tails through the backs of the clusters and tr, not through the chain loops, where they would show.
- Lay the snowflake right side up on your blocking mat.
- Pin through the picot at the tip of each of the six points. Measure point to opposite point and adjust until each pair measures 3.5 in (8.9 cm).
- Pin each popcorn valley so all six valleys sit evenly. Flat edge to flat edge should measure 3 in (7.6 cm).
- Gently open each ch-4 loop into a smooth arch with a pin tip. Push each popcorn up so it stands out.
- Spray evenly with starch, or brush on fabric stiffener, until the thread is damp all the way through.
- Let it dry completely, at least 6 hours or overnight.
- Remove the pins and check that the shape holds. If a point droops, re-dampen it, pin it, and dry it again.
Final Quality-Control Checklist
- Center ring is fully closed, with no hole
- Round 2 has 12 clusters and 12 ch-2 sps
- Round 3 has 6 V-stitches and 6 sc
- Round 4 has 36 tr, 6 picots, 6 popcorns, and 12 ch-4 loops
- All six points are the same length
- All six popcorns pop to the front (right side)
- Chain loops arch smoothly, with none twisted or pulled tight
- Blocked size is 3.5 in (8.9 cm) point to point and 3 in (7.6 cm) flat to flat
- Ends are woven in securely and invisible from the front
- The motif lies flat with no cupping or ruffling
Troubleshooting
The center cups upward: Your Round 2 ch-2 sps are too tight. Loosen your chains slightly, or go up 0.25 mm in hook size for Rounds 1–2 only.
The edge ruffles: Your ch-4 loops are too long or too loose. Tighten your chain tension, or try ch 3 loops instead and block firmly.
The points look rounded instead of sharp: Make sure all 6 tr and the picot go into the same ch-2 sp. Pin the picot firmly outward when blocking.
Popcorns sink to the back: Close each popcorn by inserting the hook from front to back into the first dc. Always work with the right side facing you.
A space count is off in Round 3: Count your Round 2 sps before starting. If you have 11 or 13, frog Round 2 and redo it with 12 clusters.
Starch leaves white flakes: Use less spray in light layers, or dilute the stiffener and let it soak in fully.
Care
Hand wash gently in cool water with mild soap and reshape while damp. Re-starch and pin to dry whenever the snowflake needs crisping.
Final Notes
The measurement chain is short and easy to track:
- 12 dc ring at 0.75 in (1.9 cm)
- 12-cluster medallion at 1.25 in (3.2 cm)
- 6 treble spokes at 2.25 in (5.7 cm)
- Final border round reaching about 3.25 in (8.3 cm)
- Blocked to 3.5 in (8.9 cm) point to point and 3 in (7.6 cm) flat to flat
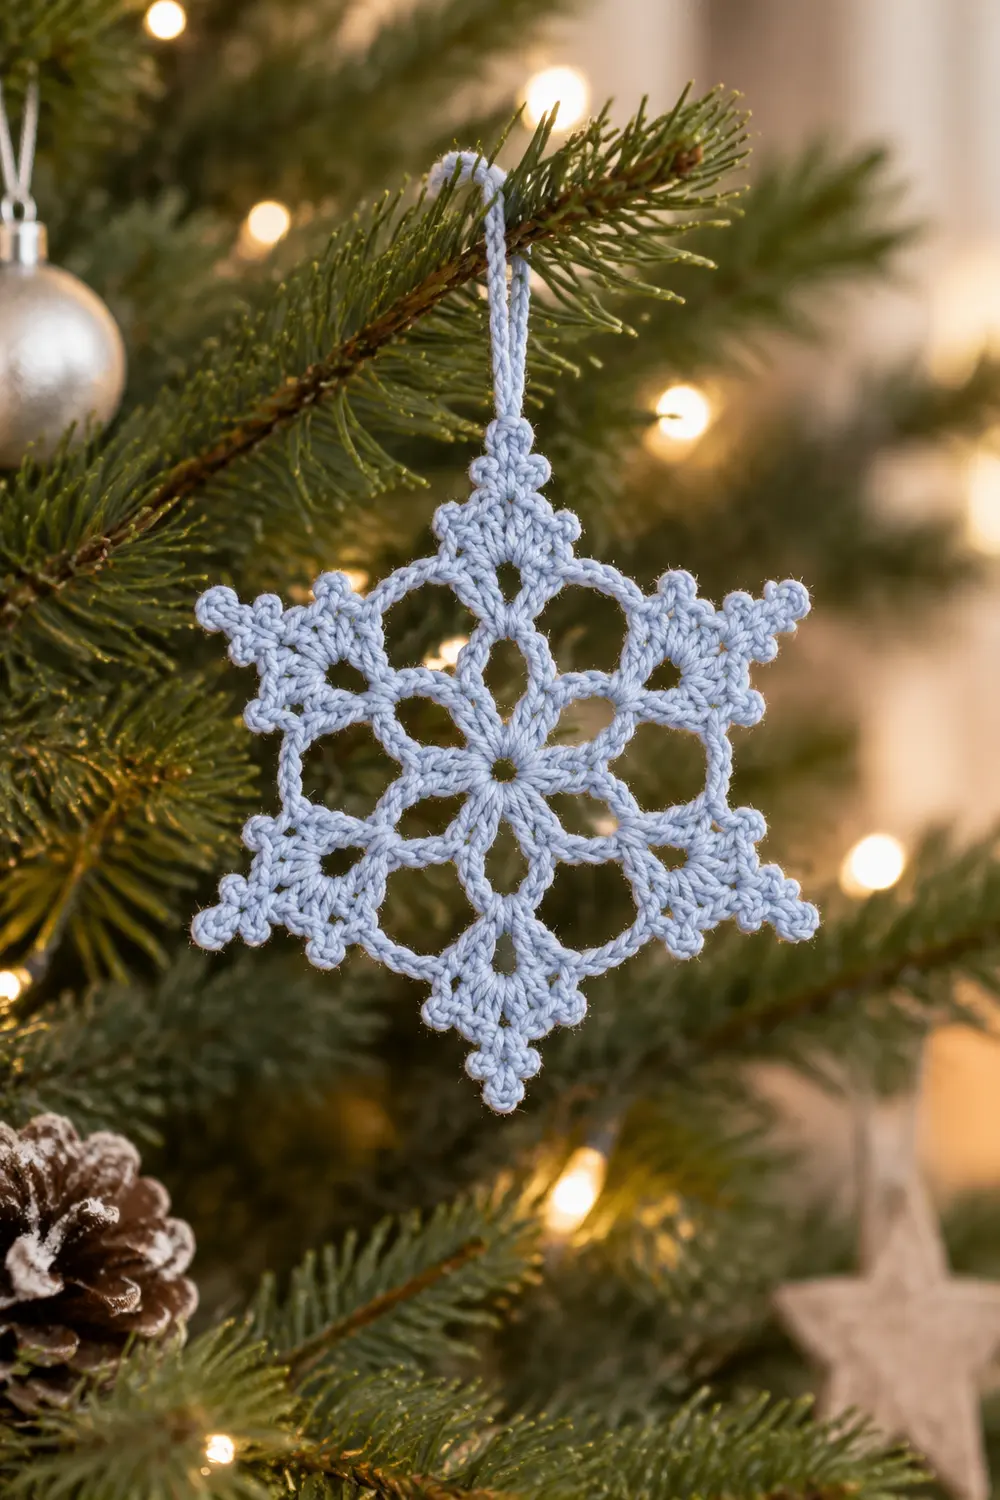
If each checkpoint lands, the finished motif will match. Optional: you can make several of these snowflakes for tree ornaments or gift toppers, but this pattern is written for a single motif.
Happy crocheting!