

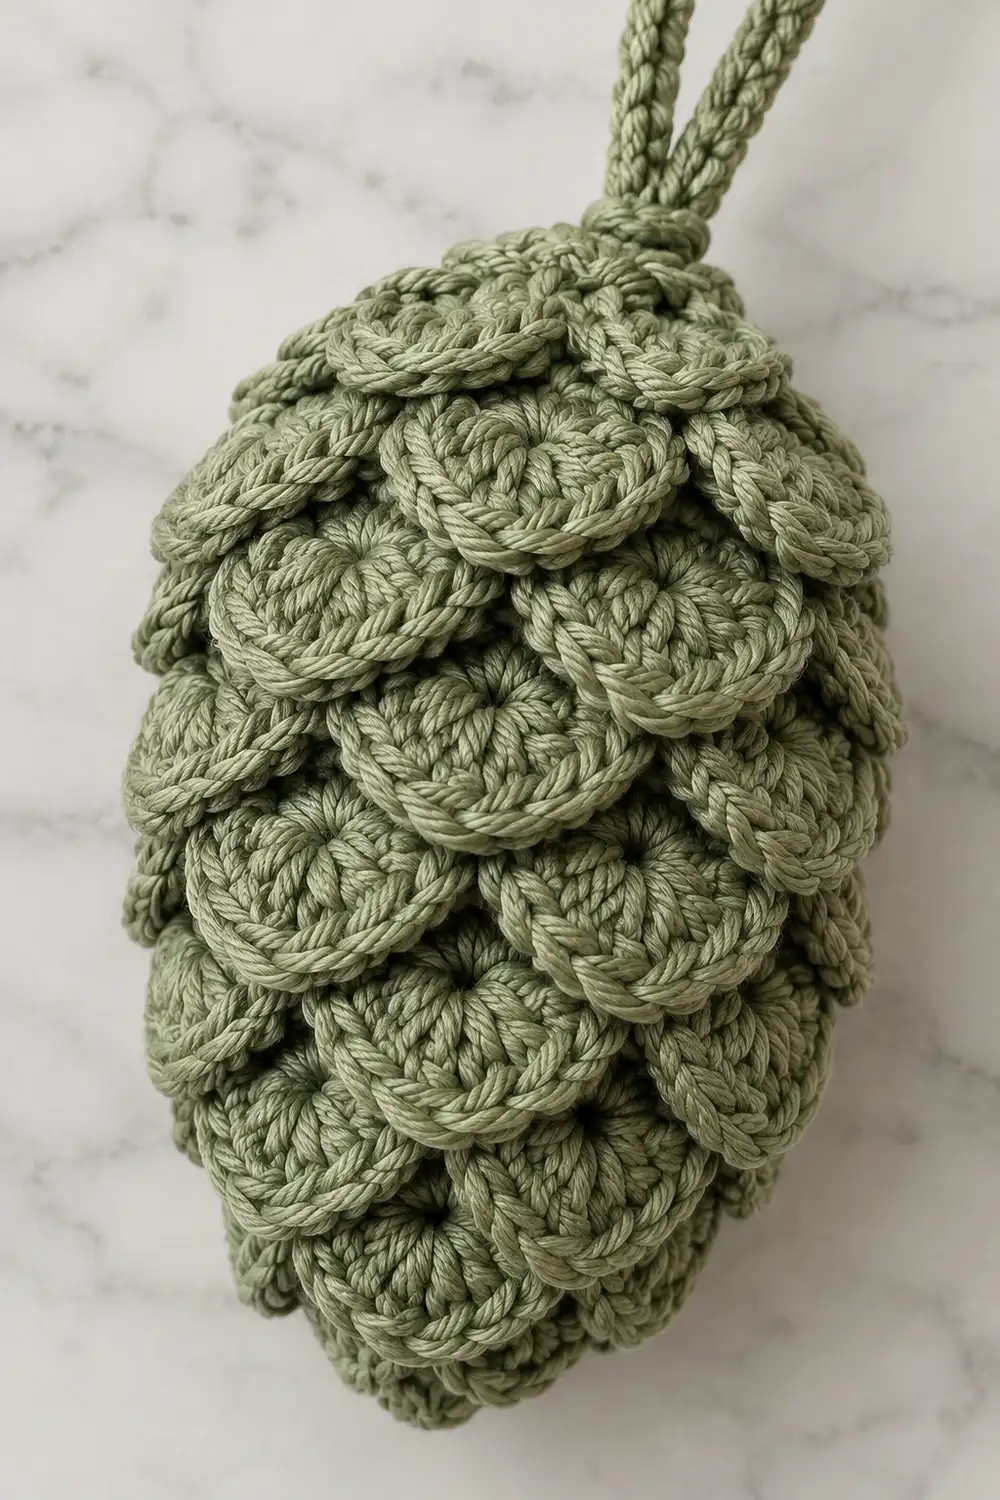
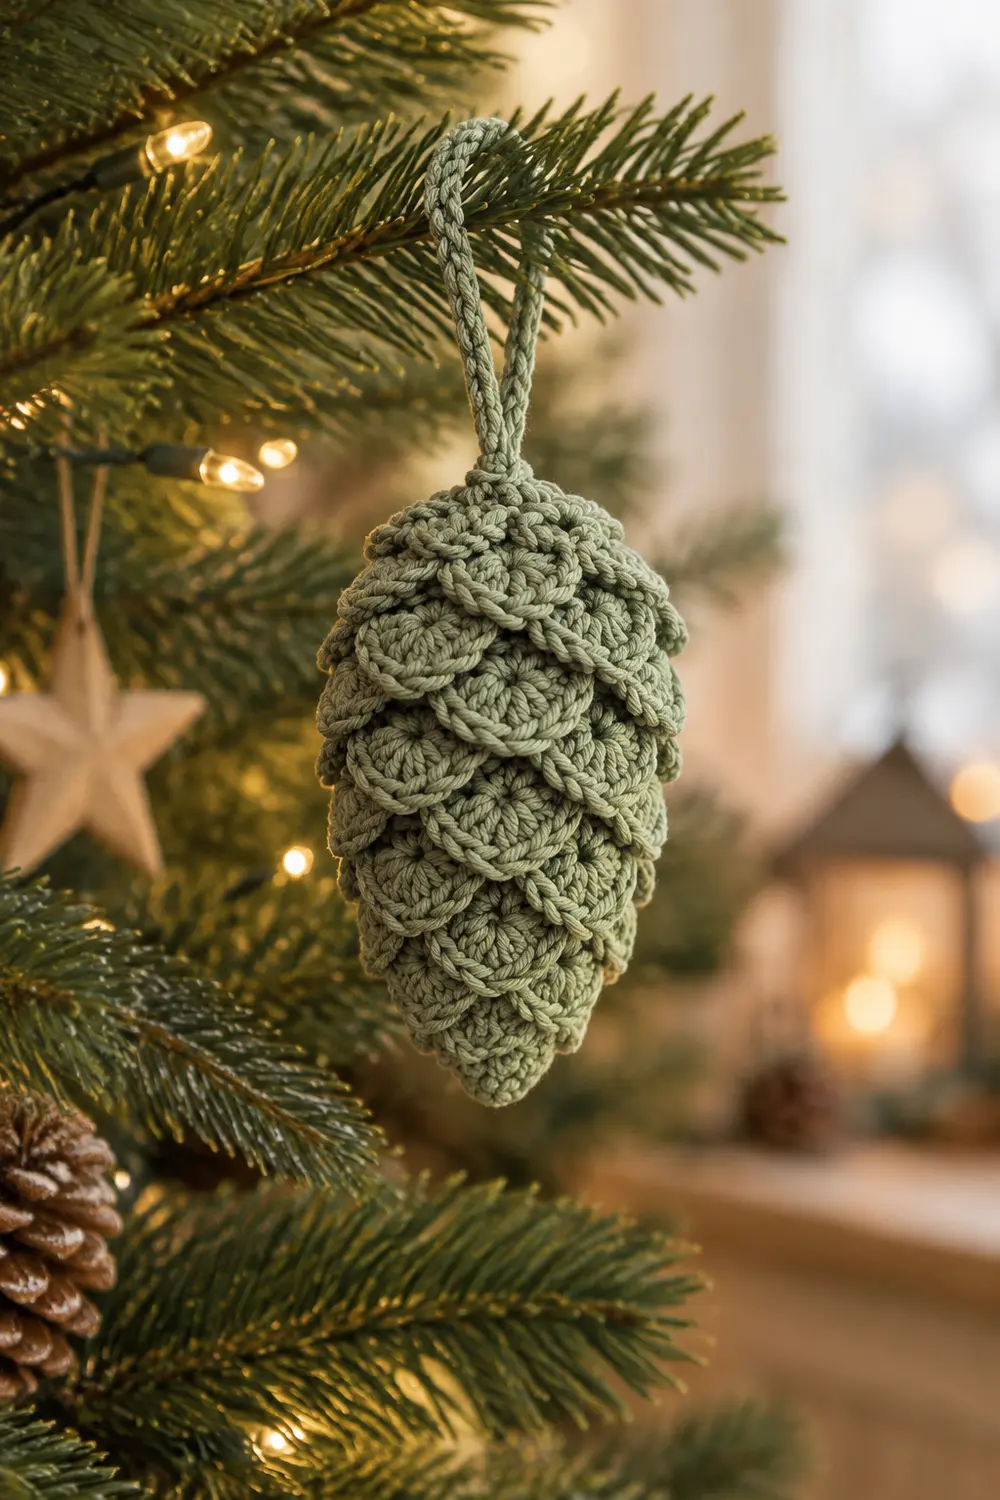
This little pinecone is a single crocheted ornament in muted sage green. Its body is covered in overlapping shell-shaped scales stacked tier on tier, which gives it the layered, dimensional look of a real pinecone. A twisted rope loop at the top lets it hang from a tree branch, a gift tag, or a hook.
The whole ornament uses one color. There is no color changing and no separate scale pieces to sew on. All of the texture and shaping comes from the stacked shell stitch construction. The style is calm and natural, and it works well with rustic, Scandinavian, or woodland decor.
This pattern uses US crochet terms. The finished pinecone measures about 2.75 in (7.0 cm) from tip to top, not counting the loop, and about 1.75 in (4.4 cm) wide across the scales at the widest point.
You start with a magic ring at the bottom tip and work upward in joined rounds. Each tier of scales is made of 5-dc shells worked into the front loops of a single crochet round. The body then continues upward in the back loops behind the scales, so every scale stands free. You close the top with two decrease rounds and then make a slip-stitch rope loop in one continuous piece.
Finished Size and Construction
- Finished size: 2.75 in (7.0 cm) long × 1.75 in (4.4 cm) wide, excluding loop
- Hanging loop: about 1.5 in (3.8 cm) tall
- Skill level: Intermediate (front loop and back loop work, joined rounds)
- Terminology: US crochet terms
- Yarn weight: DK (#3) cotton
- Hook: 3.0 mm (C/2–D/3)
- Number of pieces: 1. The body and loop are worked continuously.
- Layout: Single piece worked in joined rounds from the bottom tip up
- Piece size: 2.75 in (7.0 cm) × 1.75 in (4.4 cm)
- Size before border (after Rnd 26): about 2.5 in (6.4 cm) long
- Border depth (top dome, Rnds 27–28): about 0.25 in (0.6 cm)
Materials
Yarn: Use a smooth, mercerized or matte DK cotton. Cotton gives the scales crisp edges and holds the shell shape well. Acrylic will work, but the scales will look softer and lie flatter.
- Sage green: 15 g, about 32 m (35 yd)
These quantities include a margin of about 20% for your gauge swatch and tails.
Tools:
- 3.0 mm crochet hook
- Tapestry needle
- Scissors
- 1 stitch marker
- Ruler or tape measure
- Steam iron or garment steamer for blocking
No stuffing is used. The double layer of body fabric and overlapping scales gives the cone its form.
Abbreviations (US Terms)
- ch – chain
- sl st – slip stitch
- sc – single crochet
- dc – double crochet
- inc – 2 sc in the same stitch
- sc2tog – single crochet 2 together
- FLO – front loop only
- BLO – back loop only
- MR – magic ring
- st(s) – stitch(es)
- rep – repeat
Special stitch – Scale Repeat (4 sts wide): Sc in FLO of next st, skip next st, 5 dc in FLO of next st, skip next st. Each repeat uses 4 base stitches and makes one fan-shaped scale. A base round must therefore have a stitch count divisible by 4.
Joined rounds: Begin each round with ch 1, which does not count as a stitch. Join with sl st to the first st.
Gauge and Checkpoints
Gauge: 6 sc × 7 rounds = 1 in (2.5 cm) in sc worked through both loops.
Check this with a small swatch. Ch 13, then sc in the 2nd ch from the hook and in each ch across (12 sc). Work 7 rows. Your swatch should measure 2 in (5.1 cm) wide × 1 in (2.5 cm) tall.
Test the piece itself. Since this is a single small ornament, your first attempt through Rnd 10 serves as the real gauge test. Measure at each checkpoint:
- After Rnd 9: The body is 1 in (2.5 cm) long from tip to the top of Rnd 9. The circumference behind the scales is 4 in (10.2 cm).
- After Rnd 18: The body is about 1.9 in (4.8 cm) long.
- After Rnd 26: The body is about 2.5 in (6.4 cm) long. This is the size before the border.
- After Rnd 28: The finished length is 2.75 in (7.0 cm).
If your piece is too big: Go down 0.25 mm in hook size, or tighten your sc tension.
If your piece is too small: Go up 0.25 mm in hook size.
Keep your dc slightly relaxed in any case. Tight dc will make the scales cup inward instead of fanning out.
Pattern: Pinecone Body
Tip and First Tier
Rnd 1: Make a MR. Ch 1, then work 6 sc into the ring. Pull the ring tight and join. (6 sts)
Rnd 2: Ch 1, inc in each st around, join. (12 sts)
Rnd 3 (Base 1): Ch 1, sc in next 2 sts, inc in next st; rep from * 3 more times, join. (16 sts)*
Rnd 4 (Scales 1, in FLO of Rnd 3):
- Sl st in FLO of the next 2 sts. You are now at st 3.
- Ch 1, then work the Scale Repeat 4 times, starting in this st. The last repeat wraps around to end at st 2.
- Join to the first sc.
Result: 4 scales (4 sc + 20 dc = 24 sts). These scale stitches are decorative and are never worked into again.
Placement rule for the whole pattern:
- Every scale round begins in the 3rd st of its base round.
- Every following BLO round begins in the same st where the scale round began.
This shifts each tier by 2 sts, which is half a Scale Repeat. As a result, each new scale sits between two scales of the tier below.
Widening
Rnd 5 (BLO of Rnd 3): Fold the scales down toward the tip. Sl st into the BLO of the st holding the first sc of Rnd 4, then ch 1. Sc in BLO of next 3 sts, inc in BLO of next st; rep from * 3 more times, join. (20 sts)*
Rnd 6: Ch 1, sc in each st through both loops, join. (20 sts)
Rnd 7 (Scales 2, in FLO of Rnd 6): Sl st in FLO of next 2 sts, then ch 1. Work the Scale Repeat 5 times and join. 5 scales (30 sts)
Rnd 8 (BLO of Rnd 6): Start as set. Sc in BLO of next 4 sts, inc in BLO of next st; rep from * 3 more times, join. (24 sts)*
Rnd 9: Ch 1, sc in each st around, join. (24 sts)
Rnd 10 (Scales 3, in FLO of Rnd 9): Work the Scale Repeat 6 times. 6 scales (36 sts)
Measure now. The body should be 1 in (2.5 cm) long and 4 in (10.2 cm) around.
Straight Section
Rounds 11–19 repeat the same 3-round tier without shaping:
- Rnd 11 (BLO of Rnd 9): Ch 1, sc in BLO of each st, join. (24 sts)
- Rnd 12: Sc around through both loops. (24 sts)
- Rnd 13 (Scales 4, FLO of Rnd 12): 6 scales (36 sts)
- Rnd 14 (BLO of Rnd 12): (24 sts)
- Rnd 15: (24 sts)
- Rnd 16 (Scales 5, FLO of Rnd 15): 6 scales (36 sts)
- Rnd 17 (BLO of Rnd 15): (24 sts)
- Rnd 18: (24 sts)
- Rnd 19 (Scales 6, FLO of Rnd 18): 6 scales (36 sts)
At Checkpoint 2, the body should be about 1.9 in (4.8 cm) long.
Narrowing
Rnd 20 (BLO of Rnd 18): Sc in BLO of next 4 sts, sc2tog in BLO; rep from * 3 more times, join. (20 sts)*
Rnd 21: Sc around. (20 sts)
Rnd 22 (Scales 7, FLO of Rnd 21): 5 scales (30 sts)
Rnd 23 (BLO of Rnd 21): Sc in BLO of next 3 sts, sc2tog in BLO; rep from * 3 more times, join. (16 sts)*
Rnd 24: Sc around. (16 sts)
Rnd 25 (Scales 8, FLO of Rnd 24): 4 scales (24 sts)
Rnd 26 (BLO of Rnd 24): Sc in BLO of next 2 sts, sc2tog in BLO; rep from * 3 more times, join. (12 sts)*
The body now measures about 2.5 in (6.4 cm), which is the size before the border. Count your tiers: there should be 8 tiers of scales, with 48 scales in total (4 + 5 + 6 + 6 + 6 + 6 + 5 + 4).
Border: Top Dome and Hanging Loop
The top “border” is a smooth sc dome with no scales, topped by the loop.
Border gauge: Work at the same 6 sc × 7 rounds per 1 in (2.5 cm) as the body. Do not tighten here, or the top will pucker.
Think of the round as having 4 equal sections, the same quarters used for every shaping round. Work through both loops.
Rnd 27: Ch 1, *sc in next st, sc2tog; rep from * 3 more times, join.
- Count: 8 sts, which is 2 per section. Each section’s 3 sts become 2.
Rnd 28: Ch 1, sc2tog 4 times, join.
- Count: 4 sts, which is 1 per section.
Why the math works: Rnd 26 ends with 12 sts, or 3 per section. Removing 1 st per section in each round gives 12 → 8 → 4. The decreases stack evenly in 4 columns, so the dome closes flat and centered. Two rounds at 7 rounds per inch add about 0.29 in, which rounds to about 0.25 in (0.6 cm). The finished length is therefore 2.5 in + 0.25 in = 2.75 in (7.0 cm).
Hanging loop: Do not fasten off.
- Ch 18.
- Sl st into the back bump of the 2nd ch from the hook and each ch across. (17 sl sts)
- Twist the cord 2 full turns to emphasize the rope twist.
- Sl st into the 3rd st of Rnd 28 so the loop spans the top center.
The cord is about 3 in (7.6 cm) long and forms a loop about 1.5 in (3.8 cm) tall.
To finish, fasten off and leave a 6 in (15.2 cm) tail. Thread the tail through the remaining front loops of Rnd 28 and pull snug to close the hole. Then pass the tail through the loop base twice to anchor it, and weave in.
Weave in the MR tail up through the inside of the body.
Final Blocking
- Lay the pinecone on a towel, scales facing outward.
- Use your fingertips to fan each scale open so the 5 dc spread into a smooth arc.
- Make sure each scale overlaps the base of the scale below it and sits between two scales of the previous tier.
- Hold a steam iron 0.5 in (1.3 cm) above the piece. Do not touch it. Steam it all over for a few seconds.
- While it is warm, gently roll the cone between your palms to even out the shape.
- Reshape the loop and straighten its twist.
- Let it dry completely. Then measure: 2.75 in (7.0 cm) long and 1.75 in (4.4 cm) wide.
Final Quality-Control Checklist
- 8 tiers, 48 scales total
- Every scale has exactly 5 dc
- Scales alternate position from tier to tier
- Base counts are 16, 20, 24, 24, 24, 24, 20, 16, 12
- Top dome closes smoothly at 4 sts with no hole
- Finished length is 2.75 in (7.0 cm) and width is 1.75 in (4.4 cm)
- Loop is about 1.5 in (3.8 cm), firmly anchored, and twisted evenly
- All tails are woven inside the body
Troubleshooting
Scales cup inward. Your dc are too tight. Relax your tension or go up 0.25 mm for the scale rounds only.
Scales sit directly on top of each other. Your starting point is off. Make sure each scale round begins in the 3rd st, and each BLO round begins where the scales began.
A scale round doesn’t come out even. The base count is wrong. Recount the round; it must be 16, 20, or 24.
Holes behind the scales. You worked through both loops instead of BLO. Rip back and work the base round in BLO only.
The pinecone is too long or narrow. Your row gauge is too loose. Check against the 7 rounds = 1 in (2.5 cm) gauge.
The top puckers. Work your decreases more loosely, or use an invisible sc2tog (front loops only).
The loop leans to one side. Re-anchor it in the stitch opposite its starting point.
Care
Hand wash in cool water, press out excess water in a towel, and reshape the scales while damp. Dry flat and store loosely so the scales aren’t crushed.
Final Notes
Here is the full measurement chain:
- The gauge is 6 sc × 7 rounds = 1 in (2.5 cm).
- Rnd 9 reaches 1 in (2.5 cm) long and 4 in (10.2 cm) around.
- Rnd 18 reaches about 1.9 in (4.8 cm).
- Rnd 26 reaches 2.5 in (6.4 cm).
- The 0.25 in (0.6 cm) dome brings it to 2.75 in (7.0 cm).
- The 1.5 in (3.8 cm) twisted rope loop finishes it.
Every base round is divisible by 4, so every scale tier comes out even, and the 2-stitch shift keeps the scales neatly staggered. If you check your counts at each tier, the cone will shape itself.
Optional: make several in different shades for a matching set of ornaments.
Happy crocheting!