
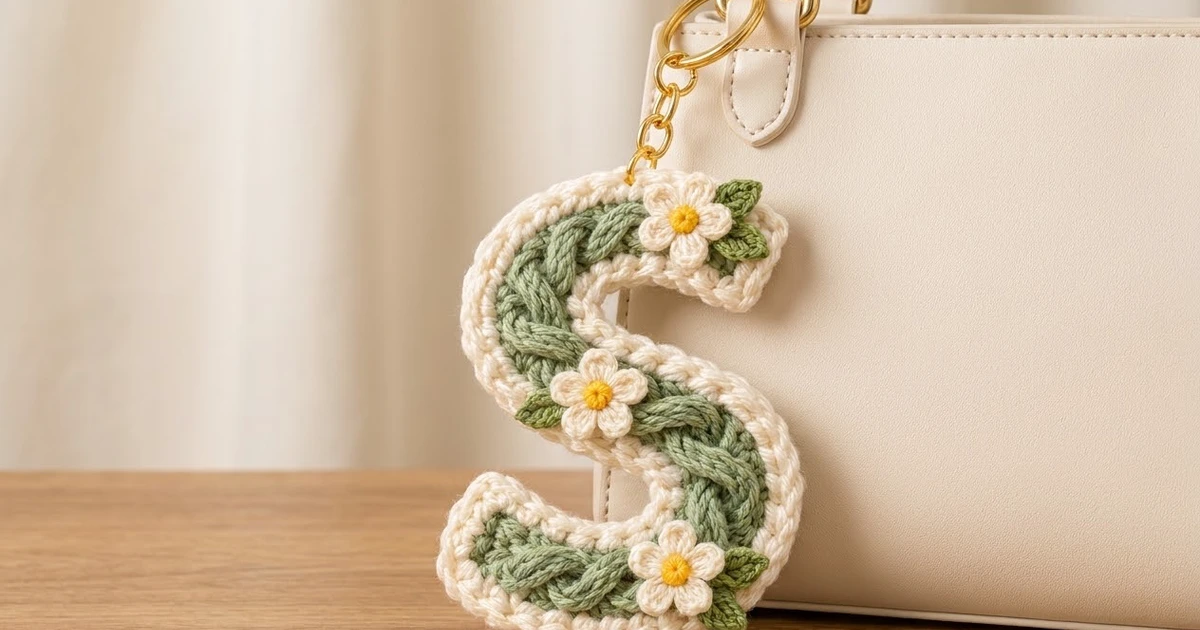
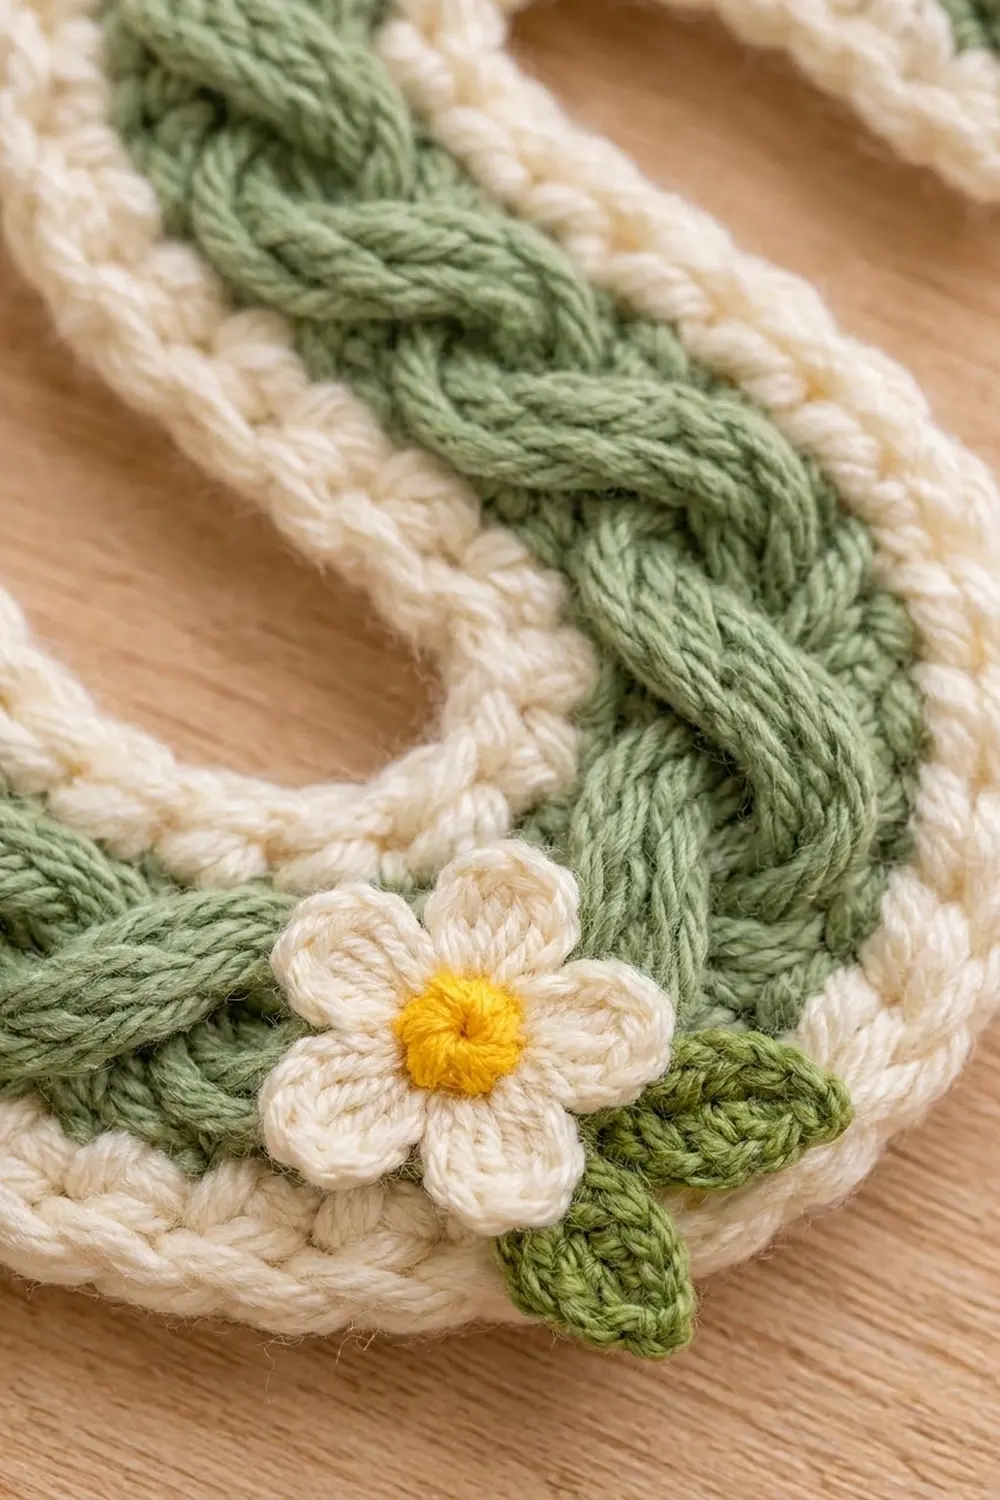
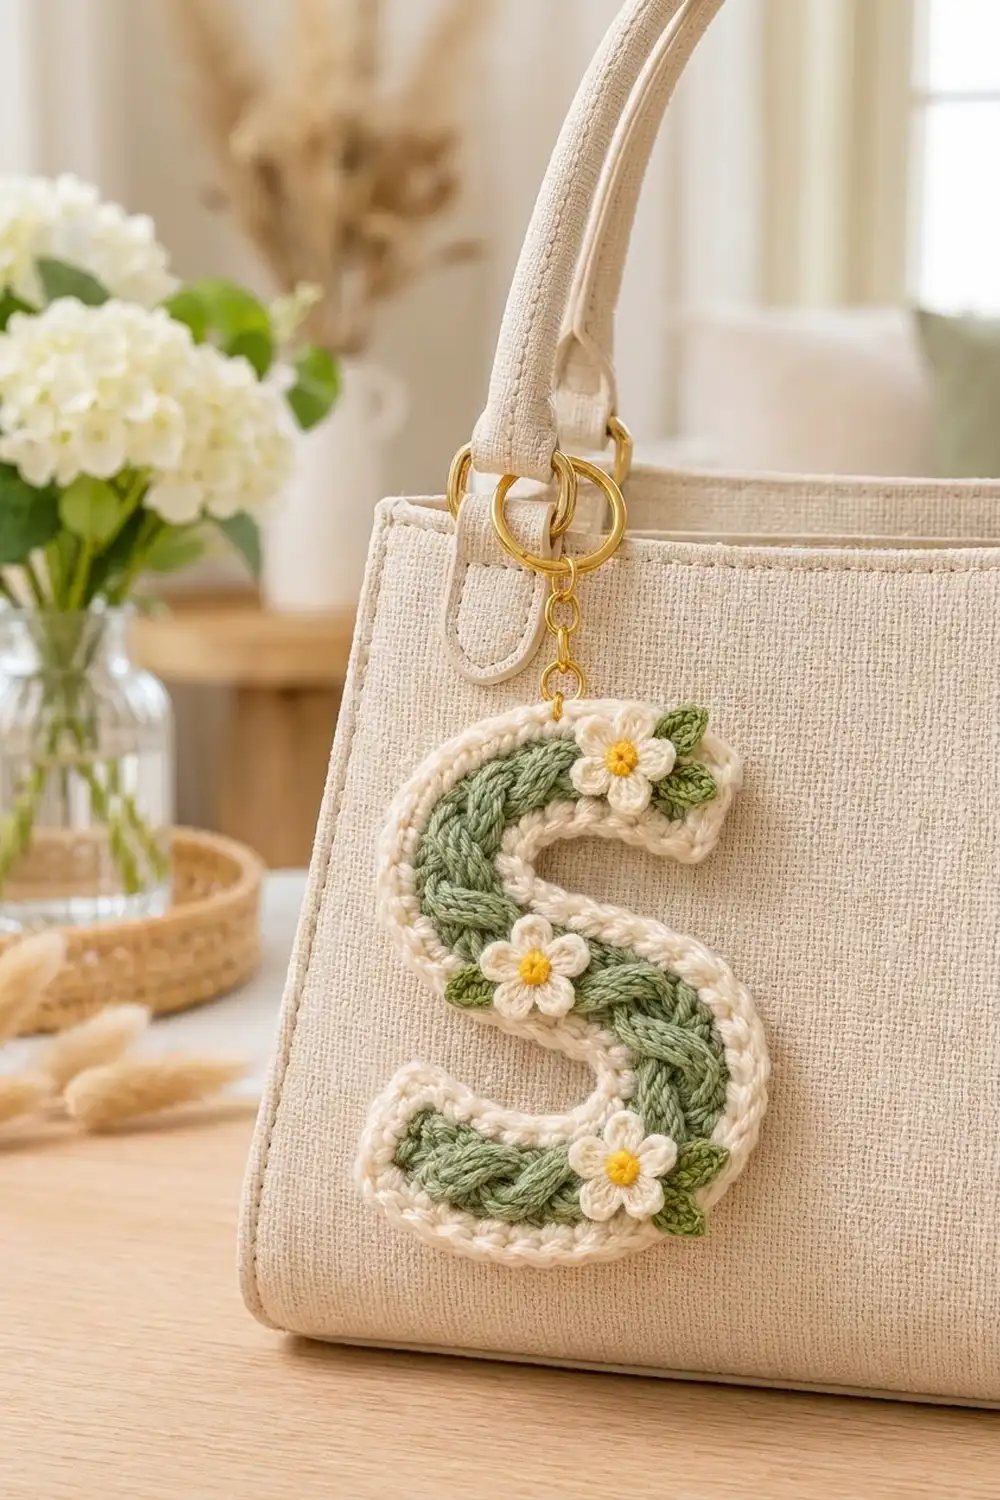
This little letter S is a quick, satisfying make that works as a keychain, a bag charm or a personalized gift. A soft sage-green plait runs through the center of the letter, and a cream frame with a corded edge gives it a neat, finished outline.
Three tiny cream daisies with sunny yellow centers and small green leaves sit on top of the letter. They add a fresh, cottage-garden feel without hiding the braid. A gold split ring and short chain finish the piece.
The pattern uses US crochet terms. The finished letter measures 4.75 in (12.1 cm) tall and 3.5 in (8.9 cm) wide.
Construction is simple and fully flat:
– Work a green base in rounds around a foundation chain. Increases on the outer curves and decreases on the inner curves bend it into an S.
– Make three green cords, plait them and sew the braid onto the base.
– Work two cream border rounds, the last one in crab stitch.
– Sew on the flowers and leaves, then add the hardware.
Finished Size and Construction
- Finished size: 4.75 in (12.1 cm) tall × 3.5 in (8.9 cm) wide
- Skill level: Intermediate (shaping in the round, crab stitch)
- Terminology: US crochet terms
- Yarn weight: DK / light (3), cotton or cotton blend
- Hook: 3.25 mm (US D-3)
- Number of pieces: 1 letter base, 3 braid cords, 3 flowers, 6 leaves. No motifs are joined to each other.
- Layout: a single letter S
- Piece size: 4.75 in × 3.5 in (12.1 cm × 8.9 cm)
- Size before border: 4.25 in × 3 in (10.8 cm × 7.6 cm)
- Border depth: 0.25 in (0.6 cm) on every edge
- Stroke width: 0.75 in (1.9 cm) green, 1.25 in (3.2 cm) with the border
Materials
Yarn: Use a smooth DK cotton or cotton blend. Cotton holds the curves crisply, shows the plait clearly and stands up well to daily handling on a bag. Avoid fuzzy yarns, because they blur the braid and the corded edge.
- Sage green: 8 g / about 18 m (base, braid cords, leaves)
- Cream: 5 g / about 11 m (border, flower petals)
- Yellow: 1 g / about 2 m (flower centers)
All quantities include a margin for swatching and tails.
Tools:
– 3.25 mm (US D-3) crochet hook
– Tapestry needle
– Stitch markers (at least 4)
– Rust-proof pins and a blocking mat
– Washable fabric marker
– Gold split ring, 1 in (2.5 cm)
– Gold chain, about 1 in (2.5 cm) long, with an 0.3 in (0.8 cm) jump ring
– Two pairs of flat-nose pliers
– Optional: a dab of fabric glue for the flower backs
Abbreviations (US Terms)
- ch – chain
- sl st – slip stitch
- sc – single crochet
- hdc – half double crochet
- dc – double crochet
- sc2tog – single crochet 2 together
- rev sc – reverse single crochet (crab stitch)
- st(s) – stitch(es)
- Rnd – round
Special stitches
- sc2tog: Insert the hook in the next st, yarn over and pull up a loop. Insert the hook in the following st, yarn over and pull up a loop. Yarn over and draw through all 3 loops. This turns 2 sts into 1.
- rev sc (crab stitch): Work from left to right (right-handed). Insert the hook in the next st to the right, yarn over and pull up a loop. Yarn over and draw through both loops. This makes the twisted, corded edge.
Gauge and Checkpoints
Gauge: 22 sc and 24 rows = 4 in (10.2 cm) in sc, which is 5.5 sts per inch.
Test one piece first. Make a 4 in (10.2 cm) sc swatch, then work Rnd 1 of the letter base and lay it flat before going further. Shaping in the round depends heavily on stitch size, so these checks matter more here than on a straight project.
Measurement checkpoints:
– Foundation chain: 40 working chains measure about 7.25 in (18.4 cm) when laid straight.
– After Rnd 1: The green strip is about 0.4 in (1.0 cm) wide and already curves gently into an S.
– After Rnd 2: The stroke is 0.75 in (1.9 cm) wide. The letter measures 4.25 in × 3 in (10.8 cm × 7.6 cm).
– After the border: The letter measures 4.75 in × 3.5 in (12.1 cm × 8.9 cm).
If your letter is too big, go down to a 3.0 mm hook. If it is too small or the curves cup, go up to a 3.5 mm (US E-4) hook. If the outer curves ruffle, your increases are too loose. Tighten your tension on those stitches rather than skipping increases, or the stitch counts will drift.
Letter Base (Sage Green)
The foundation chain is the centerline of the S. Each round goes all the way around it. One long side of the chain is called Side A and the other is Side B.
Each side passes through these regions, in order:
– a 3-stitch straight end section (terminal)
– Curve 1, worked over 15 chains
– a 2-stitch spine
– Curve 2, worked over 15 chains
– another 3-stitch terminal
Each short end of the letter (End A and End B) has its own corner stitches.
On Side A, Curve 1 is the outer curve, so it gets increases, and Curve 2 is the inner curve, so it gets decreases. On Side B it is the reverse. This is what bends the strip into an S.
Foundation: With green, ch 41.
Rnd 1:
– Sc in 2nd ch from hook and in next 3 ch.
– [Sc in next 4 ch, 2 sc in next ch] 3 times.
– Sc in next 2 ch.
– [Sc in next 3 ch, sc2tog over next 2 ch] 3 times.
– Sc in next 3 ch, then 3 sc in last ch.
– Rotate the work and continue along the free loops on the other side of the chain.
– Sc in next 3 ch.
– [Sc in next 4 ch, 2 sc in next ch] 3 times.
– Sc in next 2 ch.
– [Sc in next 3 ch, sc2tog] 3 times.
– Sc in next 3 ch.
– 2 sc in the same ch as the first sc, then sl st to first sc. (82 sts)
Count check: each long side has 3 + 18 + 2 + 12 + 3 = 38 sts, and each end has 3 sts. That gives 38 + 38 + 3 + 3 = 82.
Place a marker in each of the 4 increase groups (both Curve 1 on Side A and Curve 2 on Side B) so you can see where the outer curves are.
Rnd 2:
– Ch 1, 2 sc in first st, sc in next 3 sts.
– [Sc in next 5 sts, 2 sc in next st] 3 times.
– Sc in next 2 sts.
– [Sc in next 2 sts, sc2tog] 3 times.
– Sc in next 3 sts.
– 2 sc in next st, sc in next st, 2 sc in next st.
– Sc in next 3 sts.
– [Sc in next 5 sts, 2 sc in next st] 3 times.
– Sc in next 2 sts.
– [Sc in next 2 sts, sc2tog] 3 times.
– Sc in next 3 sts.
– 2 sc in next st, sc in last st, then sl st to first sc. (86 sts)
Count check: each side has 3 + 21 + 2 + 9 + 3 = 38 sts, and each end now has 5 sts. That gives 38 + 38 + 5 + 5 = 86.
Fasten off. Lay the base flat and gently push it into a smooth S. Check it against the after-Rnd 2 checkpoint above.
Braid (Sage Green)
Cord (make 3): With green, ch 50. Sc in 2nd ch from hook and in each ch across. (49 sc) Fasten off. On one cord only, leave a 6 in (15.2 cm) tail for sewing.
Each cord is about 9 in (22.9 cm) long and 0.25 in (0.6 cm) wide.
Plait:
1. Pin the three cords together at one end.
2. Plait them firmly, keeping every cord sc-side up so the braid lies flat.
3. Stop when the braid measures 7.25 in (18.4 cm), which matches the centerline of the base.
4. Pin the loose end so it cannot unravel.
Attach:
1. Lay the braid along the center of the green base, from End A to End B.
2. Ease it around the curves. On the outer curves, spread the plait slightly. On the inner curves, nudge the strands closer together.
3. Tuck about 0.25 in (0.6 cm) of each braid end under itself to square it off at the terminals.
4. Leave the outer loops of Rnd 2 uncovered, because you will work the border into them.
5. Using the tail, tack the braid down every 0.5 in (1.3 cm) through the base, catching the underside of the cords so no green stitching shows on top.
6. Weave in all ends on the back.
Border (Cream)
Border gauge: The border keeps the same 5.5 sts per inch. Two rounds add 0.25 in (0.6 cm) on every edge, which takes the letter from 4.25 in × 3 in (10.8 cm × 7.6 cm) to 4.75 in × 3.5 in (12.1 cm × 8.9 cm).
Rnd 3: Join cream with a sl st in the first st of Rnd 2. Lift the edge of the braid aside if it covers the stitches.
– Ch 1, sc in same st, 2 sc in next st (corner), sc in next 3 sts.
– [Sc in next 6 sts, 2 sc in next st] 3 times.
– Sc in next 2 sts.
– [Sc in next st, sc2tog] 3 times.
– Sc in next 3 sts.
– 2 sc in next st (corner), sc in next 3 sts, 2 sc in next st (corner).
– Sc in next 3 sts.
– [Sc in next 6 sts, 2 sc in next st] 3 times.
– Sc in next 2 sts.
– [Sc in next st, sc2tog] 3 times.
– Sc in next 3 sts.
– 2 sc in next st (corner), sc in last 2 sts, then sl st to first sc. (90 sts)
Count per region:
– Side A: 3 terminal + 24 outer curve + 2 spine + 6 inner curve + 3 terminal = 38
– Side B: 3 + 24 + 2 + 6 + 3 = 38
– End A: 7
– End B: 7
– Total: 38 + 38 + 7 + 7 = 90
Rnd 4: Ch 1. Working from left to right, rev sc in each st around. Sl st to the first st and fasten off. (90 rev sc)
Why the math works: In every round, each long side gains 3 sts on its outer curve and loses 3 sts on its inner curve. Each side therefore stays at exactly 38 sts. The outer edge gets longer while the inner edge gets shorter, so the letter curves without cupping or ruffling.
Only the ends grow, by 2 corner sts per end per round. That gives 82 sts, then 86, then 90. These corner increases keep the terminals square instead of rounded. Rnd 4 is worked 1 per st, so the crab stitch adds texture without changing the count.
Flowers and Leaves
Flower (make 3):
– Rnd 1: With yellow, make a magic ring. Ch 1, work 5 sc in the ring, pull the ring closed and sl st to first sc. (5 sts) Fasten off.
– Rnd 2: Join cream in any sc. (Ch 2, 2 dc, ch 2, sl st) all in the same st, then sl st into the next st. Repeat from * around for 5 petals. Fasten off and leave a 6 in (15.2 cm) tail.
Each flower is about 1 in (2.5 cm) across.
Leaf (make 6):
1. With green, ch 6.
2. Working into the chains: sl st in 2nd ch from hook, sc in next ch, hdc in next ch, sc in next ch, sl st in last ch.
3. Rotate and work into the free loops on the other side: sc in next ch, hdc in next ch, sc in next ch, sl st in the next ch (the same ch as the first sl st).
4. Fasten off.
Each leaf is about 0.6 in (1.5 cm) long.
Placement:
– Flower 1: on the top terminal (upper right end)
– Flower 2: at the middle left, where the upper bowl meets the spine
– Flower 3: at the lower right, on the bottom bowl
Tuck two leaves under each flower so they peek out between the petals. Sew each leaf by its base, then sew each flower through its yellow center and petal tips.
Hardware
- Open the jump ring with two pliers. Twist the ends sideways; don’t pull them apart.
- Pass it through two Rnd 3 sts at the top center of the upper bowl.
- Thread on the end link of the chain and close the ring fully.
- Attach the split ring to the other end of the chain.
Final Blocking
- Draw the S outline, 4.75 in × 3.5 in (12.1 cm × 8.9 cm), on your blocking mat with a washable marker.
- Mist the letter with water until it is damp but not soaked. Do this before attaching the hardware, or remove the hardware first.
- Lay it face up inside the outline.
- Pin the four terminal corners first, then the outermost point of each bowl.
- Ease the inner curves into smooth arcs and pin every 0.5 in (1.3 cm) along the border.
- Pat the braid flat with your fingertips. Don’t press the crab stitch edge flat, so it stays raised.
- Fluff the flower petals upward.
- Let it dry completely, then remove the pins.
Final Quality-Control Checklist
- Rnd 1 = 82, Rnd 2 = 86, Rnd 3 = 90 and Rnd 4 = 90 sts.
- Each long side counts 38 sts in Rnds 1–3.
- The letter measures 4.75 in × 3.5 in (12.1 cm × 8.9 cm).
- The green stroke is 0.75 in (1.9 cm) wide, and the border is an even 0.25 in (0.6 cm).
- The braid is centered, its ends are tucked and no tacking stitches show.
- The terminals are square and the bowls are smooth.
- The flowers and leaves are secure, with no loose petals.
- The jump ring is fully closed and all ends are woven in.
Troubleshooting
- The letter cups: Your increases are too tight, or you used a hook that is too small. Rework with a larger hook.
- The outer curves ruffle: Your increases are too loose. Crochet them more firmly, or go down 0.25 mm.
- The S is too open or too closed: Check that the increases sit on the outer curve on each side (Side A Curve 1, Side B Curve 2).
- The braid is too long: Undo the plait to the right length, rebraid, and tuck the ends.
- The braid covers the border stitches: Lift the braid edge while you work Rnd 3, then tack it back down.
- The crab stitch edge flares: Work the rev sc more tightly, or use a hook 0.25 mm smaller for Rnd 4 only.
- The flowers curl: Pin them flat while damp during blocking.
Care
Hand wash in cool water with mild soap, then press the water out in a towel. Reshape and dry flat. Keep the hardware dry where possible so the gold finish lasts.
Final Notes
Everything in this letter comes from one measurement chain:
– A gauge of 5.5 sts per inch gives a 7.25 in (18.4 cm) foundation chain.
– Rnd 1 makes a 0.4 in (1.0 cm) wide strip.
– Rnd 2 brings the letter to 4.25 in × 3 in (10.8 cm × 7.6 cm).
– The 0.25 in (0.6 cm) border finishes it at 4.75 in × 3.5 in (12.1 cm × 8.9 cm).
Check each stage, keep each long side at 38 stitches, and the S will lie flat and look crisp. Happy crocheting!