

This lace bell ornament pairs deep teal with soft mint for a cool, wintry look. A mint six-petal flower with a pearl center sits in the middle, framed by dark teal leaf clusters and an open chain mesh. The mesh narrows into a rounded top, and a mint scalloped edge with picots trims the flared bottom.
The style is classic thread lace: light, airy, and flat enough to hang on a branch or tie onto a gift. Two pearl beads on the hanging cord match the one in the flower.
This pattern uses US crochet terms. The finished ornament measures about 3.5 in (8.9 cm) wide and 4.75 in (12.1 cm) tall, not counting the hanging cord.
The bell is worked as one piece. You start with the mint flower in the round, then switch to teal to add leaf clusters and a mesh ring. The dome is worked in rows across the top of the ring and the flared skirt in rows across the bottom. A mint border then finishes the scallops and outlines the bell.
Finished Size and Construction
- Finished size: 3.5 in (8.9 cm) wide x 4.75 in (12.1 cm) tall, plus about 3 in (7.6 cm) of hanging cord
- Skill level: Intermediate
- Terminology: US
- Yarn weight: Size 10 crochet cotton thread (lace weight)
- Hook: 1.75 mm steel hook
- Number of pieces: 1
- Layout: Single bell. The flower and ring sit at the center, with the dome above and the skirt below.
- Piece size: Flower 1.25 in (3.2 cm); finished ring 2.75 in (7.0 cm) across
- Size before border: 3.25 in (8.3 cm) wide x 4.625 in (11.7 cm) tall
- Border depth: Bottom scallops about 0.5 in (1.3 cm); side and top edging about 0.125 in (0.3 cm)
Materials
Use mercerized size 10 cotton thread. It has a smooth sheen, holds crisp picots, and stays firm after starching. Avoid fuzzy threads, because the mesh will lose its shape.
- Color A, dark teal: 6 g / 17 m
- Color B, mint: 4 g / 11 m
- Beads: one 8 mm pearl bead for the flower center, plus one 4 mm and one 6 mm pearl bead for the cord. Each cord bead needs a hole that fits size 10 thread.
These quantities include a small safety margin.
Tools
– 1.75 mm steel crochet hook
– Fine tapestry needle
– Sewing needle and matching thread
– Bead threader or fine wire loop
– 4 stitch markers
– Small scissors
– Blocking board, rustproof pins, and spray starch
Abbreviations (US Terms)
- ch – chain
- sl st – slip stitch
- sc – single crochet
- hdc – half double crochet
- dc – double crochet
- tr – treble crochet
- sk – skip
- sp – space
- st(s) – stitch(es)
- RS / WS – right side / wrong side
Special stitches
- 3-tr cluster (3-tr cl): *Yarn over twice, insert hook in the space, pull up a loop, (yarn over, pull through 2 loops) twice. Repeat from * 2 more times (4 loops on hook). Yarn over and pull through all 4 loops.
- Picot: Ch 3, sl st in 3rd ch from hook.
Gauge and Checkpoints
Gauge: 10 sc and 10 sc rows = 1 in (2.5 cm).
Lace stretches, so test with the bell itself instead of a swatch. Work Rounds 1–7 and check your size before going on. Measure flat without stretching.
- After Round 3: 1.25 in (3.2 cm) across from petal tip to petal tip
- After Round 6: 2.25 in (5.7 cm) across
- After Round 7: 2.75 in (7.0 cm) across
- After the dome: 3.75 in (9.5 cm) from the bottom of the ring to the top of the dome
- Before the border: 3.25 in (8.3 cm) x 4.625 in (11.7 cm)
- Finished: 3.5 in (8.9 cm) x 4.75 in (12.1 cm)
If Round 7 measures more than 2.875 in (7.3 cm), switch to a 1.5 mm hook. If it measures less than 2.625 in (6.7 cm), switch to a 2.0 mm hook. Being slightly off is fine for one ornament. If you make several, keep them the same size as each other.
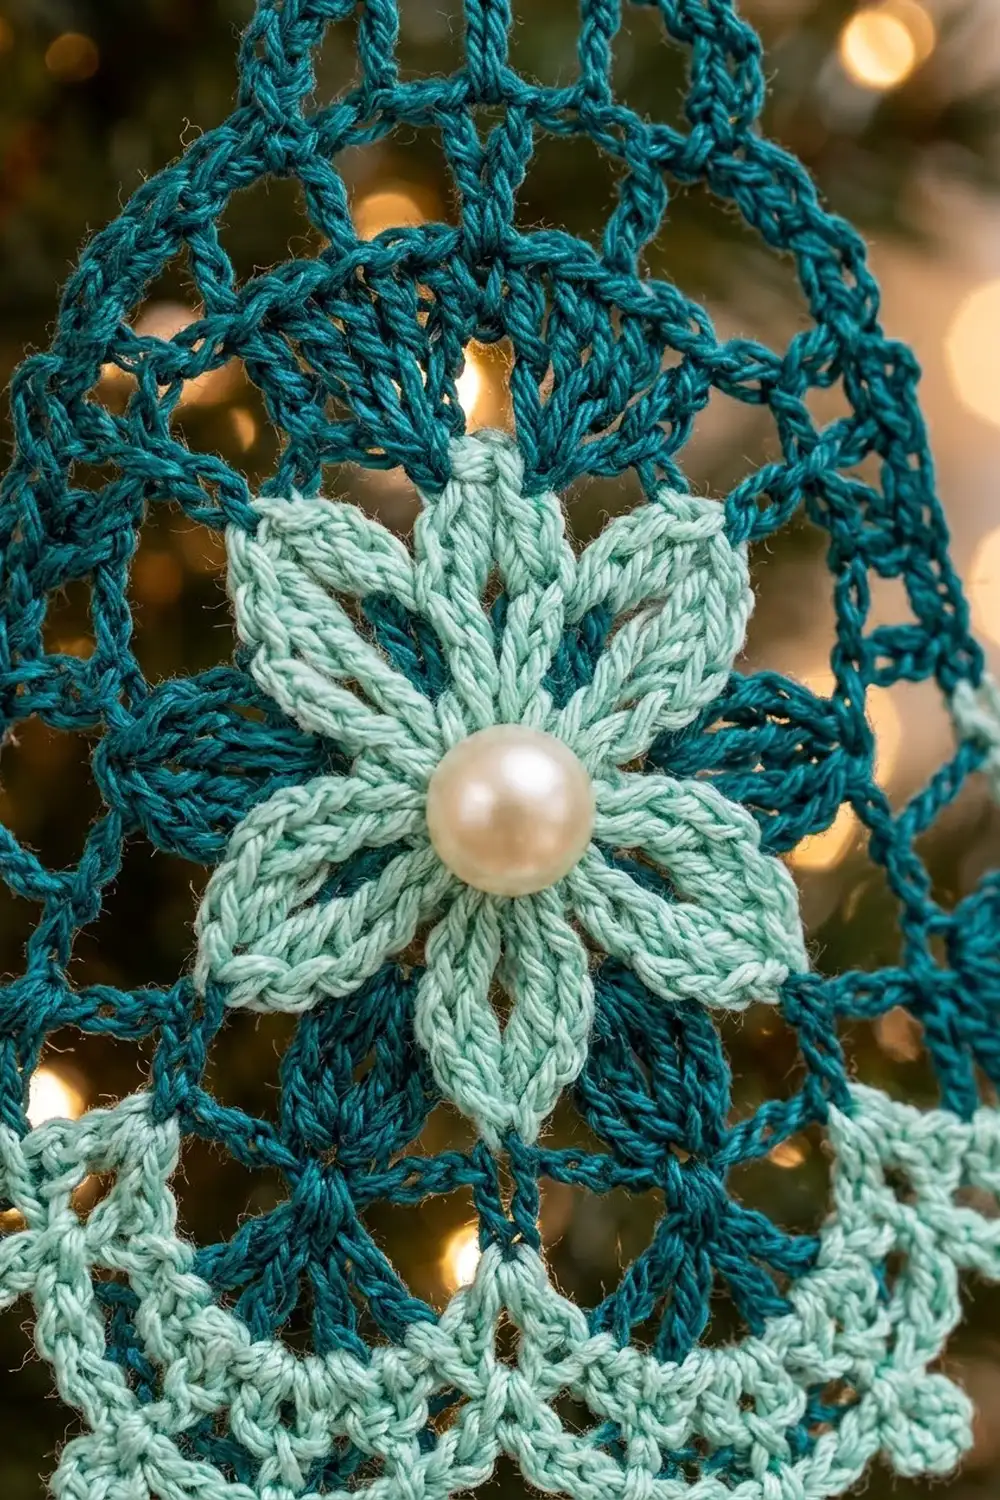
Part 1: Mint Flower
Work with Color B.
Round 1: Make a magic ring, ch 1, 12 sc in the ring. Pull the ring closed and sl st to the first sc to join. (12 sc)
Round 2: Ch 1, sc in first sc, ch 5, sk 1 sc, sc in next sc, ch 5, sk 1 sc; repeat from * 4 more times. Sl st to first sc to join. (6 sc, 6 ch-5 sps)*
Round 3: Sl st in the first ch-5 sp. In each ch-5 sp, work (sc, hdc, 3 dc, ch 2, 3 dc, hdc, sc). Sl st to first sc to join. (6 petals; each petal has 10 sts and a ch-2 tip)
The ch-2 at the tip of each petal gives it a point. Fasten off B.
Part 2: Teal Leaves and Ring
Work with Color A.
Round 4: Join A in the ch-2 tip of any petal. Ch 1, sc in the same tip, ch 7, sc in next petal tip, ch 7; repeat from * 4 more times. Sl st to first sc to join. (6 sc, 6 ch-7 sps)*
Round 5: Ch 1, sc in first sc, ch 2, (3-tr cl, ch 4, 3-tr cl) in next ch-7 sp, ch 2, sc in next sc; repeat from * around. On the last repeat, sl st to the first sc instead of working the final sc. (6 sc, 12 clusters, 6 ch-4 sps, 12 ch-2 sps)*
Each pair of clusters forms the dark teal leaves between two petals.
Round 6: Ch 1, sc in first sc, ch 5, sc in next ch-4 sp, ch 5, sc in next sc; repeat from * around. On the last repeat, sl st to the first sc instead of working the final sc. (12 sc, 12 ch-5 loops)*
Round 7: Ch 1, work 7 sc in each ch-5 loop around, skipping the sc between loops. Sl st to first sc to join. (84 sc)
Fasten off A. Check for 2.75 in (7.0 cm).
Placing the markers: Lay the ring flat with one petal pointing straight up. A second petal now points straight down.
- Top section (16 sts): The two Round 6 loops that meet above the top petal give 14 sc. Add 1 sc on each side. Mark the first and last of these 16 sts.
- Bottom section (40 sts): The six Round 6 loops centered under the bottom petal give 42 sc. Leave out the first and last sc, then mark the ends of the remaining 40 sts.
- Shoulders: The 14 sts left on each side become the sides of the bell.
Check the total: 16 + 40 + 14 + 14 = 84.
Part 3: Dome
Work in rows with Color A.
Row 1 (RS): Join A in the first marked top st. Ch 1, sc in the same st, ch 5, sk 2 sts, sc in next st; repeat from * 4 more times, ending in the last marked st. Turn. (6 sc, 5 ch-5 loops)*
The sc land in sts 1, 4, 7, 10, 13, and 16, which uses all 16 top sts.
Row 2: Ch 1, sc in first loop, ch 5, sc in next loop; repeat from * 3 more times. Turn. (5 sc, 4 loops)*
Row 3: Ch 1, sc in first loop, ch 5, sc in next loop; repeat from * 2 more times. Turn. (4 sc, 3 loops)*
Row 4: Ch 1, sc in first loop, ch 5, sc in next loop; repeat from * once more. Turn. (3 sc, 2 loops)*
Row 5: Ch 1, sc in first loop, ch 5, sc in next loop. Turn. (2 sc, 1 loop)
Row 6: Ch 1, 7 sc in the loop. (7 sc)
Each row is one loop narrower than the row before it, so the dome tapers into a rounded top. Fasten off A. Checkpoint: 3.75 in (9.5 cm) tall from the bottom of the ring.
Part 4: Bell Skirt
Work in rows with Color A.
Row 1 (RS): Join A in the first marked bottom st. Ch 1, sc in the same st, ch 5, sk 2 sts, sc in next st; repeat from * 12 more times, ending in the last marked st. Turn. (14 sc, 13 ch-5 loops)*
The sc land in sts 1, 4, 7 … 40, so this row uses all 40 bottom sts.
Row 2 (WS): Ch 1, sc in first sc, 9 dc in next loop, sc in next loop; repeat from * 5 more times, 9 dc in next loop, sc in last sc. (7 fans of 9 dc, 6 sc between fans, and 2 end sc = 71 sts)*
The fans go in loops 1, 3, 5, 7, 9, 11, and 13, so the skirt is symmetrical. Fasten off A.
Border
Work the border with Color B: two scallop rows along the bottom, then one edging row that outlines the bell.
Border gauge: Each finished scallop is about 0.5 in (1.3 cm) wide and 0.5 in (1.3 cm) deep.
Before you start: Thread the 4 mm bead and then the 6 mm bead onto B and slide them down the thread. The 6 mm bead will come up first and sit lower on the cord.
Border Row 1 (RS): Join B in the first sc of Skirt Row 2. Ch 1, sc in the same sc, ch 1, sk first dc of fan, (dc in next dc, ch 1) 7 times, sk last dc of fan, sc in next sc; repeat from * 6 more times. Turn. (Each scallop: 7 dc and 8 ch-1 sps. Total: 49 dc, 56 ch-1 sps, 8 sc)*
Border Row 2 (WS): Ch 1, sc in first sc, sk next ch-1 sp, (sc, picot, sc) in each of the next 6 ch-1 sps, sk next ch-1 sp, sc in next sc; repeat from * 6 more times. (Each scallop: 12 sc and 6 picots. Total: 84 + 8 = 92 sc, 42 picots)*
Do not fasten off. You are now at a bottom corner.
Edging Row: Work up the first side:
- 1 sc in the end of Border Row 2, 2 sc in the end of Border Row 1, 2 sc in the end of Skirt Row 2, and 1 sc in the end of Skirt Row 1 (6 sc)
- 1 sc in each of the 14 shoulder sts (14 sc)
- 3 sc around the end of each of Dome Rows 1–5 (15 sc)
- 1 sc in the end of Dome Row 6 (1 sc)
First side total: 36 sc.
Top and hanging cord: Sc in each of the first 4 sc of Dome Row 6. Then:
- Ch 8, slide the 6 mm bead up to the hook, and ch 1 to lock it.
- Ch 3, slide the 4 mm bead up, and ch 1 to lock it.
- Ch 25, then sl st in the ch just above the 4 mm bead to close the loop.
- Sl st in each of the 13 ch back down to the dome, easing each bead to one side as you go.
- Sc in the last 3 sc of Dome Row 6.
Top total: 7 sc.
Second side: Mirror the first side. Work 1 sc in the end of Dome Row 6, 3 sc around each end of Dome Rows 5–1, and 14 sc across the shoulder. Then work 1, 2, 2, and 1 sc into the ends of Skirt Row 1, Skirt Row 2, Border Row 1, and Border Row 2. (36 sc) Sl st to the first sc of Border Row 2 and fasten off.
Edging total: 36 + 7 + 36 = 79 sc.
Why the math works: The 40 bottom sts divide into 13 loops (1 sc plus 2 skipped sts each). Because 13 is odd, the 7 fans sit between 6 sc points, with a fan at each end. Each fan has 9 dc. Working the middle 7 gives 8 ch-1 spaces, and the picots go in the middle 6 of them. Both sides of the edging cover the same parts in the same order, so each side gets exactly 36 sc.
Center pearl: Sew the 8 mm pearl over the magic ring with sewing thread. Pass through the bead twice and knot on the WS.
Final Blocking
- Weave in all tails. Leave them a little long until the piece is dry.
- Dampen the bell lightly with cool water and press it in a towel.
- Pin it RS up to 3.5 in (8.9 cm) x 4.75 in (12.1 cm).
- Pin each petal tip and each cluster point outward from the center.
- Pin the 7 scallops into even curves and pin each picot open.
- Shape the dome mesh so the loops stay open and rounded.
- Spray with starch and let it dry completely before you unpin it. Then trim the tails.
Final Quality-Control Checklist
- [ ] 6 pointed petals with even ch-2 tips
- [ ] 12 teal clusters, paired between the petals
- [ ] Round 7 has 84 sc and measures 2.75 in (7.0 cm)
- [ ] The dome tapers evenly from 5 loops down to 1
- [ ] 7 equal scallops, 42 picots in all
- [ ] 36 sc on each side of the edging
- [ ] The cord is centered and both beads are locked in place
- [ ] Finished size is 3.5 in (8.9 cm) x 4.75 in (12.1 cm)
- [ ] The pearl is secure and no tails show on the RS
Troubleshooting
- Flower cups: Your Round 2 chains are too short. Make sure each is a true ch-5.
- Ring ruffles: Round 7 is too loose. Work it more snugly or use a smaller hook.
- Ring dishes: Round 7 is too tight. Go up one hook size for this round.
- Dome leans: Make sure Dome Row 1 begins and ends exactly at the markers.
- Uneven scallops: Recount to 9 dc per fan, then block each scallop to the same width.
- Beads missing: Thread both beads onto B before you start the border.
Care
Hand wash in cool water with mild soap, press dry in a towel, and re-block with starch. Store flat between tissue paper.
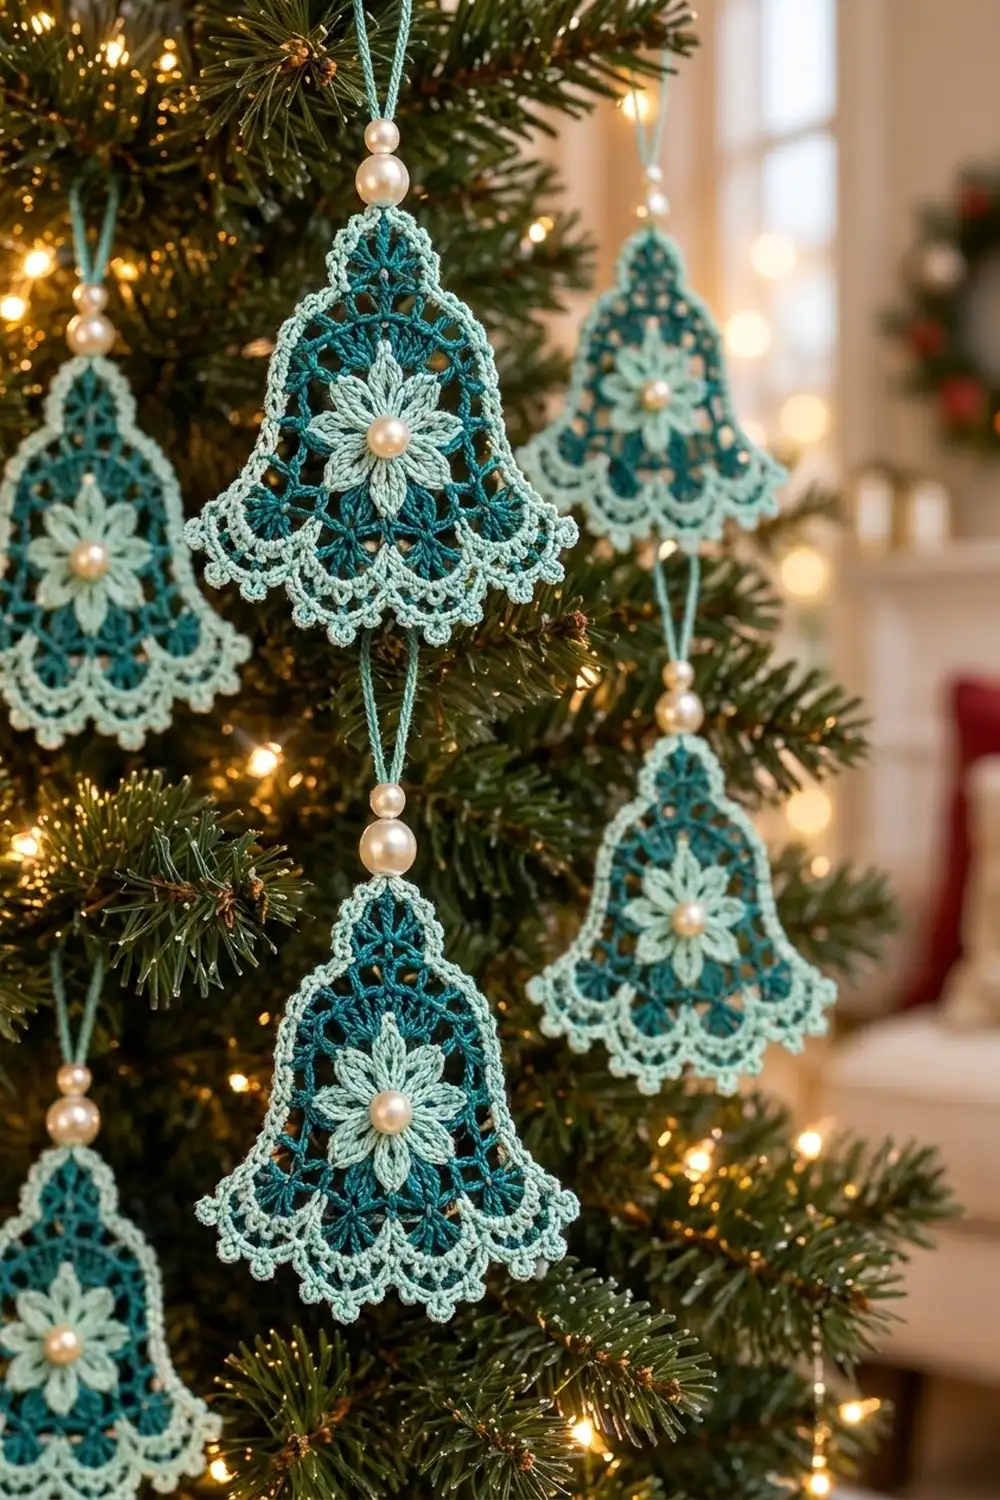
Final Notes
Check the measurements in order:
- Flower: 1.25 in (3.2 cm)
- Round 6: 2.25 in (5.7 cm)
- Round 7: 2.75 in (7.0 cm), with 84 sc
- After the dome: 3.75 in (9.5 cm) tall
- After the skirt: 3.25 in (8.3 cm) x 4.625 in (11.7 cm)
- After the border: 3.5 in (8.9 cm) x 4.75 in (12.1 cm)
If each checkpoint matches, the finished bell will too.
Happy crocheting!