
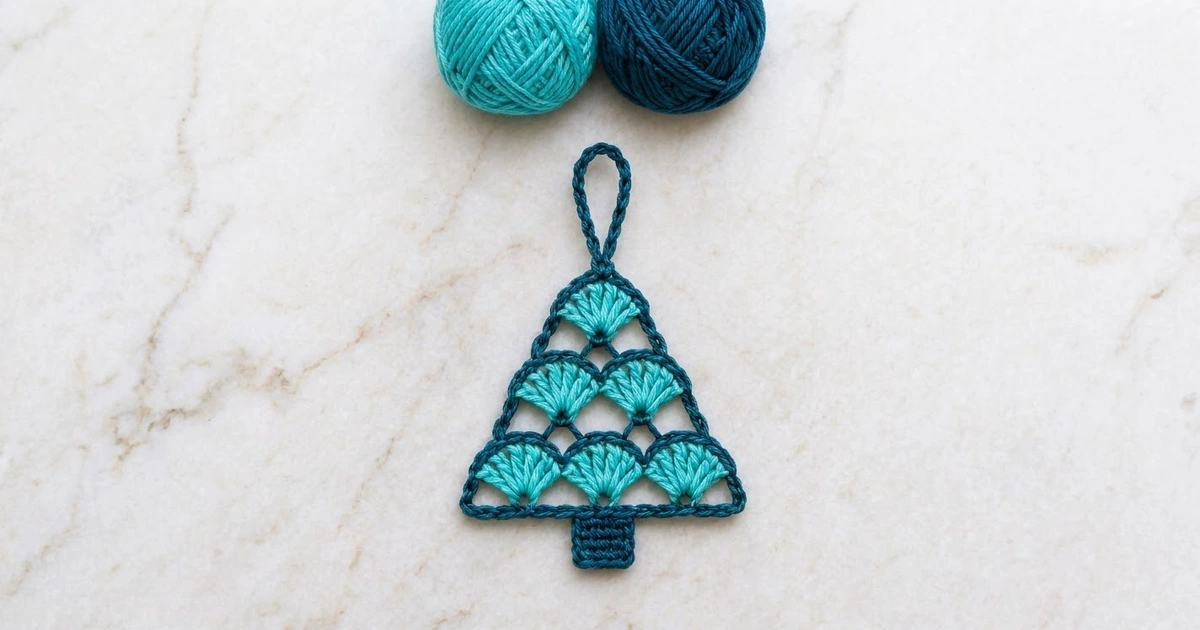
This little Christmas tree ornament is built from shell stitch fans stacked in three tiers: three fans at the bottom, two in the middle, and one at the top. Each fan is worked in bright turquoise, and a deep teal outline wraps every fan, runs along the straight diagonal sides, and finishes in a chain hanging loop at the peak. A small solid teal trunk sits under the center of the base.
The two-color palette is cool and modern, a nice change from the usual red and green. The deep teal outline makes the turquoise fans pop, and the open gaps between the fans let the branches of a real tree show through when it hangs.
The pattern uses US crochet terms. The finished ornament measures about 4 in (10.2 cm) wide at the base and 4.7 in (11.9 cm) tall from the top of the loop to the bottom of the trunk. The tree body alone is 4 in x 2.5 in (10.2 cm x 6.4 cm).
Construction is simple and flat. You work seven short rows from the base up, alternating a teal single crochet row with a turquoise shell row, and the shell rows get shorter at each tier. One teal border round then outlines the sides and base and makes the hanging loop. Finally, you work the trunk straight off the center of the base.
Finished Size and Construction
- Finished size: 4 in (10.2 cm) wide x 4.7 in (11.9 cm) tall, including loop and trunk
- Skill level: Easy to intermediate (you need to be comfortable changing colors)
- Terminology: US crochet terms
- Yarn weight: DK (light worsted, #3) cotton
- Hook: 3.5 mm (US E-4)
- Number of pieces: 1 (a single ornament worked all in one piece)
- Layout: One single motif; no joining
- Piece size (tree body, bordered): 4 in x 2.5 in (10.2 cm x 6.4 cm)
- Size before border: 3.8 in x 2.3 in (9.7 cm x 5.8 cm)
- Border depth: about 0.1 in (0.3 cm) on the sides and 0.2 in (0.5 cm) on the base
- Trunk: 1 in x 0.7 in (2.5 cm x 1.8 cm)
- Hanging loop: hangs about 1.5 in (3.8 cm) above the peak
Materials
Use a smooth mercerized or combed cotton in DK weight. Cotton gives the fans crisp, clear stitches and blocks flat, which is what you want in an ornament. Avoid fuzzy or very splitty yarn, since the stitches in the shells need to show clearly. Pick two shades with strong contrast so the outline reads clearly from across the room.
- Color A, turquoise (fans): 4 g, about 9 m
- Color B, deep teal (outline, loop, trunk): 6 g, about 14 m
Both quantities include a margin for swatching and weaving in ends. One 50 g ball of each color will make a whole set of ornaments.
Tools:
- 3.5 mm (US E-4) crochet hook
- Tapestry needle
- Scissors
- Stitch markers (2)
- Rust-proof pins and a foam blocking mat
- Spray bottle with water
- Ruler or tape measure
Abbreviations (US Terms)
- ch – chain
- sc – single crochet
- dc – double crochet
- sl st – slip stitch
- st(s) – stitch(es)
- RS – right side
- A – Color A, turquoise
- B – Color B, deep teal
Special stitch – Shell: Work 7 dc in the same stitch. Each shell counts as 7 sts.
Row direction: Every row is worked with the RS facing, starting at the right-hand end. Fasten off at the end of each row and join the next color at the right-hand end again. Work over the tails of the previous row as you go so you have fewer ends to weave in later.
Gauge and Checkpoints
Gauge: 10 sc and 12 rows = 2 in (5.1 cm) in sc with B. One shell is about 1.2 in (3.0 cm) wide and 0.5 in (1.3 cm) tall.
Gauge matters more than you’d think on a small piece, because the border chains are sized to fit the steps between the tiers. Make one ornament first and check it at each of these stages:
- After Row 1: 3.8 in (9.7 cm) long
- After Row 3 (Tier 1 complete): 3.8 in (9.7 cm) wide x about 0.9 in (2.3 cm) tall
- After Row 7 (before border): 3.8 in (9.7 cm) wide x 2.3 in (5.8 cm) tall
- After border: 4 in (10.2 cm) wide x 2.5 in (6.4 cm) tall
If your piece is too big, go down to a 3.25 mm (US D-3) hook. If it’s too small, go up to a 3.75 mm (US F-5) hook. If only the shells come out too tall, use slightly firmer tension on the dc and keep the hook size.
Pattern
Tier 1
Row 1 (B): Ch 20. Sc in the 2nd ch from hook and in each ch across. (19 sc) Fasten off.
Checkpoint: Row 1 measures 3.8 in (9.7 cm).
Row 2 (A): With RS facing, join A with a sc in the first sc. [Skip 2 sts, Shell in the next st, skip 2 sts, sc in the next st] 3 times. (3 shells + 4 sc = 25 sts) Fasten off.
The shells land on the 4th, 10th, and 16th sc of Row 1, and the sc land on the 1st, 7th, 13th, and 19th sc. The 7 dc worked into a single stitch leave a small eyelet at the base of each fan.
Row 3 (B): With RS facing, join B with a sc in the first sc. Sc in each st across. (25 sc) Fasten off.
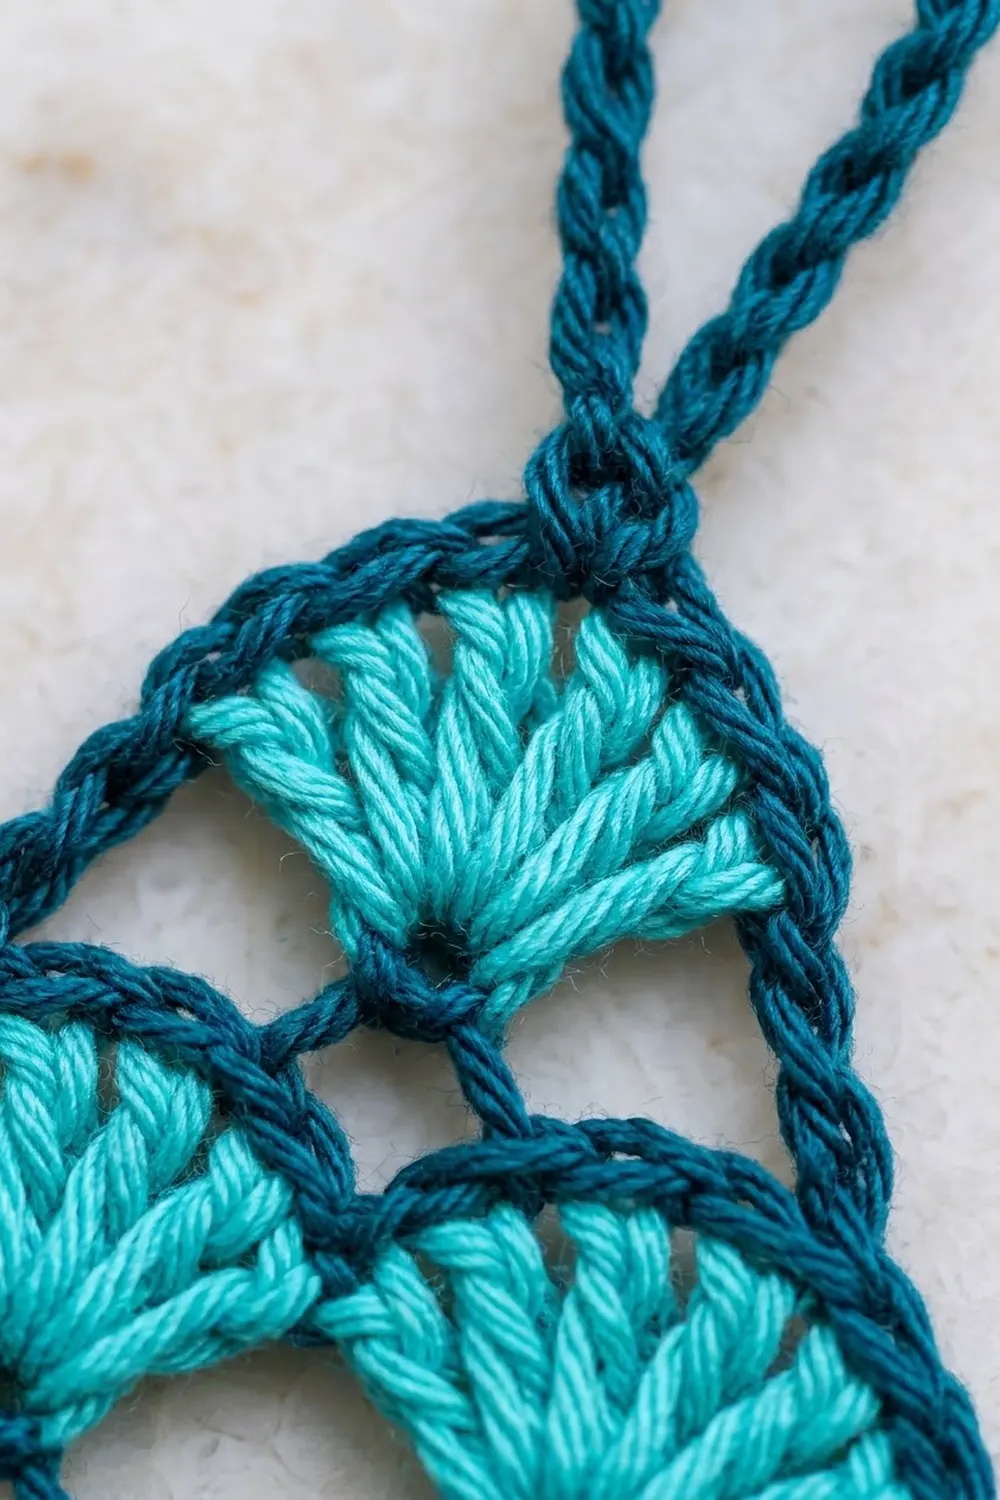
Working 1 sc into every dc of a shell makes a teal arc over the top of each fan. Each sc worked into a Row 2 sc dips down between two fans and forms a valley. Number the Row 3 sts 1 to 25: the fan centers are sts 5, 13, and 21, and the valleys are sts 9 and 17. Put a marker in st 5 now so the next join is easy to find.
Tier 2
Row 4 (A): With RS facing, join A with a sc in the 5th sc of Row 3 (the center of the first fan). [Skip 3 sts, Shell in the next st, skip 3 sts, sc in the next st] 2 times. (2 shells + 3 sc = 17 sts) Fasten off.
The shells sit in the two valleys (sts 9 and 17), and the sc anchor on the fan centers (sts 5, 13, and 21). This puts each new fan between the two fans below it. Leave 4 sts of Row 3 unworked at each end.
Row 5 (B): With RS facing, join B with a sc in the first sc. Sc in each st across. (17 sc) Fasten off.
In Row 5, the fan centers are sts 5 and 13, and the valley is st 9.
Tier 3
Row 6 (A): With RS facing, join A with a sc in the 5th sc of Row 5. Skip 3 sts, Shell in the next st, skip 3 sts, sc in the next st. (1 shell + 2 sc = 9 sts) Fasten off.
Row 7 (B): With RS facing, join B with a sc in the first sc. Sc in each st across. (9 sc) If you’re comfortable, keep going straight into the border without fastening off. Otherwise, fasten off and rejoin for the border.
Checkpoint: The piece measures 3.8 in (9.7 cm) wide and 2.3 in (5.8 cm) tall. You should see a stepped triangle with 3, 2, and 1 fans, each capped with a teal arc. Each tier is 4 sts narrower on each side than the tier below.
Border and Hanging Loop
Border gauge: The base keeps the same gauge as Row 1, 1 sc per foundation loop, or 5 sc per inch (2.5 cm). The sides are bridged with ch-4 spaces, one per tier step.
Number the sts of Row 7 from 1 to 9, right to left. Row 7 ends at st 9 (the left end). If you fastened off, rejoin B there.
Border Round (B):
- First side (down): Ch 1, sc in st 9 of Row 7. Ch 4, sc in the end sc of Row 5. Ch 4, sc in the end sc of Row 3. Sc in the row-end of Row 2, sc in the row-end of Row 1. (5 sc + 2 ch-4 spaces)
- Base: Rotate so you are working into the free loops of the foundation chain. Work 3 sc in the first free loop (corner), 1 sc in each of the next 17 free loops, and 3 sc in the last free loop (corner). (23 sc, including both corner groups)
- Second side (up): Sc in the row-end of Row 1, sc in the row-end of Row 2, sc in the end sc of Row 3. Ch 4, sc in the end sc of Row 5. Ch 4, sc in st 1 of Row 7. (4 sc + 2 ch-4 spaces)
- Top and loop: Sl st in sts 2, 3, 4, and 5 of Row 7. Ch 16, sl st in st 5 again to form the loop. Sl st in sts 6, 7, and 8. Join with a sl st in the first sc of the round. Fasten off.
Total for the round: 32 sc (5 + 23 + 4), 4 ch-4 spaces, and a 16-ch loop.
Why the math works: Row 1 has 19 sts, so the foundation has 19 free loops. On the base, 17 loops get 1 sc each and the 2 corner loops get 3 sc each: 17 + 6 = 23 sc. The corner sc are counted once, inside that 23. On the sides, each tier starts 4 sts in from the tier below (Row 3 spans sts 1–25, Row 5 spans 5–21, Row 7 spans 9–17). A ch-4 matches that 4-st step, so the sides come out as straight diagonals without pulling or rippling. The loop is centered on st 5 of Row 7, directly over the center dc of the top fan, with 4 sts on each side.
Trunk
Rotate the tree so the base is on top, RS facing. Count the 23 base sc from the right-hand corner: the 12th is the center.
Row 1 (B): Join B with a sc in the 10th base sc. Sc in each of the next 4 sts. (5 sc)
Rows 2–4: Ch 1, turn, sc in each st across. (5 sc)
Fasten off, leaving a 6 in (15.2 cm) tail. Weave in the tail, or keep it to tie the ornament on if you’d rather not use the loop.
Checkpoint: The trunk measures 1 in (2.5 cm) wide x 0.7 in (1.8 cm) tall, centered under the tree with 9 base sc on each side.
Final Blocking
- Weave in all remaining ends along the teal rows so they don’t show through the turquoise.
- Spray the ornament lightly until it is damp but not dripping.
- Lay it flat on the blocking mat, RS up.
- Pin the two bottom corners 4 in (10.2 cm) apart.
- Pin the peak so the tree body is 2.5 in (6.4 cm) tall from base to top arc.
- Pull each ch-4 space taut and pin it so the sides are straight lines.
- Gently open each fan with your fingers so the 7 dc spread evenly, and pin the top of each arc.
- Straighten the trunk into a neat rectangle and lay the loop flat.
- Leave it to dry completely, at least 4–6 hours, before unpinning.
Final Quality-Control Checklist
- Tier stitch counts: Row 1 = 19, Row 2 = 25, Row 3 = 25, Row 4 = 17, Row 5 = 17, Row 6 = 9, Row 7 = 9.
- There are 6 fans in a 3-2-1 layout, and each upper fan sits centered between two lower fans.
- The border base has 23 sc, and each side has two ch-4 spaces.
- The loop is centered over the top fan.
- The trunk is 5 sc wide, with 9 base sc on each side.
- The tree body is 4 in x 2.5 in (10.2 cm x 6.4 cm), and the full height is 4.7 in (11.9 cm).
- No tails are visible from the RS.
Troubleshooting
The fans ruffle or cup. Your dc are too loose for the skipped sts. Tighten your tension or try a smaller hook just for the shell rows.
The upper fans aren’t centered. Recount Row 3 or Row 5 and mark the 5th st before joining A. The join must land on a fan center, not a valley.
The sides bow outward. The ch-4 spaces are too long for your tension. Try ch 3.
The sides pull inward and the fans pucker. The chains are too tight. Try ch 5, or chain more loosely.
The base flares. Make sure there is only 1 sc in each of the 17 middle free loops, and don’t add extra sc at the corners.
The trunk is off-center. Count the base again: the trunk starts in st 10 and ends in st 14 of the 23.
Care
Hand wash in cool water with mild soap, press out the water in a towel, and dry flat. If the fans lose their shape, reshape and re-block.

Final Notes
Here is the measurement chain to keep in mind: Row 1 is 19 sc and 3.8 in (9.7 cm). The three tiers bring the piece to 3.8 in x 2.3 in (9.7 cm x 5.8 cm). The border brings the body to 4 in x 2.5 in (10.2 cm x 6.4 cm). The 1 in x 0.7 in (2.5 cm x 1.8 cm) trunk and the 1.5 in (3.8 cm) loop complete the ornament at 4.7 in (11.9 cm) tall. If you match the gauge and the counts at each checkpoint, every ornament you make will be the same size, ready for gift tags or a matching set for your tree.
Happy crocheting!