

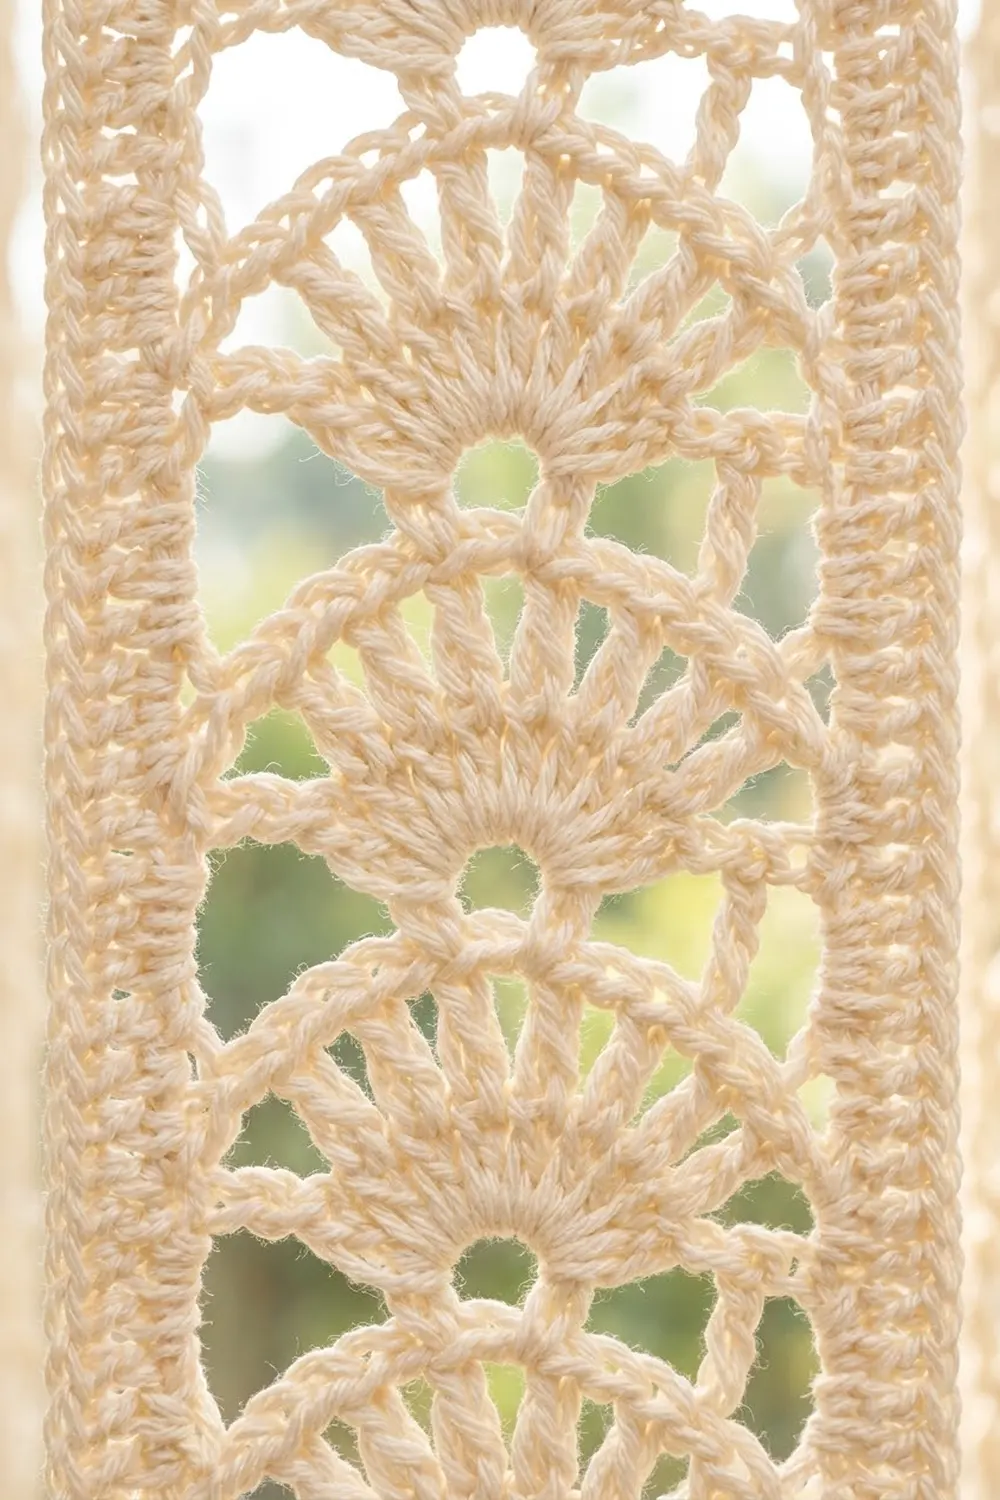
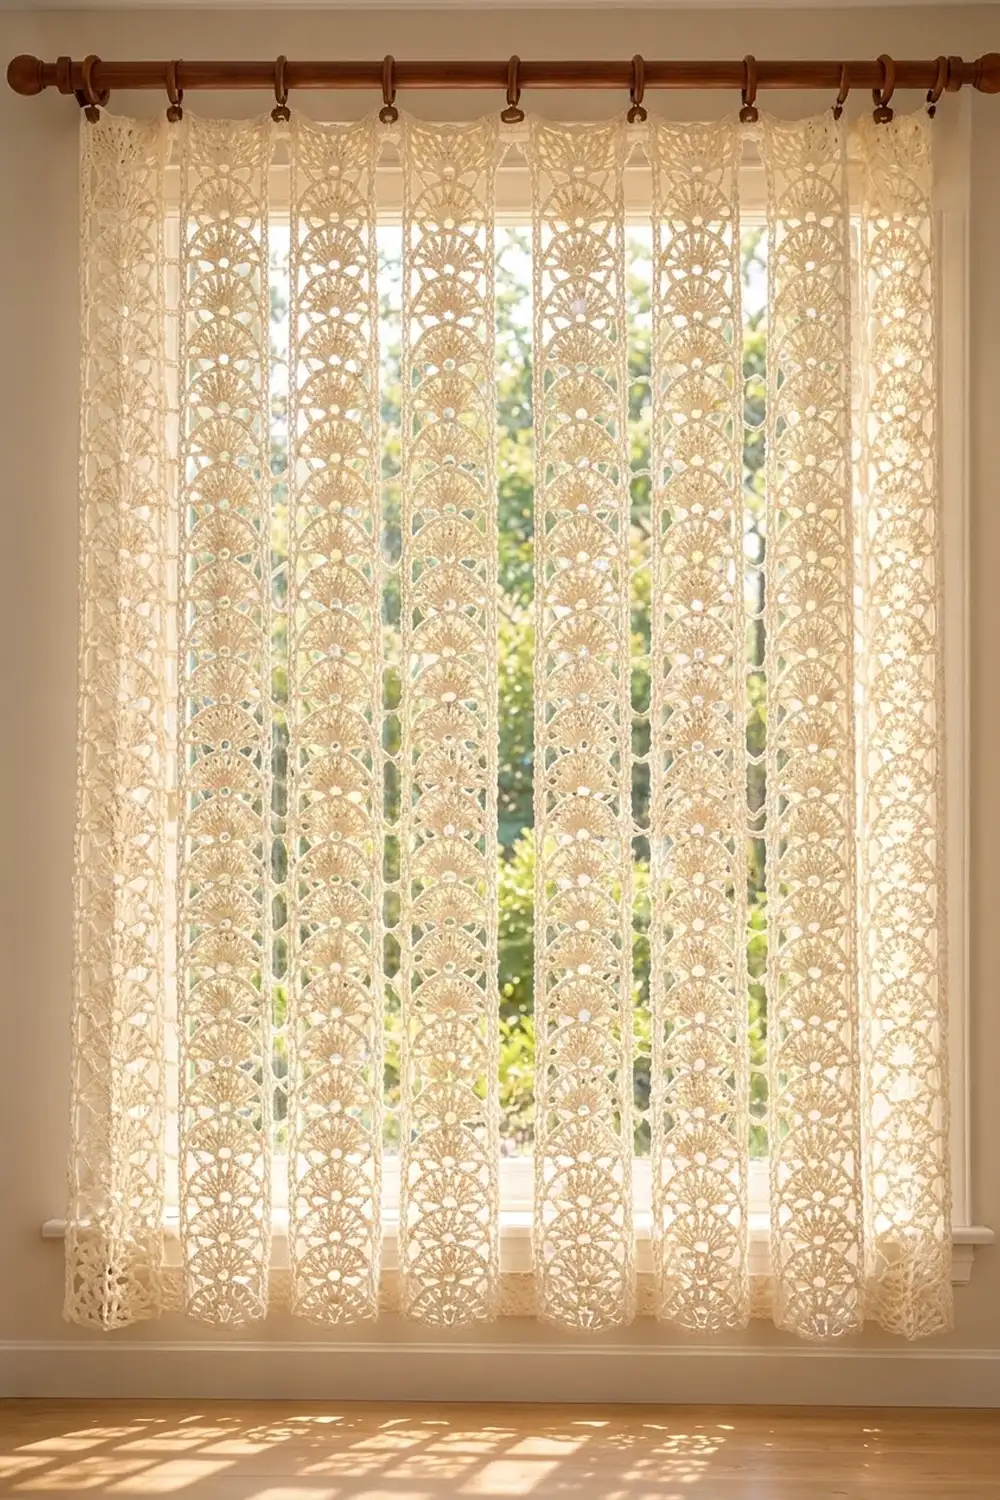
This curtain is built from tall columns of lace fans. Each fan opens upward from a small round hole, spreads into nine slim rays, and finishes with a scalloped arch. The next fan sits right on top of that arch, so each column looks like a long string of stacked shells.
The sample is worked in a single cream cotton. The fabric is mostly open space, so it filters light softly and throws a lacy shadow on the floor. The look is calm and classic, and it suits farmhouse, cottage, and minimal rooms equally well.
The pattern uses US crochet terms. The finished curtain measures 41 in wide x 60 in long (104.1 cm x 152.4 cm), including a narrow border.
You make eight identical strips, each worked flat in rows from the bottom up. Then you slip-stitch the strips together along their long edges, add a two-round single crochet border around the whole panel, and block. The solid double crochet edges on each strip give you a clean, easy seam line.
Finished Size and Construction
- Finished size: 41 in x 60 in (104.1 cm x 152.4 cm)
- Skill level: Intermediate
- Terminology: US
- Yarn weight: DK (#3), cotton
- Hook: 4.0 mm (US G-6)
- Number of pieces: 8 strips
- Layout: 8 strips side by side, 1 row of strips
- Piece size (one blocked strip): 5 in x 59 in (12.7 cm x 149.9 cm)
- Size before border: 40 in x 59 in (101.6 cm x 149.9 cm)
- Border depth: 0.5 in (1.3 cm) on every side
Materials
Yarn: Choose a smooth, mercerized or combed cotton in DK weight. Cotton holds the fan shapes crisply, blocks well, and does not stretch much while hanging. Avoid fuzzy or very splitty yarns, because they blur the holes.
- Cream / ivory: about 500 g, approximately 1,200 m (1,312 yd), based on a yarn with about 120 m per 50 g
Each strip uses about 50 g. Joining and the border use about 40 g together. The total above includes a margin of roughly 60 g, so you will not run short if your tension is slightly loose.
Tools:
- 4.0 mm (US G-6) crochet hook
- Tapestry needle
- 10 locking stitch markers
- Measuring tape
- Rust-proof pins and a large blocking surface (foam mats or a bed with a towel)
- Spray bottle
- Curtain rod with 9 or more clip rings, for hanging
Abbreviations (US Terms)
- ch – chain
- sl st – slip stitch
- sc – single crochet
- dc – double crochet
- sk – skip
- sp – space
- st(s) – stitch(es)
- RS / WS – right side / wrong side
Special stitch – V-stitch (V-st): (dc, ch 2, dc) all in the same stitch. The ch-2 space in the middle becomes the small round hole at the base of each fan.
Note: The ch 3 at the start of each row counts as the first dc.
Gauge and Checkpoints
Gauge: 21 dc = 5 in (12.7 cm) and 8 rows of dc = 4 in (10.2 cm), after blocking. One fan tier (4 rows) = 2 in (5.1 cm), after blocking.
Before you commit, work the first five tiers of one strip. Wet-block that section lightly, let it dry, and measure.
Checkpoints for one strip:
- After Row 1: width 5 in (12.7 cm)
- After Row 5 (first fan tier): height 2.5 in (6.4 cm)
- After Row 21 (five tiers): height 10.5 in (26.7 cm)
- Finished strip, blocked: 5 in x 59 in (12.7 cm x 149.9 cm)
If your strip is too wide, go down to a 3.75 mm hook. If it is too narrow, go up to a 4.5 mm hook. Do not change the stitch count; the fan math depends on 21 stitches.
If your tiers are too tall or short, check width first. If the width is right but the height is off, you can add or remove tiers. Each tier changes the length by 2 in (5.1 cm). The yarn estimate changes by about 13 g (31 m) per curtain for every tier you add or remove.
Strip Pattern
Every strip is worked the same way. Rows 2–5 form the first fan tier. Rows 6–9 form every following tier.
Foundation: Ch 23.
Row 1 (RS): Dc in 4th ch from hook (the skipped 3 ch count as 1 dc) and in each ch across, turn. (21 dc)
First Fan Tier
Row 2 (V-row): Ch 3, dc in next st, ch 7, sk next 8 sts, V-st in next st (this is the 11th, center stitch), ch 7, sk next 8 sts, dc in last 2 sts, turn. (4 dc, 1 V-st, 2 ch-7 sps)
Check: 2 + 8 + 1 + 8 + 2 = 21 stitches of Row 1 used.
Row 3 (fan row): Ch 3, dc in next dc, ch 3, sk ch-7 sp and first dc of V-st, 9 dc in ch-2 sp of V-st, ch 3, sk second dc of V-st and ch-7 sp, dc in last 2 dc, turn. (13 dc: 2 edge + 9 fan + 2 edge; 2 ch-3 sps)
Row 4 (ray row): Ch 3, dc in next dc, ch 2, dc in first fan dc, (ch 1, dc in next fan dc) 8 times, ch 2, dc in last 2 dc, turn. (13 dc; 8 ch-1 sps between fan dc; 2 ch-2 sps)
The ch-1 spaces spread the nine fan stitches into separate rays.
Row 5 (arch row): Ch 3, dc in next dc, ch 1, sc in first fan dc, (ch 2, sc in next fan dc) 8 times, ch 1, dc in last 2 dc, turn. (4 dc, 9 sc, 8 ch-2 sps, 2 ch-1 sps)
The ch-2 loops form the scalloped arch over the fan. The 5th sc is the top center of the arch.
Repeating Fan Tier
Row 6 (V-row): Ch 3, dc in next dc, ch 7, sk ch-1 sp and first 4 sc with their ch-2 sps, V-st in 5th (center) sc, ch 7, sk remaining 4 sc, ch-2 sps and ch-1 sp, dc in last 2 dc, turn. (4 dc, 1 V-st, 2 ch-7 sps)
The new V-st sits on the center of the arch, so each fan rises from the arch below it.
Row 7: Work as Row 3. (13 dc, 2 ch-3 sps)
Row 8: Work as Row 4. (13 dc, 8 ch-1 sps, 2 ch-2 sps)
Row 9: Work as Row 5. (4 dc, 9 sc, 8 ch-2 sps, 2 ch-1 sps)
Repeat Rows 6–9 another 27 times, ending with Row 117. You now have 29 fan tiers. Place a marker every 5 tiers to make counting easier.
Top Row
Row 118 (closing row): Ch 3, dc in next dc, sk ch-1 sp, dc in next sc, (dc in next ch-2 sp, dc in next sc) 8 times, sk ch-1 sp, dc in last 2 dc. (21 dc)
Count: 2 edge dc + 17 center dc (1 + 8 x 2) + 2 edge dc = 21. This matches Row 1, so the top and bottom of each strip are both exactly 21 stitches.
Fasten off, leaving a 6 in (15.2 cm) tail. Weave in all ends.
Strip total: 118 rows, 5 in x 59 in (12.7 cm x 149.9 cm) blocked. Height check: Row 1 (0.5 in) + 29 tiers x 2 in (58 in) + Row 118 (0.5 in) = 59 in (149.9 cm).
Make All Pieces
Make 8 strips in cream, using about 50 g each and 400 g in total.
Lightly block every strip to 5 in x 59 in (12.7 cm x 149.9 cm) before joining. Strips of matching length give you a straight hem.
Layout (front view, all strips RS facing, Row 1 at the bottom):
| S1 | S2 | S3 | S4 | S5 | S6 | S7 | S8 |
All strips run in the same direction, so the fans all open upward.
Joining
Method: Slip-stitch seam on the WS.
- Place Strip 1 and Strip 2 RS together, edges aligned, Row 1 at the bottom.
- Pin at the bottom, top, and every 10 in (25.4 cm). Match row to row: Row 1 to Row 1, Row 118 to Row 118. The markers you placed every 5 tiers should line up.
- Join yarn at the bottom corner through both layers.
- Work 2 sl st into each matching pair of dc row ends, going through both layers. That is 118 row ends x 2 = 236 sl st per seam.
- Fasten off and weave in the ends.
Join the remaining strips in order, S2 to S3 and so on. There are 7 seams in total.
Stitch logic: Every row of every strip ends in the same 2-dc edge column, so the row ends match exactly. Two slip stitches per dc row end match the height of the row without gathering.
Tension: Keep slip stitches as loose as your normal dc. Tight slip stitches pucker the seam and shorten the curtain along that line. If your slip stitches tend to be tight, go up to a 4.5 mm hook for joining only.
Size checkpoint: The joined panel should measure 40 in x 59 in (101.6 cm x 149.9 cm). The flat seams add no measurable width, so 8 strips x 5 in = 40 in. If the panel is uneven at the top or bottom, a seam has slipped a row. Unpick back to the misaligned marker and rejoin.
Border
Border gauge: 21 sc = 5 in (12.7 cm) along the top and bottom; 4 sc = 1 in (2.5 cm) along the sides (2 sc per dc row end).
Starting counts:
- Top edge: 8 strips x 21 sts = 168 sts
- Bottom edge: 8 strips x 21 foundation ch = 168 sts
- Each side edge: 118 row ends x 2 sc = 236 sc
The 21 stitches per strip already include each strip’s own corner stitches. No stitches are added at the seams.
Round 1 (RS): Join yarn in the first st of the top edge at the right corner. Ch 1, sc in each of the 168 sts across the top, ch 2 (corner). Working down the side, 2 sc in each of the 118 row ends (236 sc), ch 2 (corner). Working into the foundation chains, sc in each of the 168 sts across the bottom, ch 2 (corner). Working up the other side, 2 sc in each row end (236 sc), ch 2 (corner). Join with sl st to first sc.
(168 + 236 + 168 + 236 = 808 sc, plus 4 ch-2 corner sps)
Round 2: Ch 1, sc in each sc, and work (sc, ch 2, sc) in each ch-2 corner sp. Join with sl st to first sc.
(Top and bottom: 170 sc each; sides: 238 sc each; total 816 sc, plus 4 ch-2 corner sps)
Fasten off and weave in the ends.
Why the math works: The top and bottom counts come straight from the strips: 8 x 21 = 168, which at 21 sc per 5 in equals 40 in. The sides use 2 sc per dc row end: 236 sc at 4 sc per in equals 59 in. The border stitches match the gauge of the panel, so the edges lie flat without ruffling or cupping. The corner chain spaces give each corner room to turn, and Round 2 adds exactly 1 sc to each end of every side.
Two rounds of sc add 0.5 in (1.3 cm) on every side. The final size is 40 + 1 = 41 in by 59 + 1 = 60 in (104.1 cm x 152.4 cm).
Final Blocking
- Weave in any remaining ends along the dc edge columns, where they hide easily.
- Soak the curtain in cool water with a little gentle wash for 15 minutes.
- Press out the water gently. Roll the curtain in towels to remove more moisture. Do not wring.
- Lay the curtain flat on your blocking surface, RS up.
- Pin the four corners to 41 in x 60 in (104.1 cm x 152.4 cm).
- Pin along each edge every 3 in (7.6 cm), keeping the edges straight.
- Gently open each fan with your fingers, centering the base hole and spreading the rays evenly. Pin the tops of any arches that curl.
- Let it dry completely, at least 24 hours.
- Unpin and hang on clip rings. Place one ring at each top corner and space the others evenly, about every 5 in (12.7 cm).
Final Quality-Control Checklist
- All 8 strips have 29 fan tiers and 118 rows.
- Every fan has 9 rays and a round hole at its base.
- Every V-st sits on the center sc of the arch below.
- All fans open upward.
- The 7 seams are flat and line up row to row.
- Border Round 2 has 170 sc on the top and bottom and 238 sc on each side.
- The finished curtain measures 41 in x 60 in (104.1 cm x 152.4 cm).
- All ends are woven in securely.
Troubleshooting
Fans lean to one side: The V-st was not worked in the center stitch. In Row 2, count 10 stitches before the V-st. In later V-rows, count 4 sc before the center sc.
Arches look flat or crowded: Check that you worked ch 2 between the sc, not ch 1. Every arch row needs 8 ch-2 loops.
Strip edges wave: Your ch-7 spaces may be too tight or too loose. Keep your chains the same size as your normal stitches.
Strip is narrower at the top: Make sure Row 118 has exactly 21 dc and skips both ch-1 spaces.
Seam puckers: Rip it out and rejoin more loosely, or use a larger hook for joining.
Border ruffles: Use 2 sc per row end, not 3. If it still ruffles, your sc tension is loose; go down half a hook size for the border.
Curtain is too long: Before joining, take out whole tiers from the top of each strip, 2 in (5.1 cm) per tier.
Care
Hand wash, or machine wash in a mesh bag on a gentle cool cycle, then reshape and dry flat. Re-block lightly if the fans lose their shape.
Final Notes
Here is the full measurement chain. Gauge sets 21 dc at 5 in (12.7 cm). One strip of 29 tiers plus a starting row and a closing row measures 5 in x 59 in (12.7 cm x 149.9 cm). Eight strips joined edge to edge make 40 in x 59 in (101.6 cm x 149.9 cm). A 0.5 in (1.3 cm) border brings the curtain to 41 in x 60 in (104.1 cm x 152.4 cm).
Check your gauge on the first strip and use markers to keep your rows matched, and the panel will hang straight and even.
Happy crocheting!