

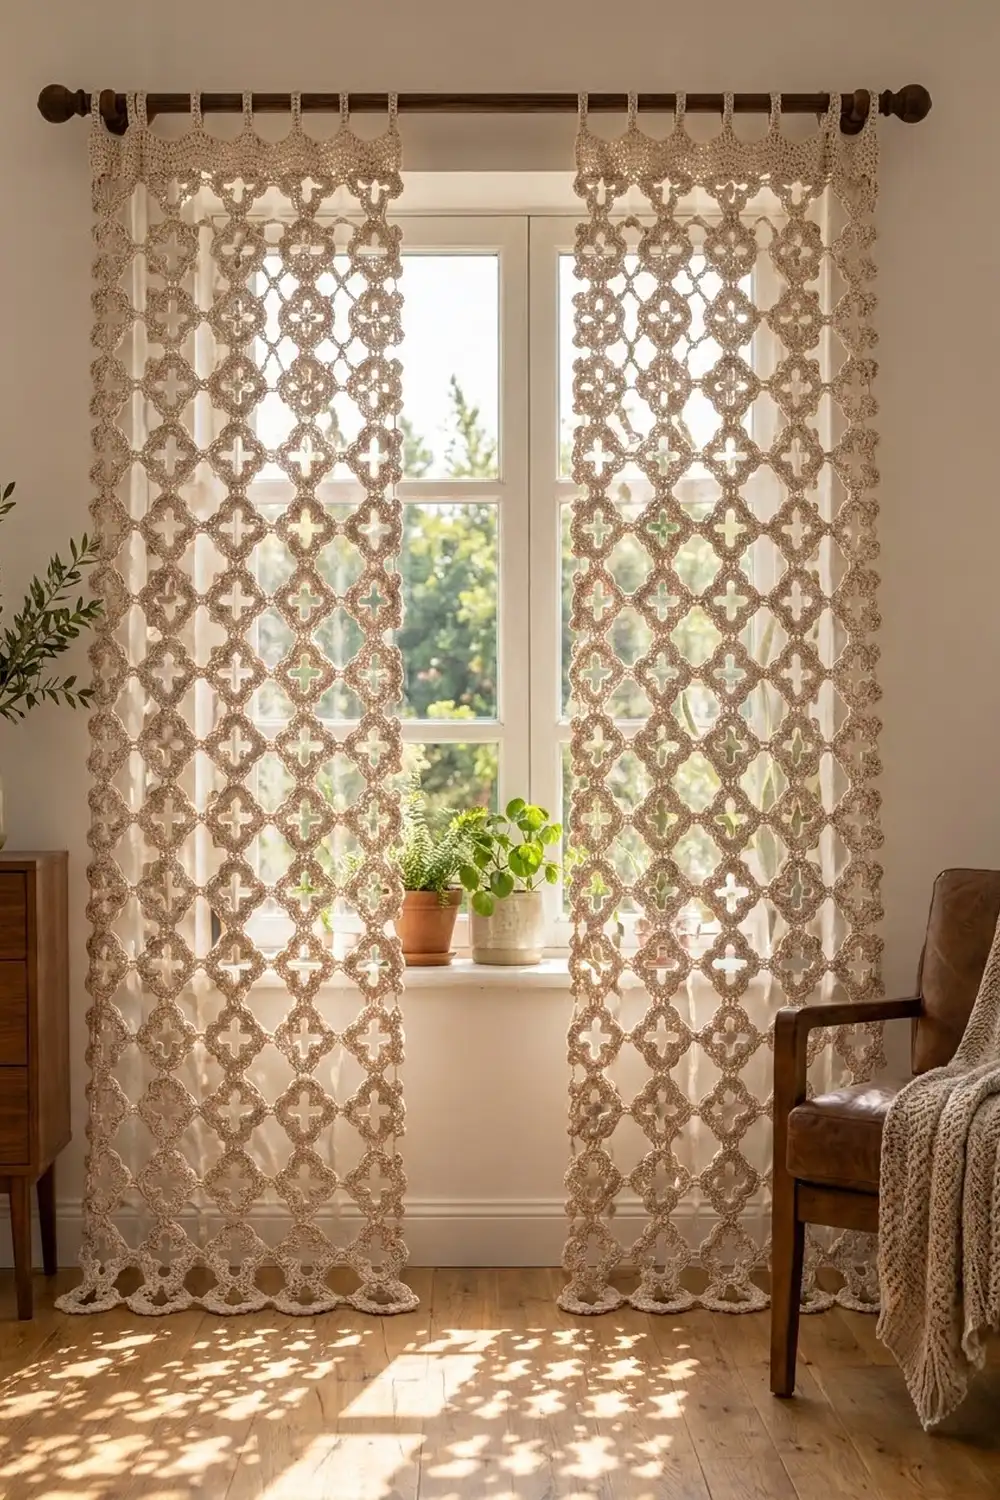
These curtains filter daylight through rows of open quatrefoil motifs. Each four-lobed motif frames a cross-shaped window, and short links at the lobe tips join the motifs into an airy grid. The result is a lace curtain with a modern, sculptural look.
The pattern uses one color: a natural oatmeal cotton that looks warm in sunlight and goes with wood, linen and plants. The thick, rope-like stitches give each motif a raised outline, so the panels look good from both inside and outside.
The pattern uses US crochet terms. Each finished panel measures 30 in wide x 78.9 in long (76.2 x 200.4 cm), not counting the tab loops. The pattern makes two panels.
Here’s how it works. You crochet each motif in four rounds and join it to its neighbors while you work the last round (join-as-you-go). Ninety motifs make a 6 x 15 grid for each panel. A filler row then levels the top edge, a solid double crochet band goes over it, and seven tabs finish the panel for hanging.
Finished Size and Construction
- Finished panel size: 30 x 78.9 in (76.2 x 200.4 cm), excluding tabs
- Skill level: Intermediate
- Terminology: US crochet terms
- Yarn weight: Worsted (#4) cotton
- Hook: 5.0 mm (H-8)
- Number of pieces: 90 motifs per panel, 180 motifs for the pair
- Layout: 6 motifs across x 15 motifs down per panel
- Motif size: 4.5 in (11.4 cm) tip to tip
- Joined link: 0.6 in (1.5 cm) between lobe tips
- Size before border: 30 x 75.9 in (76.2 x 192.8 cm)
- Border (top band) depth: 3 in (7.6 cm), plus tabs that hang as 2.5 in (6.4 cm) loops
Materials
Yarn: Choose a smooth, firm worsted-weight cotton or cotton blend with good stitch definition. Mercerized or tightly plied cotton shows the rope-like texture best. Avoid fuzzy or very soft yarn, because the motif outlines will blur and the panel may stretch.
- Oatmeal (natural cream-beige): 1,400 g / 2,660 m (2,909 yd), about 14 balls of 100 g / 190 m (208 yd). That’s about 700 g (1,330 m) per panel.
Each motif uses about 6 g, or 12 m (13 yd). These quantities include a margin of about 15% for gauge swatches, joining and the tabs. Buy all the yarn from one dye lot.
Tools:
– 5.0 mm (H-8) crochet hook
– Tapestry needle
– Scissors
– Stitch markers
– Tape measure
– Blocking mats or a large clean towel, plus rust-proof pins
– Spray bottle
– A curtain rod up to 1.25 in (3.2 cm) in diameter
Abbreviations (US Terms)
- ch – chain
- sl st – slip stitch
- sc – single crochet
- hdc – half double crochet
- dc – double crochet
- tr – treble crochet
- dtr – double treble crochet (yarn over 3 times, insert hook, pull up a loop, then [yarn over, pull through 2 loops] 4 times)
- sp – space
- st(s) – stitch(es)
- RS / WS – right side / wrong side
Special stitch – sc3tog: (Insert hook in the next st, yarn over, pull up a loop) 3 times, then yarn over and pull through all 4 loops on the hook. This makes 1 stitch from 3. Here it pulls the foundation ring inward to form the pointed inner corners of the cross-shaped opening.
Gauge and Checkpoints
Make one complete motif before you start the panels and block it lightly. Hold every motif to these checkpoints:
- After Rnd 2: about 3 in (7.6 cm) across
- After Rnd 3: about 4 in (10.2 cm) across
- After Rnd 4: 4.5 in (11.4 cm) tip to tip, with an opening of about 1.5 in (3.8 cm)
A motif between 4.25 and 4.75 in (10.8 and 12.1 cm) is acceptable, as long as every motif stays consistent.
Band gauge: 16 dc and 8 rows = 4 in (10.2 cm). Tab gauge: 16 sc and 18 rows = 4 in (10.2 cm).
If your motif is too big, go down 0.5 mm in hook size. If it is too small, go up 0.5 mm. Keep the foundation chain loose, because a tight ring closes up the center opening.
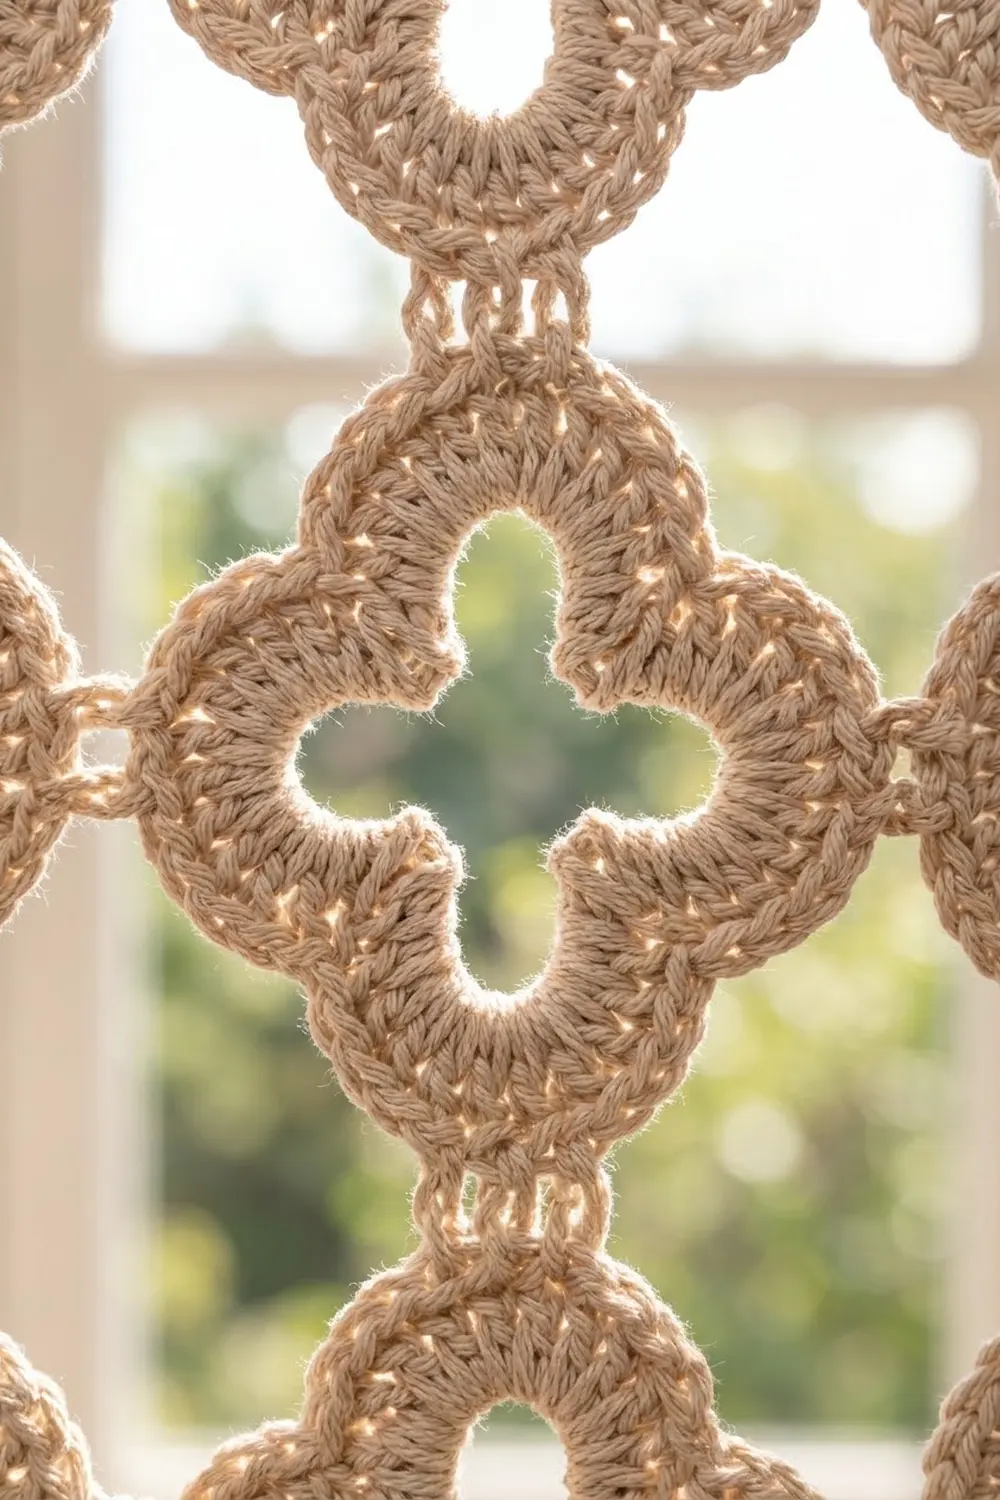
Motif (make 180)
Rnd 1 (foundation ring): Ch 40 and sl st to the first ch to form a ring. Take care not to twist it. (40 ch)
Rnd 2 (shaping round): Ch 1 (does not count as a st). *Sc3tog over the next 3 ch, hdc in the next ch, 2 dc in each of the next 4 ch, hdc in the next ch, sc in the next ch. Repeat from * 3 more times. Sl st to the first sc3tog to join.
Stitch count: 12 sts per lobe, 48 sts total.
Each sc3tog becomes an inner point of the opening, and each group of 8 dc becomes a lobe.
Rnd 3 (growth round): Ch 1. *Sc in the sc3tog, hdc in the hdc, [dc in the next dc, 2 dc in the next dc] 4 times, hdc in the hdc, sc in the sc. Repeat from * 3 more times. Sl st to the first sc to join.
Stitch count: 16 sts per lobe, 64 sts total.
Rnd 4 (outline round, unjoined version): Don’t chain. Sl st in the same st as the join. *Sc in the hdc, sc in each of the next 6 dc, ch 3 (lobe tip), sc in each of the next 6 dc, sc in the hdc, sl st in the sc. Sl st in the next sc to begin the next lobe and repeat from * 3 more times, ending the last repeat with the sl st in the final sc. Sl st to the first sl st and fasten off.
Stitch count: 14 sc per lobe, 56 sc total, plus 8 sl sts and 4 ch-3 tip spaces.
The 2 sl sts between neighboring lobes make the dipped outer valleys, and the ch-3 tips form the joining points.
Only the very first motif is worked fully unjoined. Every other motif joins as it goes; see Joining.
Make All Pieces
Make 90 motifs per panel, all in Oatmeal: 180 motifs for the pair. Work row by row, from left to right and from top to bottom. Use this layout grid for each panel (M = motif; the top row is under the band):
Band + tabs
Row 1:  M  M  M  M  M  M
Row 2:  M  M  M  M  M  M
Row 3:  M  M  M  M  M  M
 ...    (repeat for Rows 4–14)
Row 15: M  M  M  M  M  M
Each motif’s top lobe points up, its bottom lobe points down, and its side lobes point left and right. Keep this orientation for every motif so the openings line up.
Joining
Method: Join-as-you-go in Rnd 4. When you reach a lobe tip that joins a finished motif, replace the ch 3 with: ch 1, sl st into the neighbor’s ch-3 tip sp, ch 1. Then continue the round as written.
Stitch-to-stitch logic: Each joined tip still has 1 ch on each side of the sl st. It therefore works as a ch-3 sp for later steps. Every motif keeps its 56 sc, and no stitches are added or removed at the joins.
- Row 1 motifs: join each motif’s left tip to the right tip of the motif before it.
- Rows 2–15: join the top tip to the bottom tip of the motif above. For the 2nd through 6th motifs in a row, also join the left tip to the right tip of the motif to the left.
Tension: Keep the joining chains the same height as your regular chains. If a link pulls tight, the grid will pucker; if it’s loose, the panel will sag. Each link should measure about 0.6 in (1.5 cm), so motif centers sit about 5.1 in (13.0 cm) apart.
Size checkpoints:
– After Row 1, the strip should measure 30 in (76.2 cm): 6 x 4.5 in + 5 x 0.6 in.
– After 5 rows: 24.9 in (63.2 cm) long.
– After 10 rows: 50.4 in (128.0 cm) long.
– After 15 rows: 75.9 in (192.8 cm) long.
Border: Top Band and Tabs
The sides and hem have no border. The motif lobes stay as a scalloped edge, just like in the photo. Only the top edge gets a border.
Border gauge: 16 dc = 4 in (10.2 cm), or 4 dc per inch. The band’s 30 in (76.2 cm) width needs 120 sts, which is 20 sts per motif.
Row 1 (filler/conversion row): With RS facing, join yarn in the left tip sp of the first top-row motif. Ch 5 (counts as the first dtr).
For each motif, work: dtr in the left tip sp (the ch 5 replaces this on the first motif), ch 2, tr in the valley between the 2 sl sts, ch 1. Skip the first sc of the top lobe and the next 2 sc. Sc in each of the next 4 sc, 2 sc in the top ch-3 sp, sc in each of the next 4 sc. Skip the next 3 sc, ch 1, tr in the next valley, ch 2, dtr in the right tip sp.
Repeat for all 6 motifs. At each join, the right dtr of one motif and the left dtr of the next sit side by side in the same link.
Stitch count: 20 per motif (2 dtr + 2 tr + 10 sc + 6 ch), for a total of 6 x 20 = 120 sts.
The tall stitches reach down to the lower side tips and valleys, and the sc stay at tip height, so this row makes the top edge straight.
Row 2: Ch 3 (counts as dc throughout) and turn. Dc in each st and each ch across. (120 dc: 1 per existing st, 0 added)
Rows 3–7: Ch 3, turn, dc in each dc across. (120 dc)
The band measures 3 in (7.6 cm) deep from the top tips. Don’t fasten off.
Why the math works: Each motif gives exactly 20 sts at 4 dc per inch, which is 5 in of band. That equals 4.5 in of motif plus one 0.6 in link, minus a 0.1 in share at the ends, so the 120 sts match the 30 in (76.2 cm) motif strip. There are no extra seam stitches, because the side-by-side dtr already belong to the 20-st count of their own motif.
Tabs (7 per panel): With RS facing, work across the top of Row 7. Tabs sit on sts 1–6, 20–25, 39–44, 58–63, 77–82, 96–101 and 115–120, with 13 sts between tabs (7 x 6 + 6 x 13 = 120).
For each tab: join yarn in the first st, ch 1, sc in the same st and in the next 5 sts. (6 sc) Then ch 1, turn, and sc across for 21 more rows. (22 rows total, 6 sc each)
Each tab is 1.5 in (3.8 cm) wide and about 5 in (12.7 cm) long. Fold it to the WS and whipstitch the last row to the top of Row 3, which leaves a 2.5 in (6.4 cm) loop.
Repeat everything for the second panel.
Final Blocking
- Weave in all ends along the motif outlines, never across the openings.
- Lay one panel flat on mats or towels, RS up. Work in sections if your space is limited.
- Pin the band straight to 30 in (76.2 cm) wide and 3 in (7.6 cm) deep.
- Pin each lobe tip and each link so that motif centers are 5.1 in (13.0 cm) apart, both across and down.
- Push a pin through each center opening to open the cross shape evenly.
- Spray until damp, not soaked.
- Let it dry completely, then unpin and repeat for the second panel.
Final Quality-Control Checklist
- Every motif is 4.5 in (11.4 cm) tip to tip, within 0.25 in (0.6 cm).
- Every motif has 56 sc and 4 tips.
- All joins are ch 1, sl st, ch 1 and lie flat.
- The grid is 6 x 15 with every opening facing the same way.
- Band Row 1 has 120 sts, and Rows 2–7 have 120 dc each.
- 7 tabs with 13 sts between each.
- Each panel measures 30 x 78.9 in (76.2 x 200.4 cm), and the two panels are within 1 in (2.5 cm) of each other in length.
Troubleshooting
- Center opening is round, not a cross shape: Your sc3tog stitches are too loose, or the Rnd 1 chain is too tight. Pull each sc3tog snug.
- Lobes ruffle: Your Rnd 3 tension is loose. Try a hook 0.5 mm smaller for Rnds 3–4.
- Panel is narrower than the band: Your links are too short. Loosen the joining chains.
- Band waves above the motifs: Recount Row 1 (it should have 20 sts per motif), or tighten your band dc.
- Gaps below the band: Make your dtr taller by pulling up a longer first loop.
- Panel stretches when hung: Cotton relaxes over time. Re-block it, and make sure the hem clears the floor by about 0.5 in (1.3 cm).
Care
Hand wash cold or machine wash on a gentle cycle in a mesh bag, then reshape and dry flat. Don’t hang the panels wet, because the weight will stretch them.
Final Notes
Here is the measurement chain to check against. A 4.5 in (11.4 cm) motif plus a 0.6 in (1.5 cm) link gives a 30 in (76.2 cm) row of six motifs. Fifteen rows reach 75.9 in (192.8 cm). A 120-stitch band adds 3 in (7.6 cm) for a 78.9 in (200.4 cm) panel. If each checkpoint matches, both panels will hang straight and line up with each other.
Happy crocheting!