

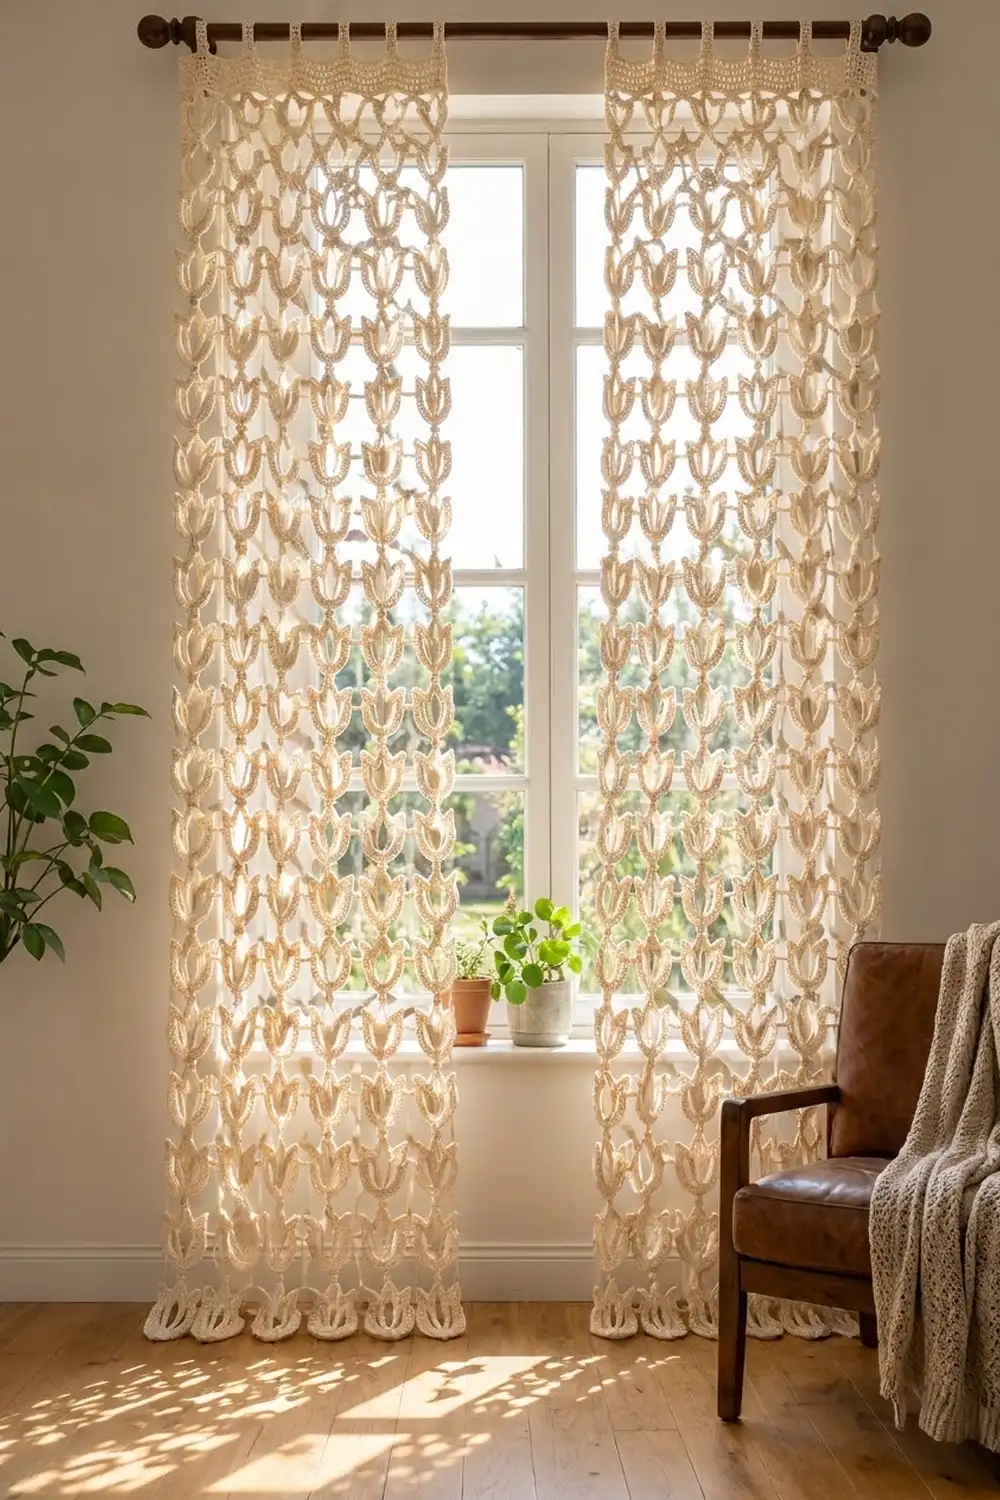
These airy curtain panels are built from dozens of small open tulip motifs. The motifs are linked into a light lace screen that filters sunlight into soft patterns on the floor. Each tulip has a rounded cup, two pointed side petals, and a tall almond-shaped center petal. Open spaces between the petals keep the window visible.
The whole pair is worked in one natural cream cotton, which keeps the look calm and suits almost any room. The style is somewhere between cottage and modern boho. A solid double crochet header band and simple tab tops finish the upper edge, and the lowest row of tulips hangs free as a scalloped fringe.
This pattern uses US crochet terms. Each finished panel measures 26.5 in (67.3 cm) wide and 69 in (175.3 cm) long from the top of the header to the lowest tulip. The tab loops add another 3 in (7.6 cm). Make two panels for a standard window.
The construction is modular:
- Crochet each tulip separately.
- Link the tulips into vertical strands with short knotted chains.
- Connect the strands with short horizontal chains.
- Work the header band across the top row.
Finished Size and Construction
- Finished panel size: 26.5 in x 69 in (67.3 cm x 175.3 cm), plus 3 in (7.6 cm) tabs
- Skill level: Intermediate
- Terminology: US crochet terms
- Yarn weight: Worsted (#4) cotton
- Hook: 4.5 mm (US 7)
- Number of pieces: 72 tulip motifs per panel, 144 for the pair
- Layout: 6 columns x 12 rows per panel
- Motif size: 4 in wide x 4.5 in tall (10.2 cm x 11.4 cm)
- Size before the header: 26.5 in x 65 in (67.3 cm x 165.1 cm)
- Header depth: 4 in (10.2 cm), plus 3 in (7.6 cm) tab loops
Materials
Choose a smooth mercerized or combed worsted cotton. Cotton holds the pointed petal tips crisply and stretches very little when it hangs. Avoid acrylic for this project: long hanging panels in acrylic tend to grow over time. Natural, undyed shades give the warmest glow against the light.
- Cream/ivory: 1,700 g (about 3,230 m), based on 100 g / 190 m balls
- 4.5 mm (US 7) crochet hook
- Tapestry needle
- Stitch markers (at least 4)
- Rust-proof pins and a large blocking surface
- Spray bottle
- Measuring tape
Each motif uses about 8 g (15 m) of yarn. The total above includes a margin of roughly 15 percent to cover gauge swatches, links, and the header. Buy all the yarn from one dye lot.
Abbreviations (US Terms)
- ch: chain
- sl st: slip stitch
- sc: single crochet
- hdc: half double crochet
- dc: double crochet
- sp: space
- st(s): stitch(es)
Special stitch – knot: ch 3, sl st in the 3rd ch from the hook. This makes the small bead-like knot in the middle of each vertical link.
Gauge and Checkpoints
- Sc gauge: 16 sc and 18 rows = 4 in (10.2 cm)
- Dc gauge (header): 16 dc and 8 rows = 4 in (10.2 cm)
Before anything else, make one complete motif. Wet it, pin it flat, and let it dry. Then measure it at each of these checkpoints:
- After Round 2: the center petal is 3 in tall x 1.5 in wide (7.6 cm x 3.8 cm)
- After Row 4: the frame is 3.5 in wide x 4 in tall (8.9 cm x 10.2 cm)
- After Row 5: the finished motif is 4 in wide x 4.5 in tall (10.2 cm x 11.4 cm)
If your motif is wider than 4 in (10.2 cm), change to a 4 mm (US G-6) hook. If it is narrower, change to a 5 mm (US H-8) hook. A difference of just 0.5 in (1.3 cm) per motif adds 3 in (7.6 cm) to the panel width and 6 in (15.2 cm) to its length, so this test is worth the time.
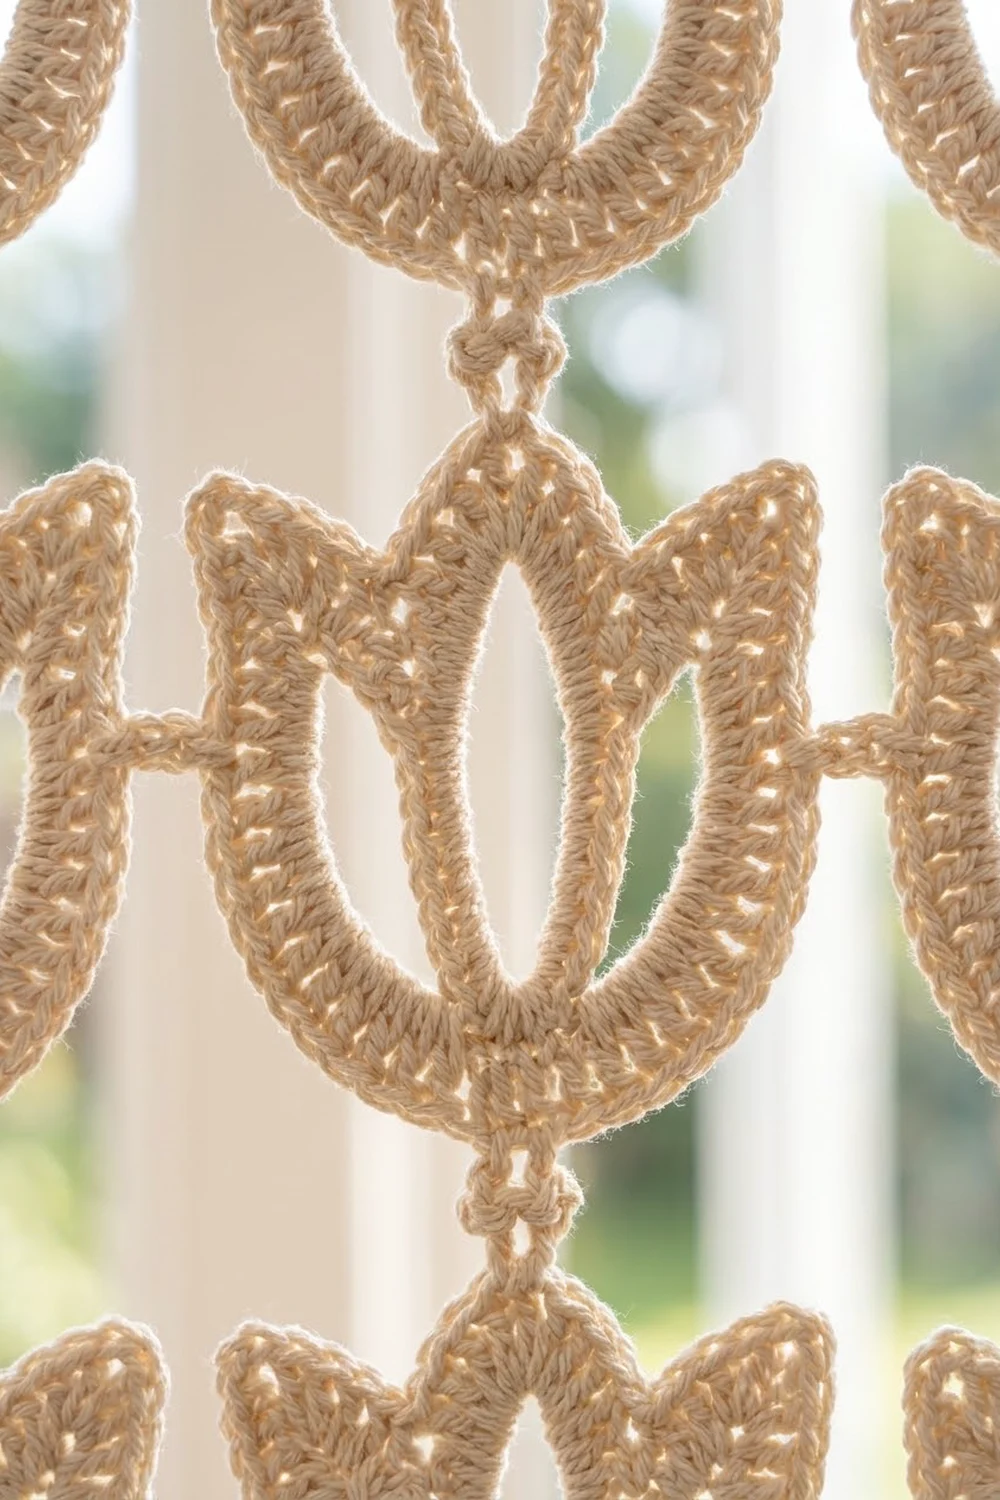
Tulip Motif (make 144)
Center Petal
Round 1: Ch 25. Sl st in the first ch to form a ring, taking care not to twist the chain. (25 ch)
Round 2: Ch 1. Working into each ch around:
– sc in the first 2 ch
– hdc in the next 2 ch
– dc in the next 7 ch
– hdc in the next ch
– (hdc, ch 2, hdc) in the next ch for the tip
– hdc in the next ch
– dc in the next 7 ch
– hdc in the next 2 ch
– sc in the last 2 ch
Sl st in the first sc. (26 sts and 1 ch-2 tip)
Number these stitches 1 to 26, starting from the first sc. Stitches 1 and 26 sit at the base. Place a marker in st 9 (side A) and another in st 18 (side B). These are mirror-image points about two-thirds of the way up each side.
Flatten the ring so the base sits at the bottom and the ch-2 tip points straight up. The graded stitch heights pull the ring into a pointed almond shape.
Petal Frame
Row 3 (chain frame): Sl st in sts 2 through 9, ending at marked st 9. Then work the frame chains in this order:
- Ch 8 for the inner edge of side petal A.
- Ch 3 for the petal tip.
- Ch 22 for the outer wall running down to the base.
- Sl st in st 1 of the center petal.
- Ch 22 for the outer wall of side B.
- Ch 3 for the tip.
- Ch 8 for the inner edge.
- Sl st in marked st 18.
(66 ch)
Arrange the chains so each side petal sits beside the center petal, with its tip lower than the center tip.
Row 4: Ch 1, turn. Then work along the frame:
– sc in each of the 8 inner-edge ch
– (2 sc, ch 2, 2 sc) in the ch-3 tip sp
– sc in each of the 22 outer-wall ch
– sc in the base sl st
– sc in each of the 22 outer-wall ch
– (2 sc, ch 2, 2 sc) in the ch-3 tip sp
– sc in each of the 8 inner-edge ch
Sl st in st 9. (8 + 4 + 22 + 1 + 22 + 4 + 8 = 69 sc and 2 ch-2 tips)
Row 5 (outer edge): Ch 1, turn. Then:
– sl st in the next 10 sc to reach the first tip
– (sc, ch 3, sc) in the ch-2 tip sp
– sc in the next 24 sc
– 2 sc in the base sc
– sc in the next 24 sc
– (sc, ch 3, sc) in the next ch-2 tip sp
– sl st in the last 10 sc
Fasten off. (24 + 2 + 24 + 4 tip sc = 54 sc and 2 ch-3 tips; sl sts are not counted)
Row 5 thickens only the outer outline. That makes the cup and the outer petal edges bolder than the inner lines, just as they look on the finished curtain. Three openings remain: the almond in the center and a curved space on each side.
Joining points: On Row 5, the 12th of each group of 24 sc, counted from its side tip toward the base, sits at the widest part of the cup. Mark both of these on every motif. The vertical joining points are the center tip ch-2 sp and the space between the 2 base sc.
Weave in all ends on the back. Block every motif to 4 in x 4.5 in (10.2 cm x 11.4 cm) before joining.
Make All Pieces
- Cream/ivory: 144 motifs in total, 72 per panel
Each panel is a grid of 6 columns and 12 rows, with every tulip pointing upward. In the layout below, M is a motif, | is a vertical link, and – is a horizontal link.
Header band (106 sts)
M – M – M – M – M – M     row 1
|   |   |   |   |   |
M – M – M – M – M – M     row 2
|   |   |   |   |   |
(repeat through row 12)
M – M – M – M – M – M     row 12 (free fringe)
Joining
Vertical links (making strands): Join yarn with a sl st in the center tip ch-2 sp of a motif. Ch 2, make 1 knot, ch 2, then sl st between the 2 base sc of the next motif above. Fasten off. Each link measures 1 in (2.5 cm). Join 12 motifs this way, with 11 links, to make one strand. Make 6 strands per panel (66 vertical links).
Horizontal links: Lay two strands side by side on a flat surface with the motifs level. Join yarn with a sl st in the marked widest sc of the left motif, ch 2, then sl st in the marked widest sc of the right motif. Fasten off. Each link measures 0.5 in (1.3 cm). Make 12 links between each pair of strands, for 60 per panel.
The links connect stitch to stitch only, so no stitches are added to the motifs themselves. The motif counts stay exactly as written.
Keep the link tension even. Count the chains every time instead of judging by eye, and check that the knots in each row sit at the same height. Tight links pucker the lace, and loose links make the columns sag unevenly.
Size checkpoint:
– Width = 6 x 4 in + 5 x 0.5 in = 26.5 in (67.3 cm)
– Length = 12 x 4.5 in + 11 x 1 in = 65 in (165.1 cm)
Measure the panel flat before you start the header.
Border: Header Band and Tab Tops
The header across the top is the only border on this design. The side edges and the bottom row stay open so the tulip shapes show clearly.
Header gauge: 16 dc = 4 in (10.2 cm), so 106 dc = 26.5 in (67.3 cm), which matches the joined width.
Row 1 (attaching row): With the right side facing, join yarn in the right side tip of the top right motif. For each motif, work: sc in the side tip ch-3 sp, ch 5, 2 sc in the center tip ch-2 sp, ch 5, sc in the other side tip ch-3 sp. That is 14 sts per motif. Ch 4 between motifs. Repeat across all 6 top motifs, then turn. (6 x 14 + 5 x 4 = 104 sts)
Row 2 (conversion row): Ch 3 (counts as dc) and dc in the same st. Dc in each st and ch across to the last st, then 2 dc in the last st. Turn. (104 sts worked 1 per st + 2 extra dc = 106 dc)
Rows 3–8: Ch 3 (counts as dc), dc in each st across, turn. (106 dc)
Row 9: Ch 1, sc in each st across. (106 sc)
Tabs: Make 6 tabs, each 6 sts wide, over sts 1–6, 21–26, 41–46, 61–66, 81–86, and 101–106. That is 6 x 6 = 36 tab sts plus 5 gaps of 14 sts (70 sts), for 106 in total.
For each tab:
1. Join yarn in the first tab st and work 6 sc.
2. Work rows of 6 sc until you have 27 rows, about 6 in (15.2 cm).
3. Fold the tab to the back and whipstitch the last row to Row 8. This leaves a 3 in (7.6 cm) loop.
Why the math works: Each motif contributes 14 sts and each gap contributes 4 sts. Row 2 adds exactly 2 sts, one at each end, to cover the outer edges of the corner motifs. That brings the count to 106 dc, which at gauge equals the 26.5 in (67.3 cm) joined width. Because of this, the header lies flat without pulling in or rippling. Rows 1–9 together measure 4 in (10.2 cm).
Final Blocking
- Soak the panel in cool water for 15 minutes, then gently press the water out. Do not wring it.
- Roll the panel in towels to remove as much moisture as possible.
- Lay it flat on a large surface and pin the header straight at 26.5 in (67.3 cm).
- Pin each column straight. From the base of the header to the base of the lowest tulip should measure 65 in (165.1 cm).
- Pin each petal tip to a sharp point, and open up the almond and side spaces.
- Let the panel dry completely before unpinning. Repeat with the second panel.
Final Quality-Control Checklist
- Every motif measures 4 in x 4.5 in (10.2 cm x 11.4 cm).
- All 66 vertical links and 60 horizontal links are in place and even.
- The knots sit level across each row.
- The header is 106 sts wide and 4 in (10.2 cm) deep.
- The six tabs are evenly spaced and form 3 in (7.6 cm) loops.
- All ends are woven in securely on the back.
- Both panels match in width and length.
Troubleshooting
The center petal looks round, not pointed: Check that Round 2 uses dc only in the two 7-st sections and that the tip has a ch-2.
The side petals droop: The 8-ch inner edge is too loose. Chain more firmly, or work Row 4 a little tighter.
The panel narrows at the top: Check the Row 1 chain counts. Use exactly ch 5 inside each motif and ch 4 between motifs.
The strands twist: Make sure every motif faces the same way, right side up, before you link it.
The knots sit at different heights: Redo any link that does not have exactly ch 2 on each side of its knot.
The panel grows after hanging: Some growth is normal for cotton. Re-block the panel and dry it flat rather than on the rod.
Care
Hand wash in cool water with a mild detergent and dry flat. Do not tumble dry, because heat and agitation can felt the knots and distort the motifs.
Final Notes
The measurements build on each other:
– One motif measures 4 in x 4.5 in (10.2 cm x 11.4 cm).
– Six columns joined with 0.5 in (1.3 cm) links make 26.5 in (67.3 cm).
– Twelve rows joined with 1 in (2.5 cm) links make 65 in (165.1 cm).
– The 106-st header matches that width exactly and adds 4 in (10.2 cm). That gives a 69 in (175.3 cm) panel, with 3 in (7.6 cm) tabs above.
Get the first motif right, and every other number follows from it.
Happy crocheting!