

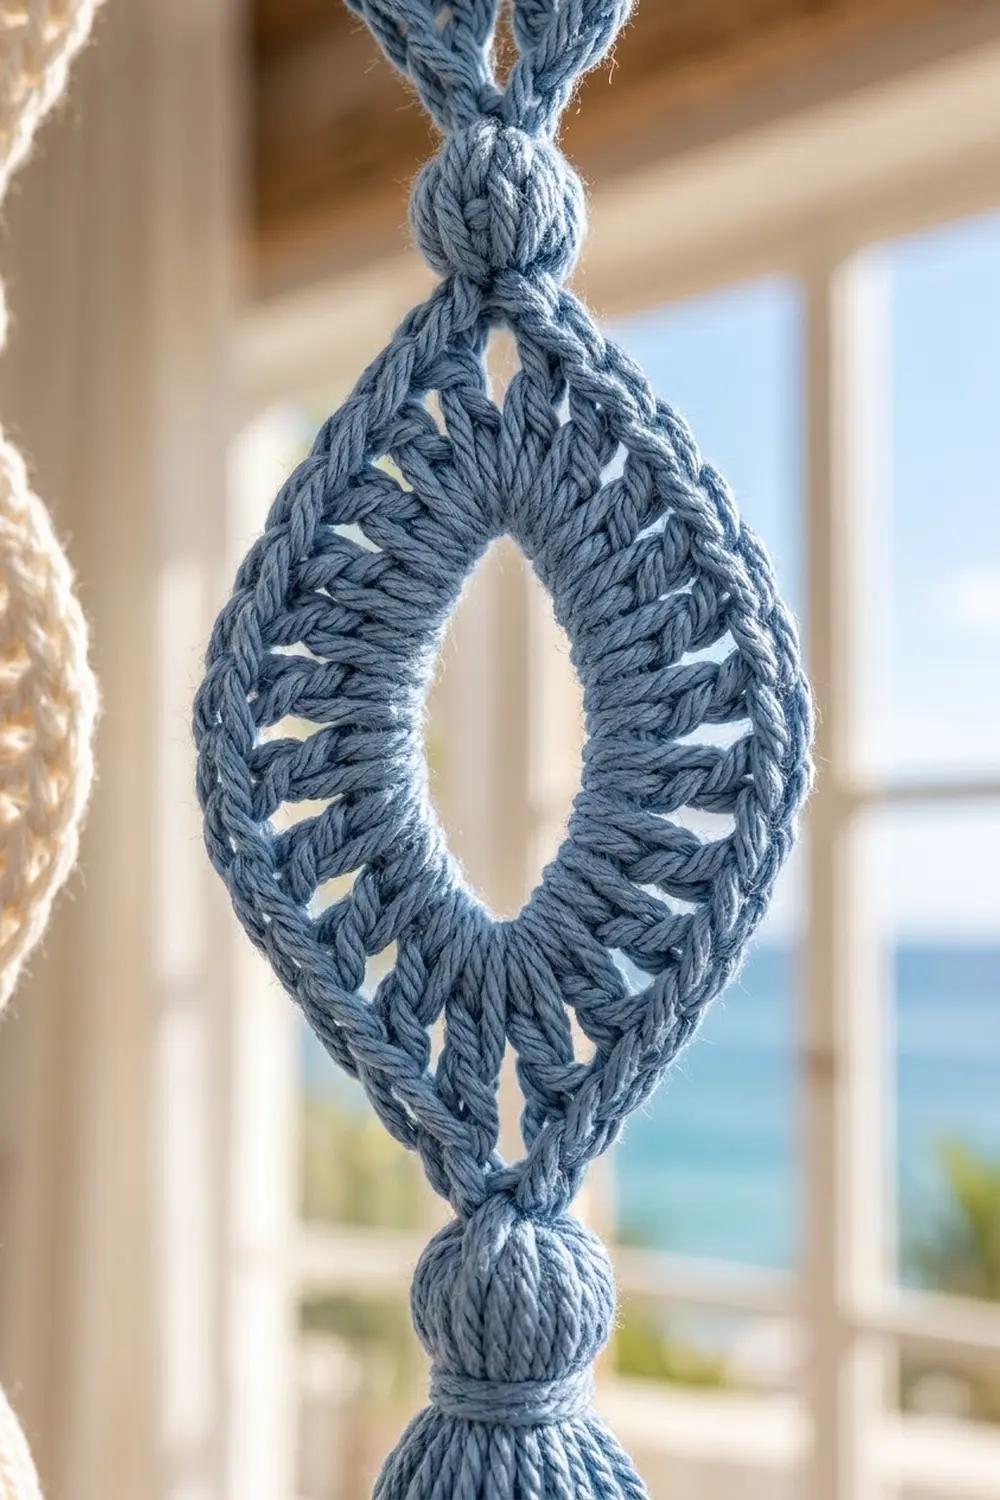
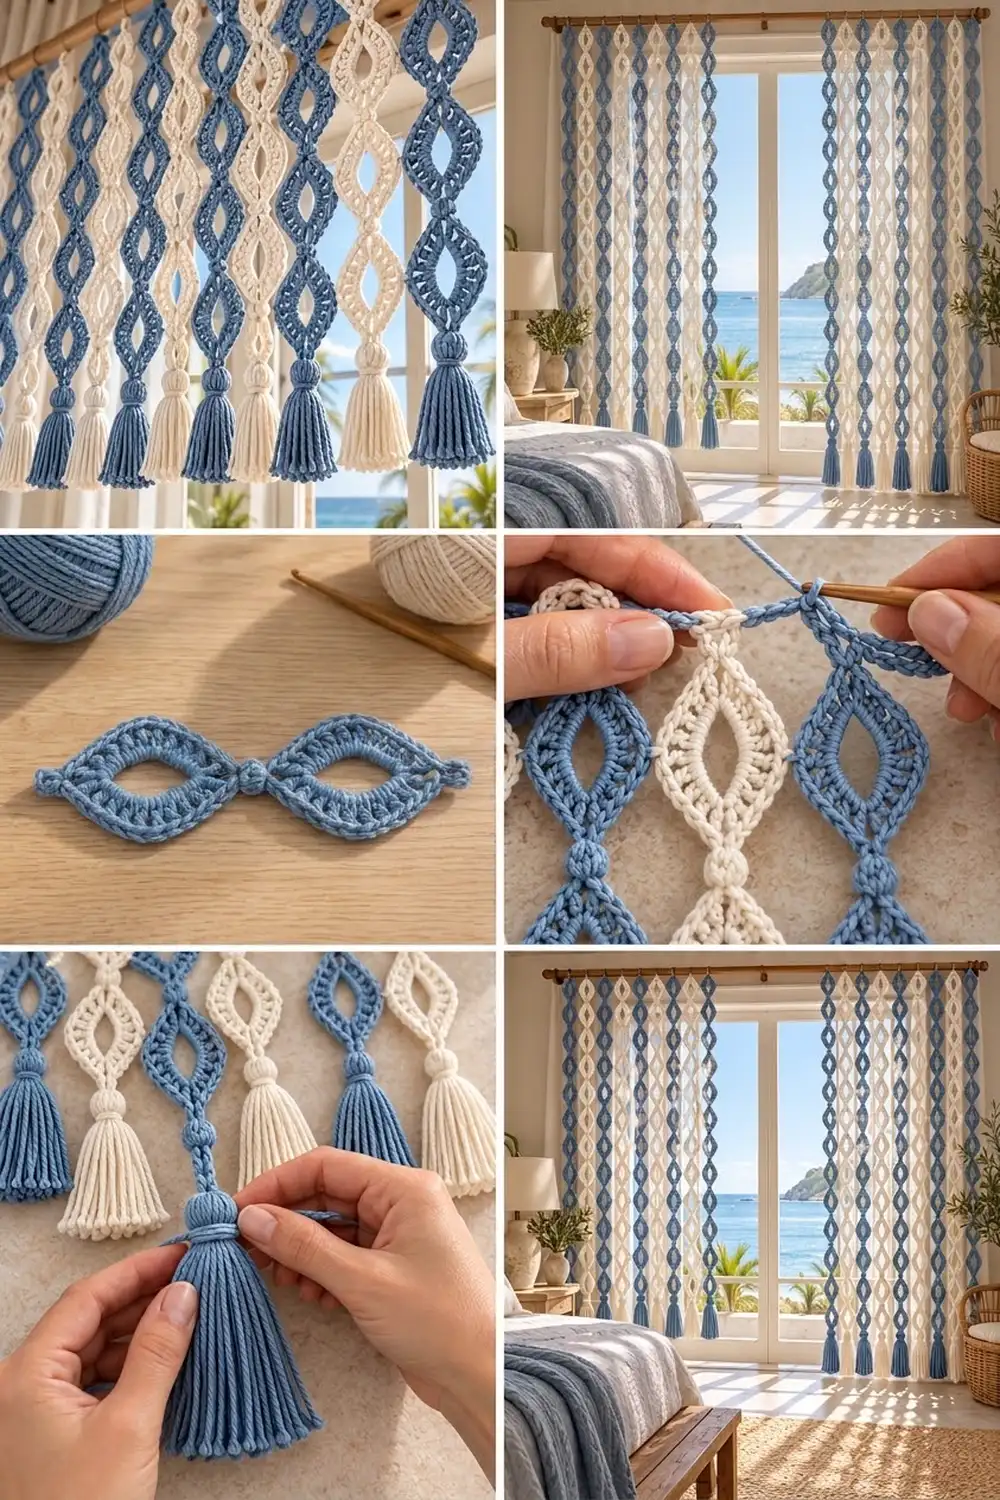
The Tidewater Strand Curtain is a light, airy panel of crocheted strands that lets sunlight and sea breezes through. Each strand is a chain of open, almond-shaped motifs linked by small bobble knots, and it ends with a round bead and a full tassel.
Strands alternate dusty blue and natural cream, which gives a calm coastal look that suits a bedroom window, a doorway or a reading nook. A blue header band joins the strands at the top and forms a rod pocket.
This pattern uses US crochet terms. One finished panel measures 26 in (66.0 cm) wide and 73 in (185.4 cm) long from the top of the header to the tassel tips. For a pair like the one in the room photo, make two panels.
Construction is simple. Each strand is worked from the top down in one continuous pass that builds every motif and half of its rim. A second, upward pass finishes the other half of each rim. The strands are then joined in the first row of the header, and the header is folded into a rod pocket.
Finished Size and Construction
- Finished panel size: 26 in (66.0 cm) wide × 73 in (185.4 cm) long
- Skill level: Intermediate
- Terminology: US crochet terms
- Yarn weight: Worsted (#4) cotton
- Hook: 5.0 mm (H-8)
- Number of pieces: 10 strands (5 blue, 5 cream), plus 10 beads and 10 tassels, joined by 1 header band
- Layout: 10 strands in one row, alternating colors, centers 2.75 in (7.0 cm) apart
- Motif size: 2 in (5.1 cm) wide × 3 in (7.6 cm) tall
- Motifs per strand: 16, repeating every 4 in (10.2 cm)
- Strand length (excluding header): 71.5 in (181.6 cm)
- Header before folding: 26 in × 3 in (66.0 × 7.6 cm)
- Header depth after folding: 1.5 in (3.8 cm)
Materials
Use a smooth, mercerized or combed worsted-weight cotton of about 170 m per 100 g. Cotton holds the almond shape well and hangs straight. Avoid fuzzy or very stretchy yarns, because they blur the openings and let the strands sag.
- Dusty blue: 380 g / 646 m (strands, beads, tassels and header)
- Natural cream: 320 g / 544 m (strands, beads and tassels)
These quantities include roughly a 15–20% margin over the measured use, so you have yarn for gauge swatches and tassel trimming.
Tools:
- 5.0 mm (H-8) crochet hook
- Tapestry needle
- Stitch markers
- Stiff card 4.5 in (11.4 cm) tall, for tassels
- Sharp scissors
- Small amount of yarn scraps, for stuffing beads
- Rustproof pins and a blocking surface
- Tape measure
Abbreviations (US Terms)
- ch: chain
- sl st: slip stitch
- sc: single crochet
- hdc: half double crochet
- dc: double crochet
- sc2tog: single crochet 2 together
- sc3tog: single crochet 3 together
- MR: magic ring
- sp: space
- st(s): stitch(es)
5-dc bobble: *Yo, insert hook in indicated st, yo and pull up a loop, yo and draw through 2 loops. Repeat from * 4 more times (6 loops on hook). Yo and draw through all 6 loops.
Knot: Ch 3, work a 5-dc bobble in the 3rd ch from hook, then ch 1 to lock. The bobble sits on the strand as a small round knot.
Gauge and Checkpoints
Gauge: 16 sc and 16 rows = 4 in (10.2 cm) in sc rows.
Test one piece first. Work a tab and two motifs of a strand, then check each stage:
- Tab: 1.25 in (3.2 cm) wide × 1.5 in (3.8 cm) tall.
- Ring: about 2 in (5.1 cm) long when flattened.
- After Round 1: 1.5 in (3.8 cm) wide × 2.5 in (6.4 cm) tall.
- Motif with both half-rims: 2 in (5.1 cm) wide × 3 in (7.6 cm) tall.
- Motif repeat: 4 in (10.2 cm), measured from one motif’s top point to the next motif’s top point.
If your pieces are too big, go down half a hook size. If they are too small, go up half a size. If the motif cups, your ring is too tight: work the ring chains more loosely rather than changing the stitch counts.
Strand Pattern
Make 5 strands in blue and 5 in cream. Each strand is worked top-down (Pass 1) and then finished upward (Pass 2).
Top Tab
Row 1: Ch 6, sc in 2nd ch from hook and in each ch across. (5 sc)
Rows 2–4: Ch 1, turn, sc in each sc across. (5 sc)
Row 5: Ch 1, turn, sc2tog, sc, sc2tog. (3 sts)
Row 6: Ch 1, turn, sc3tog. (1 st)
The tab is now 1.25 in × 1.5 in (3.2 × 3.8 cm) and tapers to a center point. The free loops of the Row 1 foundation chain (5 loops) will be joined to the header later.
Top cord: Ch 4. This is about 1 in (2.5 cm).
Pass 1: Motifs (Work 16 Times)
Ring: Ch 14, sl st in 14th ch from hook to form a ring. This sl st is the motif’s top point (T).
Round 1: Work all sts into the ring, over the chain rather than into individual chains:
- Side A: 2 sc, 2 hdc, 4 dc, 2 hdc, 2 sc (12 sts).
- Ch 2 for the bottom point sp.
- Side B: 2 sc, 2 hdc, 4 dc, 2 hdc, 2 sc (12 sts).
- Sl st in T.
(24 sts and 1 ch-2 sp)
Slide the stitches so they fill the ring evenly. Pull the ring into an almond so the 4 dc on each side sit at the widest part and the sc sit at the points. The center stays open.
Half-Rim A: Ch 1, sc in each of the 12 sts of Side A, then sc in the bottom ch-2 sp. (13 sc)
Connector (after motifs 1–15 only): Knot, ch 3.
Then make the Ring for the next motif.
End drop (after motif 16 only): Knot, ch 4. Sl st in 2nd ch from hook. Sl st in the back bump of each remaining ch and through the knot’s lock ch, back up to the bottom ch-2 sp of motif 16.
Pass 2: Upward Rims
Motif 16: Ch 1, sc in the bottom ch-2 sp (this sp now holds 2 sc). Sc in each of the 12 sts of Side B, then sl st in T. (13 sc)
Motifs 15 to 1: Sl st loosely along the connector above, working into the back bump of each ch and through the knot’s lock ch. When you reach the next motif’s bottom ch-2 sp, work sc in that sp, sc in each of the 12 sts of Side B, and sl st in T. (13 sc)
Finish: Sl st in each of the 4 top cord chains and in the tab point. Fasten off and weave in the end.
Each motif rim now has 26 sc: 12 per side plus 2 in the bottom sp. The sl sts along the cords firm them up so they look like the rounded cords in the photo.
Bead (Make 10: 5 Blue, 5 Cream)
Round 1: 6 sc in MR. (6)
Round 2: 2 sc in each st. (12)
Round 3: Sc in each st. (12)
Round 4: Sc2tog 6 times. (6)
Stuff the bead firmly with yarn scraps, close the opening and leave a 6 in (15.2 cm) tail. The bead is about 0.75 in (1.9 cm) across.
Tassel (Make 10: 5 Blue, 5 Cream)
- Wrap yarn 40 times around the 4.5 in (11.4 cm) card.
- Slide a 12 in (30.5 cm) tie strand under the wraps at the top and knot it tightly.
- Cut the wraps open at the bottom.
- Wrap a separate strand 6 times around the tassel, 0.5 in (1.3 cm) below the top, and secure it.
- Trim the ends to 4.25 in (10.8 cm).
Assembly: Thread the tassel’s tie strand up through the center of a matching bead and knot it to the end of the drop. Sew the bead’s tail into the end of the drop as well, so the bead sits snugly between the knot and the tassel.
Make All Pieces
- Blue: 5 strands, 5 beads, 5 tassels and 1 header
- Cream: 5 strands, 5 beads and 5 tassels
Layout (front view, left to right):
Position:  1  2  3  4  5  6  7  8  9  10
Color:     B  C  B  C  B  C  B  C  B  C
Lay the strands out flat in this order with their tabs at the top and all Side A rims facing the same way.
Joining
The strands are joined in Header Row 1. You work single crochet into each tab’s foundation loops and chain across the gaps between tabs.
Header Row 1 (blue): Work across the foundation edge of each tab, in the free loops of the tab’s Row 1 chain. Make sure every tab’s right side faces you:
- Join yarn at the right corner of tab 1 and ch 1.
- Sc in each of the 5 loops of tab 1.
- *Ch 6, then sc in each of the 5 loops of the next tab. Repeat from * across to tab 10.
Stitch count: (10 tabs × 5 sc) + (9 gaps × 6 ch) = 50 + 54 = 104 sts.
No stitches are added at the edges of the tabs. The 6 gap chains are the only extra stitches, and they are counted once.
Tension: Keep the gap chains the same tension as your sc so each gap measures 1.5 in (3.8 cm). If the chains are tight, the strands bunch together. If they are loose, the header waves.
Size checkpoint: Row 1 should measure 26 in (66.0 cm). Each tab is 1.25 in (3.2 cm) and each gap is 1.5 in (3.8 cm), so the strand centers sit 2.75 in (7.0 cm) apart. Because the motifs are 2 in (5.1 cm) wide, there is a 0.75 in (1.9 cm) space between neighboring motifs.
Border (Header Band)
Border gauge: 16 sc and 16 rows = 4 in (10.2 cm), the same as the main gauge.
Row 2: Ch 1, turn. Sc in each sc and in each ch. (104 sc)
Rows 3–12: Ch 1, turn, sc in each sc across. (104 sc per row)
The band is now 26 in × 3 in (66.0 × 7.6 cm). Do not fasten off.
Side edging: Ch 1 and rotate the band. Work 12 sc evenly down the short side, 1 sc per row end. Fasten off. Rejoin at the opposite top corner of Row 12 and work 12 sc down the other short side. Fasten off.
Final counts per side:
- Top edge: 104 sts
- Bottom edge (joined to the strands): 104 sts
- Each short side: 12 sc
Rod pocket: Fold the band in half to the back along the line between Rows 6 and 7. Whipstitch the Row 12 stitches to the back of the Row 1 stitches, 1 st to 1 st, for all 104 sts. Leave both short ends open for the rod.
Why the math works:
- 104 sts at 4 sts per in = 26 in (66.0 cm).
- 12 rows at 4 rows per in = 3 in (7.6 cm), which folds to 1.5 in (3.8 cm).
- The folded pocket is about 3 in (7.6 cm) around, so it fits a rod up to 0.875 in (2.2 cm) in diameter.
- Whipstitching 104 sts to 104 sts keeps the pocket flat with no pulling.
Final Blocking
- Soak the whole panel in cool water for 10 minutes, then gently press out the water. Do not wring it.
- Roll the panel in a towel to remove more moisture.
- Lay the header flat and pin it to 26 in × 1.5 in (66.0 × 3.8 cm).
- Lay each strand straight down from its tab. Pin each motif to 2 in × 3 in (5.1 × 7.6 cm), with the points centered and the openings fully open.
- Check that the motif repeats are 4 in (10.2 cm) apart along each strand.
- Smooth the tassels, comb them with your fingers, and let everything dry completely.
- Hang the panel on its rod and trim the tassels level if needed.
Final Quality-Control Checklist
- Every motif has 24 sts in Round 1 and 26 sc in its rim.
- Each strand has 16 motifs, 15 connectors and 1 end drop.
- All Side A rims face the same direction.
- The header has 104 sts in every row and measures 26 in (66.0 cm).
- The gaps between tabs are an even 1.5 in (3.8 cm).
- Strand lengths match within 0.5 in (1.3 cm).
- Beads are firm and the tassels are knotted securely.
- All ends are woven in along the rims or the header.
Troubleshooting
- Motif cups or curls: The ring is too tight. Chain the ring loosely or go up half a hook size for the ring only.
- Motif ruffles: The ring is too loose. Tighten your ring chains and keep the counts the same.
- Center opening closes up: You worked into the chains instead of over them. Work Round 1 around the ring.
- Strands twist: Block the strands flat and pinned, and keep all Side A rims on the same side.
- Header is too narrow or wavy: Check the gap chain tension and confirm Row 1 has 104 sts.
- Strands are different lengths: Count the motifs, and make the cord sl sts loose and consistent.
- Tassel slips: Tighten the top tie and add a second neck wrap.
Care
Hand wash in cool water with a mild detergent. Press out the water gently and dry flat or hanging straight, away from strong direct heat.
Final Notes
Every size in this curtain follows from one gauge: 16 sc = 4 in (10.2 cm).
- Width: Each tab is 5 sc, or 1.25 in (3.2 cm), and each gap is 6 ch, or 1.5 in (3.8 cm), so strand centers are 2.75 in (7.0 cm) apart. Across 10 strands that gives a 104-stitch header, 26 in (66.0 cm) wide.
- Length: Each motif is 2 in × 3 in (5.1 × 7.6 cm) and repeats every 4 in (10.2 cm). With the folded header, the tab, the cord, 16 motifs, 15 connectors, the end drop, the bead and the tassel, the panel measures 73 in (185.4 cm) long.
To shorten or lengthen the panel, remove or add motifs, 4 in (10.2 cm) per motif.
Happy crocheting!