

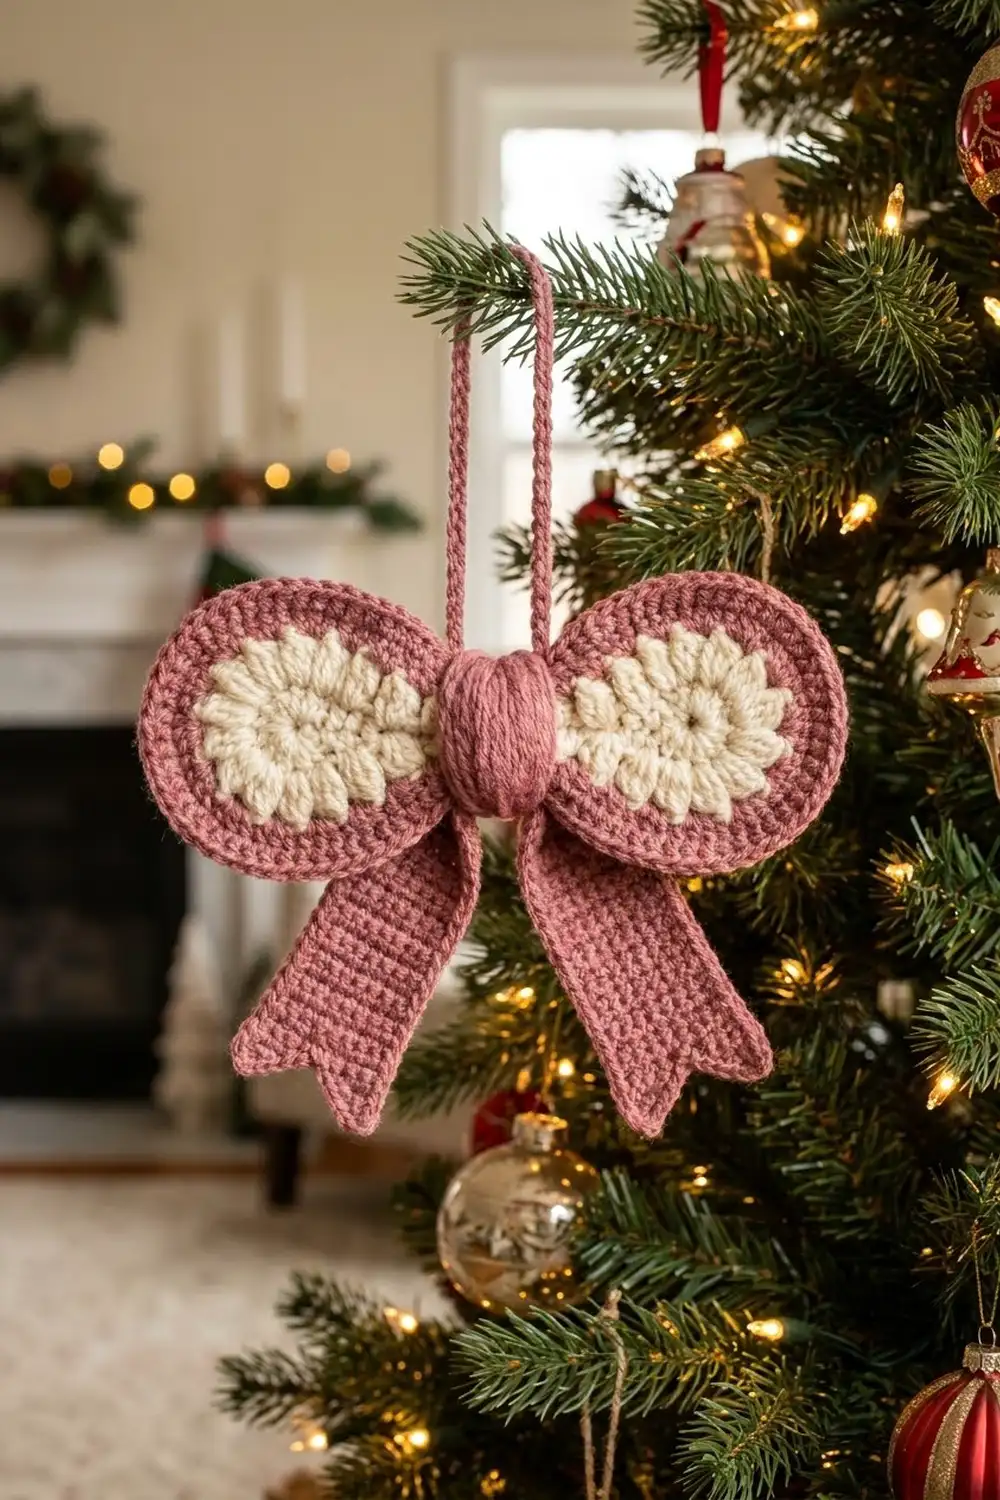
This little bow ornament has two rounded, teardrop-shaped loops in dusty rose. Each loop is filled with a fan of plump cream strands. The bow is finished with a snug wrapped center knot, two notched tails, and a long hanging loop.
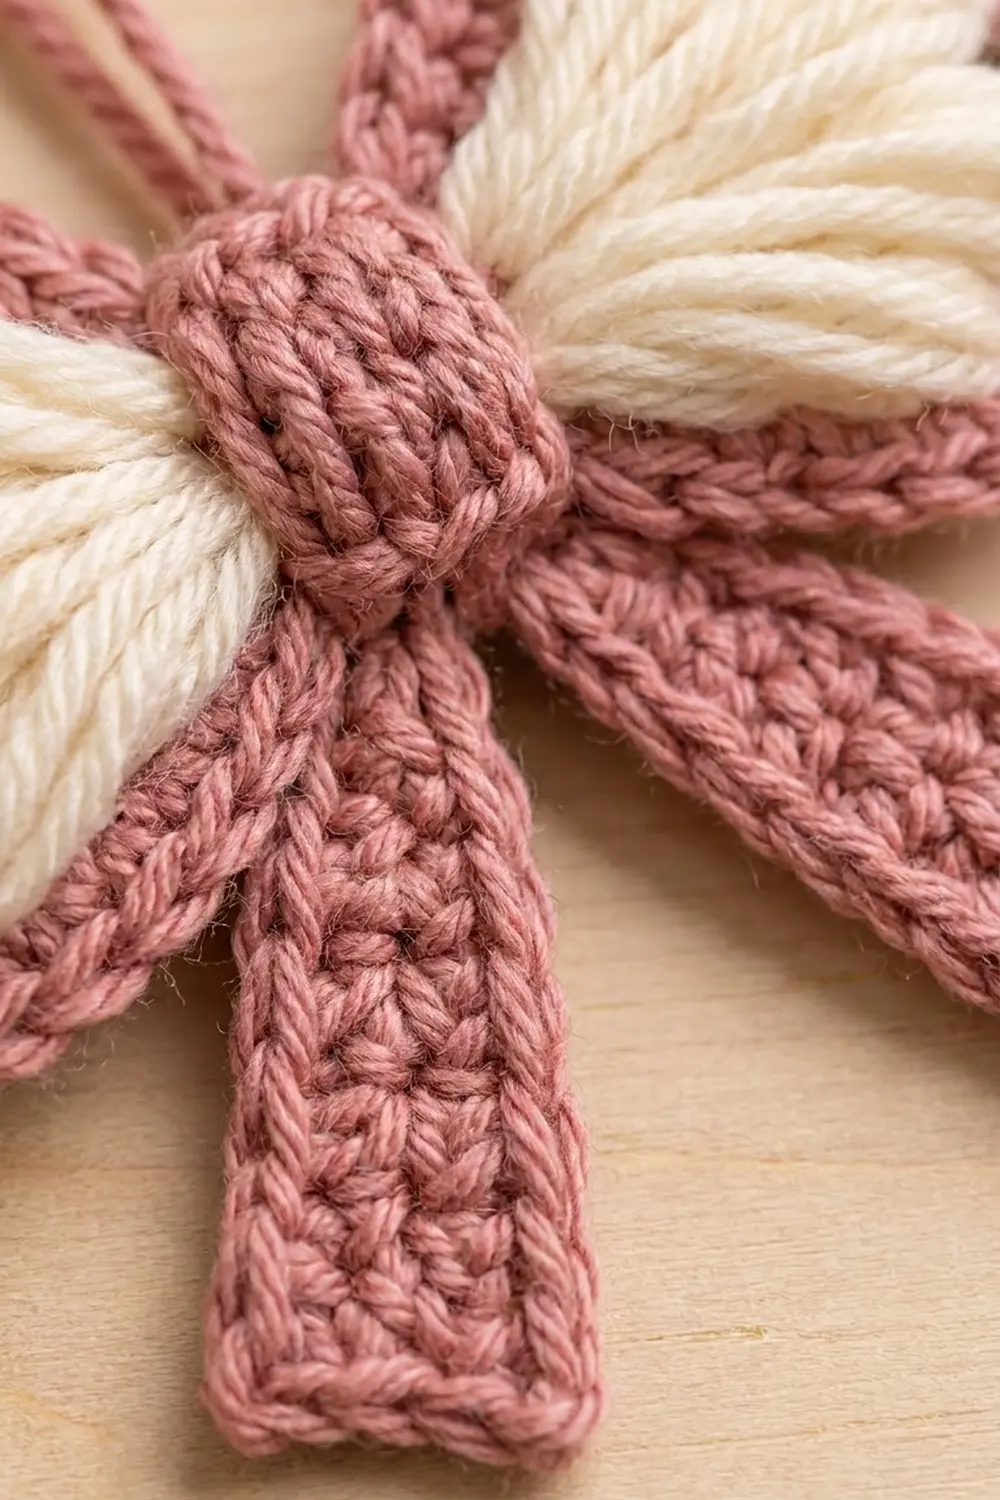
There are only two colors. The frame, knot, tails, and hanger are dusty rose, and the fan fill is cream. The rose parts are plain single crochet, so they look neat and slightly braided. The cream fill is made of long-loop puff stitches, which give it soft, woolly volume.
This pattern uses US crochet terms. The finished bow is about 3.75 in (9.5 cm) wide and 3 in (7.6 cm) tall, from the top of the loops to the tips of the tails. The hanging loop adds another 4 in (10.2 cm).
You’ll make these parts:
- 2 loop frames, worked in the round around a chain ring
- 2 cream fans
- 2 tails, worked in rows
- 1 knot strip
- 1 chain hanger
Then you pinch, stack, and wrap them into one finished ornament.
Finished Size and Construction
- Finished size: 3.75 in (9.5 cm) wide × 3 in (7.6 cm) tall, plus a 4 in (10.2 cm) hanging loop
- Skill level: Easy to intermediate (the long-loop puff takes a little practice)
- Terminology: US crochet terms
- Yarn weight: DK (#3, light)
- Hook: 3.5 mm (E-4)
- Number of pieces: 1 finished ornament, assembled from 8 small parts (2 loops, 2 fans, 2 tails, 1 knot, 1 hanger)
- Layout: One bow with two loops side by side, a center knot, and two tails angled down and out
- Single loop size: 2 in (5.1 cm) long × 1.6 in (4.1 cm) tall
- Loop size before border: 1.6 in (4.1 cm) × 1.2 in (3.0 cm)
- Border depth: 0.2 in (0.5 cm) on every edge of each loop
Materials
Use a smooth DK yarn with good stitch definition. Cotton or a cotton blend gives the crispest rose frame. A soft acrylic or wool blend works best for the cream fill, because the strands will look fuller.
- Color A, dusty rose: 7 g, about 16 m
- Color B, cream: 4 g, about 9 m
Tools:
- 3.5 mm (E-4) crochet hook
- Tapestry needle
- 4 locking stitch markers
- Scissors
- Measuring tape or ruler
- Pins and a blocking mat or folded towel
- Spray bottle with water
These quantities include a margin of about 30% for your test loop, sewing tails, and any rounds you have to rip out and redo.
Abbreviations (US Terms)
- ch: chain
- sl st: slip stitch
- sc: single crochet
- sc2tog: single crochet 2 together
- st(s): stitch(es)
- yo: yarn over
- rnd: round
Special stitch: Long-loop puff (LP)
- Yo, insert hook in the ring, yo, and pull up a loop to 1 in (2.5 cm) tall.
- Repeat step 1 three more times (4 times in total). You now have 9 loops on the hook.
- Yo and draw through all 9 loops, then ch 1 to lock.
Keep every loop the same height by resting your index finger on the tops while you work.
Gauge and Checkpoints
Gauge: 20 sc and 22 rows = 4 in (10.2 cm), so 5 sc = 1 in (2.5 cm).
Skip the large swatch. Make one complete loop frame first (Rnd 1 plus the border) and measure it. That loop is your real gauge test.
Checkpoints:
- After loop Rnd 1: 1.6 in (4.1 cm) × 1.2 in (3.0 cm), with an inner opening of about 1.2 in (3.0 cm) × 0.8 in (2.0 cm)
- After loop border: 2 in (5.1 cm) × 1.6 in (4.1 cm)
- Tail after Row 10: 1.8 in (4.6 cm) long × 0.8 in (2.0 cm) wide
- Finished tail: 2.2 in (5.6 cm) long
- Knot strip: 0.6 in (1.5 cm) × 1.5 in (3.8 cm)
If your loop is more than 0.1 in (0.3 cm) too large, go down half a hook size. If it’s too small, go up half a size. Change the hook, not the stitch counts, because the counts are what keep the curves flat.
Part 1: Bow Loops (make 2, Color A)
Each loop is a teardrop. The narrow end goes to the center of the bow, and the rounded far end points outward. All of the shaping comes from where the increases are placed. The foundation ring is divided into four zones:
- Narrow end: ch 1–2
- Top edge: ch 3–6
- Far curve: ch 7–12
- Bottom edge: ch 13–16
Foundation: With A, ch 16. Join with a sl st to the first ch to form a ring, taking care not to twist the chain. (16 ch)
Rnd 1 (conversion round): Ch 1, then work into the chains as follows:
- Narrow end: sc in next 2 ch. (2 sts)
- Top edge: sc in next ch, 2 sc in next ch, sc in next 2 ch. (5 sts)
- Far curve: 2 sc in each of next 6 ch. (12 sts)
- Bottom edge: sc in next ch, 2 sc in next ch, sc in next 2 ch. (5 sts)
Join with a sl st to the first sc.
Count: 16 sts worked 1-per-ch + 8 extra = 24 sc (2 + 5 + 12 + 5).
Place a marker in the first st of each zone. Lay the loop flat. The far curve should be smooth and round, and the narrow end should be slightly pointed.
Fasten off, leaving an 8 in (20.3 cm) tail. Make a second loop the same way.
Next step: Work the border round (see the Border section) on both loops before you start Part 2. The fans are sewn to the inner chain edge, so the border doesn’t get in their way, and a bordered loop is easier to measure and fill.
Part 2: Cream Fans (make 2, Color B)
Foundation: With B, ch 3. Join with a sl st to form a small ring.
Fan: Work into the ring: LP, ch 1, LP, ch 1, LP. (3 LP and 2 ch-1 spaces)
Fasten off, leaving a 12 in (30.5 cm) tail. You now have three plump bundles of strands spreading from one base, which gives the three-lobed, heart-like shape.
Sew the fan in place:
- Set the fan inside a bordered loop, with the ring at the narrow end and the bundles pointing toward the far curve.
- With the B tail, sew the ring to the inner edge of the narrow end (ch 1–2).
- Spread the bundles. Tack the top of the first LP to ch 7, the middle LP between ch 9 and ch 10, and the last LP to ch 12.
- Let the strands puff up slightly above the frame. They should fill most of the opening, with small gaps showing at the sides.
- Weave in the ends on the back.
Repeat for the second loop.
Part 3: Tails (make 2, Color A)
Row 1: Ch 5, sc in 2nd ch from hook and in each ch across. (4 sc)
Rows 2–10: Ch 1, turn, sc in each st across. (4 sc)
Checkpoint: the tail should now be 1.8 in (4.6 cm) long.
First point:
- Row 11: Ch 1, turn, sc in first 2 sts. Leave the rest unworked. (2 sc)
- Row 12: Ch 1, turn, sc2tog. (1 sc) Fasten off.
Second point:
- Row 11: Join A in the 3rd st of Row 10, ch 1, sc in the same st and in the last st. (2 sc)
- Row 12: Ch 1, turn, sc2tog. (1 sc) Fasten off.
Each tail measures 2.2 in (5.6 cm) and has a clean V-notch. Leave an 8 in (20.3 cm) tail at the Row 1 end for sewing.
Part 4: Center Knot (make 1, Color A)
Row 1: Ch 4, sc in 2nd ch from hook and in each ch across. (3 sc)
Rows 2–8: Ch 1, turn, sc in each st across. (3 sc)
Fasten off, leaving a 12 in (30.5 cm) tail. The strip measures 0.6 in (1.5 cm) × 1.5 in (3.8 cm).
Part 5: Hanger (make 1, Color A)
Ch 40, about 8 in (20.3 cm) long. Fasten off, leaving 6 in (15.2 cm) tails at both ends. When folded in half, it makes a doubled 4 in (10.2 cm) loop.
Part 6: Assembly
- Pinch the loops. Fold each loop’s narrow end flat. Overlap the two narrow ends by about 0.3 in (0.8 cm), with the fans facing forward, and stitch through all layers.
- Add the tails. Place the Row 1 end of each tail behind the pinch. Angle the tails about 25° out from vertical, so the tips sit about 2 in (5.1 cm) apart. Sew them in place.
- Add the hanger. Sew both hanger ends to the back of the pinch, pointing down.
- Wrap the knot. Wrap the strip snugly around the pinch, catching the hanger ends and the tail tops. Whipstitch Row 1 to Row 8 on the back. The knot face should be slightly domed and measure about 0.6 in (1.5 cm) wide × 0.5 in (1.3 cm) tall.
- Weave in all remaining ends on the back.
Border (Color A, both loops)
Border gauge: 5 sc per 1 in (2.5 cm), the same as the main gauge. One round adds 0.2 in (0.5 cm) to every edge.
Join A with a sl st in the first st of the narrow end.
Rnd 2 (border, conversion round): Ch 1, then:
- Narrow end: sc in next 2 sts. (2 sts)
- Top edge: sc in next 2 sts, 2 sc in next st, sc in next 2 sts. (6 sts)
- Far curve: (sc in next 2 sts, 2 sc in next st) 4 times. (16 sts)
- Bottom edge: sc in next 2 sts, 2 sc in next st, sc in next 2 sts. (6 sts)
Join with a sl st to the first sc.
Count: 24 sts worked 1-per-st + 6 extra = 30 sc (2 + 6 + 16 + 6).
Fasten off and weave in the ends. The loop should now measure 2 in (5.1 cm) × 1.6 in (4.1 cm).
Why the math works: When a closed shape grows outward by 0.2 in (0.5 cm), its outer edge gets longer by about 2 × π × 0.2 in, which is 1.26 in (3.2 cm). At 5 sts per inch, that’s about 6 sts, the same as the 6 increases in this round.
- Four of the increases sit on the far curve, where the edge bends most.
- The narrow end gets no increases, because it is pinched and hidden under the knot.
- Rnd 1 uses the same logic: its 6 doubled stitches make the far curve round instead of pointed.
Final Blocking
- Spritz the ornament lightly with water until it’s damp, not soaked.
- Lay it face up on a blocking mat or folded towel.
- Shape each loop into a smooth 2 in (5.1 cm) × 1.6 in (4.1 cm) teardrop and pin around the far curve.
- Pin the tails at a 25° angle, with the notch points slightly apart.
- Fluff the cream strands with a fingertip so the three lobes stand apart. Don’t pin the fill.
- Check the full bow: 3.75 in (9.5 cm) × 3 in (7.6 cm). Adjust the pins if needed.
- Let it dry completely, then remove the pins.
Final Quality-Control Checklist
- Each loop’s border counts 30 sc (2 + 6 + 16 + 6).
- Both loops match to within 0.1 in (0.3 cm).
- Each fan has three LP bundles of even height.
- Each fan is tacked at the narrow end and at three points on the far curve.
- Both tails measure 2.2 in (5.6 cm) and have clean V-notches.
- The knot is snug and hides all seams and the hanger ends.
- The hanger is 4 in (10.2 cm) long and centered above the knot.
- No yarn ends show on the front.
Troubleshooting
The far curve ruffles. Recount: Rnd 1 should have 12 sts on the far curve, and the border should have 16. If the counts are right, your tension is loose, so go down half a hook size.
The loop cups inward. Your increases are tight. Go up half a hook size for the border only.
The fan strands are uneven. Make sure each loop reaches 1 in (2.5 cm) before you work the next yo.
It’s hard to pull through 9 loops. Use a pointed hook, or yo and draw through 5 loops, then yo and draw through the remaining 5.
The knot looks flat. Add a row to the strip and wrap it more firmly.
The tails flip upward. Sew them slightly lower behind the pinch, then re-block.
Care
Spot clean with cool water and mild soap, reshape, and dry flat. Store the ornament flat in tissue so the loops and fans keep their shape.
Final Notes
Each measurement in this pattern builds on the one before it:
- Gauge: 5 sc = 1 in (2.5 cm).
- Loop after Rnd 1: 24 sc, 1.6 in (4.1 cm) × 1.2 in (3.0 cm).
- Bordered loop: 30 sc, 2 in (5.1 cm) × 1.6 in (4.1 cm).
- Tails: 2.2 in (5.6 cm). Knot strip: 1.5 in (3.8 cm).
- Assembled bow: 3.75 in (9.5 cm) × 3 in (7.6 cm), plus a 4 in (10.2 cm) hanger.
If every checkpoint matches, the bow will lie flat, the fans will fill the loops, and the ornament will hang straight.
Happy crocheting!