

This poinsettia bookmark is a small, quick holiday make. Five pointed red petals form a star, a cluster of yellow bobbles sits in the middle, and a slim green stem slides between the pages of a book. The flower stays above the pages, so it is easy to find your place.
The colors are classic Christmas: deep red for the petals, mustard yellow for the center and medium green for the stem. Each petal is worked around a foundation chain, which creates a natural center vein and a leaf shape with a sharp tip.
The pattern uses US crochet terms. The finished flower measures about 4.5 in (11.4 cm) wide and 4.25 in (10.8 cm) tall. The whole bookmark, from the top petal tip to the end of the stem, is about 8 in (20.3 cm) long.
You make five petals, one bobble center and one slip-stitch cord stem, then sew them together. Each petal gets a single-crochet edging round before assembly, so every petal arrives at the sewing stage finished and pointed.
Finished Size and Construction
- Finished size: flower 4.5 in (11.4 cm) wide × 4.25 in (10.8 cm) tall; total length 8 in (20.3 cm)
- Skill level: Easy
- Terminology: US crochet terms
- Yarn weight: DK / light worsted (#3), cotton or cotton blend
- Hook: 3.5 mm (E-4)
- Number of pieces: 7 (5 petals, 1 center, 1 stem)
- Layout: five petals in a star, center on top, stem behind
- Petal size (finished): 2.25 in (5.7 cm) long × 1.25 in (3.2 cm) wide
- Petal size before edging: 2 in (5.1 cm) long × 1 in (2.5 cm) wide
- Edging (border) depth: about 0.125 in (0.3 cm) on each side
- Center: 0.75 in (1.9 cm) across
- Stem: 6 in (15.2 cm) long
Materials
Choose a smooth mercerized cotton or a cotton blend. Cotton holds the petal points crisply and survives being slipped in and out of books. Avoid fuzzy yarns, because they hide the center vein and soften the tips.
- Red (petals): 10 g, about 25 m
- Yellow (center): 2 g, about 5 m
- Green (stem): 4 g, about 10 m
These quantities include a margin of about 20% for gauge swatches and sewing tails.
Tools:
– 3.5 mm (E-4) crochet hook
– Tapestry needle
– Scissors
– Stitch marker
– Rust-proof pins and a blocking mat or folded towel
– Spray bottle of water
– Ruler or tape measure
Abbreviations (US Terms)
- ch – chain
- sl st – slip stitch
- sc – single crochet
- hdc – half double crochet
- dc – double crochet
- sp – space
- st(s) – stitch(es)
- yo – yarn over
- rnd – round
Special stitch – 3-dc bobble: [Yo, insert hook in the stitch, yo and pull up a loop, yo and pull through 2 loops] 3 times in the same stitch. You now have 4 loops on the hook. Yo and pull through all 4 loops.
Gauge and Checkpoints
Gauge: 20 sc × 24 rows = 4 in (10.2 cm) in sc. This works out to 5 stitches per 1 in (2.5 cm). Gauge is not critical for a bookmark, but it controls whether the petals fit around the center.
Make one petal first. It is the best gauge test for this project.
- Foundation: 11 chains should measure about 2.25 in (5.7 cm) when relaxed.
- After Rnd 1: the petal should be 2 in (5.1 cm) long × 1 in (2.5 cm) wide.
- After Rnd 2 (edging): the petal should be 2.25 in (5.7 cm) long × 1.25 in (3.2 cm) wide.
- Center: 0.75 in (1.9 cm) across.
- Stem: 6 in (15.2 cm) long.
If your petal is too big, go down to a 3.25 mm hook. If it is too small or the petal cups, go up to a 3.75 mm hook. A petal that is 0.25 in (0.6 cm) off in length changes the flower width by about 0.5 in (1.3 cm), so it is worth checking.
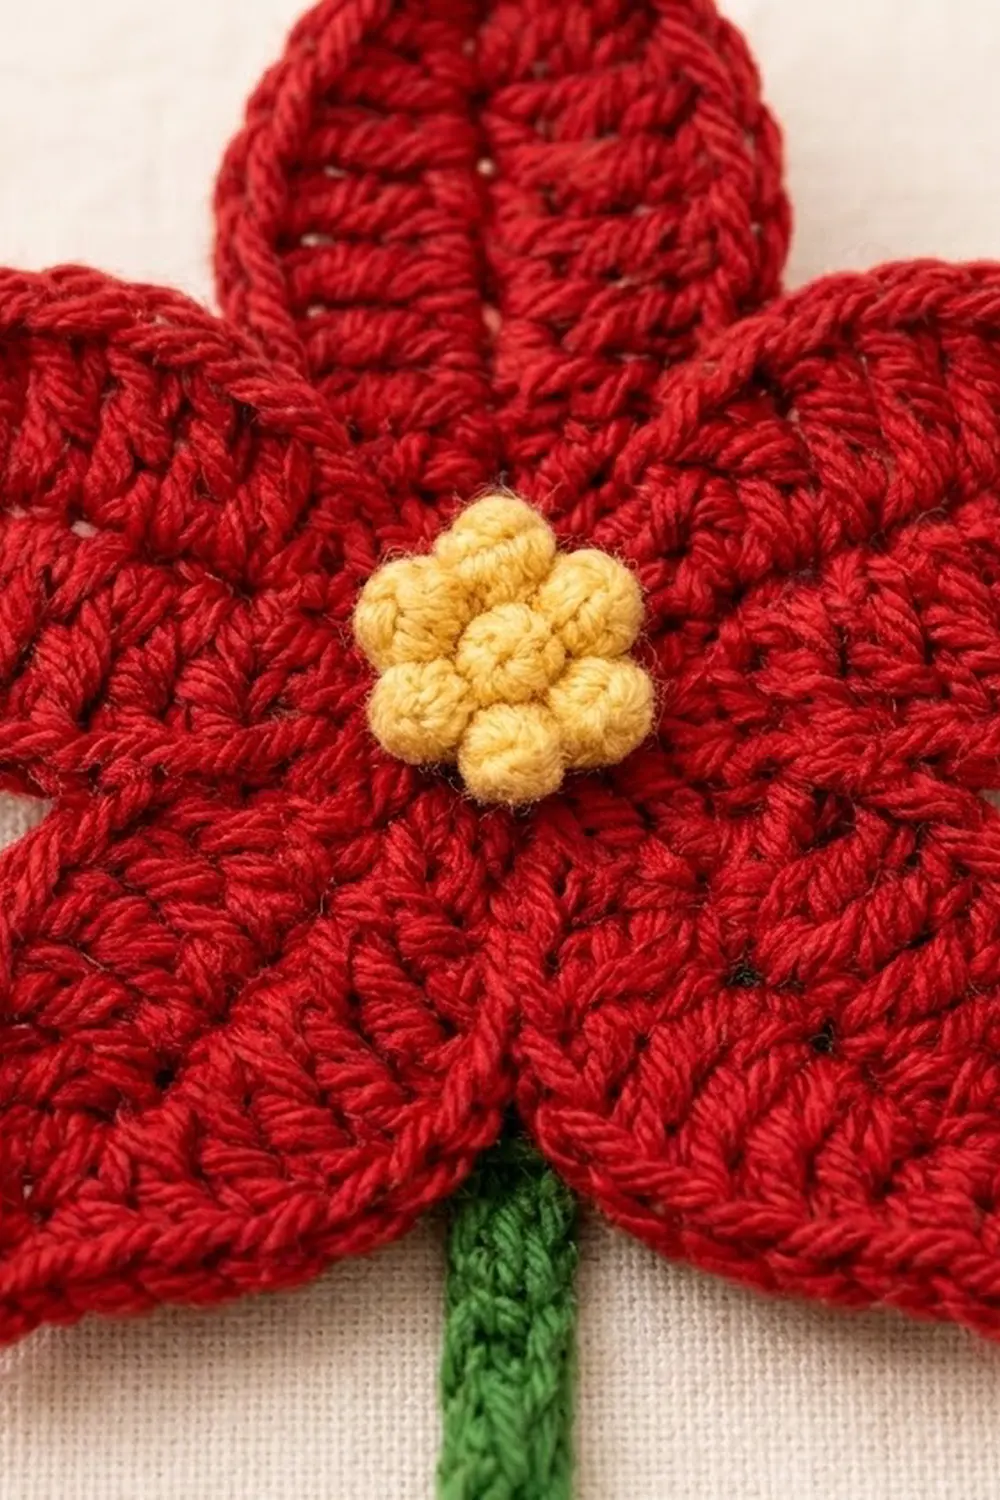
Petals (Make 5)
With red, ch 11.
Rnd 1: Working in the back bumps of the chain: sc in 2nd ch from hook, hdc in next ch, dc in next 5 ch, hdc in next ch, sc in next ch. That is 9 sts along Side A. Work (sc, ch 2, sc) in the last ch to form the tip.
Rotate the piece and work along the opposite side of the foundation chain: sc in next ch, hdc in next ch, dc in next 5 ch, hdc in next ch, sc in next ch. That is 9 sts along Side B. Join with sl st to the first sc.
Count: 20 sts (9 on Side A + 2 tip sc + 9 on Side B) and 1 ch-2 tip sp.
The foundation chain now runs down the middle of the petal as the vein. The dc in the middle make the petal widest at its center, and the hdc and sc taper it toward both ends to give the leaf shape.
Rnd 2 (edging): Work the petal edging round given in the Border section below. Do this now, before you fasten off.
Fasten off and leave a 10 in (25.4 cm) tail on each petal for sewing.
Checkpoint: 2.25 in (5.7 cm) × 1.25 in (3.2 cm), lying flat with a sharp tip.
Center (Make 1)
With yellow, make a magic ring.
Rnd 1: Ch 1, 6 sc in the ring, join with sl st to the first sc. Pull the ring fully closed. (6 sts)
Rnd 2: Ch 2 (does not count as a st). [3-dc bobble in next sc, ch 1] 6 times. Join with sl st to the top of the first bobble.
Count: 6 bobbles and 6 ch-1 sps.
Push each bobble toward the right side with your finger so the center forms a domed cluster. Fasten off and leave an 8 in (20.3 cm) tail.
Checkpoint: 0.75 in (1.9 cm) across.
Stem (Make 1)
With green, ch 31.
Row 1: Sl st in the back bump of the 2nd ch from hook and in each ch across. (30 sl sts)
Fasten off and leave an 8 in (20.3 cm) tail at the top end. Weave in the other tail.
Working into the back bumps leaves a neat braided line on the front and makes a firm cord that will not stretch in a book.
Checkpoint: 6 in (15.2 cm), straight and firm.
Make All Pieces
Before assembly you should have:
- Red: 5 petals, each edged with 22 sc and a ch-2 tip
- Yellow: 1 bobble center with 6 bobbles
- Green: 1 stem with 30 sl sts
Layout (front view):
            [P1]
   [P5]   (center)   [P2]
       [P4]     [P3]
            |
          (stem)
            |
P1 points straight up. P2 and P5 point out to the sides at about 72° from P1. P3 and P4 point down and outward, and the stem drops between them.
Joining
Method: Whipstitch with the red tails, then sew the center on top and the stem on the back.
Step 1 – Petal ring. Each petal’s base is the join point of Rnd 2: the first sc of Side A and the last sc of Side B. Lay the petals right side up in the star layout so the bases meet. Overlap each base over its neighbor by about 0.25 in (0.6 cm).
Starting with P1, whipstitch its 2 base sts to the 2 base sts of P2, matching stitch to stitch. Continue with P2 to P3, P3 to P4, P4 to P5, and P5 back to P1. You have sewn 5 seams, 10 base stitches in total. Sew through the back loops only so no red yarn shows on the front. Pull each stitch snug but not tight. Tight stitches make the center pucker, and loose ones leave a hole.
Step 2 – Center. Place the yellow center over the joined bases. Using the yellow tail, sew through each of the 6 ch-1 sps into the petals underneath. That is 6 tacking stitches, evenly spaced, and it hides every petal seam.
Step 3 – Stem. On the back, lay the top 0.5 in (1.3 cm) of the stem behind the center, between P3 and P4. With the green tail, whipstitch it to the back of the petal ring along those 0.5 in (1.3 cm). This leaves 5.5 in (14.0 cm) hanging below the center, and about 3.5 in (8.9 cm) of it shows below the lower petal tips.
Size checkpoint: The flower is 4.5 in (11.4 cm) tip to tip across P2 and P5, and 4.25 in (10.8 cm) from the tip of P1 to the line across the tips of P3 and P4. The total length is 8 in (20.3 cm).
Border: Petal Edging (Rnd 2 of Each Petal)
This bookmark has no outer border around the whole flower. Each petal gets its own edging round, worked as Rnd 2 before you fasten off. That edging is what gives the petals their clean, defined outline.
Border gauge: 5 sc per 1 in (2.5 cm) along the petal edge.
Rnd 2: Ch 1. Sc in the same st as the join and in each of the next 9 sts of Side A. Sc in the first tip sc. Then work (sc, ch 2, sc) in the ch-2 tip sp. Sc in the second tip sc and in each of the 9 sts of Side B. Join with sl st to the first sc.
Count per side:
– Side A: 10 sc worked one per existing st (9 side sts + 1 tip sc) + 1 sc in the tip sp = 11 sc
– Side B: 1 sc in the tip sp + 10 sc worked one per existing st (1 tip sc + 9 side sts) = 11 sc
– Total: 20 existing sts worked 1-per-st + 2 sc added in the tip sp = 22 sc, plus 1 ch-2 tip sp
Why the math works: One sc in each stitch keeps the long sides flat. The edge only lengthens by the one row of sc, so it does not ruffle. All the extra fullness goes into the tip: the 2 added sc and the ch-2 turn the corner sharply, which keeps the point crisp. Nothing is added at the base, so it stays narrow and overlaps neatly at the center. The edging adds about 0.125 in (0.3 cm) on each side, which takes the petal from 1 in (2.5 cm) to 1.25 in (3.2 cm) wide. It adds 0.25 in (0.6 cm) to the length, which takes it from 2 in (5.1 cm) to 2.25 in (5.7 cm).
Final Blocking
- Weave in all remaining tails on the back, following stitches of the same color.
- Lay the bookmark face down on a blocking mat or folded towel.
- Mist it until it is damp but not wet.
- Turn it face up. Pin each petal tip through the ch-2 sp, setting the tips 4.5 in (11.4 cm) apart across P2 and P5.
- Run a finger down each petal vein to straighten it, and smooth the edges outward.
- Pin the stem straight, measuring 5.5 in (14.0 cm) from the center to its end.
- Leave it pinned until completely dry, about 4–6 hours.
- For extra stiffness, lightly mist the petals with diluted fabric stiffener before drying. This is optional.
Final Quality-Control Checklist
- Each petal has 22 edging sc and a sharp ch-2 tip.
- All 5 petals are the same length: 2.25 in (5.7 cm).
- The center vein runs straight down each petal.
- No petal seams show around the yellow center.
- The center has 6 raised bobbles and no gap in the middle.
- The stem is fixed securely and hangs straight between P3 and P4.
- The flower is 4.5 in (11.4 cm) wide, and the total length is 8 in (20.3 cm).
- The back is flat, with no bulky knots that could mark book pages.
Troubleshooting
- Petal curls lengthwise: Your foundation chain is too tight. Chain with a hook one size larger, then switch back for Rnd 1.
- Petal edge ruffles: You added extra sc along the sides. Check that you have exactly 11 sc per side.
- Blunt tip: You skipped the ch-2 in Rnd 1 or Rnd 2. Redo the tip, or pin it hard when blocking.
- Hole in the middle of the flower: Overlap the petal bases more, then re-tack the center through all 6 ch-1 sps.
- Bobbles sink to the back: Push them forward from behind, and tighten the final yo of each bobble.
- Stem twists: Block it pinned straight. Next time, work the sl sts into the back bumps only.
Care
Hand wash in cool water with mild soap, press out the water in a towel, and dry flat with the petals pinned. Do not tumble dry, because it softens the petal points.
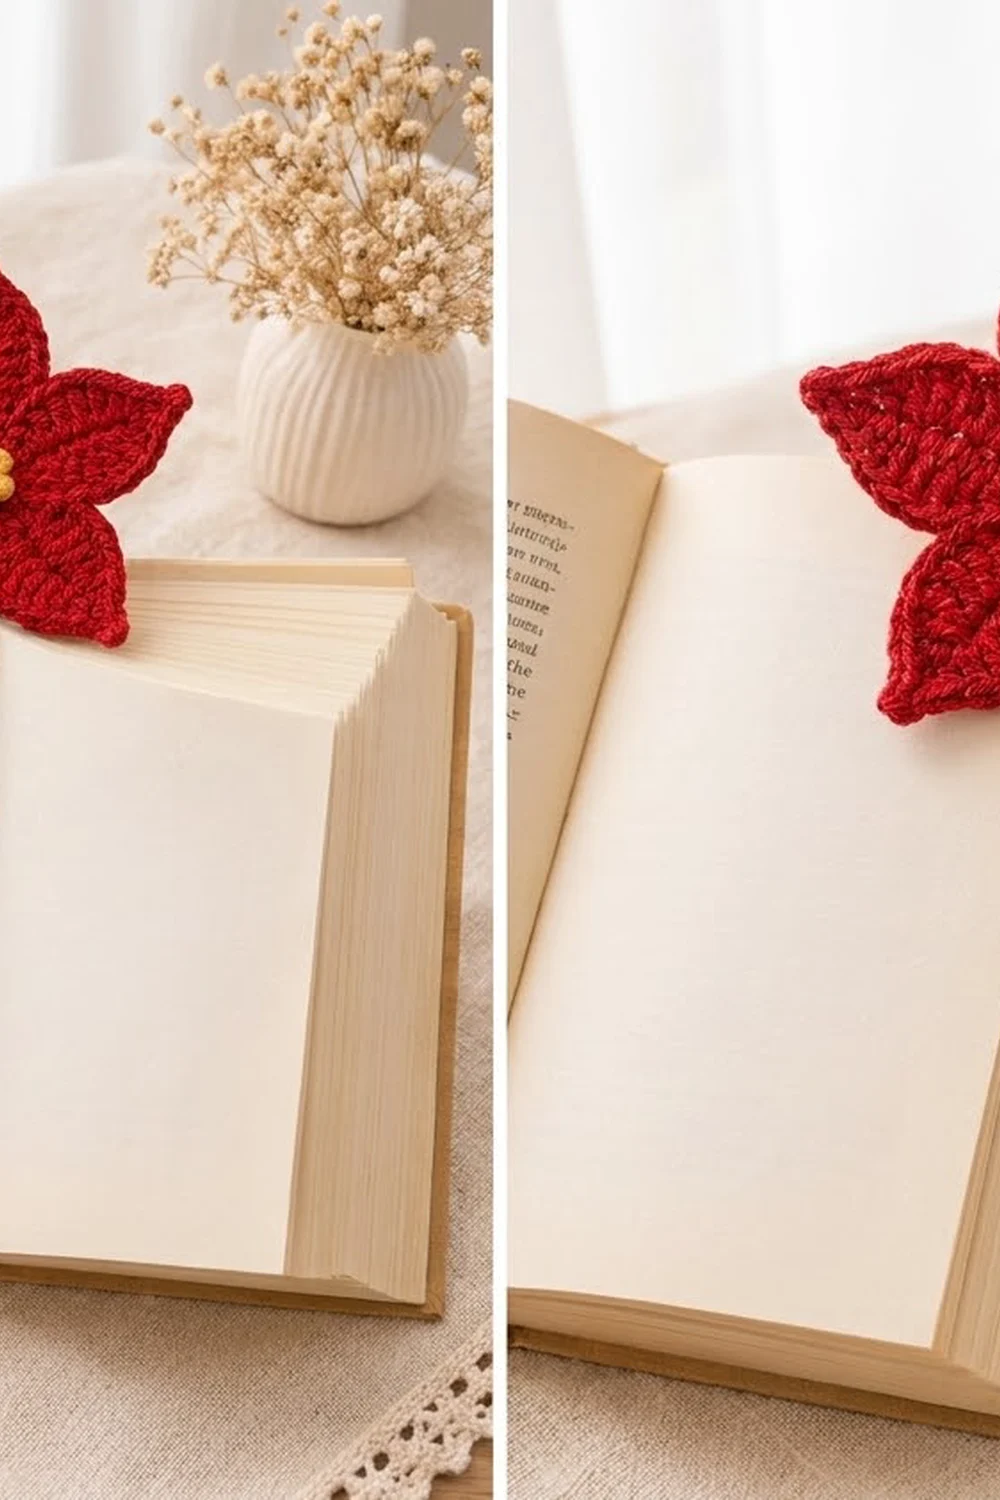
Final Notes
The measurements build on each other. A gauge of 5 sc per 1 in (2.5 cm) gives a 2 in (5.1 cm) petal after Rnd 1. The edging takes it to 2.25 in (5.7 cm) × 1.25 in (3.2 cm). Five petals around a 0.75 in (1.9 cm) center make a 4.5 in (11.4 cm) flower, and a 6 in (15.2 cm) stem brings the finished bookmark to 8 in (20.3 cm). If the first petal measures correctly, the rest of the project will too.
Happy crocheting!