

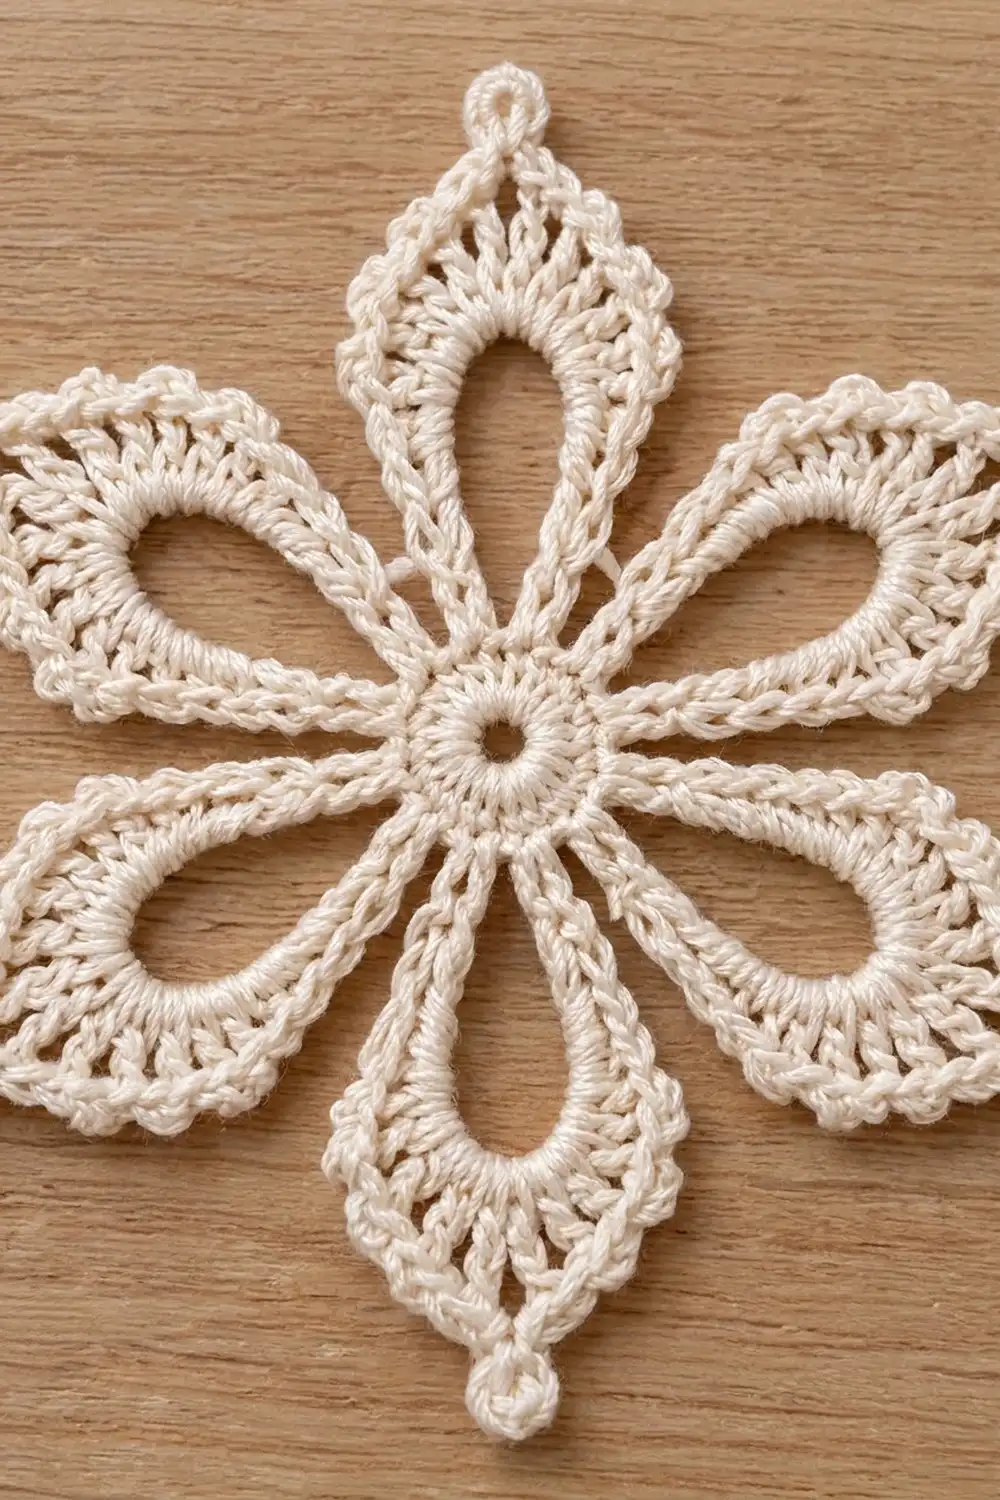
The Frosted Petal Snowflake is a lacy, six-petal motif with a classic heirloom look. Each petal has an open teardrop window at its center, framed by a solid band of stitches and a textured outer edging that flares into a soft diamond shape before ending in a tiny picot point.
This sample is worked in a single cream cotton, which gives a frosty, vintage feel. It looks lovely hanging on a tree, tied onto a gift, or scattered across a holiday table. White, ivory, pale silver-gray, or icy blue would all suit the design.
The pattern uses US crochet terms. The finished motif measures 6 in (15.2 cm) from tip to opposite tip after blocking.
The construction is simple. You start with a solid ring of double crochet, add six chain loops, and fill each loop with a graduated band of stitches. A final edging round shapes the diamond silhouette and adds the picot tips. An optional chain hanging loop turns the motif into an ornament.
Finished Size and Construction
- Finished size: 6 in (15.2 cm) tip to opposite tip
- Skill level: Easy-Intermediate
- Terminology: US crochet terms
- Yarn weight: Sport-weight (#2) mercerized cotton
- Hook: 3.0 mm (US C/2–D/3)
- Number of pieces: 1 single motif
- Layout: Six petals radiating from a central ring
- Petal size: 3 in (7.6 cm) from center to tip; 1.75 in (4.4 cm) wide at the shoulders
- Size before border (after Rnd 3): 5 in (12.7 cm) tip to tip
- Border depth (Rnd 4): 0.5 in (1.3 cm) added at each tip
Materials
Yarn: Use a smooth, tightly plied, mercerized sport-weight cotton. Mercerized cotton shows stitch definition crisply, holds its shape after blocking, and has the gentle sheen you see in the sample. Avoid fuzzy or very soft acrylics, because the open loops will sag and lose their teardrop shape.
- Cream (or white/ivory): 8 g, about 25 m (27 yd) per motif, hanging loop included
These quantities include a margin of about 20% for your gauge swatch, your tails, and small tension differences.
Tools:
– 3.0 mm crochet hook
– Tapestry needle
– Scissors
– Rust-proof pins
– Blocking mat or folded towel
– Spray bottle with clean water
– Optional: liquid starch or fabric stiffener for ornaments
– Ruler or tape measure
Abbreviations (US Terms)
- ch – chain
- sl st – slip stitch
- sc – single crochet
- hdc – half double crochet
- dc – double crochet
- sp – space
- st(s) – stitch(es)
- rnd – round
- rep – repeat
- MR – magic ring
Special stitch – Picot: Ch 3, sl st into the 3rd ch from the hook (the first chain made). This forms the small round knob at each petal tip.
Gauge and Checkpoints
Gauge is not critical for an ornament, but it does control the final size and how well the petals lie flat. Before you commit to a full set, make one complete motif and measure it.
Checkpoints:
– After Rnd 1: The center ring measures 1 in (2.5 cm) across, with a center hole of about 0.25 in (0.6 cm).
– After Rnd 2: With the loops pulled gently outward, the motif measures about 3.5 in (8.9 cm) from loop tip to opposite loop tip.
– After Rnd 3: 5 in (12.7 cm) tip to tip. Each petal is about 1.25 in (3.2 cm) wide.
– After Rnd 4: 6 in (15.2 cm) tip to tip. Each petal is 1.75 in (4.4 cm) wide at the shoulders.
If your motif is too big: Change to a 2.75 mm hook, or check whether your chain loops in Rnd 2 are loose. Loose chains are the most common cause of oversized petals.
If your motif is too small: Change to a 3.25 mm hook. If the petals cup instead of lying flat, your chains are probably too tight, so loosen up on Rnd 2 only.
Pattern
Round 1 – Center Ring
Make a magic ring.
Rnd 1: Ch 3 (counts as first dc), work 17 dc into the ring. Pull the ring closed, leaving a small hole about 0.25 in (0.6 cm) across. Join with a sl st to the top of the beginning ch-3.
Stitch count: 18 dc.
Checkpoint: The ring should lie flat and measure 1 in (2.5 cm) across. If it ruffles, pull the magic ring tighter. If it cups, rework it with 16 dc plus the ch-3 and check your hook size.
Round 2 – Petal Loops
This round divides the 18 stitches into six groups of 3 sc and places one chain loop after each group.
Rnd 2: Ch 1 (does not count as a st). Sc in the same st as the join, then sc in the next 2 dc. Ch 15. Sc in the next 3 dc, ch 15; rep from * 4 more times. Join with a sl st to the first sc.
Stitch count: 18 sc (6 groups of 3) and 6 ch-15 loops.
Each loop starts at the last sc of one group and ends at the first sc of the next group. Since those two sc are side by side, the base of each loop is narrow and the loop forms a teardrop. That teardrop becomes the open window at the center of each petal.
Keep your chains even and a little relaxed. Every ch-15 loop should be the same length, or the finished petals will be uneven.
Round 3 – Solid Petal Band
In this round you fill each chain loop with a graduated band of stitches: short stitches near the center and taller stitches toward the tip. Work all petal stitches into the loop itself (around the chain), not into individual chains.
To find your place: Rnd 2 ended at the first sc of a group. Each group has three sc, and the middle one is the anchor point between petals.
Rnd 3: Sl st in the next sc (the middle sc of the first group).
Skip the next sc. Work the following into the next ch-15 loop: 3 sc, 3 hdc, 6 dc, ch 2, 6 dc, 3 hdc, 3 sc. Skip the next sc, then sl st in the next sc (the middle sc of the following group).
Rep from * 5 more times. On the last repeat, the final sl st goes into the beginning sl st.
Stitch count per petal: 12 sts on side A (3 sc + 3 hdc + 6 dc), one ch-2 tip sp, and 12 sts on side B (6 dc + 3 hdc + 3 sc), for 24 sts plus the ch-2 sp.
Round total: 6 petals × 24 sts = 144 sts, plus 6 sl sts between petals = 150 sts, plus 6 ch-2 tip sps.
The 24 stitches are deliberately packed around a 15-chain loop. The extra stitches push the band outward into a curve, so the inner chain loop opens into a clean teardrop rather than collapsing.
Checkpoint: 5 in (12.7 cm) tip to tip. The petals should touch only near the center, with open V-shaped gaps between them.
Border (Round 4 – Diamond Edging and Picot Tips)
The final round is the motif’s border. It follows the outline of each petal, adds two increases on each side to make the rounded shoulders, and finishes each tip with a picot.
Border gauge: This round adds 0.5 in (1.3 cm) to each petal tip (picot included) and widens each petal from 1.25 in (3.2 cm) to 1.75 in (4.4 cm) at the shoulders.
Do not fasten off after Rnd 3. Your hook is at the sl st between petal 6 and petal 1.
Rnd 4: Do not ch. Work into the stitches of Rnd 3 as follows.
Side A (up the petal): Sc in the first 3 sts (the sc), hdc in the next 3 sts (the hdc), dc in the next 2 dc, 2 dc in each of the next 2 dc, dc in the next 2 dc. This gives 14 sts.
Tip: Work (2 dc, picot, 2 dc) into the ch-2 sp. This gives 4 dc plus 1 picot.
Side B (down the petal): Dc in the next 2 dc, 2 dc in each of the next 2 dc, dc in the next 2 dc, hdc in the next 3 sts, sc in the next 3 sts. This gives 14 sts.
Between petals: Sl st into the Rnd 3 sl st between this petal and the next one. If the sl st is hard to see, insert your hook into the gap at its base.
Rep for the remaining 5 petals. The final sl st lands in the starting sl st. Fasten off, leaving a 6 in (15.2 cm) tail.
Count per petal: 14 + 4 + 14 = 32 sts plus 1 picot, and 1 sl st between petals.
Round total: 6 × 33 = 198 sts, plus 6 picots.
Why the math works:
– Sides: Each side of a Rnd 3 petal has 12 sts. In Rnd 4, all 12 are worked one-per-stitch, and 2 of them get a second dc. That gives 12 worked + 2 added = 14 sts per side.
– Shoulders: The increases sit on the 9th and 10th sts of each side. That puts them about two-thirds of the way up the petal, where the widest point of the diamond should be.
– Tip: The last 2 dc before the tip are worked without increases, so the petal narrows again. The 4 dc around the ch-2 sp then form a tight point under the picot.
– Base: Matching sc and hdc to the sc and hdc below keeps the petal base narrow. This leaves the open V-shaped gaps between petals.
Optional Hanging Loop
Join cream thread with a sl st into the picot of any one petal. Ch 20, then sl st into the same picot. Fasten off. This makes a hanging loop about 1.5 in (3.8 cm) long.
Finishing
Weave in all tails along the solid sc and hdc stitches near the center, where they are least visible. Make sure each tail changes direction at least once so it stays secure after washing. Do not trim the tails close until after blocking.
Final Blocking
Blocking turns this motif from a slightly curly piece into a crisp, flat snowflake. Do not skip it.
- Wet: Soak the motif in cool water for 5 minutes, then press out the water gently in a towel. Do not wring it.
- Center: Pin the center ring flat on your mat with 4–6 pins, keeping the center hole round.
- Tips: Pin each picot outward so that opposite tips are exactly 6 in (15.2 cm) apart. Neighboring tips should be evenly spaced, 60 degrees apart.
- Shoulders: Place a pin on each side of each petal at the widest point, so each petal is 1.75 in (4.4 cm) wide.
- Windows: Slide a pin into each teardrop opening and ease it into an even, open shape.
- Stiffen (optional): For ornaments, brush on or spray diluted liquid starch or fabric stiffener while the motif is pinned.
- Dry: Let it dry completely, usually 12–24 hours, before removing the pins.
- Trim: Clip any remaining tails close to the fabric.
Final Quality-Control Checklist
- [ ] The center ring has 18 dc, and the center hole is small and round.
- [ ] There are 6 petals, all the same length.
- [ ] Each petal has an open teardrop window.
- [ ] Each petal’s Rnd 3 band has 24 sts plus a ch-2 tip sp.
- [ ] Each petal side in Rnd 4 has 14 sts, with shoulders at matching heights.
- [ ] Every tip has a single, rounded picot.
- [ ] The motif measures 6 in (15.2 cm) tip to tip.
- [ ] The gaps between petals are open V shapes, with petals touching only at their bases.
- [ ] All tails are secure and invisible from the front.
- [ ] If included, the hanging loop is centered on one picot.
Troubleshooting
The center ring cups or ruffles. Cupping means too few stitches or too small a hook. Ruffling means the ring wasn’t pulled tight enough. Check that you have 18 dc and close the magic ring firmly.
The petals are different lengths. Your ch-15 loops were uneven. Count every chain, and keep your chain tension the same across all six loops.
The teardrop windows collapse or look narrow. Make sure you work into the loop space, not into individual chains. Also check that you skipped the sc on each side of the loop in Rnd 3. Blocking with a pin in each window will help as well.
The petal tips look blunt instead of pointed. Make sure the tip of each petal has only 4 dc (2 on each side of the picot) and that the dc just before and after the tip have no increases.
The motif won’t lie flat after Rnd 4. Check your count of 14 sts per side. Extra increases make the petals ripple, and missing ones make them curl inward.
The petals overlap at the base. Make sure you sl st into the Rnd 3 sl st between petals, not into the next petal’s first sc.
My tail shows through the lace. Weave it through the solid sc and hdc only, never across an open window.
Care
Hand wash in cool water with a mild soap, press dry in a towel, and lay flat or re-pin to dry. Stiffened ornaments should be wiped clean rather than soaked, and re-stiffened if they soften over time.
Final Notes
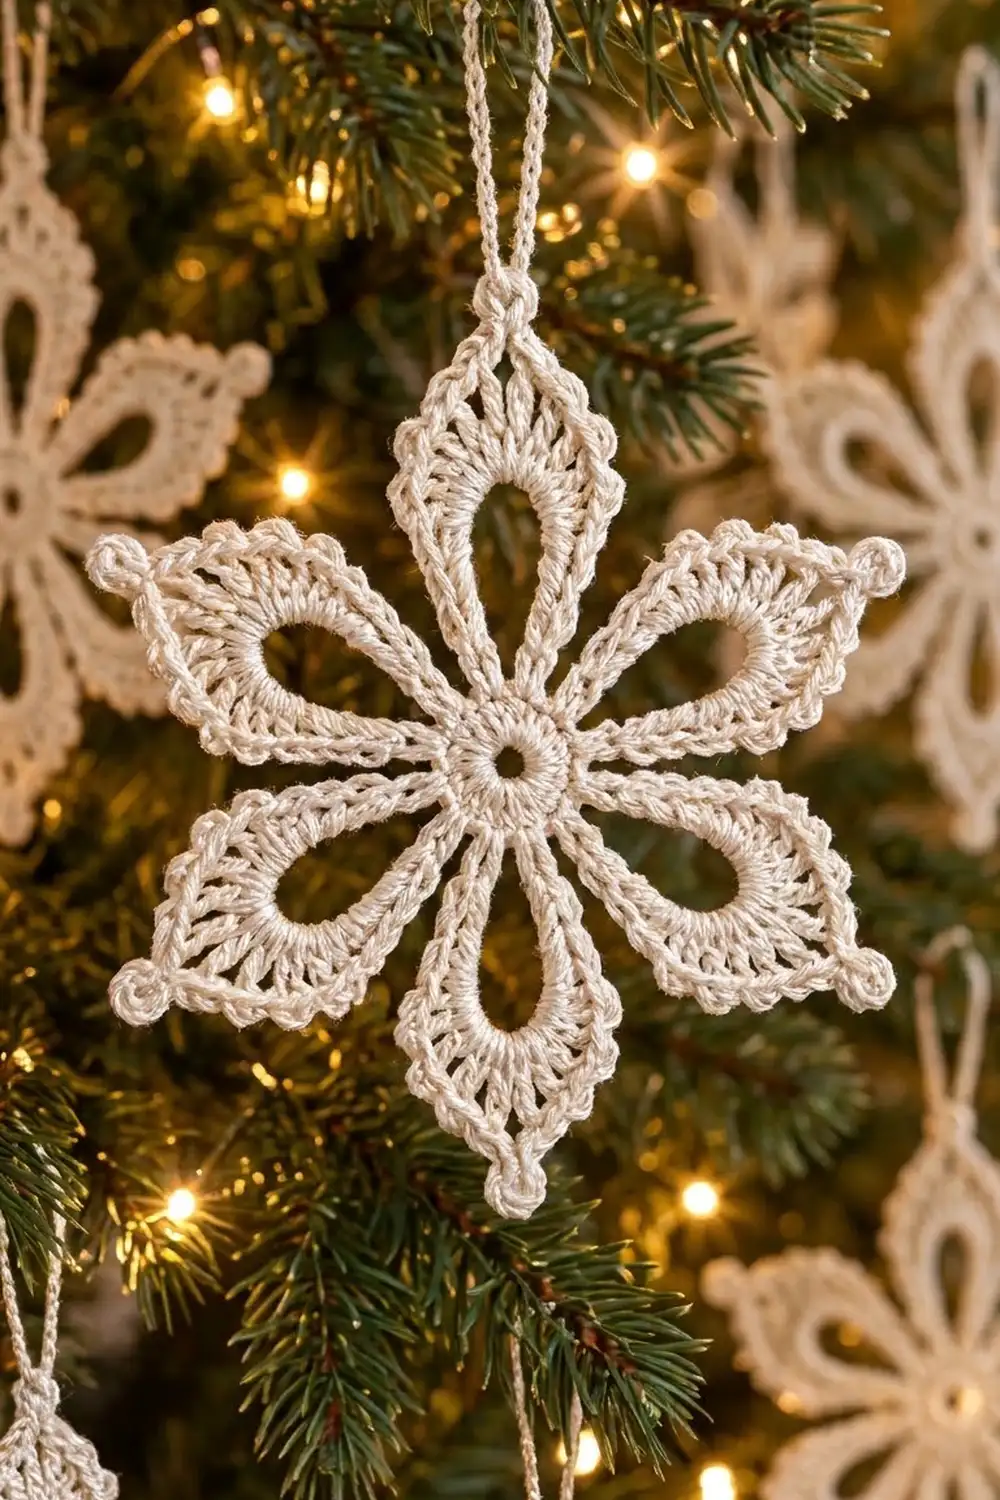
The size of this snowflake is built up step by step: a 1 in (2.5 cm) ring of 18 dc, six even ch-15 loops reaching 3.5 in (8.9 cm), a 24-stitch band per petal bringing it to 5 in (12.7 cm), and a 14-stitches-per-side border with picot tips finishing at 6 in (15.2 cm). If you check each stage and block carefully, every snowflake you make will match. Make one for your tree, a handful for gift tags, or a whole flurry for the window.
Happy crocheting!