

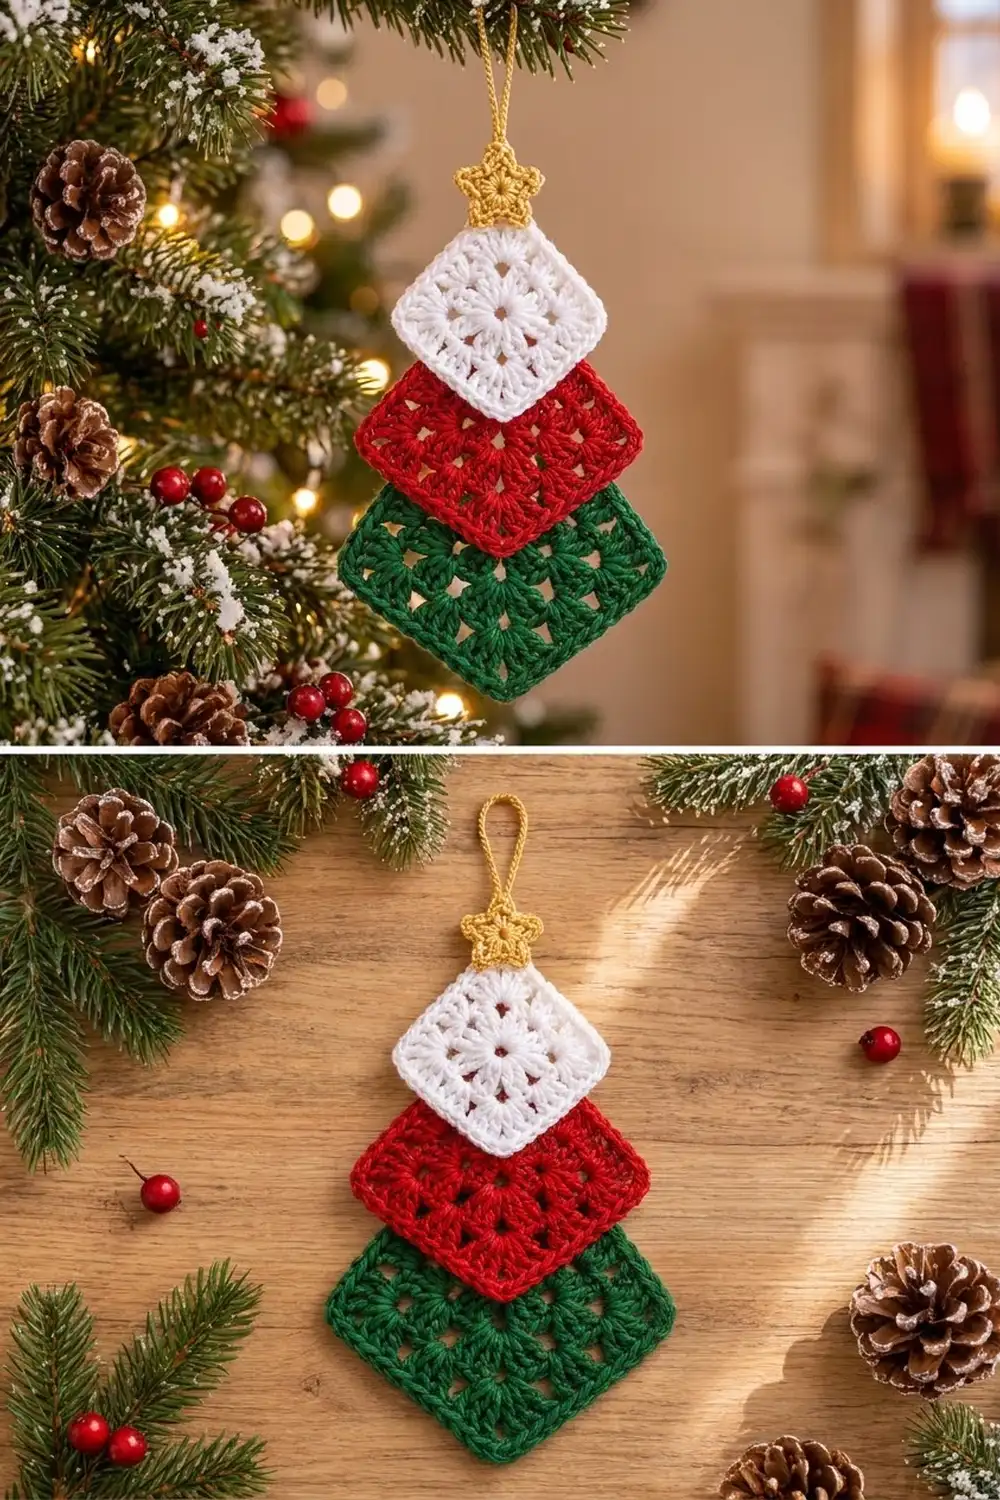
This little Christmas tree ornament is made from three classic granny squares turned on point and stacked into a tiny tree. A green square forms the wide base, a red square sits in the middle, and a small white square makes the top tier. A golden star and a chain hanging loop finish it off.
The colors are traditional: forest green, cherry red, snow white, and mustard gold. Each square has the familiar open granny texture with small chain-space windows, plus a neat single crochet edge that keeps the outlines crisp. Where the white square overlaps the red one, the red shows through the white square’s holes, which adds a nice bit of depth.
This pattern uses US crochet terms. The finished ornament measures about 5.3 in (13.5 cm) wide and 9 in (22.9 cm) tall, from the bottom point to the top of the star. The hanging loop adds another 2 in (5.1 cm).
You make three granny squares (2, 3, and 4 rounds) and give each one a single crochet border. Then you crochet a small five-point star, stack the pieces, and sew them together. Last, you add the loop at the top point of the star.
Finished Size and Construction
- Finished ornament: 5.3 in (13.5 cm) wide x 9 in (22.9 cm) tall, plus a 2 in (5.1 cm) loop
- Skill level: Easy
- Terminology: US crochet terms
- Yarn weight: DK / light worsted (#3)
- Hook: 3.5 mm (E-4)
- Number of pieces: 4 (3 granny squares + 1 star), plus a chain loop
- Layout: squares turned on point and stacked vertically, smallest on top
- Piece sizes (bordered): white 2.25 in (5.7 cm), red 3 in (7.6 cm), green 3.75 in (9.5 cm) per side
- Size before border: white 2 in (5.1 cm), red 2.75 in (7.0 cm), green 3.5 in (8.9 cm) per side
- Border depth: 1 round of sc, about 0.125 in (0.3 cm) per side
- Star: about 1.25 in (3.2 cm) across
Materials
Pick a smooth DK cotton or acrylic with good stitch definition. Cotton gives the crispest edges and holds the diamond shape best on a tree.
Yarn (DK, about 125 m per 50 g):
- Green: 10 g (25 m)
- Red: 7 g (18 m)
- White: 5 g (13 m)
- Gold / mustard: 3 g (8 m)
These amounts include extra for swatching, sewing tails, and the hanging loop.
Tools:
- 3.5 mm (E-4) crochet hook
- Tapestry needle
- Scissors
- Stitch marker
- Blocking mat and rustproof pins
- Spray bottle with water
- Ruler or tape measure
Abbreviations (US Terms)
- ch – chain
- sl st – slip stitch
- sc – single crochet
- hdc – half double crochet
- dc – double crochet
- sp – space
- st(s) – stitch(es)
- MR – magic ring
- [ ] – repeat the steps inside the brackets as directed
Corner group: (3 dc, ch 2, 3 dc) all worked in the same corner ch-2 sp.
Beginning ch 3: counts as the first dc throughout.
Gauge and Checkpoints
Gauge matters here because the squares have to stack in the right proportions. Make the green square first and measure it at each stage before you make the others.
Gauge: After Rounds 1–2, the granny square measures 2 in (5.1 cm) per side, measured flat across the middle.
Checkpoints (per side, flattened but not blocked):
- After Round 1: 1.25 in (3.2 cm)
- After Round 2: 2 in (5.1 cm)
- After Round 3: 2.75 in (7.0 cm)
- After Round 4: 3.5 in (8.9 cm)
- After the sc border: add 0.25 in (0.6 cm) to the side length
Each granny round adds about 0.75 in (1.9 cm) to the side length.
If your square is too big: go down to a 3.25 mm hook, or make sure your beginning ch 3 isn’t loose. If it’s too small: go up to a 3.75 mm or 4 mm hook. Settle on your hook before starting the second square so all three tiers match.
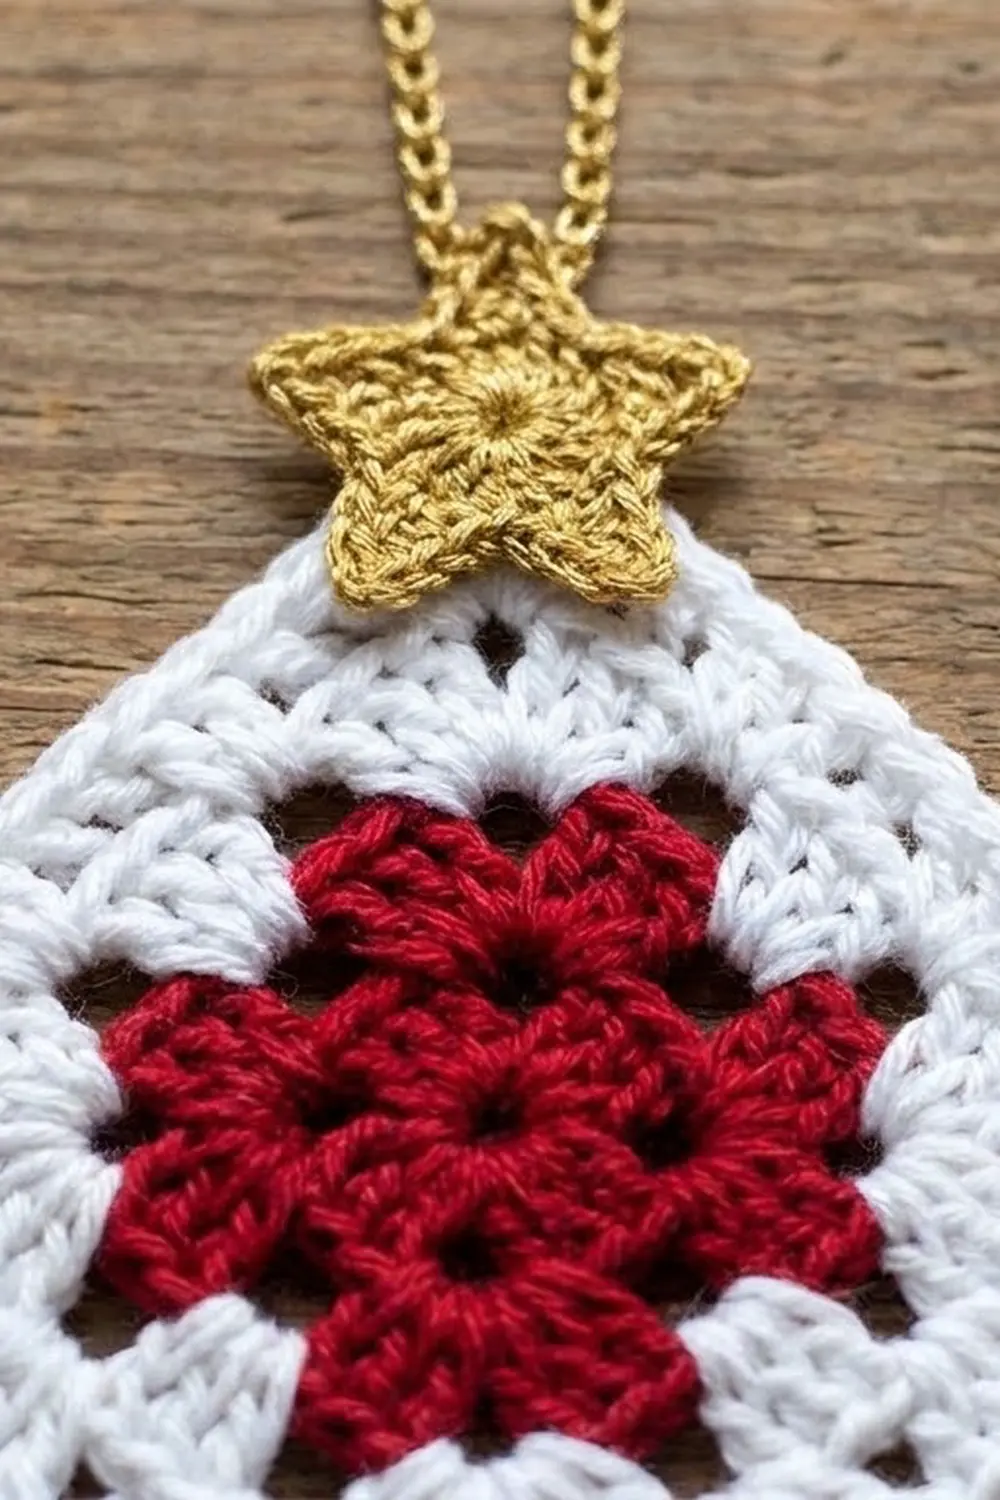
Granny Squares
All three squares use the same pattern. The only difference is how many rounds you work:
- White (top tier): Rounds 1–2, then Border
- Red (middle tier): Rounds 1–3, then Border
- Green (base tier): Rounds 1–4, then Border
Round 1: MR, ch 3, 2 dc in ring, ch 2, [3 dc in ring, ch 2] 3 times. Pull the ring closed and sl st to the top of the beginning ch 3. (12 dc, 4 ch-2 corner sps; 3 dc per side)
Round 2: Sl st in the next 2 dc and into the corner ch-2 sp. Ch 3, (2 dc, ch 2, 3 dc) in the same sp, ch 1. [Corner group in the next ch-2 sp, ch 1] 3 times. Sl st to the top of the beginning ch 3. (24 dc, 4 corners, 4 ch-1 sps; 6 dc per side)
For the white square, stop here and go to the Border.
Round 3: Sl st in the next 2 dc and into the corner ch-2 sp. Ch 3, (2 dc, ch 2, 3 dc) in the same sp, ch 1. [3 dc in the next ch-1 sp, ch 1, corner group in the next ch-2 sp, ch 1] 3 times, 3 dc in the next ch-1 sp, ch 1. Sl st to the top of the beginning ch 3. (36 dc, 4 corners, 8 ch-1 sps; 9 dc per side)
For the red square, stop here and go to the Border.
Round 4: Sl st in the next 2 dc and into the corner ch-2 sp. Ch 3, (2 dc, ch 2, 3 dc) in the same sp, ch 1. [(3 dc in the next ch-1 sp, ch 1) twice, corner group in the next ch-2 sp, ch 1] 3 times, (3 dc in the next ch-1 sp, ch 1) twice. Sl st to the top of the beginning ch 3. (48 dc, 4 corners, 12 ch-1 sps; 12 dc per side)
The green square is now ready for its Border.
Quick count rule: after Round n, each side has 3n dc and n – 1 ch-1 sps.
Star Topper
Use gold yarn.
Round 1: MR, ch 1, 10 sc in ring. Pull the ring closed and sl st to the first sc. (10 sc)
Round 2 (points): [Ch 4, sl st in the 2nd ch from the hook, sc in the next ch, hdc in the next ch, skip the next sc of Round 1, sl st in the following sc] 5 times. Your last sl st lands in the joining st. (5 points; each point = 1 sl st + 1 sc + 1 hdc worked along the chain)
Fasten off and leave a 10 in (25.4 cm) tail for sewing. The star should measure about 1.25 in (3.2 cm) from point to point. Gently tug each point to sharpen it.
Make All Pieces
You need one of each piece:
- Green: 1 square (4 rounds + Border)
- Red: 1 square (3 rounds + Border)
- White: 1 square (2 rounds + Border)
- Gold: 1 star (+ the hanging loop, added at the end)
Layout (front view, squares on point, top to bottom):
      [ STAR ]     gold, with loop
     [ WHITE ]     2.25 in (5.7 cm)
    [   RED   ]    3 in (7.6 cm)
   [   GREEN   ]   3.75 in (9.5 cm)
The bottom point of each upper square sits on the center of the square below it.
Border
Work the border on each square before joining, using that square’s color. This is a trim round: you work one sc into every existing st or sp, and each corner gets 2 sc with a ch 2 between them.
Border gauge: about 4 to 4.5 sc per inch (1.6 to 1.8 sc per cm) along the edge. The border adds about 0.125 in (0.3 cm) to each edge.
Border Round: Sl st in the next 2 dc and into the corner ch-2 sp. Ch 1, (sc, ch 2, sc) in the same corner sp. Sc in each dc and each ch-1 sp across to the next corner, (sc, ch 2, sc) in the corner sp. Repeat from * to * twice more. Sc in each dc and ch-1 sp across the last side. Sl st to the first sc and fasten off.
Counts (each side includes its 2 corner sc):
- White: 6 dc + 1 ch-1 sp + 2 corner sc = 9 sc per side. Total: 24 (1 per dc) + 4 (1 per ch-1 sp) + 8 (2 per corner) = 36 sc, plus 4 ch-2 corners.
- Red: 9 dc + 2 ch-1 sps + 2 corner sc = 13 sc per side. Total: 36 + 8 + 8 = 52 sc, plus 4 ch-2 corners.
- Green: 12 dc + 3 ch-1 sps + 2 corner sc = 17 sc per side. Total: 48 + 12 + 8 = 68 sc, plus 4 ch-2 corners.
Why the math works: A 3-dc group plus its ch-1 sp is about as wide as the 4 sc you work into them, so the edge keeps its length without ruffling or pulling in. The ch 2 at each corner gives the turn just enough room to stay square and pointed. That’s why each bordered square is only 0.25 in (0.6 cm) larger than before the border.
Weave in each square’s center tail now. On the red and white squares, keep a 12 in (30.5 cm) border tail for sewing.
Joining
Block the three squares lightly before joining (see Final Blocking) so the edges are straight and easy to line up.
Method: Whipstitch with the upper square’s tail. Go through the back loop of each border sc on the upper square and catch only the top layer of the square underneath. The stitches stay hidden in the sc edge.
Red onto green:
- Turn both squares on point. Lay the red square on top of the green so the red square’s bottom corner sits exactly over the green square’s center ring. Line up their vertical center lines.
- Pin the red square in place. In this position, the red square’s lower edges cross over the green square’s upper edges.
- With the red tail, sew the red square’s bottom corner ch-2 sp to the green. Then sew the 8 sc nearest the bottom corner on each lower side (8 of 13). That covers all of the red edge that actually lies over green fabric.
- Leave the other 5 sc on each lower side, and the red square’s upper edges, unsewn. The red square’s side corners stick out past the green, which gives the tree its stepped shape.
White onto red:
- Lay the white square on the red with its bottom corner over the red square’s center, lined up the same way.
- With the white tail, sew the bottom corner and the 6 sc nearest it on each lower side (6 of 9).
Star:
- Place the star so two of its points straddle the white square’s top corner, with one point straight up. That top point should sit about 1 in (2.5 cm) above the white square’s top corner.
- With the gold tail, sew the star’s center ring to the white square’s top corner, then add a small tack under each of the two lower points.
Tension advice: Keep each stitch just snug. Pulling too hard puckers the square underneath, and loose stitches let the upper tier tip forward when the ornament hangs.
Hanging loop: Join gold with a sl st at the tip of the star’s top point. Ch 22, then sl st back into the same tip. Fasten off and weave the ends into the star. The loop should be about 2 in (5.1 cm) tall.
Size checkpoint: The joined ornament measures 5.3 in (13.5 cm) across the green square’s side corners. From the green bottom point to the white top point it measures about 8 in (20.3 cm), and with the star it’s about 9 in (22.9 cm).
Final Blocking
- Lightly mist the ornament until it’s damp but not wet.
- Lay it face up on a blocking mat.
- Pin every visible corner of each square. Check that the sides are straight and match the bordered sizes: 2.25 in (5.7 cm), 3 in (7.6 cm), and 3.75 in (9.5 cm).
- Pin out the five star points so they’re sharp and evenly spaced.
- Make sure all the top and bottom points line up on one straight vertical line.
- Let it dry completely, which takes at least 4 to 6 hours.
- Unpin. For a firmer hanging shape, you can lightly spray fabric stiffener on the back.
Final Quality-Control Checklist
- Each square has the right per-side count: 9, 13, and 17 sc.
- Every corner of each square has a clear ch-2 point.
- The bordered squares measure 2.25 in (5.7 cm), 3 in (7.6 cm), and 3.75 in (9.5 cm) per side.
- Each upper square’s bottom point sits on the center of the square below.
- The joining stitches don’t show on the front.
- The star stands upright and is centered on the top corner.
- The loop is secure and about 2 in (5.1 cm) tall.
- All ends are woven in and trimmed.
- The ornament hangs straight without twisting.
Troubleshooting
Square twists or skews: At the start of each round, make sure you begin in the corner ch-2 sp. Starting in the wrong spot shifts the corners.
Square ruffles: Your ch-2 corners or ch-1 sps may be too loose. Tighten the chains or go down a hook size.
Square cups: Your dc may be too tight. Loosen them or go up a hook size.
Border waves: You may have an extra sc. Recount against 9, 13, or 17 per side.
Upper tier flops forward: Add a few extra tacks near the bottom corner, or lightly stiffen the ornament.
Star points are soft: Chain more tightly and pin the points during blocking.
Ornament hangs crooked: Move the loop so it sits exactly on the tip of the star’s top point.
Care
Spot clean with mild soap and cool water, then reshape and lay flat to dry. Store flat or hanging, away from heat.
Final Notes
The measurements build step by step. After Round 2 the square should measure 2 in (5.1 cm), and each extra round adds 0.75 in (1.9 cm). The border adds 0.25 in (0.6 cm), so the squares come out at 2.25 in (5.7 cm), 3 in (7.6 cm), and 3.75 in (9.5 cm). When you set each square’s bottom point on the center of the square below, the tree measures about 8 in (20.3 cm) tall and 5.3 in (13.5 cm) wide, and the star brings the height to 9 in (22.9 cm). If your gauge matches at the first checkpoint, everything else will fit.
Happy crocheting!