

This little tree is lace you can hang anywhere. It’s worked in fine cotton thread in deep teal, with three gold stars stacked down the middle, a gold star on top, and a twisted gold edge that catches the light. It looks great swinging from a rearview mirror, on a tree branch, or in a window.
It uses just two colors: a rich teal for the lace and trunk, and a warm gold for the stars, border, and hanging loop. The style is classic thread lace. Solid double crochet rows alternate with open mesh, and a small notch marks the top of each of the three tiers.
The pattern uses US crochet terms throughout. The finished ornament is 4.1 in (10.4 cm) wide and 5.4 in (13.7 cm) tall with the border. With the topper star it’s about 6.0 in (15.2 cm) tall, not counting the hanging loop.
Construction is simple. You crochet the tree body flat from the base up to the tip, decreasing as you go, then work the trunk down from the center of the foundation chain. Two gold border rounds go all the way around. Finally, you make four small stars and sew them on, then add the hanging loop.
Finished Size and Construction
- Finished size: 4.1 in wide x 5.4 in tall (10.4 x 13.7 cm); 6.0 in (15.2 cm) tall with the topper star
- Skill level: Intermediate (thread work, shaped rows)
- Terminology: US crochet terms
- Yarn weight: Size 10 crochet cotton thread (Lace / 0)
- Hook: 1.5 mm steel hook
- Number of pieces: 1 tree (body and trunk worked as one), plus 4 small star appliqués sewn on
- Layout: One standalone ornament; no joining
- Body size before border: 3.7 in wide x 5.0 in tall (9.4 x 12.7 cm), trunk included
- Border depth: 0.2 in (0.5 cm) per side
Materials
Yarn: Use mercerized size 10 cotton thread. It holds crisp stitch definition and takes starch well. A gold thread with a light metallic strand gives extra sparkle, but plain golden-yellow cotton works too.
- Color A – Teal: 8 g, about 45 m
- Color B – Gold: 6 g, about 34 m
These quantities include a safety margin of roughly 30%.
Tools:
– 1.5 mm steel crochet hook
– Fine tapestry needle (size 24–26)
– Scissors
– Stitch markers (2)
– Liquid fabric starch or a sugar-water stiffener
– Blocking board or foam and rustproof pins
– Ruler or tape measure
Abbreviations (US Terms)
- ch – chain
- sl st – slip stitch
- sc – single crochet
- hdc – half double crochet
- dc – double crochet
- tr – treble crochet
- sk – skip
- sp – space
- st(s) – stitch(es)
- dc3tog – double crochet 3 together: [yo, insert hook in next st, pull up a loop, yo, pull through 2 loops] 3 times, yo, pull through all 4 loops on hook
- rev sc (crab stitch) – reverse single crochet. Work from left to right (right-handed): insert hook in the next st to the right, pull up a loop, yo, pull through both loops.
Special notes:
– Ch-3 at the start of a row counts as 1 dc. Ch-4 at the start of a mesh row counts as 1 dc plus ch 1.
– In mesh rows, every ch-1 sp counts as 1 stitch.
– Edge decrease: To lose 1 st at each end of a row, turn, sl st in the first 2 sts, then start the row from the 2nd st. Work across and leave the last st unworked. The row loses 2 sts.
– Notch decrease: To lose 2 sts at each end of a row, turn, sl st in the first 3 sts, then start the row from the 3rd st. Work across and leave the last 2 sts unworked. The row loses 4 sts.
Gauge and Checkpoints
Gauge: 20 dc x 8 dc rows = 2 in (5.1 cm), worked with Color A and a 1.5 mm hook.
Test first: Ch 22 and dc in the 4th ch from the hook and in each ch across (20 dc). Work 7 more rows of dc. The swatch should measure 2 in (5.1 cm) square. Thread gauge varies a lot between brands, so make this check before you start the tree.
Checkpoints:
– After Row 1: 3.7 in (9.4 cm) wide
– After Row 6 (end of Tier 1): 1.5 in (3.8 cm) tall
– After Row 12 (end of Tier 2): 3.0 in (7.6 cm) tall
– After Row 17 (tip): 4.25 in (10.8 cm) tall
– After the trunk: 5.0 in (12.7 cm) total height
– After the border: 4.1 x 5.4 in (10.4 x 13.7 cm)
If your piece is too big, go down to a 1.4 mm or 1.25 mm hook. If it’s too small, go up to 1.65 mm or 1.75 mm. If only the height is off, adjust how tall you pull up your dc rather than changing the hook.
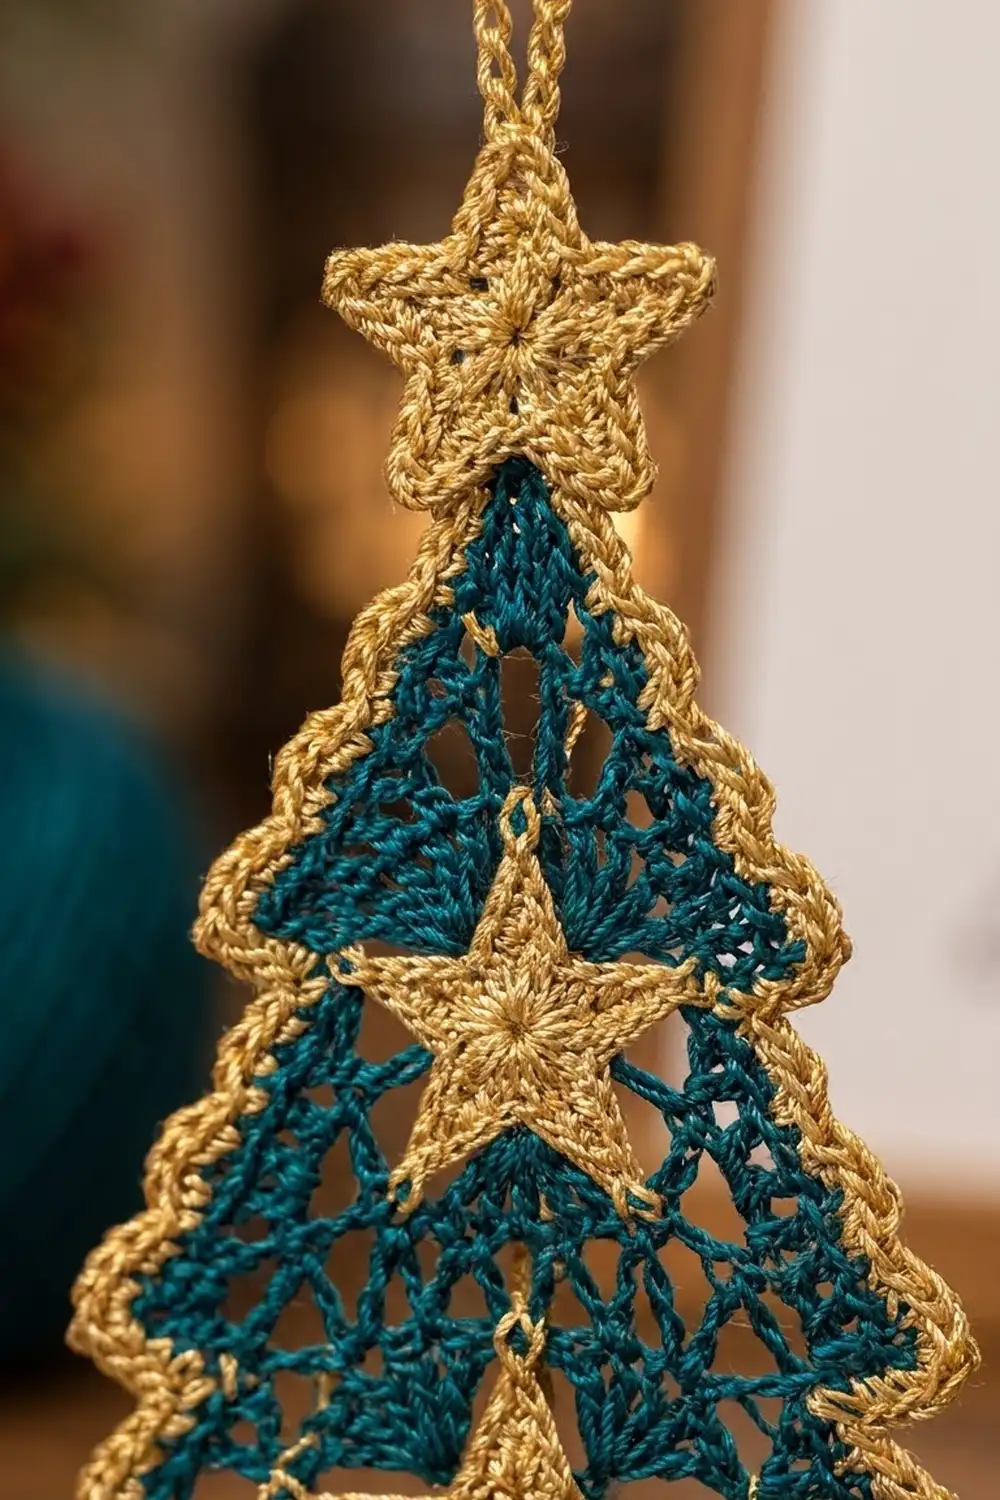
Tree Body
Use Color A. Work flat in rows and turn at the end of every row. Odd rows are solid, and even rows are mesh.
Tier 1
Foundation and Row 1 (solid): Ch 39. Dc in the 4th ch from the hook (the skipped ch counts as 1 dc) and in each ch across. (37 sts)
Place a marker in the free loop of foundation ch-st 15 and another in st 23, counting from the start of Row 1. The trunk goes between them later.
Row 2 (mesh): Edge decrease: turn, sl st in the first 2 sts, ch 4 (counts as dc + ch 1), sk next st. Dc in next st, ch 1, sk next st; repeat from * until 2 sts remain. Dc in the next st and leave the last st unworked. (35 sts: 18 dc, 17 ch-1 sps)
Row 3 (solid): Edge decrease: turn, sl st in the first 2 sts, ch 3. Dc in each dc and each ch-1 sp until 1 st remains, then leave it unworked. (33 sts)
Row 4 (mesh): Work as Row 2. (31 sts: 16 dc, 15 ch-1 sps)
Row 5 (solid): Work as Row 3. (29 sts)
Row 6 (mesh): Work as Row 2. (27 sts: 14 dc, 13 ch-1 sps)
Checkpoint: the piece should be 1.5 in (3.8 cm) tall.
Tier 2
Row 7 (solid, notch): Notch decrease: turn, sl st in the first 3 sts, ch 3. Dc in each dc and each ch-1 sp until 2 sts remain, then leave them unworked. (23 sts)
This sharp decrease leaves a 2-stitch ledge on each side. That ledge forms the step between the tiers. Tier 2 starts 2.3 in (5.8 cm) wide.
Row 8 (mesh): Work as Row 2. (21 sts: 11 dc, 10 ch-1 sps)
Row 9 (solid): Work as Row 3. (19 sts)
Row 10 (mesh): Work as Row 2. (17 sts: 9 dc, 8 ch-1 sps)
Row 11 (solid): Work as Row 3. (15 sts)
Row 12 (mesh): Work as Row 2. (13 sts: 7 dc, 6 ch-1 sps)
Checkpoint: the piece should be 3.0 in (7.6 cm) tall.
Tier 3
Row 13 (solid, notch): Work as Row 7. (9 sts)
Tier 3 starts 0.9 in (2.3 cm) wide.
Row 14 (mesh): Work as Row 2. (7 sts: 4 dc, 3 ch-1 sps)
Row 15 (solid): Work as Row 3. (5 sts)
Row 16 (mesh): Work as Row 2. (3 sts: 2 dc, 1 ch-1 sp)
Row 17 (tip): Turn and ch 2 (doesn’t count as a st). Dc3tog over the dc, the ch-1 sp, and the last dc. (1 st)
Fasten off and weave in the end.
Checkpoint: the piece should be 4.25 in (10.8 cm) tall and 3.7 in (9.4 cm) wide at the base.
Trunk
Turn the tree upside down so the foundation chain is on top. You’ll work into the free loops of the 9 center foundation sts, from marker to marker.
Row 1: Join Color A with a sl st in the free loop at the first marker (st 15). Ch 3 (counts as dc), then dc in each of the next 8 free loops, ending at the second marker (st 23). (9 dc)
Rows 2–3: Turn, ch 3 (counts as dc), dc in each st across, working the last dc into the top of the turning ch. (9 dc)
Fasten off and weave in the end. The trunk measures 0.9 in (2.3 cm) wide x 0.75 in (1.9 cm) tall.
Checkpoint: total height from the trunk’s bottom edge to the tip should be 5.0 in (12.7 cm). There are 14 free foundation loops on each side of the trunk.
Border
Border gauge: Work 2 sc per dc row end, and 1 sc per stitch along the foundation and trunk bottom. On the slanted sides this works out to about 8 sc per 1 in (2.5 cm).
Round 1 (Color B – sc)
Join Color B in the top of the tip (Row 17). Ch 1 and work as follows, with the right side facing:
- Tip: 3 sc in the top of the dc3tog. (3)
- Right side, tip to base: 2 sc in each of the 16 row ends from Row 16 down to Row 1 (32 sc), plus 1 sc in each of the 2 ledge sts on the Row 12 and Row 6 notches (4 sc). (36)
- Right base corner: 1 extra sc in the same corner spot as the last side sc. (1)
- Bottom right: 1 sc in each of the 14 free foundation loops from the corner to the trunk. (14)
- Trunk right side: 2 sc in each of the 3 trunk row ends. (6)
- Trunk bottom: 1 extra sc at the corner, 1 sc in each of the 9 sts, and 1 extra sc at the corner. (9 + 2 = 11)
- Trunk left side: 2 sc in each of the 3 row ends. (6)
- Bottom left: 1 sc in each of the 14 free foundation loops. (14)
- Left base corner: 1 extra sc in the same spot as the next sc. (1)
- Left side, base to tip: 2 sc in each of 16 row ends plus 1 sc in each of 4 ledge sts. (36)
Join with a sl st to the first sc. Total: 128 sc.
Check: 3 + 36 + 1 + 14 + 6 + 11 + 6 + 14 + 1 + 36 = 128.
Round 2 (Color B – crab stitch)
Ch 1. Rev sc in each st around. (128 rev sc)
The counts per side don’t change: 36 per slanted side, 14 per bottom section, 6 per trunk side, 11 across the trunk bottom, 3 at the tip, and 1 at each base corner.
Join, fasten off, and weave in the end.
Why the math works: A dc row is about 0.25 in (0.6 cm) tall. Two sc cover each row end without pulling the edge tight or making it ruffle. Each sharp notch decrease skips 2 sts, so those 2 sts get 1 sc each. The single extra sc at each outer corner turns the corner. The 3 sc at the tip turn the point. Crab stitch is worked 1 per st, so Round 2 keeps the same 128 sts and simply twists the edge into a rope. Each round adds about 0.1 in (0.25 cm), so the border is 0.2 in (0.5 cm) deep. That brings 3.7 in to 4.1 in (9.4 to 10.4 cm) and 5.0 in to 5.4 in (12.7 to 13.7 cm).
Gold Star Appliqués
Use Color B for all four stars. Leave a 6 in (15.2 cm) tail on each one for sewing.
Large Star (Bottom) – 1.25 in (3.2 cm)
Rnd 1: Magic ring, ch 1, 10 sc in the ring. Join. (10 sc)
Rnd 2: Ch 1, 2 sc in each st. Join. (20 sc)
Rnd 3: Ch 6, sl st in the 2nd ch from the hook, then sc, hdc, dc, and tr in the next 4 ch. Sk the next 3 sc and sl st in the next sc. Repeat from * 5 times in total, working the last sl st into the joining st. (5 points, 4 base sts each)
Medium Star (Middle) – 1.0 in (2.5 cm)
Rnds 1–2: Work as the large star. (20 sc)
Rnd 3: Ch 5, sl st in the 2nd ch from the hook, then sc, hdc, and dc in the next 3 ch. Sk the next 3 sc and sl st in the next sc. Repeat 5 times. (5 points)
Small Star (Top) and Topper Star – 0.7 in (1.8 cm), make 2
Rnd 1: Magic ring, ch 1, 10 sc in the ring. Join. (10 sc)
Rnd 2: Ch 4, sl st in the 2nd ch from the hook, then sc and hdc in the next 2 ch. Sk the next sc and sl st in the next sc. Repeat 5 times. (5 points, 2 base sts each)
Pull each magic ring closed tightly so the center lies flat.
Placement
Lay the tree right side up and measure from the bottom edge of Row 1, before the border. Center each star left to right, with one point facing straight up.
- Large star: centered 0.75 in (1.9 cm) above the base, on Tier 1
- Medium star: centered 2.25 in (5.7 cm) above the base, on Tier 2
- Small star: centered 3.25 in (8.3 cm) above the base, over the Tier 2–3 notch
Sew each star down along its center and the base of each point with small stitches that go through the mesh. Keep the points free so they stay crisp. Sew the topper star behind the tip so it rises about 0.6 in (1.5 cm) above the border, with one point facing up.
Hanging Loop
Join Color B at the top point of the topper star. Ch 72, about 6 in (15.2 cm), and sl st back into the same point. This makes a loop that hangs about 3 in (7.6 cm). Fasten off and weave in the ends.
Final Blocking
- Weave in every tail along the solid dc rows, where it won’t show through the mesh.
- Soak the ornament in cool water and press it gently in a towel.
- Dip it in liquid starch and squeeze out the extra. The mesh should be coated, not clogged.
- Pin it flat to 4.1 x 5.4 in (10.4 x 13.7 cm). Pin each tier corner, both base corners, the tip, and all four trunk corners.
- Open the mesh holes by pulling each tier gently outward. Pin each star point.
- Leave it to dry completely, at least 12 hours. Unpin and clear any starch film out of the holes with a needle.
Final Quality-Control Checklist
- Body is 37 sts at the base, and the counts follow the table down to a single dc3tog tip
- Both notch ledges show clearly on each side
- Trunk is centered, with 14 foundation sts on each side
- Border Round 1 has 128 sc, with 36 per slanted side
- Crab stitch lies flat and doesn’t flip
- Stars are centered, evenly spaced, and graduated large to small
- Topper star stands straight, and the loop is secure
- Finished piece is 4.1 x 5.4 in (10.4 x 13.7 cm)
Troubleshooting
- The tree leans to one side: You’ve probably decreased unevenly. Count each row. Every row should lose exactly 1 st at each end, or 2 at each end on notch rows.
- The mesh holes look closed up: Make sure you’re skipping a st under every ch-1. Starch and pin the mesh open while it dries.
- The border ruffles: Work 1 fewer sc on the trunk sides and go down a hook size for Round 1.
- The border cups or pulls: Loosen your tension, or go up a size just for the crab stitch.
- The star points curl: Starch them and pin each point flat.
- The notches don’t show: Check that Rows 7 and 13 skip 2 sts at each end, not 1.
Care
Hand wash in cool water and dry flat. Starch again and reshape after washing. Store the ornament flat between sheets of tissue paper.
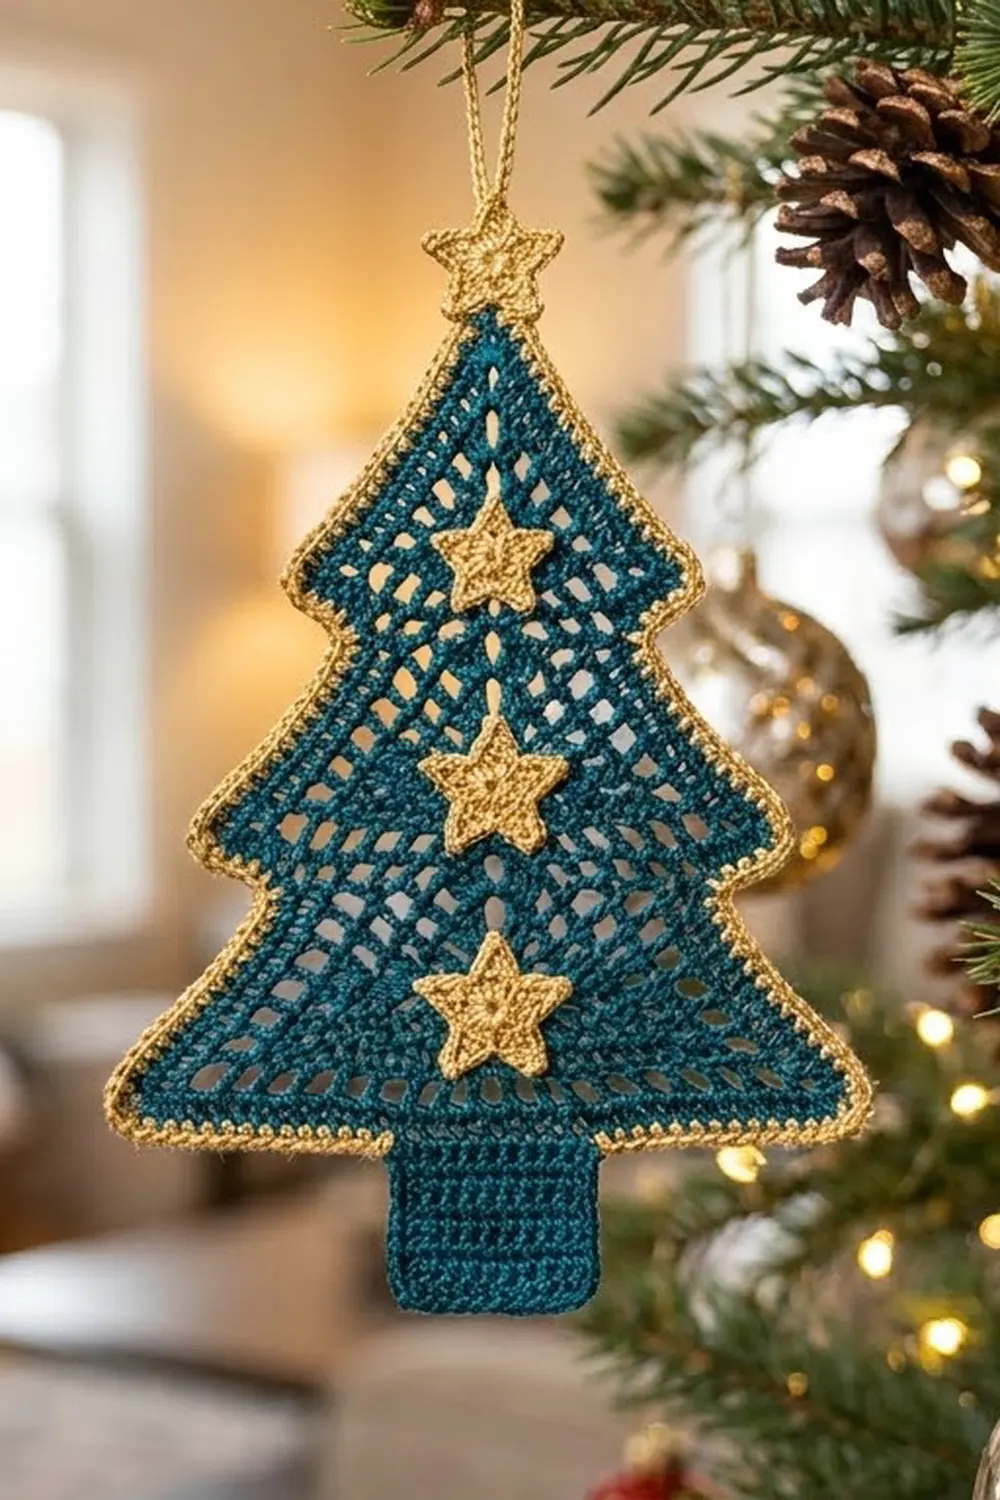
Final Notes
Each measurement leads to the next: a 2 in (5.1 cm) gauge swatch gives a 3.7 in (9.4 cm) base. Then three tiers bring you to 4.25 in (10.8 cm) at the tip and the trunk to 5.0 in (12.7 cm). Two border rounds finish the piece at 4.1 x 5.4 in (10.4 x 13.7 cm), and the topper makes it 6.0 in (15.2 cm) tall. If every checkpoint matches, the stars will sit right where they should.
Happy crocheting!