

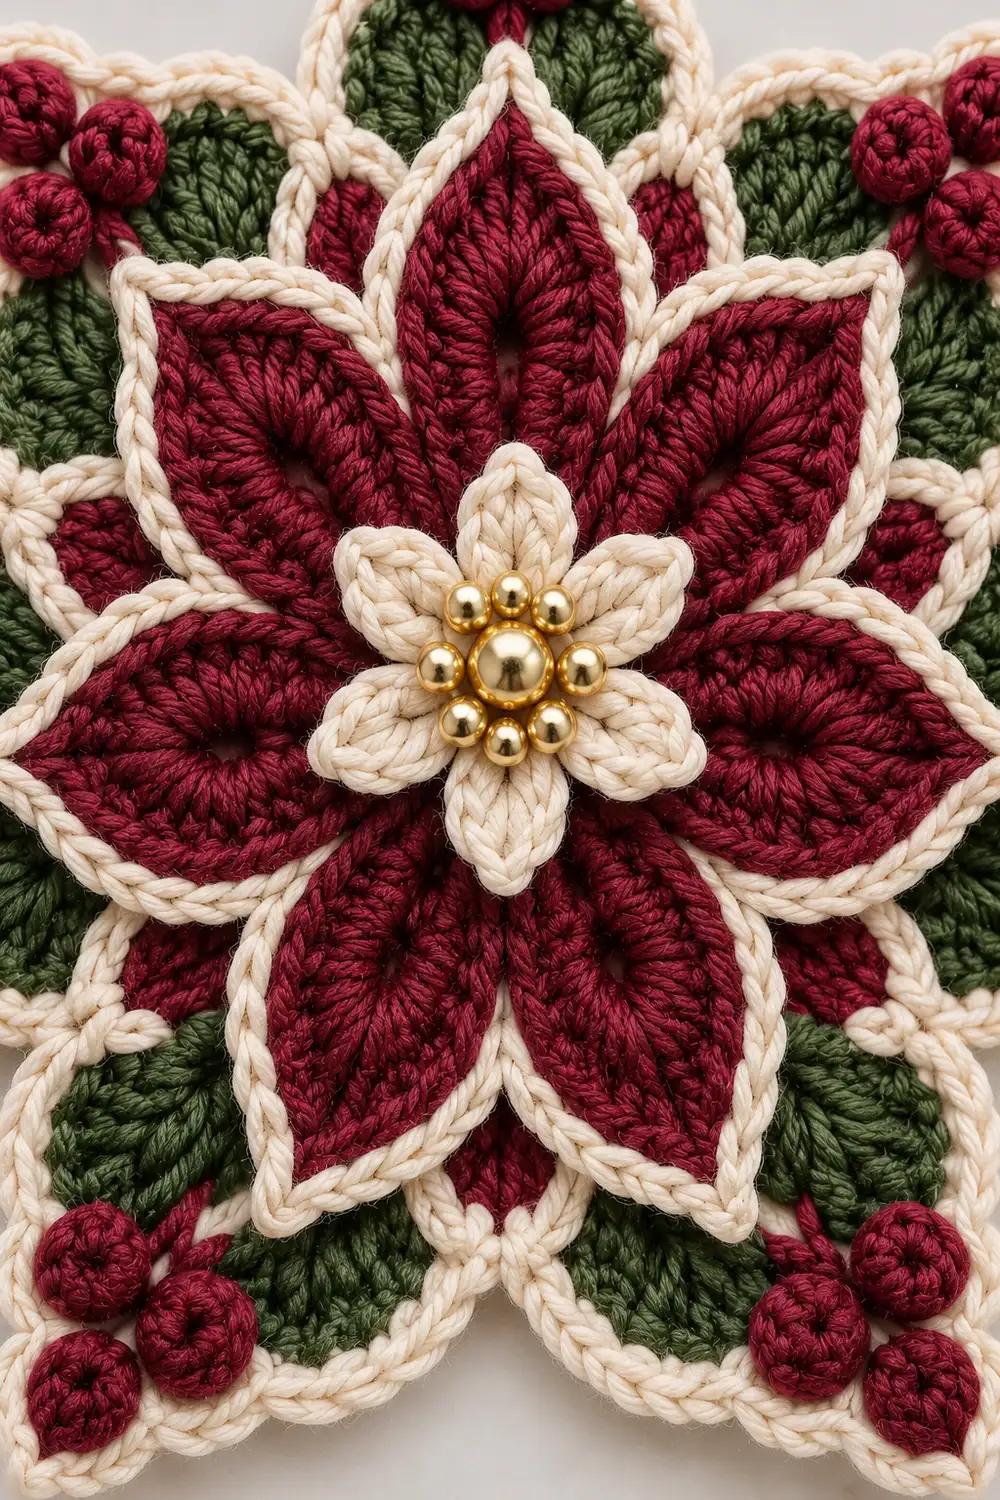
The Winter Berry Poinsettia Star is a single, layered Christmas motif. Four large burgundy petals point north, south, east, and west around a cream core. Forest-green leaves peek out on the diagonals, and small burgundy berry bobbles dot the outer tips. A small cream flower with a golden bead sits on top of the center.
A crisp cream single crochet trim outlines every petal and leaf, giving the piece its clean, illustrated look. The palette is classic holiday: wine-red, deep green, and soft cream.
This pattern uses US crochet terms. The finished motif measures 4.5 in (11.4 cm) from petal tip to petal tip, including the trim. With the berry clusters it measures about 5 in (12.7 cm).
The construction is worked in the round, from the center out. You make a cream core and a burgundy base ring. The petals are worked into the front loops of that ring, and the leaves go into the back loops behind them. A cream trim round outlines the edge, then you add the berries. Last, you sew a small cream flower and a gold bead to the center.
Finished Size and Construction
- Finished size: 4.5 in (11.4 cm) petal tip to petal tip; about 5 in (12.7 cm) including berries
- Skill level: Intermediate
- Terminology: US crochet terms
- Yarn weight: DK (light worsted, #3) cotton
- Hook: 3.5 mm (US E-4)
- Number of pieces: 1 motif. The main body is worked in one piece, with a small appliqué flower sewn to the center.
- Layout: Petals sit at the four main points; leaves sit on the four diagonals behind the petals.
- Piece size: 4.5 in (11.4 cm)
- Size before border: 4 in (10.2 cm) petal tip to petal tip
- Border depth: 0.25 in (0.6 cm) cream trim on each side. The berries add about 0.25 in (0.6 cm) beyond each tip.
Materials
Choose a smooth, mercerized DK cotton, about 115 m per 50 g. Cotton holds the petal points and shows stitch definition well. Avoid fuzzy or very stretchy yarns, because the trim will lose its crisp line.
- Burgundy (wine): 6 g / 14 m (core ring, petals, berries)
- Green (forest/sage): 3 g / 7 m (leaves)
- Cream: 5 g / 12 m (core, trim, center flower)
These quantities include a small safety margin for gauge swatching and weaving in ends.
Tools:
– 3.5 mm (US E-4) crochet hook
– Tapestry needle
– Sewing needle and cream or gold thread
– One 8 mm gold bead (optional: eight 3 mm gold beads to ring it)
– Stitch marker
– Scissors
– Rustproof pins, blocking mat, and a spray bottle
Abbreviations (US Terms)
- MR – magic ring
- ch – chain
- sl st – slip stitch
- sc – single crochet
- hdc – half double crochet
- dc – double crochet
- tr – treble crochet
- FL / BL – front loop / back loop
- st(s) – stitch(es)
- sp – space
- yo – yarn over
- rep – repeat
Special stitch – Berry bobble (bob): Yo, insert hook in the indicated st or sp, pull up a loop, yo, pull through 2 loops. Rep from * 3 more times in the same place (5 loops on hook). Yo and pull through all 5 loops.
Gauge and Checkpoints
Gauge: 5 sc = 1 in (2.5 cm), worked firmly with a 3.5 mm hook.
Since this is a single motif, Rounds 1–3 serve as your test piece. Work them first and measure before you commit to the petals.
Checkpoints:
– After Round 2 (cream core): 1.1 in (2.8 cm) across
– After Round 3 (burgundy ring): 1.5 in (3.8 cm) across
– After Round 5 (petals): 4 in (10.2 cm) petal tip to petal tip
– After Round 6 (leaves): about 3.5 in (8.9 cm) leaf tip to opposite leaf tip
– After the trim: 4.5 in (11.4 cm) petal tip to petal tip
– Center flower: 1.25 in (3.2 cm) across
If your piece is too big: go down to a 3.25 mm hook. If it is too small: go up to a 3.75 mm hook. Change the hook rather than the stitch counts, because the trim math depends on them.
Part 1: Core and Base Ring
Round 1 (cream): MR, ch 1, 8 sc in ring, sl st to first sc. (8 sc)
Round 2: Ch 1, 2 sc in each st around, sl st to first sc. (16 sc) Fasten off cream.
Round 3 (burgundy): Join burgundy in any st. Ch 1, sc in next st, 2 sc in next st, rep from * 7 more times, sl st to first sc. (24 sc)
Place a marker in the first sc of Round 3. This is st 1. Do not fasten off.
Checkpoint: 1.5 in (3.8 cm) across, lying flat.
Part 2: Petals
The petals are worked into the front loops only. This leaves the back loops of Round 3 free for the leaves.
Round 4 (FL only): Ch 2 (does not count as a st). Hdc in next st, dc in next st, 2 tr in each of next 2 sts, dc in next st, hdc in next st, rep from * 3 more times, sl st to first hdc. (32 sts: 8 per petal)
Each petal now sits on 6 sts of Round 3: sts 1–6, 7–12, 13–18, and 19–24. In each petal, the 8 sts read: hdc, dc, tr, tr, tr, tr, dc, hdc.
Round 5 (both loops): Ch 1. Sl st in hdc, hdc in dc, dc in next tr, 2 tr in next tr, ch 3, 2 tr in next tr, dc in next tr, hdc in dc, sl st in hdc, rep from * 3 more times. Join to first sl st. (40 sts: 10 per petal, plus 4 ch-3 tip sps)
Each petal count: 1 sl st + 1 hdc + 1 dc + 2 tr + 2 tr + 1 dc + 1 hdc + 1 sl st = 10 sts. Fasten off burgundy.
Checkpoint: 4 in (10.2 cm) petal tip to petal tip. The petals should separate at the sl sts, leaving a small valley between each pair.
Part 3: Leaves
Fold the petals toward you to expose the free back loops of Round 3.
Round 6 (green, BL of Round 3): Join green with a sl st in the BL of st 6, the last st under any petal.
Ch 6, sc in 2nd ch from hook, hdc in next ch, dc in next ch, hdc in next ch, sc in next ch (5 leaf sts). Sl st in BL of next 6 sts of Round 3. Rep from * 3 more times. The last sl st lands in st 6 and closes the round.
Count: 4 leaves of 5 sts each (20 leaf sts), plus 24 BL sl sts.
Each leaf starts at the last st of one petal group and ends at the first st of the next. This places it exactly in the valley. Fasten off green.
Checkpoint: about 3.5 in (8.9 cm) from leaf tip to opposite leaf tip. The leaf tips should stop short of the petal tips, so the cross shape stays clear.
Part 4: Center Flower (Appliqué)
Round 1 (cream): MR, ch 1, 6 sc in ring, sl st to first sc. (6 sc)
Round 2: In next sc work (sl st, ch 2, dc, tr, dc, ch 2, sl st), rep from * 5 more times. (6 petals)
Fasten off, leaving a 10 in (25.4 cm) tail for sewing. Checkpoint: 1.25 in (3.2 cm) across.
Set the flower aside. You will attach it after blocking.
Border
Border gauge: 5 sc = 1 in (2.5 cm), the same as the main gauge. The trim is worked through both loops at a firm, even tension.
Border Round 1: Cream Trim
Join cream with a sl st in the first hdc of any petal, next to a valley. Ch 1.
Per petal (worked into Round 5):
– Skip the opening sl st.
– Sc in hdc, sc in dc, sc in tr, 2 sc in next tr.
– (Sc, ch 2, sc) in ch-3 tip sp.
– 2 sc in next tr, sc in tr, sc in dc, sc in hdc.
– Skip the closing sl st.
This gives 5 sc + 1 tip sc on each half, for 12 sc per petal, plus 1 ch-2 tip.
Per leaf (worked into Round 6):
– Skip the base-most st or chain loop, which is tucked behind the petal.
– Sc in next 4 sts up the first side.
– (Sc, ch 2, sc) in the turning ch at the tip.
– Sc in next 4 loops down the second side.
– Skip the base-most loop.
Work up whichever side of the leaf faces you first. This gives 4 sc + 1 tip sc on each half, for 10 sc per leaf, plus 1 ch-2 tip.
Alternate petal, leaf, petal, leaf around. Go straight from the last sc of one shape to the first sc of the next, with no extra sts in the valleys. Sl st to the first sc.
Total: (4 petals × 12) + (4 leaves × 10) = 48 + 40 = 88 sc, plus 8 ch-2 tip sps. Fasten off.
Border Round 2: Berry Accents
Berries are worked into the ch-2 tip sps of the trim. Join and fasten off burgundy at each tip.
- Petal tips (berry trio): Join burgundy with a sl st in the ch-2 sp. Ch 2, bob in same sp, ch 2, sl st in same sp, rep from * 2 more times. (3 bobs)
- Leaf tips (single berry): Join with a sl st in the ch-2 sp. Ch 2, bob in same sp, ch 2, sl st in same sp. (1 bob)
Total: (4 × 3) + (4 × 1) = 16 bobbles.
Why the Math Works
After blocking, each petal half-edge measures about 1.2 in (3.0 cm). At 5 sc per in, that edge needs 6 sc: 5 worked into the stitches plus 1 in the tip sp.
Each visible leaf half-edge measures about 1.0 in (2.5 cm), which needs 5 sc: 4 in the stitches plus 1 at the tip.
The extra sc in each tr provides the added length on the curved outer edge. Skipping the hidden sl sts and the base-most leaf stitches keeps the valleys from rippling. The trim adds 0.25 in (0.6 cm) on each side, so the 4 in (10.2 cm) motif becomes 4.5 in (11.4 cm).
Final Blocking
- Weave in all ends on the back, following the same-color stitches.
- Spritz the motif until it is evenly damp, but not dripping.
- Lay it face up on the blocking mat.
- Pin the four petal tips first, 4.5 in (11.4 cm) apart, measured across.
- Pin the leaf tips on the diagonals, centered between the petals.
- Gently push the petals forward so they sit layered over the leaves.
- Let the motif dry completely, then unpin it.
- Center the cream flower over the core. Sew it in place around Round 1 with the tail.
- Sew the 8 mm gold bead to the flower center through all layers. If you like, add a ring of eight 3 mm beads around it.
Final Quality-Control Checklist
- Round 3 has 24 sc and lies flat at 1.5 in (3.8 cm).
- Each petal has 10 sts in Round 5, with a ch-3 tip.
- The 4 leaves sit centered in the valleys, behind the petals.
- The trim has 88 sc and 8 ch-2 tips.
- There are 16 bobbles: trios on the petals and singles on the leaves.
- The motif measures 4.5 in (11.4 cm) tip to tip.
- The flower and bead are secure and centered.
- No ends show on the front.
Troubleshooting
Core cups or ruffles: Your tension has changed. Redo Round 3 with a steady, even hand.
Petals look stubby: Pull up the tr loops to full height before completing each stitch.
Leaves extend past the petals: Your chains are too loose. Work the ch 6 more tightly.
Trim waves at the valleys: Make sure you skipped the hidden sl sts and the base-most leaf stitches.
Trim pulls the tips inward: Check that you worked 2 sc into the second tr of each petal half.
Berries are flat: Keep each bobble’s loops even in height, and close the stitch firmly.
Motif is over 4.5 in (11.4 cm): Remake it with a 3.25 mm hook.
Care
Hand wash in cool water with mild soap, press out the water in a towel, and dry flat. Do not wring the motif or put it in the dryer, because this protects the bead and the petal shape.
Final Notes
The measurement chain runs as follows. The core is 1.1 in (2.8 cm). The base ring is 1.5 in (3.8 cm). The petals reach 4 in (10.2 cm) tip to tip, and the leaves reach about 3.5 in (8.9 cm). The trim brings the motif to 4.5 in (11.4 cm), and the berries add up to about 5 in (12.7 cm).
If each checkpoint matches, the trim count of 88 sc will fit without stretching or rippling.
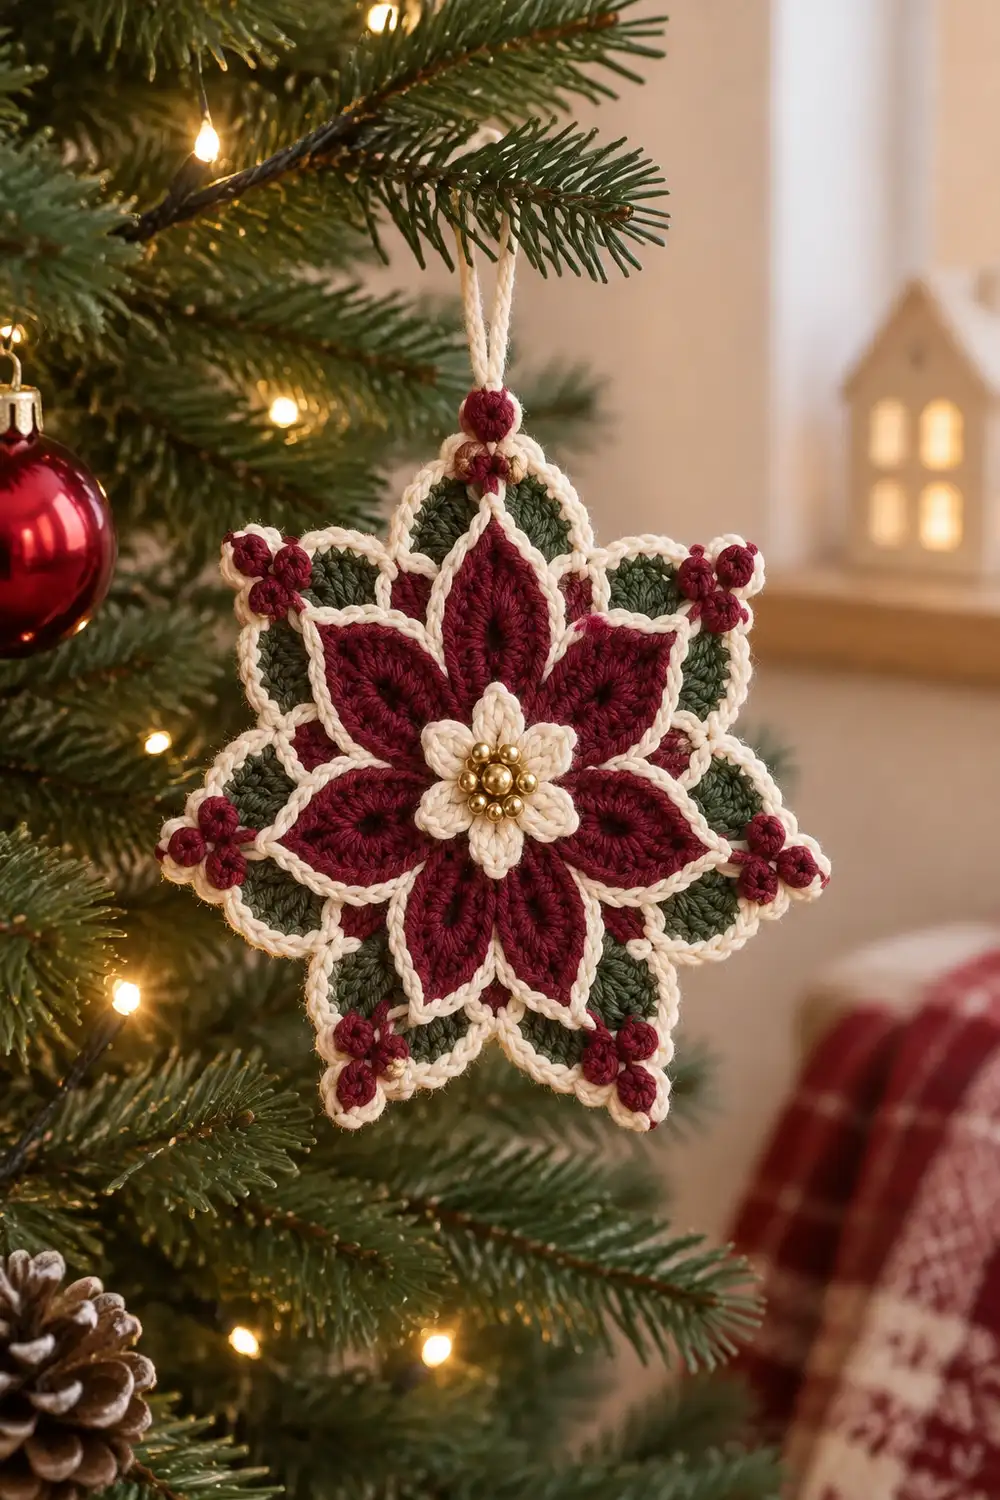
Optional: the finished motif works well as an ornament, coaster, or gift topper. If you want to use it that way, add a hanging loop to one berry trio.
Happy crocheting!