

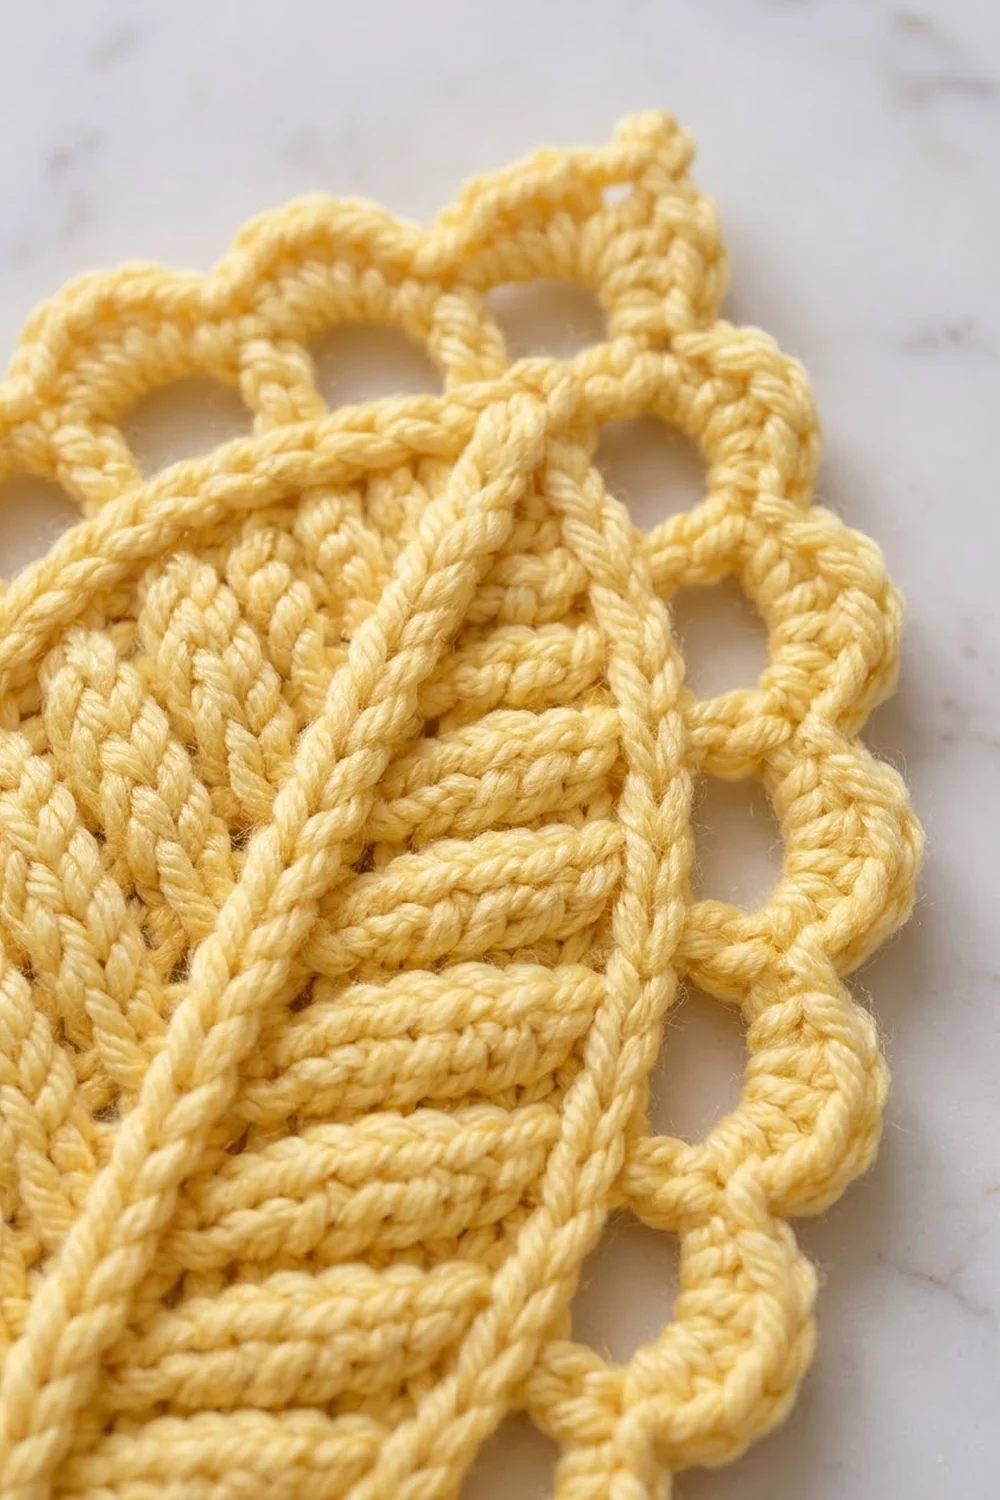
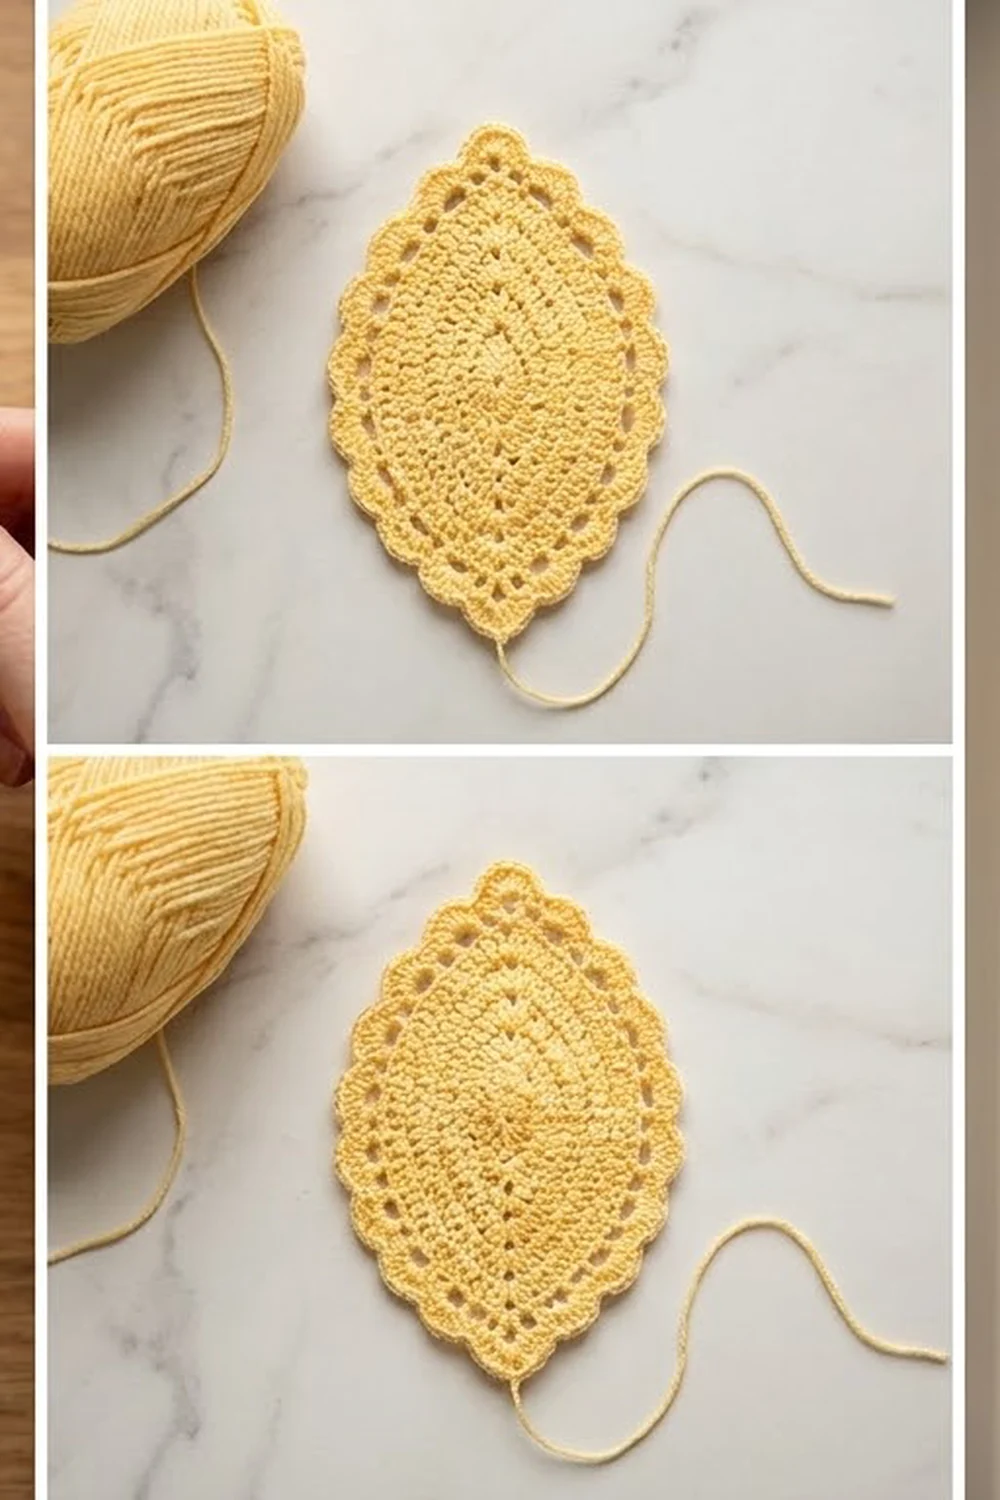
This leaf motif has sculpted herringbone veins, a braided center spine, and a lacy scalloped frame. Thick ridges angle up from the spine toward the edges, much like the veins of a real leaf, and an open ring of chain arches lets light through around the solid center.
The sample is worked in a single butter-yellow worsted cotton, which gives a warm, sunny look and very clear stitch definition. Any smooth, light-colored yarn will show the texture well. The style is a mix of Irish-crochet appliqué and modern home décor.
This pattern uses US crochet terms throughout. The finished motif measures 5.5 in (14.0 cm) wide by 8 in (20.3 cm) tall after blocking.
Construction is simple. You crochet the leaf body flat in turned chevron rows from base to tip, working in back loops to build the ridges. Then you work two rim rounds and two border rounds all the way around. Last, you add a surface slip-stitch spine up the center.
Finished Size and Construction
- Finished size: 5.5 in (14.0 cm) wide x 8 in (20.3 cm) tall
- Skill level: Intermediate
- Terminology: US crochet terms
- Yarn weight: Worsted (#4)
- Hook: 4.5 mm (US 7)
- Number of pieces: 1
- Layout: Single standalone motif, no joining
- Leaf body size (after Row 28): 3.75 in (9.5 cm) x 6.25 in (15.9 cm)
- Size before border (after Round 2): 4.25 in (10.8 cm) x 6.75 in (17.1 cm)
- Border depth (Rounds 3–4): 0.625 in (1.6 cm) on every side
Materials
Yarn: Use a smooth worsted-weight cotton or cotton blend with good twist. Mercerized or lightly brushed cotton both show the ridges well. Avoid fuzzy or highly textured yarns, because they blur the herringbone veins.
- Color A – Butter Yellow: 25 g, about 50 m. This includes about 1 m for the spine.
The quantities include a safety margin of roughly 20 percent. The motif itself uses about 20 g.
Tools:
- 4.5 mm (US 7) crochet hook
- 3 locking stitch markers
- Tapestry needle
- Scissors
- Ruler or tape measure
- Blocking mat, rust-proof pins, and a spray bottle
Abbreviations (US Terms)
- ch – chain
- sl st – slip stitch
- sc – single crochet
- hdc – half double crochet
- dc – double crochet
- sk – skip
- st(s) – stitch(es)
- sp – space
- BLO – back loop only
- RS / WS – right side / wrong side
Special stitches:
- sc3tog (single crochet 3 together): Insert your hook in the next stitch, yarn over and pull up a loop. Repeat in each of the next 2 stitches (4 loops on hook). Yarn over and draw through all 4 loops. This removes 2 stitches.
- Picot: Ch 3, then sl st in the 3rd ch from the hook.
- Surface sl st: Hold the working yarn behind the fabric. Insert your hook from front to back through the fabric, pull up a loop, and draw it through the loop on your hook.
Gauge and Checkpoints
Gauge: 16 sc and 18 rows = 4 in (10.2 cm), worked in sc BLO.
Test your gauge on the motif itself. Work Rows 1–9, lay the piece flat, and measure before you go any further.
Checkpoints:
- After Row 9: about 2 in (5.1 cm) tall at the center and 3.5 in (8.9 cm) wide
- After Row 18: about 4 in (10.2 cm) tall at the center and 3.75 in (9.5 cm) wide
- After Row 28: 6.25 in (15.9 cm) tall and 3.75 in (9.5 cm) wide
- After Round 2: 4.25 in (10.8 cm) x 6.75 in (17.1 cm)
- After Round 4: 5.5 in (14.0 cm) x 8 in (20.3 cm)
If your piece is too big, go down 0.5 mm in hook size and start over. If it is too small, go up 0.5 mm. A difference of 0.25 in (0.6 cm) at Row 9 becomes almost 1 in (2.5 cm) by the end, so fix it early.
Leaf Body
Work every row from Row 2 onward in BLO. Each turned row leaves a raised front loop, and together these build the ridges. The center sc3tog pulls each row into a V, which angles the ridges into the herringbone pattern.
Row 1 (RS): Ch 6, sc in 2nd ch from hook and in each ch across, turn. (5 sts)
Place a marker in Row 1 to mark the RS.
Growth rows: On each of Rows 2–9, work this row:
Ch 1 (does not count as a st). Working in BLO: 3 sc in first st, sc in each st up to the center 3 sts, sc3tog over the center 3 sts, sc in each st to the last st, 3 sc in last st, turn.
Each growth row adds 4 stitches at the edges and removes 2 at the center, for a net gain of 2.
- Row 2: 7 sts
- Row 3: 9 sts
- Row 4: 11 sts
- Row 5: 13 sts
- Row 6: 15 sts
- Row 7: 17 sts
- Row 8: 19 sts
- Row 9: 21 sts
On Row 2 there are no stitches between the edge increases and the center sc3tog. Starting with Row 3, the plain sc sections get one stitch longer on each side every row.
Checkpoint: 2 in (5.1 cm) tall at center, 3.5 in (8.9 cm) wide.
Level rows: On each of Rows 10–18, work this row:
Ch 1. Working in BLO: 2 sc in first st, sc in each st up to the center 3 sts, sc3tog, sc in each st to the last st, 2 sc in last st, turn. (21 sts per row)
These rows add 2 stitches at the edges and remove 2 at the center, so the count stays at 21. Each plain sc section has 8 sts.
Checkpoint: 4 in (10.2 cm) tall at center, 3.75 in (9.5 cm) wide.
Taper rows: On each of Rows 19–27, work this row:
Ch 1. Working in BLO: sc in each st up to the center 3 sts, sc3tog, sc in each st to the end, turn.
Each taper row loses 2 stitches.
- Row 19: 19 sts
- Row 20: 17 sts
- Row 21: 15 sts
- Row 22: 13 sts
- Row 23: 11 sts
- Row 24: 9 sts
- Row 25: 7 sts
- Row 26: 5 sts
- Row 27: 3 sts
Row 28: Ch 1, sc3tog BLO. (1 st) This is the leaf tip. Do not fasten off.
Checkpoint: 6.25 in (15.9 cm) tall, 3.75 in (9.5 cm) wide. You should see 14 rows of ridges on the RS, angling up from the center column.
Rim
The rim rounds turn the stepped row edges into a smooth, raised outline. Keep working with the same yarn, with the RS facing you.
Round 1:
- Ch 1, then work 3 sc in the Row 28 stitch to make the tip.
- Work down the first side with 1 sc in the end of each row. (28 sc)
- Work across the underside of the foundation chain: sc in the first 2 chs, 3 sc in the center ch, sc in the last 2 chs. (7 sc)
- Work up the second side with 1 sc in the end of each row. (28 sc)
- Join with a sl st to the first sc.
Total: 66 sts. That is 3 at the tip + 28 + 7 at the base + 28.
Round 2:
- Ch 1. Sc in the first st, then work 3 sc in the next st (the tip center). Place the tip marker in the middle sc of this group.
- Sc in the next 15 sts, 2 sc in the next st (the widest point of the leaf), sc in the next 16 sts.
- Work 3 sc in the base center st. Place the base marker in the middle sc of this group.
- Sc in the next 15 sts, 2 sc in the next st, sc in the next 15 sts.
- Join with a sl st to the first sc.
Total: 72 sts (66 worked 1 per existing stitch + 6 added). The 6 added stitches are 2 at the tip, 2 at the base, and 1 at each widest point. Each side between the two markers now has 35 sts.
Checkpoint: 4.25 in (10.8 cm) x 6.75 in (17.1 cm).
Border
Border gauge: Each ch-4 arch spans 4 Round 2 stitches, which is 1 in (2.5 cm) at gauge. Round 3 adds about 0.375 in (1.0 cm) of depth and Round 4 adds about 0.25 in (0.6 cm). Together they make the 0.625 in (1.6 cm) border on every side.
Round 3 (windows):
- Sl st in each of the next 4 sts. You are now 2 sts past the tip marker.
- Ch 1, sc in the same st.
- [Ch 4, sk 3 sts, sc in next st] 17 times.
- Ch 4, sk 3 sts, join with a sl st to the first sc.
Total: 18 sc and 18 ch-4 arches.
How the arches land:
- The tip marker stitch sits in the middle of the last arch, under the tip.
- The base marker stitch sits in the middle of the 9th arch, under the base.
- Each side has 8 arches between the tip arch and the base arch: 8 + 8 + 1 + 1 = 18.
Round 4 (scallops):
- Sl st into the first ch-4 sp, then ch 1.
- In each ch-4 sp, work: (sc, hdc, 2 dc, picot, 2 dc, hdc, sc). Repeat in all 18 spaces.
- Join with a sl st to the first sc and fasten off.
Total: 144 sts (18 scallops x 8 sts) + 18 picots. Each side has 8 scallops, plus 1 at the tip and 1 at the base. The tip and base scallops’ picots form the small peaks at each point.
Why the math works: The 72 stitches of Round 2 divide evenly into 18 repeats of 4. The tip and base markers are 36 stitches apart, which is exactly 9 repeats, so both points land in the center of an arch and the border is symmetrical.
The perimeter also matches. Round 2 measures about 18 in (45.7 cm) around, and 72 sts at 4 sts per inch is 18 in (45.7 cm). That’s why the border lies flat without ruffling or cupping.
Center Spine
- Cut a 40 in (101.6 cm) length of yarn.
- With the RS facing, hold the yarn behind the work at the base marker. Pull up a loop through the Round 2 stitch.
- Work surface sl sts straight up the center column of sc3tog stitches, 1 per round or row: Round 2, Round 1, Rows 1–28, Round 1, and Round 2, ending at the tip marker. (32 sl sts)
- Fasten off and pull the tail to the back.
Keep your tension relaxed. The spine should sit up as a braided cord without puckering the leaf.
Checkpoint: The spine measures 6.75 in (17.1 cm), the same as the Round 2 height. Remove all markers.
Final Blocking
- Weave in all ends on the WS, running each tail through 1 in (2.5 cm) of stitches in two directions.
- Mist the motif lightly until it is damp but not dripping.
- Lay it RS up on the blocking mat.
- Pin the tip and base picots first, 8 in (20.3 cm) apart.
- Pin the two widest scallops 5.5 in (14.0 cm) apart.
- Pin each remaining picot so the scallops curve evenly.
- Use your fingertips to open each ch-4 window into a round shape.
- Don’t press the leaf body flat. Gently pinch the ridges and the spine upward.
- Let the motif dry completely, about 4–6 hours, before unpinning.
Final Quality-Control Checklist
- Finished size is 5.5 in (14.0 cm) x 8 in (20.3 cm).
- There are 14 ridge rows on the RS, angling up evenly from the center.
- The spine runs straight from the base picot to the tip picot.
- There are 18 open windows: 8 per side, plus 1 at the tip and 1 at the base.
- There are 18 scallops, each with a centered picot.
- The tip and base points are symmetrical.
- The motif lies flat with no cupping or ruffling.
- All ends are woven in invisibly on the WS.
Troubleshooting
- Ridges don’t slant: Check that you are working sc3tog over the exact center 3 sts. Count the stitches on both sides of it; they should match.
- Ridges are faint: Make sure you are working in BLO on every row from Row 2 onward.
- Leaf too narrow: You may have worked 2 sc instead of 3 sc in the edge stitches on Rows 2–9. Count each row: it should be 2 sts more than the row before.
- Rim ripples: Your row-end stitches are too tight or too loose. Rework Round 1, keeping the stitch height even.
- Border cups: Your Round 3 chains are too tight. Loosen them, or work ch 5 instead of ch 4. Keep all counts the same.
- Border ruffles: Your chains are too loose. Go down 0.5 mm for Rounds 3–4 only.
- Spine puckers: Rework it with looser loops, or with a hook 0.5 mm larger.
- Lopsided tip: Recheck that the Round 3 starting point is exactly 2 sts past the tip marker.
Care
Hand wash in cool water with mild soap, press out the water in a towel, and reshape. Dry flat; don’t wring or tumble dry.
Final Notes
The measurement chain builds on one stage at a time:
- Gauge: 16 sc and 18 rows = 4 in (10.2 cm)
- Leaf body: 28 rows reaching 3.75 in (9.5 cm) x 6.25 in (15.9 cm)
- Rim: 66, then 72 sts, reaching 4.25 in (10.8 cm) x 6.75 in (17.1 cm)
- Border: 18 arches and 18 scallops, adding 0.625 in (1.6 cm) per side
- Finished motif: 5.5 in (14.0 cm) x 8 in (20.3 cm)
Check each checkpoint as you go, and your leaf will come out symmetrical, textured, and flat.
Happy crocheting!