

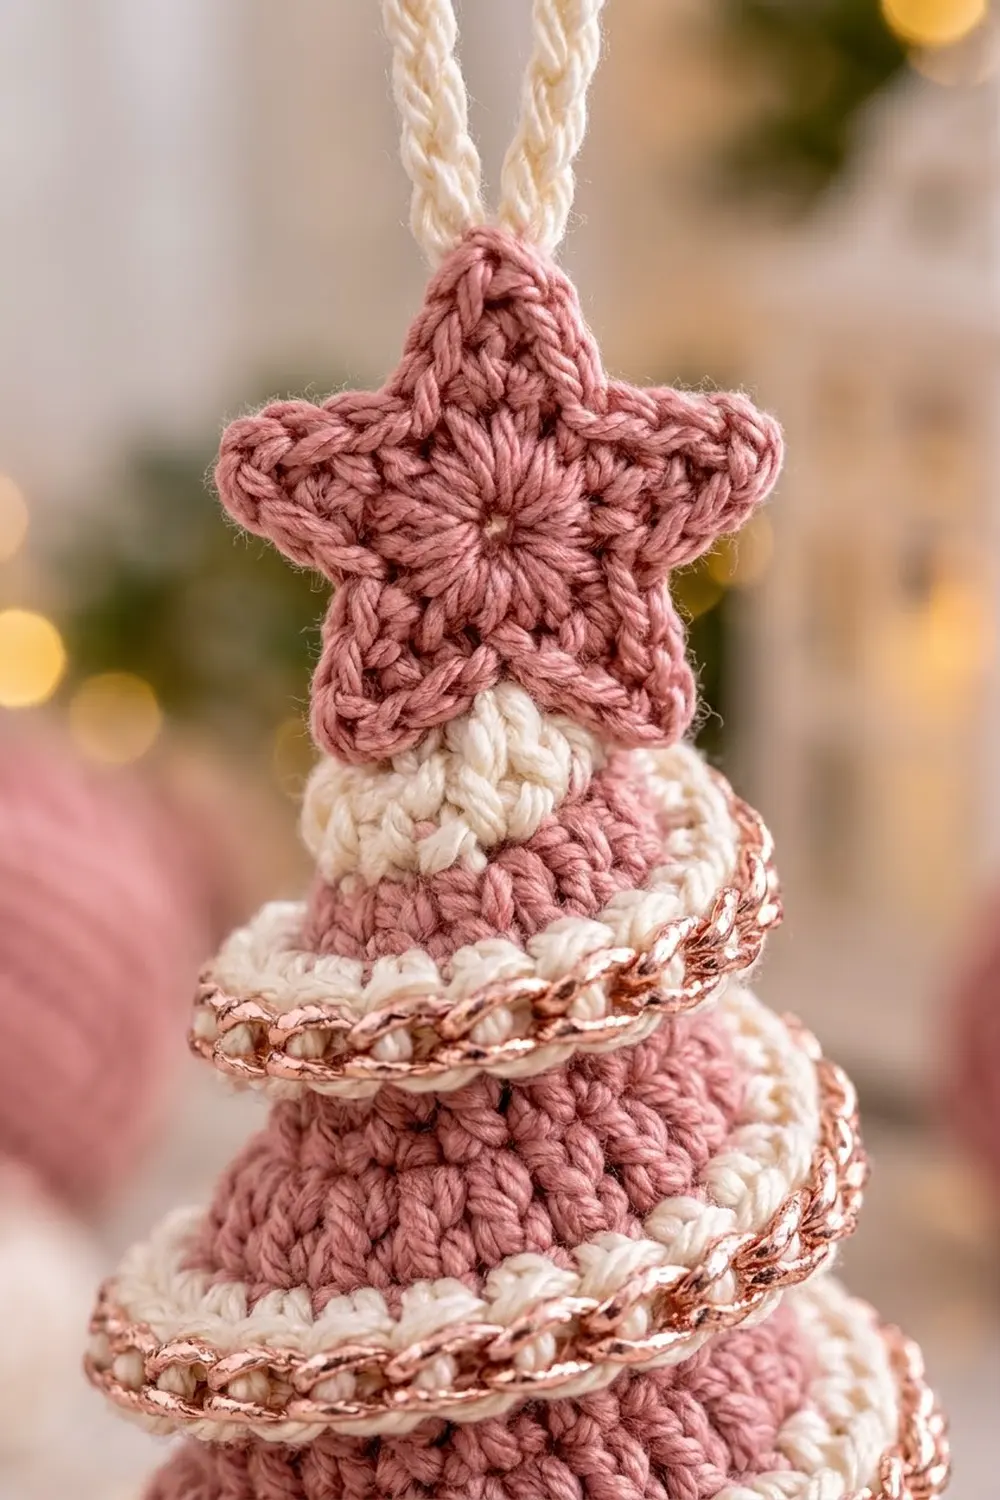
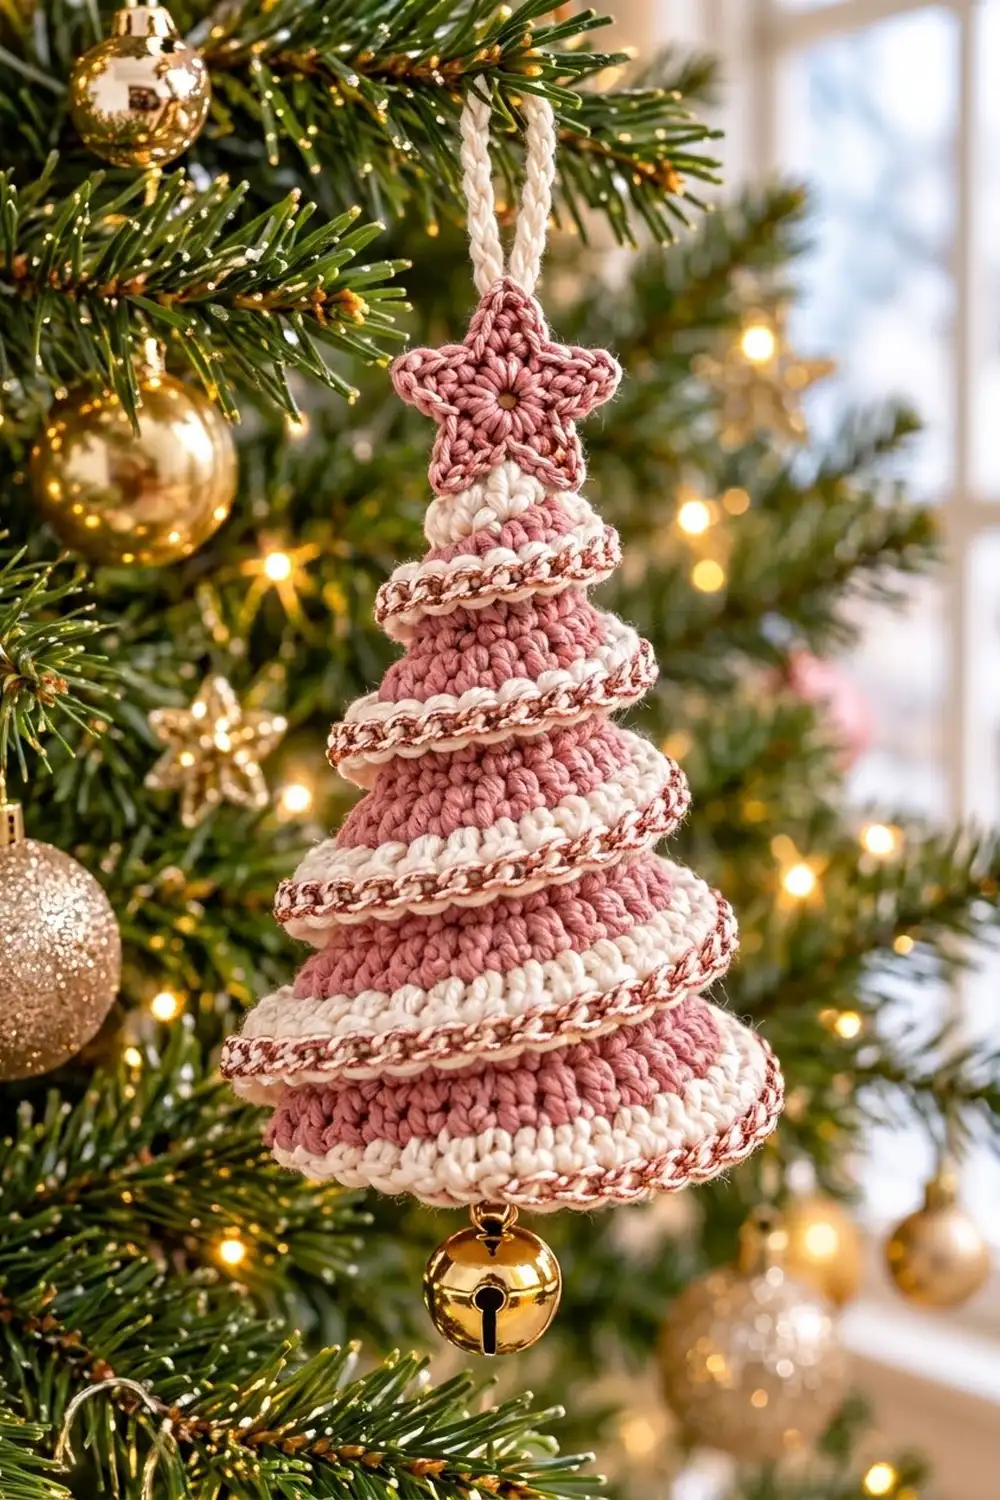
This ornament is one long, curved strip of crochet coiled into a spiral Christmas tree. Each turn of the coil flares out a little, so the finished tree has about seven stacked tiers, each with its own piped edge.
The colors are soft and vintage. Dusty rose is used for the body and star, cream for the edge rows and hanging loop, and a rose-gold metallic yarn for the slip-stitch trim. A small gold jingle bell hangs underneath. One tree looks pretty on its own, and a set of five or six looks even better.
The pattern uses US crochet terms. The finished tree is 6 in (15.2 cm) tall from the bottom edge to the tip of the star, with a base 3.25 in (8.3 cm) across. With the loop and bell, it hangs about 9 in (22.9 cm) long.
Here is how it comes together. You crochet a strip 36 in (91.4 cm) long in rows. Its lower edge gets evenly spaced increases, so the strip curves as it grows. Next you add a cream edge row and a rose-gold slip-stitch trim. Last, you make a small cream tip cone and a double-layer star, then coil the strip around the tip, sewing as you go.
Finished Size and Construction
- Finished size: 6 in (15.2 cm) tall with star, 3.25 in (8.3 cm) base diameter
- Hanging length: about 9 in (22.9 cm) with loop and bell
- Skill level: Intermediate (simple stitches; the shaping happens at assembly)
- Terminology: US crochet terms
- Yarn weight: DK (weight 3) cotton or cotton blend, plus a fine metallic yarn
- Hook: 3.25 mm (US D/3)
- Number of pieces: 1 finished ornament made of 4 components: spiral strip, tip cone, star (2 layers) and hanging cord
- Layout: one strip coiled into about 7 tiers around a central tip
- Strip size: 36 in (91.4 cm) long × 0.9 in (2.3 cm) wide
- Strip width before border: 0.7 in (1.8 cm)
- Border depth: 0.2 in (0.5 cm), made of a cream row plus a rose-gold slip-stitch trim
Materials
Choose a smooth DK cotton, either mercerized or matte. Cotton holds its shape when coiled and sewn, and the stitches stay crisp. Acrylic also works, but the tiers will be softer and will droop more.
- Dusty rose (Color A): 25 g, about 60 m (strip and star)
- Cream (Color B): 10 g, about 25 m (edge row, tip cone, cord, bell strand)
- Rose-gold metallic (Color C): 5 g, about 15 m (fingering or sport weight)
These quantities include a margin of about 20 percent for your gauge swatch, sewing and weaving in ends.
Tools:
- 3.25 mm (US D/3) crochet hook
- 1 gold jingle bell, 18–20 mm (about 0.75 in / 1.9 cm)
- Tapestry needle
- Scissors
- Stitch markers (at least 4)
- Pins and a steam iron or garment steamer
- Measuring tape
Abbreviations (US Terms)
- ch – chain
- sc – single crochet
- hdc – half double crochet
- sl st – slip stitch
- st(s) – stitch(es)
- BLO – back loop only
- inc – 2 sc in the same stitch
- MR – magic ring
- RS / WS – right side / wrong side
Special stitch – BLO surface slip stitch: Insert the hook in the back loop only of the next stitch, yarn over, and pull through the stitch and the loop on the hook. Keep these loose. In a contrasting color, they make a neat raised chain along the top of the row, and the front loops of the row below still show as a thin cream line.
Gauge and Checkpoints
Gauge: 20 sc and 24 rows = 4 in (10.2 cm) in sc worked in rows. That is 5 sc and 6 rows per 1 in (2.5 cm).
Before you start the full strip, work a test section. Ch 41, then work Rows 1–5 below over 40 sts, leaving out the increases. It should measure 8 in (20.3 cm) long and 0.8 in (2.0 cm) wide.
Checkpoints:
- After Row 1: the strip is 36 in (91.4 cm) long and lies flat.
- After Row 4: the strip is 0.7 in (1.8 cm) wide and curves gently, with the lower edge longer than the top edge.
- After Row 6: the strip is 0.9 in (2.3 cm) wide, and the trim edge measures about 48 in (121.9 cm) laid along its curve.
- Tip cone: 1 in (2.5 cm) tall, 2 in (5.1 cm) around the base.
- Star: 1.25 in (3.2 cm) from point to point.
If your gauge is off: If the strip is too long (fewer than 5 sts per inch), go down to a 3.0 mm hook. If it is too short, go up to a 3.5 mm hook. A small difference only changes the number of tiers slightly, but loose stitches make floppy tiers, so a firmer fabric is better.
Pattern
Part 1: The Spiral Strip
Work in rows with Color A. The ch 1 at the start of each row does not count as a stitch. The foundation edge becomes the top (sewn) edge of each tier, and the increased edge becomes the flared lower edge.
Foundation: With Color A, ch 181.
Row 1 (RS): Sc in 2nd ch from hook and in each ch across, turn. (180 sts)
Place a marker on this side to mark the RS.
Row 2 (growth row): Ch 1, sc in next 8 sts, inc in next st; repeat from * 20 times total, turn. (200 sts)
Check: 20 repeats × 9 sts used = 180 sts worked; 20 repeats × 10 sts made = 200 sts.
Row 3: Ch 1, sc in each st across, turn. (200 sts)
Row 4 (growth row): Ch 1, sc in next 9 sts, inc in next st; repeat from * 20 times total. (220 sts)
Check: 20 × 10 sts used = 200; 20 × 11 sts made = 220.
Fasten off Color A, leaving a 12 in (30.5 cm) tail for sewing.
Lay the strip flat. It should curve into a long, shallow arc 0.7 in (1.8 cm) wide. The increases are what let it coil into a cone later, so don’t skip them.
Part 2: Tip Cone
Work in continuous rounds with Color B. Mark the first stitch of each round.
Rnd 1: 4 sc in MR. (4 sts)
Rnd 2: Sc in next st, inc in next st; repeat 2 times. (6 sts)
Rnd 3: Sc in next 2 sts, inc in next st; repeat 2 times. (8 sts)
Rnd 4: Sc in each st around. (8 sts)
Rnd 5: Sc in next 3 sts, inc in next st; repeat 2 times. (10 sts)
Rnd 6: Sc in each st around. (10 sts) Sl st in next st.
Fasten off, leaving an 8 in (20.3 cm) tail. The cone is 1 in (2.5 cm) tall and 2 in (5.1 cm) around the base. Don’t stuff it; it has to stay open so the bell strand can pass through.
Part 3: Star (make 2)
Use Color A.
Rnd 1: Ch 1, 10 sc in MR, sl st to first sc. (10 sts) Pull the ring tightly closed.
Rnd 2 (points): Ch 4, sl st in 2nd ch from hook, sc in next ch, hdc in next ch, skip next sc of Rnd 1, sl st in next sc; repeat from * 5 times total. (5 points)
Each point uses 2 sts of Rnd 1, so 5 points × 2 sts = 10 sts. The last sl st lands in the first sc of the round.
Fasten off the first star with a short tail and the second with a 12 in (30.5 cm) tail.
Place the stars WS together with the points lined up. Whipstitch around the edge with the long tail. Before closing, push a small pinch of Color A scraps inside so the star is puffy. The star measures 1.25 in (3.2 cm) from point to point.
Part 4: Hanging Cord
With Color B, ch 25. Sl st in the back bump of the 2nd ch from hook and in each back bump across. (24 sl sts)
The cord is about 4.5 in (11.4 cm) long. Folded in half, it makes a loop about 2.25 in (5.7 cm) tall. Leave both tails 6 in (15.2 cm) long.
Border: Cream Edge and Rose-Gold Trim
Work the border along the increased (Row 4) edge of the strip only. The short ends and the foundation edge don’t get a border.
Border gauge: Same as the body, 5 sc per inch measured along the edge. Because the edge curves, measure it flat along its arc, not in a straight line.
Row 5 (conversion row, Color B): With RS facing, join Color B in the first st of Row 4. Ch 1, sc in next 10 sts, inc in next st; repeat from * 20 times total. (220 sts worked 1 per existing st + 20 extra = 240 sts)
Check: 20 × 11 = 220 sts used; 20 × 12 = 240 sts made. Fasten off Color B.
Row 6 (trim row, Color C): With RS facing, join Color C in the first st of Row 5. Work a BLO surface slip stitch in each st across. (240 sl sts, 1 per st, no extras)
Fasten off Color C.
Why the math works: The foundation edge has 180 sts and the trim edge has 240 sts. Rows 2, 4 and 5 each add 20 evenly spaced stitches, and Rows 1, 3 and 6 add none: 180 + 20 + 20 + 20 = 240. At 5 sts per inch, the top edge is 36 in (91.4 cm) and the trim edge is 48 in (121.9 cm). That one-third difference makes each tier flare like a small lampshade. Spreading the increases over 20 even repeats keeps the curve smooth rather than ruffled.
Keep the Row 6 slip stitches loose. If they are tight, the trim edge shrinks and the tiers stop flaring.
Final Blocking
Block the strip before you coil it, then shape the tree as you sew.
- Steam the strip. Pin it flat along its natural curve, RS up. Hold a steam iron 1 in (2.5 cm) above it without touching, especially over the metallic trim. Let it dry completely.
- Start the coil. Place one short end of the strip’s foundation edge against Rnd 6 of the tip cone, RS out and trim edge pointing down. Wrap it around the cone, sewing the foundation edge to Rnd 6 with small whipstitches in Color A.
- Spiral down. As you pass the starting point, let the strip drop slightly so its foundation edge tucks under the tier above. Sew it to the WS of the tier above, along Row 2. Rows 3–6 of the upper tier then hang over as a flared edge.
- Check every tier. Each tier should show about 0.5 in (1.3 cm) of rose plus its cream and rose-gold trim. After the third tier, the bottom edge should be about 1.75 in (4.4 cm) across.
- Finish the base. Keep going until the strip runs out, at about 7 tiers. The last tier’s bottom edge should be about 3.25 in (8.3 cm) across. Tuck the strip end inside the last tier and tack it down from the WS.
- Add the bell. Cut a 12 in (30.5 cm) strand of Color B. Thread it down through the top of the tip cone and out through the hollow center. Tie on the bell so it hangs 0.25 in (0.6 cm) below the bottom edge, then bring the strand back up and knot it at the top.
- Add the star and loop. Thread the cord tails through the top point of the star and knot them inside. Sew the bottom two points of the star to the top of the tip cone, leaving about 0.25 in (0.6 cm) of cream showing under the star.
- Final steam. Hold the tree by its loop and give each tier a quick burst of steam. Use your fingers to shape the edges into even flares, then let it dry hanging.
Final Quality-Control Checklist
- The tree is 6 in (15.2 cm) tall with the star and 3.25 in (8.3 cm) across the base.
- There are about 7 tiers, each wider than the one above.
- Every tier’s rose-gold trim faces out and down.
- No foundation or sewing stitches show between tiers.
- The cream band under the star is even all the way around.
- The bell hangs straight down from the center.
- The star faces front and is sewn on firmly.
- The loop is centered, so the tree hangs straight.
- All ends are woven in on the WS.
Troubleshooting
The strip twists like a corkscrew. Steam-block it flat before coiling, and check that you turned at the end of every row.
The tiers don’t flare. Either increases were missed or Row 6 is too tight. Count Row 5; it must have 240 sts. If needed, rework Row 6 with a larger hook.
The edge ruffles. You probably added extra increases. Check that Rows 2, 4 and 5 each have exactly 20.
The tree leans to one side. Some tiers were sewn lower than others. Always sew along Row 2 of the tier above.
Too many or too few tiers. Your gauge is not 5 sts per inch. A tree with 6 or 8 tiers still looks right; just check that the base is close to 3.25 in (8.3 cm).
The metallic yarn splits. Use a smooth-tipped hook and work slowly.
Care
Spot clean with cool water and mild soap, then reshape the tiers and dry hanging. Store it hanging or in a box so the tiers don’t get crushed.
Final Notes
The whole tree comes from one measurement chain. At 5 sts and 6 rows per inch, the 180-st foundation is 36 in (91.4 cm) long. Three 20-st increase rows take the edge to 240 sts and 48 in (121.9 cm). The strip is 0.7 in (1.8 cm) wide before the border and 0.9 in (2.3 cm) after it. Coiled around a tip cone 2 in (5.1 cm) around the base, it makes about 7 flared tiers and a tree 6 in (15.2 cm) tall and 3.25 in (8.3 cm) wide.
Check your gauge first, count Row 5 and keep the trim loose. After that, the tree is just a calm, steady coil.
Happy crocheting!