
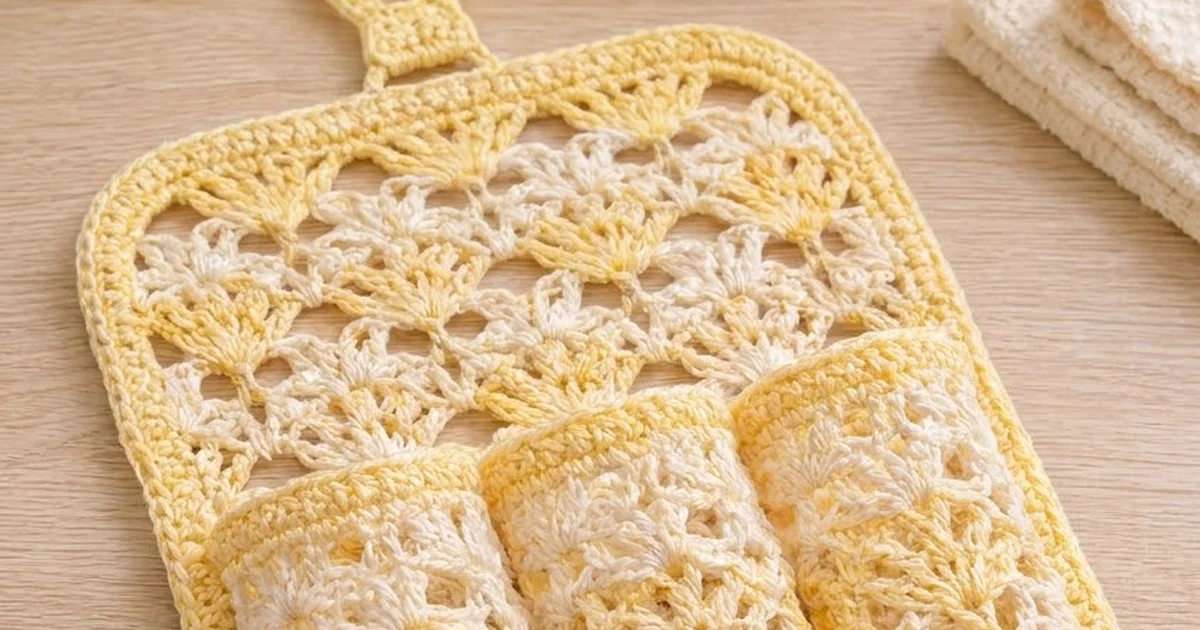
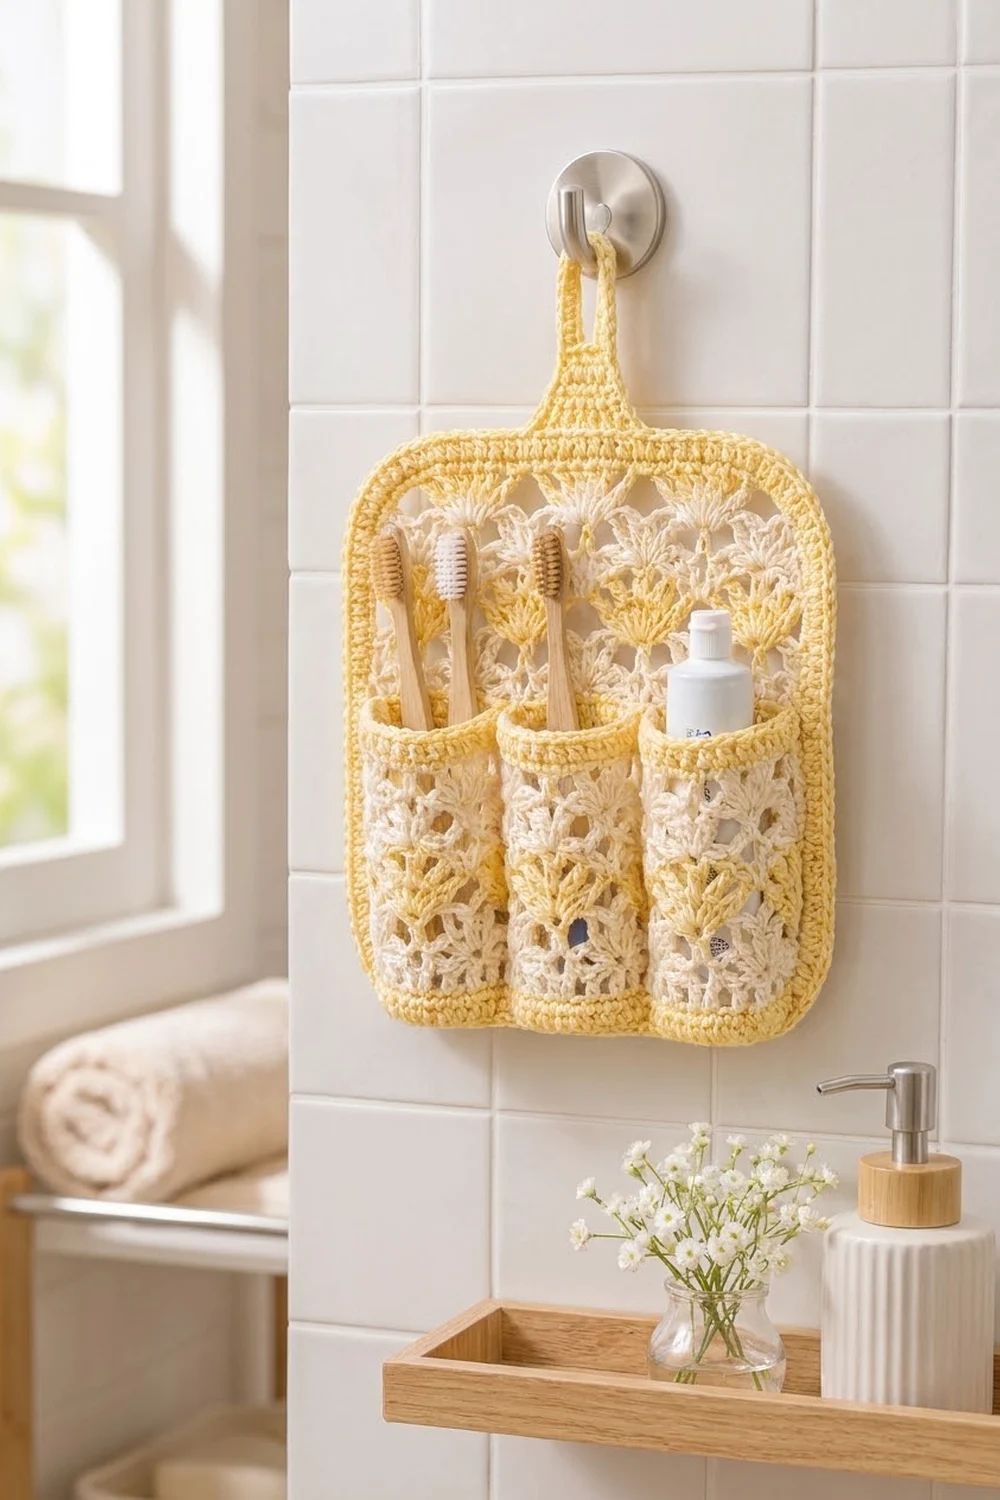
This hanging toothbrush holder pairs cream fan lace with soft butter-yellow accents. It has a lace back panel with gently rounded corners and a solid yellow border. A tab that narrows toward the top rises from the top center and ends in a teardrop loop. Three open tube pockets sit side by side across the lower part of the panel.
Most of the lace is cream. Every second fan row is worked in yellow, so small yellow fans are scattered across the cream. The yellow border and the yellow bands on each pocket frame everything neatly.
All instructions use US crochet terms. The finished panel measures 8 in wide x 7 in tall (20.3 x 17.8 cm). Including the tab and loop, it hangs about 9 1/4 in (23.5 cm) tall.
You crochet one lace panel in rows and three lace tubes in joined rounds. Next you sew the tubes onto the panel. Then you work a 4-round border around the panel and crochet the hanging tab directly off the border.
Finished Size and Construction
- Finished size: 8 x 7 in (20.3 x 17.8 cm), plus a 2 1/4 in (5.7 cm) tab and loop
- Skill level: Intermediate
- Terminology: US
- Yarn weight: Fingering (#1 super fine) cotton
- Hook: 2.5 mm
- Number of pieces: 4 (1 back panel, 3 pockets)
- Layout: 3 pockets side by side across the lower panel
- Pocket size: 2 1/8 in (5.4 cm) wide when flat x 4 1/2 in (11.4 cm) tall
- Panel before border: 7 x 6 in (17.8 x 15.2 cm)
- Border depth: 1/2 in (1.3 cm), 4 rounds
Materials
Use a smooth mercerized cotton in fingering weight, about 170 m (186 yd) per 50 g. Cotton holds its shape well in a damp bathroom.
- Cream (Color A): 35 g, about 120 m (131 yd)
- Butter yellow (Color B): 30 g, about 102 m (112 yd)
Tools:
- 2.5 mm crochet hook
- Tapestry needle
- 8 locking stitch markers
- Rust-proof pins and a blocking mat
- Measuring tape
These yarn amounts already include about 15% extra for swatching and tails.
Abbreviations (US Terms)
- ch: chain
- sl st: slip stitch
- sc: single crochet
- dc: double crochet
- sc2tog: single crochet 2 together
- sk: skip
- sp: space
- st(s): stitch(es)
- rnd: round
- RS / WS: right side / wrong side
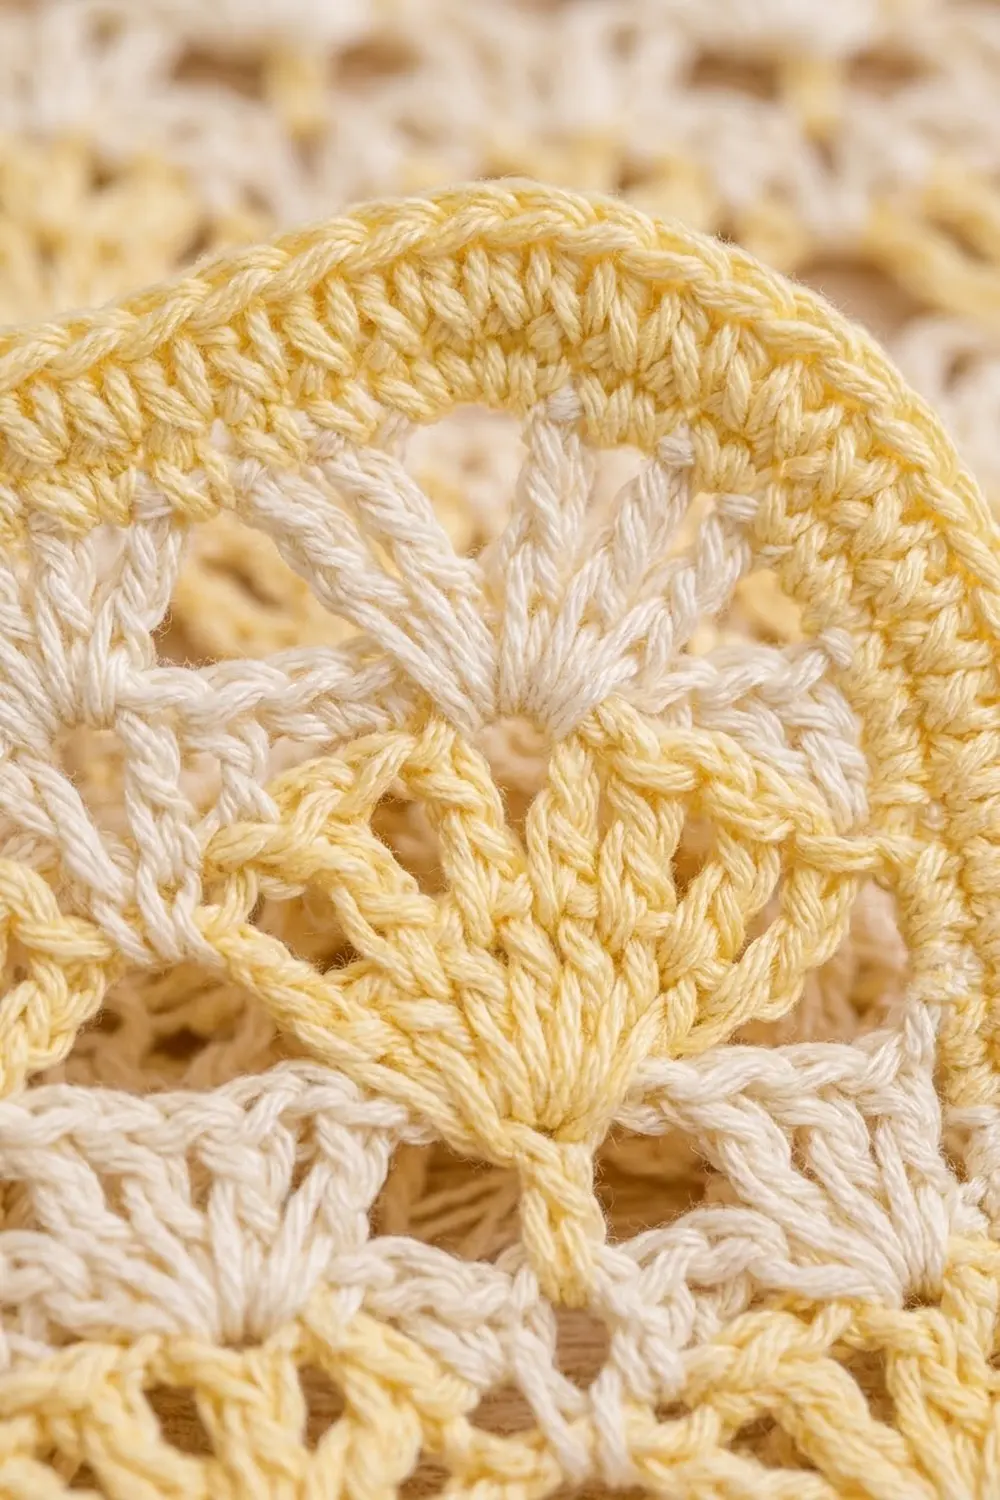
Fan: Work (dc, ch 1) 4 times, then dc, all in the same st. This gives 5 dc and 4 ch-1 sps. The center dc is the 3rd dc.
Half fan: Work (dc, ch 1, dc, ch 1, dc) in the same st. At the start of a row, ch 4 counts as the first dc and ch-1.
Gauge and Checkpoints
- Single crochet: 7 sc and 8 rows = 1 in (2.5 cm)
- Fan lace: 8 fan repeats (49 sts) = 7 in (17.8 cm), and 12 fan rows = 5 in (12.7 cm)
Make one pocket first as your test piece, since it uses both colors and both stitch patterns. Check it at these points:
- After Pocket Rnd 3: The band is 3/8 in (1.0 cm) tall and 2 1/8 in (5.4 cm) wide when flat.
- After Pocket Rnd 11: The pocket is about 3 3/4 in (9.5 cm) tall.
- Finished pocket: 4 1/2 in (11.4 cm) tall.
If your pocket comes out too big, go down 0.25 mm in hook size. If it comes out too small, go up 0.25 mm. Don’t add or remove stitches, because the fans need multiples of 6.
Back Panel
Work in rows. At the end of each fan row, cut the yarn, turn, and join the next color at that same edge. The border will cover these tails.
Foundation: With cream, ch 50.
Row 1 (RS): Sc in 2nd ch from hook and in each ch across, turn. (49 sc)
Row 2 (cream, Fan row A): Ch 1, sc in first sc, *sk 2, Fan in next sc, sk 2, sc in next sc; rep from * 7 more times. (8 fans, 9 sc) Fasten off.
Checkpoint: The width is 7 in (17.8 cm).
Row 3 (yellow, Fan row B): Turn. Join yellow with sl st in first sc, ch 4, then work (dc, ch 1, dc) in the same sc to make a half fan. *Sc in center dc of next fan, Fan in next sc; rep from * 6 more times. Sc in center dc of last fan, half fan in last sc. (7 fans, 2 half fans, 8 sc) Fasten off.
Row 4 (cream, Fan row A): Turn. Join cream with sc in last dc of the half fan. *Fan in next sc, sc in center dc of next fan; rep from * 6 more times. Fan in next sc, sc in 3rd ch of beg ch-4. (8 fans, 9 sc) Fasten off.
Rows 5–14: Repeat Rows 3–4 five more times. Odd rows are yellow and even rows are cream. Don’t fasten off after Row 14.
Checkpoint: The piece measures about 5 1/2 in (14.0 cm) from the foundation edge.
Row 15 (cream, leveling row): Ch 5 (counts as dc and ch 2), turn. Sc in center dc of next fan. *Ch 2, dc in next sc, ch 2, sc in center dc of next fan; rep from * 6 more times. Ch 2, dc in last sc. (9 dc, 8 sc, 16 ch-2 sps)
Row 16 (cream): Ch 1, turn. Sc in first dc. *2 sc in next ch-2 sp, sc in next sc, 2 sc in next ch-2 sp, sc in next dc; rep from * 7 more times, working the last sc in the 3rd ch of the ch-5. (1 + 8 x 6 = 49 sc) Fasten off.
Checkpoint: The panel is 7 x 6 in (17.8 x 15.2 cm), with 49 sts along both the top and bottom edges.
Pockets
Work in joined rounds without turning. Fasten off at each color change.
Rnd 1 (yellow): Ch 30 and sl st in first ch to form a ring, without twisting the chain. Ch 1, sc in each ch around, sl st in first sc. (30 sc)
Rnds 2–3 (yellow): Ch 1, sc in each sc around, sl st in first sc. (30 sc) Fasten off.
Rnd 4 (cream): Join cream with sc in any sc. *Sk 2, Fan in next sc, sk 2, sc in next sc; rep from * 3 more times. Sk 2, Fan in next sc, sk 2, sl st in first sc. (5 fans, 5 sc) Fasten off.
Rnd 5 (yellow): Join yellow with sc in center dc of any fan. *Fan in next sc, sc in center dc of next fan; rep from * 3 more times. Fan in last sc, sl st in first sc. (5 fans, 5 sc) Fasten off.
Rnds 6–11: Repeat Rnd 5, working Rnds 6, 8, and 10 in cream and Rnds 7, 9, and 11 in yellow. (5 fans, 5 sc each rnd)
Rnd 12 (cream, leveling round): Join cream with sl st in any sc, ch 5 (counts as dc and ch 2). Sc in center dc of next fan, ch 2. *Dc in next sc, ch 2, sc in center dc of next fan, ch 2; rep from * 3 more times. Sl st in 3rd ch of beg ch-5. (5 dc, 5 sc, 10 ch-2 sps) Fasten off.
Rnd 13 (yellow): Join yellow with sc in any dc. Sc in each dc and each sc, and work 2 sc in each ch-2 sp around. Sl st in first sc. (5 + 5 + 20 = 30 sc)
Rnds 14–15: Ch 1, sc in each sc around, sl st in first sc. (30 sc) Fasten off and weave in ends.
Make All Pieces
- Back panel: Make 1. Work cream on Rows 1–2, 4, 6, 8, 10, 12, and 14–16, and yellow on Rows 3, 5, 7, 9, 11, and 13.
- Pockets: Make 3. Work cream on Rnds 4, 6, 8, 10, and 12, and yellow on Rnds 1–3, 5, 7, 9, 11, and 13–15.
Layout (front view, before the border):
+-----------------------------------------+
|         fan lace panel, 49 sts          |
|  +-----------+-----------+-----------+  |
|  | Pocket 1  | Pocket 2  | Pocket 3  |  |
|  |  15 sts   |  15 sts   |  15 sts   |  |
|  +-----------+-----------+-----------+  |
+-----------------------------------------+
  2 sts                              2 sts
Joining
Flatten each pocket so the color-change joins line up along one fold, and turn that fold to face the panel’s outer edge. Each flattened layer now has 15 sts along the bottom.
Placement: Lay the panel RS up with Row 1 at the bottom. Mark the first 2 and last 2 sts of Row 1, which stay uncovered. The 45 sts in between hold the three pockets, 15 sts each, placed edge to edge.
Bottom seam: With yellow, whipstitch through the front pocket layer, the back pocket layer, and one Row 1 st at a time, matching 1 pocket st to 1 panel st. This closes the bottom of the pocket and attaches it to the panel. That’s 15 stitches per pocket and 45 in total.
Side seams: Whipstitch the back layer of each pocket fold straight up the panel, catching the panel about every 1/4 in (0.6 cm). Stop at the top of Rnd 12 so the top band stays free.
Tension: Pull each stitch just snug. Stitches that are too tight make the panel pucker. Stitches that are too loose let the tubes sag.
Checkpoint: The panel still lies flat at 7 x 6 in (17.8 x 15.2 cm), and the pocket tops sit 4 1/2 in (11.4 cm) above Row 1.
Border
Border gauge: 7 sc = 1 in (2.5 cm), and 4 rnds = 1/2 in (1.3 cm).
In this section, “straight” stitches are the stitches between the corner groups. Corner groups are counted separately. In Rnd 1, the corner stitches are the end stitches of Rows 1 and 16.
Rnd 1 (yellow): With RS facing, join yellow in the first st of Row 16 and work 3 sc in that st. Then:
- Top: Sc in next 47 sts, then 3 sc in last st.
- First side: Work 40 sc along the row-ends: 2 sc in each of Rows 2 and 14, 3 sc in each of the other 11 fan rows, and 3 sc in Row 15.
- Bottom: 3 sc in the first free foundation loop, sc in next 47 loops, then 3 sc in the last loop.
- Second side: Work 40 sc along the row-ends, spaced the same way as the first side.
Sl st in first sc. (Straight: 47 top, 47 bottom, 40 per side. Corners: 3 each. Total: 94 + 80 + 12 = 186 sts)
Rnd 2: Ch 1, sc in each straight st. At each corner group, work 2 sc in the first st, sc in the center st, and 2 sc in the last st. Sl st in first sc. (Straight sts unchanged. Corners: 5 each. Total: 174 + 20 = 194 sts)
Rnd 3: Ch 1, sc in each straight st. At each corner group, work sc, 2 sc, sc, 2 sc, sc across its 5 sts. Sl st in first sc. (Corners: 7 each. Total: 174 + 28 = 202 sts)
Rnd 4: Ch 1, sc in each straight st. At each corner group, sc in the first 3 sts, 2 sc in the center st, and sc in the last 3 sts. Sl st in first sc. (Corners: 8 each. Total: 174 + 32 = 206 sts) Fasten off.
Why the math works: A straight edge doesn’t need extra length, so the straight counts stay at 47 and 40 in every round. All the increases go into the corners: 2, 2, 2, then 1, for a total of 7 per corner. A square corner would need 8. Spreading those increases across each corner group curves the corner gently instead of making a point. Four rounds add 1/2 in (1.3 cm) to every side, so the 7 x 6 in panel becomes 8 x 7 in (20.3 x 17.8 cm).
Hanging tab: Join yellow with sc in the 20th straight st of the top edge. This leaves 19 sts on each side of the 9-st tab.
- Row 1: Sc in next 8 sts. (9 sc)
- Row 2: Ch 1, turn, sc in each st. (9 sc)
- Row 3: Ch 1, turn, sc2tog, sc in next 5, sc2tog. (7 sc)
- Row 4: Ch 1, turn, sc in each st. (7 sc)
- Row 5: Ch 1, turn, sc2tog, sc in next 3, sc2tog. (5 sc)
- Rows 6–8: Ch 1, turn, sc in each st. (5 sc)
The tab measures 1 in (2.5 cm).
Loop: Ch 20, then sl st in the first sc of Row 8. Ch 1 and work 28 sc over the chain loop, then sl st in the last sc of Row 8. Fasten off. The loop stands about 1 1/4 in (3.2 cm) tall.
Final Blocking
- Soak the holder in cool water for 10 minutes, then roll it in a towel to remove excess water.
- Pin the panel to 8 x 7 in (20.3 x 17.8 cm), keeping the edges straight.
- Pin each corner into an even curve, placing pins every 1/4 in (0.6 cm).
- Gently open the fans so every ch-1 space shows.
- Slide a rolled towel, about 1 in (2.5 cm) thick, into each pocket to round it.
- Shape the hanging loop into a teardrop.
- Leave everything pinned until completely dry.
Final Quality-Control Checklist
- The panel measures 8 x 7 in (20.3 x 17.8 cm).
- All corners are evenly rounded, with no ruffling or cupping.
- The fans are staggered, with yellow fans on every other row.
- All three pockets measure 2 1/8 x 4 1/2 in (5.4 x 11.4 cm).
- The pocket bottoms are closed and the top bands open freely.
- The 2-st side margins match.
- The tab is centered, with 19 sts on each side.
- All ends are woven in securely.
Troubleshooting
- Fans drift sideways: You worked into an outer dc instead of the center one. Count to the 3rd dc of each fan.
- The panel flares at the top: The chains in Row 15 are too loose. Work them more tightly.
- The border corners ruffle: Leave out the increase in the Rnd 4 corners.
- The border corners cup: Add a second increase in the center of each Rnd 4 corner.
- A pocket twists: The foundation ring was twisted when you joined it. Rip back and rejoin it straight.
- The pockets sag: Add more side-seam stitches, about every 1/8 in (0.3 cm).
Care
Hand wash in cool water with mild soap, then reshape and lay flat to dry. Shake out the pockets now and then so they dry completely between uses.
Final Notes
Here is how the measurements connect. At 7 sc per inch, the 49-st fan panel (8 repeats of 6 sts plus 1) measures 7 x 6 in (17.8 x 15.2 cm). The three 30-st pockets flatten to 15 sts each, covering 45 of those 49 stitches. The 4-round border adds 1/2 in (1.3 cm) to each side, bringing the finished size to 8 x 7 in (20.3 x 17.8 cm). If you check each of these steps, your holder will hang straight and neat.
Happy crocheting!