

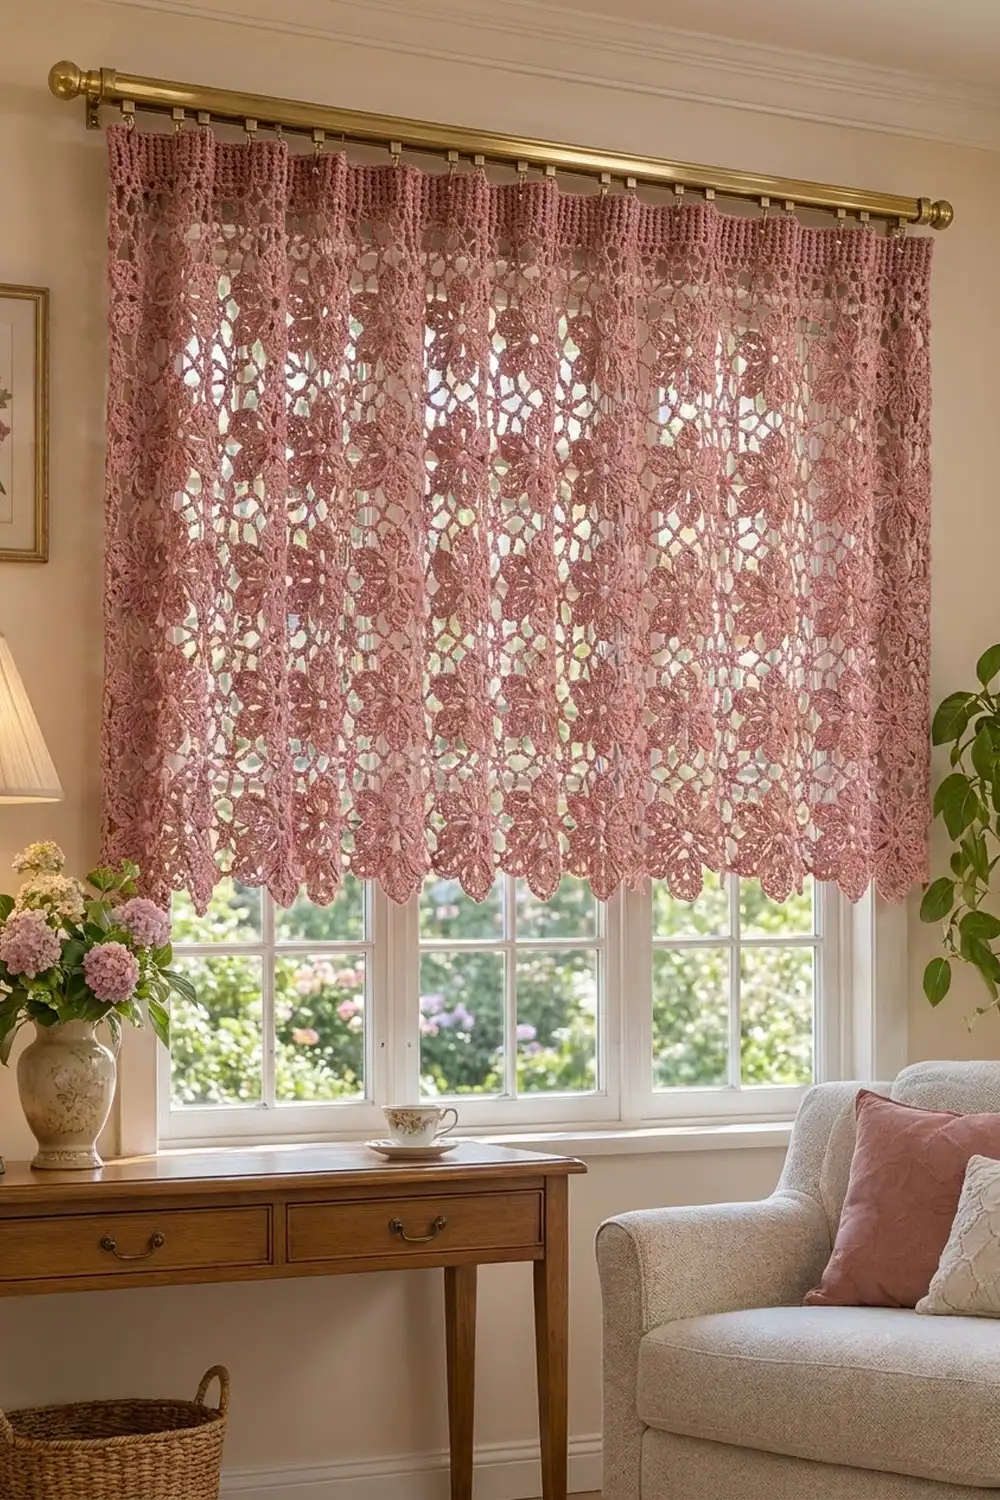
The Rosewood Bloom Lace Valance is a light, airy window topper made from small eight-petal flower motifs joined into an open lace grid. Each flower sits inside a soft chain-loop mesh, so daylight comes through the petals and the gaps between them. A dense ribbed header across the top makes the piece firm enough to hang. A row of pointed, petal-like scallops finishes the lower edge.
The whole valance uses one color, a dusty rose cotton that looks warm and vintage without being too sweet. The style is classic cottage lace: pretty, practical and easy to wash.
This pattern uses US crochet terms. After blocking, the finished valance measures 42.5 in (108.0 cm) wide and 16.2 in (41.1 cm) tall, including the header and the scalloped edge.
You make 30 identical flower motifs and join them as you go on the last round, in a grid 10 motifs wide and 3 motifs tall. Next you work one round of single crochet around the panel, add a 4-row ribbed header across the top, and finish the bottom with a row of pointed scallops. The valance hangs from clip rings on a curtain rod.
Finished Size and Construction
- Finished size: 42.5 in x 16.2 in (108.0 cm x 41.1 cm)
- Skill level: Intermediate
- Terminology: US crochet terms
- Yarn weight: DK (#3), cotton or cotton blend
- Hook: 3.5 mm (E-4)
- Number of pieces: 30 flower motifs
- Layout: 10 motifs wide x 3 motifs tall
- Motif size: 4.2 in (10.7 cm) square, blocked
- Size before border: 42 in x 12.6 in (106.7 cm x 32.0 cm)
- Border depth: 0.25 in (0.6 cm) at each side; 1.85 in (4.7 cm) at the top (sc round plus header); 1.75 in (4.4 cm) at the bottom (sc round plus scallops)
Materials
Choose a smooth DK cotton, either mercerized or matte. Cotton holds the lace shape after blocking, doesn’t fuzz in sunlight and stands up to washing. Avoid fluffy or very stretchy acrylics, which blur the petals and let the header sag.
- Dusty rose DK cotton: about 300 g / 660 m (about 6 balls of 50 g / 110 m)
- Motifs: about 180 g / 396 m (about 6 g / 13 m per motif)
- Border, header and scallops: about 75 g / 165 m
- Remainder: safety margin
Tools:
- 3.5 mm (E-4) crochet hook
- Tapestry needle
- Stitch markers
- Rust-proof pins and a blocking surface at least 44 in x 18 in (111.8 cm x 45.7 cm)
- Measuring tape
- 13 curtain clip rings and a rod for hanging
All quantities include a margin of about 15%. Buy all the yarn from the same dye lot.
Abbreviations (US Terms)
- ch – chain
- sl st – slip stitch
- sc – single crochet
- hdc – half double crochet
- dc – double crochet
- tr – treble crochet
- fpdc – front post double crochet
- bpdc – back post double crochet
- sp(s) – space(s)
- st(s) – stitch(es)
- RS / WS – right side / wrong side
Special stitch – Point: (2 dc, 2 tr, ch 3, 2 tr, 2 dc) all in the same stitch. Each Point has 8 stitches plus a ch-3 tip.
Gauge and Checkpoints
Before anything else, make one complete motif and block it. It should measure 4.2 in (10.7 cm) square from side edge to side edge.
Checkpoints for a single motif (lightly pressed flat):
- After Round 1: about 1.1 in (2.8 cm) across
- After Round 3: about 3 in (7.6 cm) from one petal tip to the opposite petal tip
- After Round 4: about 3.6 in (9.1 cm) across the chain loops
- After Round 5: 4.2 in (10.7 cm) square, blocked
Border gauge: 20 sts = 4 in (10.2 cm) in both sc and dc; 10 dc rows = 4 in (10.2 cm). This matches the motif edge, which has 21 stitches per 4.2 in (10.7 cm) side, or 5 stitches per inch.
If your motif is too big, go down 0.25 mm in hook size. If it is too small, go up 0.25 mm. Even 1/8 in (0.3 cm) per motif adds up to 1.25 in (3.2 cm) across 10 motifs, so adjust now rather than later.
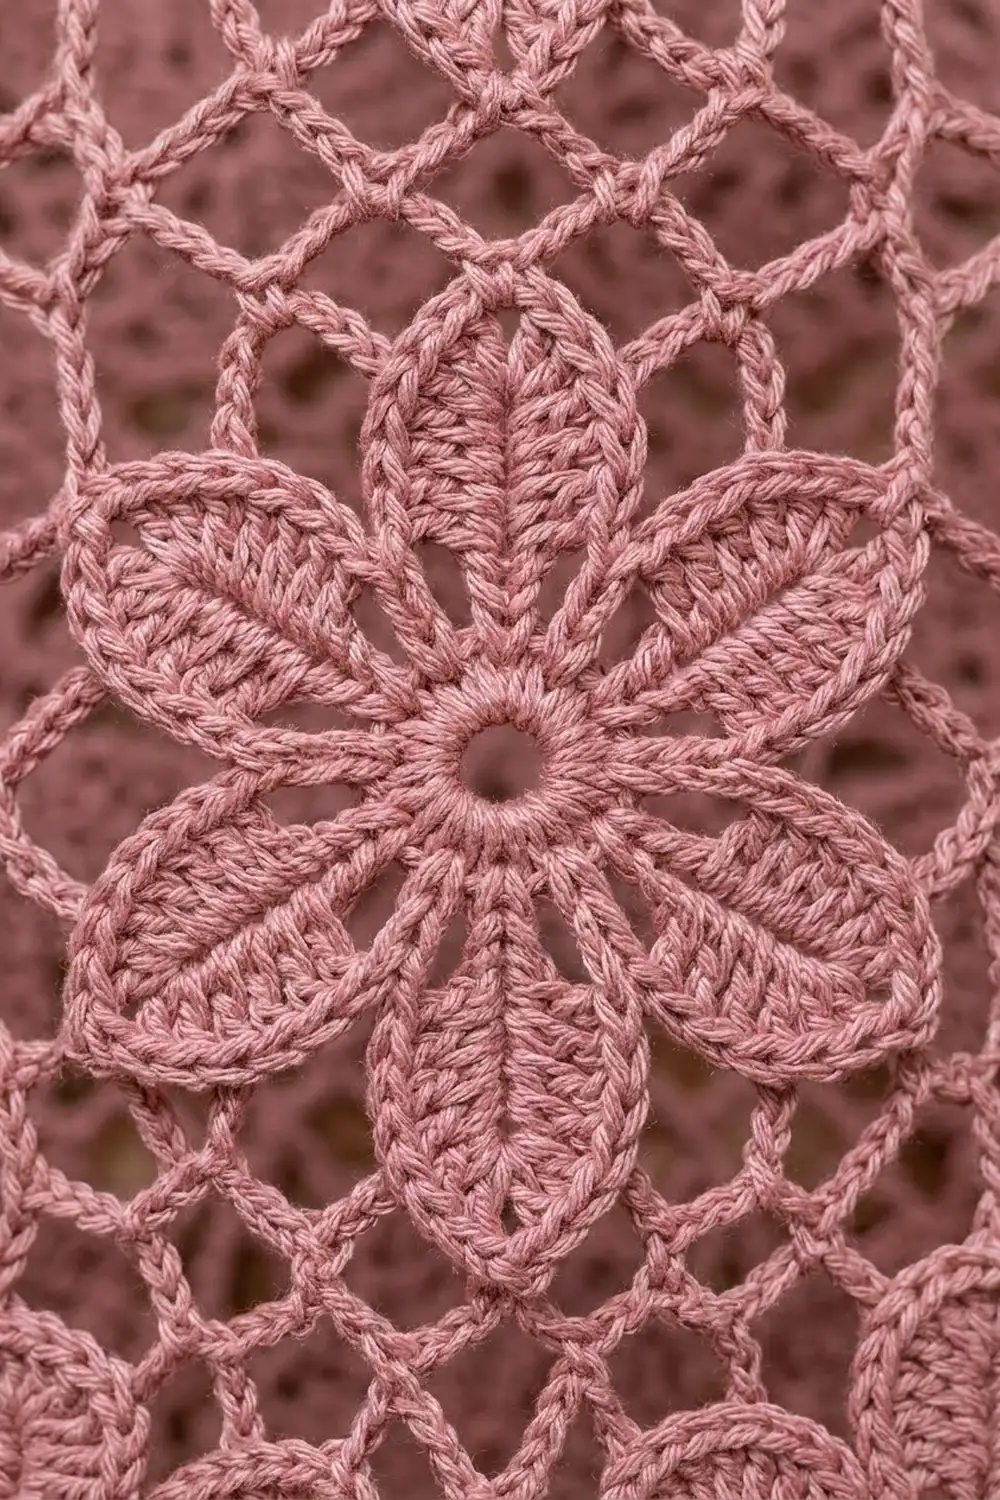
Flower Motif
Make 1 complete motif first. Motifs 2 through 30 use the same Rounds 1–4 and join on Round 5 (see Joining).
Round 1: Ch 6, sl st to the first ch to form a ring. Ch 3 (counts as dc), 15 dc in the ring, sl st to the top of the beginning ch-3. (16 dc)
Round 2: Ch 1, sc in the same st, ch 5, skip next dc, sc in next dc, ch 5, skip next dc; repeat from * 6 more times, sl st to the first sc. (8 sc, 8 ch-5 sps)
Round 3 (petals): Sl st into the first ch-5 sp, ch 1, (sc, hdc, 2 dc, tr, ch 3, tr, 2 dc, hdc, sc) in the ch-5 sp; repeat from * in each ch-5 sp around, sl st to the first sc. (8 petals: 80 sts plus 8 ch-3 tips)
The tr and ch-3 in the middle of each petal make the pointed tip. The sc at each end pulls the petal in at its base, which gives it the long almond shape.
Round 4 (mesh loops): Sl st in the next hdc, the next 2 dc and the next tr, then sl st into the ch-3 tip sp. Ch 1, sc in the ch-3 tip sp, ch 7; repeat from * in each petal tip around, sl st to the first sc. (8 sc, 8 ch-7 loops)
Round 5 (squaring round): Sl st into the next ch-7 loop. Ch 4 (counts as tr), then (2 tr, ch 3, 3 tr) in the same loop for the first corner. Ch 3, (sc, ch 5, sc) in the next loop, ch 3, (3 tr, ch 3, 3 tr) in the next loop for the corner; repeat from * 2 more times. Ch 3, (sc, ch 5, sc) in the last loop, ch 3, sl st to the top of the beginning ch-4. Fasten off.
Round 5 count: 24 tr, 8 sc, 8 ch-3 side sps, 4 ch-5 sps and 4 corner ch-3 sps.
Stitches per side: Between two corner ch-3 sps, each side has 3 tr + 3 ch + 1 sc + 5 ch + 1 sc + 3 ch + 3 tr = 19 stitches. Later you’ll work 1 sc into each corner sp, so each side gives 19 + 2 = 21 stitches. Those 21 already include both corner stitches.
The tall tr groups push the corners outward, while the sc and ch-5 stay low in the middle of each side. This turns the round flower into a square.
Make All Pieces
Make 30 flower motifs in dusty rose: 1 complete motif, then 29 more that join on Round 5.
Layout (10 wide x 3 tall, joined in numbered order):
Top    [ 1][ 2][ 3][ 4][ 5][ 6][ 7][ 8][ 9][10]
       [11][12][13][14][15][16][17][18][19][20]
Bottom [21][22][23][24][25][26][27][28][29][30]
Weave in the center tail of each motif as you go. Leave the last tails until all the joining is done.
Joining
Join as you go on Round 5. Work Rounds 1–4 of the new motif, then work Round 5 as usual until you reach a side that touches a finished motif.
Joining a corner: Instead of (3 tr, ch 3, 3 tr), work 3 tr, ch 1, sl st into the corner ch-3 sp of the neighboring motif, ch 1, 3 tr.
Joining a side: Instead of (sc, ch 5, sc), work sc, ch 2, sl st into the neighbor’s ch-5 sp, ch 2, sc.
Don’t join the ch-3 side spaces. They stay open and form the diamond-shaped mesh between the flowers.
Stitch-to-stitch logic: Ch 1 + sl st + ch 1 fills the same 3 positions as the ch-3 it replaces. Ch 2 + sl st + ch 2 fills the same 5 positions as the ch-5. So each joined side still has exactly 19 stitches between its corners, or 21 counting the corners. Each joined side connects at 3 points: 2 corners and 1 center.
Four-motif corners: When a corner meets motifs that are already joined, sl st into the existing join (the sl st already there), not into a separate space. All four corners then meet at a single point.
Tension: Keep the ch-1 and ch-2 joining chains relaxed. Tight chains make the seams pucker and the panel narrower. Lay each finished row flat before you start the next one.
Checkpoint: When the first row of 10 is done, lay it flat and smooth it gently. It should measure 42 in (106.7 cm) wide. The finished panel measures 42 in x 12.6 in (106.7 cm x 32.0 cm).
Border
Border gauge: 20 sts = 4 in (10.2 cm) in sc and dc, so 21 stitches match each 4.2 in (10.7 cm) motif side exactly.
Border Round 1 (sc): With RS facing, join yarn in the top right corner sp. Along every outer side, work 1 sc in each tr, sc and ch, plus 1 sc in each motif’s corner sp. At seams, work 1 sc into each motif’s own corner sp, one on each side of the joining sl st. In the 4 outer panel corners, work (sc, ch 2, sc). Each of those sc belongs to its own side, and the ch-2 is the turning space.
- Top: 10 motifs x 21 = 210 sc
- Bottom: 10 motifs x 21 = 210 sc
- Each short side: 3 motifs x 21 = 63 sc
- Total: 546 sc plus 4 corner ch-2 sps
Sl st to the first sc and fasten off. You don’t add any stitches at seams; the 2 sc at each seam are the two motifs’ own corner stitches.
Header Row 1 (RS): With RS facing, join in the top right corner ch-2 sp. Ch 2 (does not count), dc in each of the 210 top sc, turn. (210 dc)
Header Row 2 (WS): Ch 2 (does not count), fpdc around next st, bpdc around next st; repeat from * across, turn. (105 fpdc + 105 bpdc = 210 sts)
Header Rows 3–4: Ch 2 (does not count). Work fpdc around each st that sticks out toward you and bpdc around each st that sits back, turn. (210 sts each row)
Fasten off after Row 4. The ribs run vertically and make a firm 1.6 in (4.1 cm) band for the clip rings. Because 210 is even, the fpdc/bpdc pairs divide evenly.
Scallop Row (RS): Turn the valance upside down. With RS facing, join in the first of the 210 bottom sc. Work across each motif’s 21 stitches like this: sc in the first st, skip 4 sts, Point in the next st, skip 4 sts, sc in the next st; repeat from * once more. That uses 1 + 4 + 1 + 4 + 1 + 4 + 1 + 4 + 1 = 21 stitches per motif. Repeat across all 10 motifs. (20 Points, 30 sc)
Fasten off. Where two motifs meet, 2 sc sit side by side and form a small dip between the scallops.
Why the math works: Every edge count is a multiple of 21 because each motif contributes exactly 21 stitches per side. At 5 stitches per inch, the 210-stitch header matches the 42 in (106.7 cm) panel, so the top neither ruffles nor pulls in. The scallop repeat fits 21 stitches exactly, so every motif gets 2 Points with no stitches left over.
Final Blocking
- Weave in all remaining ends, following the stitch path for at least 2 in (5.1 cm).
- Soak the valance in cool water with a little wool wash for 15 minutes.
- Roll it in a towel and press out the water. Do not wring.
- Lay it flat on the blocking surface, RS up.
- Pin the four corners to 42.5 in x 16.2 in (108.0 cm x 41.1 cm).
- Pin along the header every 3 in (7.6 cm) to keep it straight.
- Pin the tip of every Point so the 20 scallops are even.
- Open out each flower and smooth the petals with your fingers. Pin the mesh corners if needed.
- Let it dry completely, then unpin.
Final Quality-Control Checklist
- 30 motifs, each 4.2 in (10.7 cm) square
- Every joined side connected at 3 points, with the ch-3 side spaces left open
- Panel before border: 42 in x 12.6 in (106.7 cm x 32.0 cm)
- Border Round 1: 210 / 63 / 210 / 63 sc
- Header: 4 rows of 210 sts, with straight vertical ribs
- 20 Points along the bottom, 2 per motif
- Finished size: 42.5 in x 16.2 in (108.0 cm x 41.1 cm)
- All ends secure and invisible from the RS
Troubleshooting
Petals curl forward: Your Round 3 tension is too tight. Loosen the tr stitches, or go up 0.25 mm for Round 3 only.
Motif stays round, not square: Check that the corners use tr, not dc, and the side groups use sc. Block the corners firmly.
Seams pucker: The joining chains are too tight. Redo the join with looser ch-1 and ch-2.
Header ruffles or pulls in: Check your header gauge against 20 sts = 4 in (10.2 cm). Change hook size for the header only.
Scallops are uneven: Recount 21 stitches per motif along the bottom edge. One missing corner sc shifts every Point after it.
Lace looks limp: Block it again with a light spray starch.
Care
Hand wash, or machine wash on a gentle cool cycle in a mesh bag. Reshape and dry flat; hanging it wet stretches the lace.
Final Notes
Each measurement builds on the one before it. Each motif is 4.2 in (10.7 cm) and 21 stitches per side. Ten motifs make a 42 in (106.7 cm) panel with 210 stitches across, and three rows make it 12.6 in (32.0 cm) tall. Border Round 1 adds 0.25 in (0.6 cm) all around, the header adds 1.6 in (4.1 cm) and the scallops add 1.5 in (3.8 cm). That gives a finished size of 42.5 in x 16.2 in (108.0 cm x 41.1 cm). Check each of these measurements as you go and the valance will hang straight and even.
Happy crocheting!