
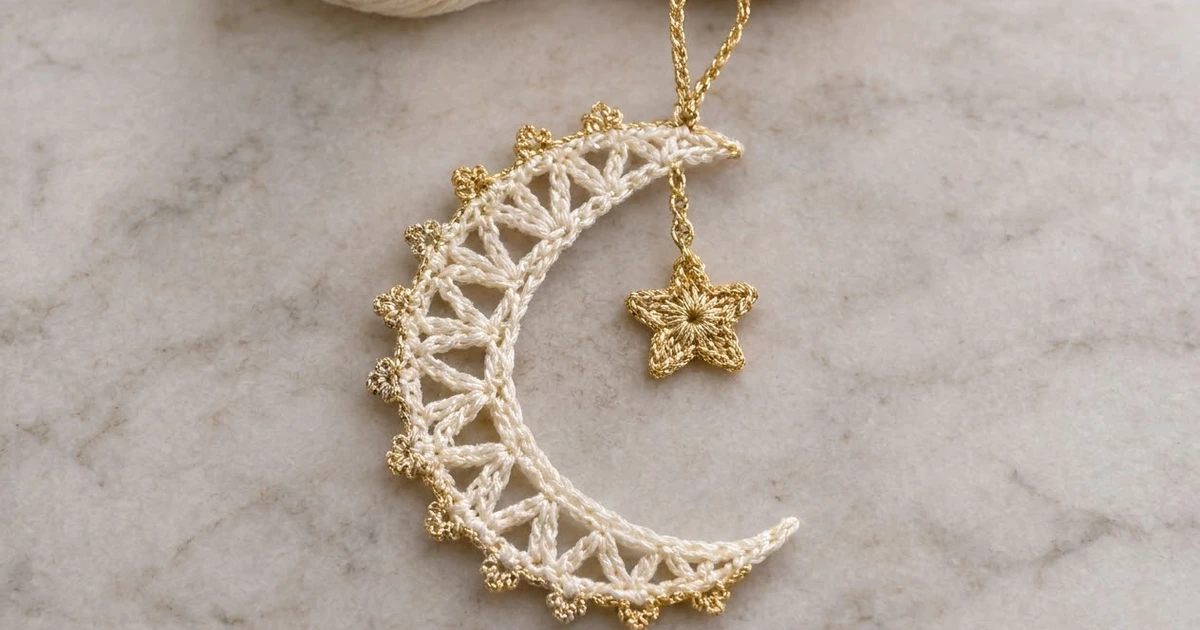
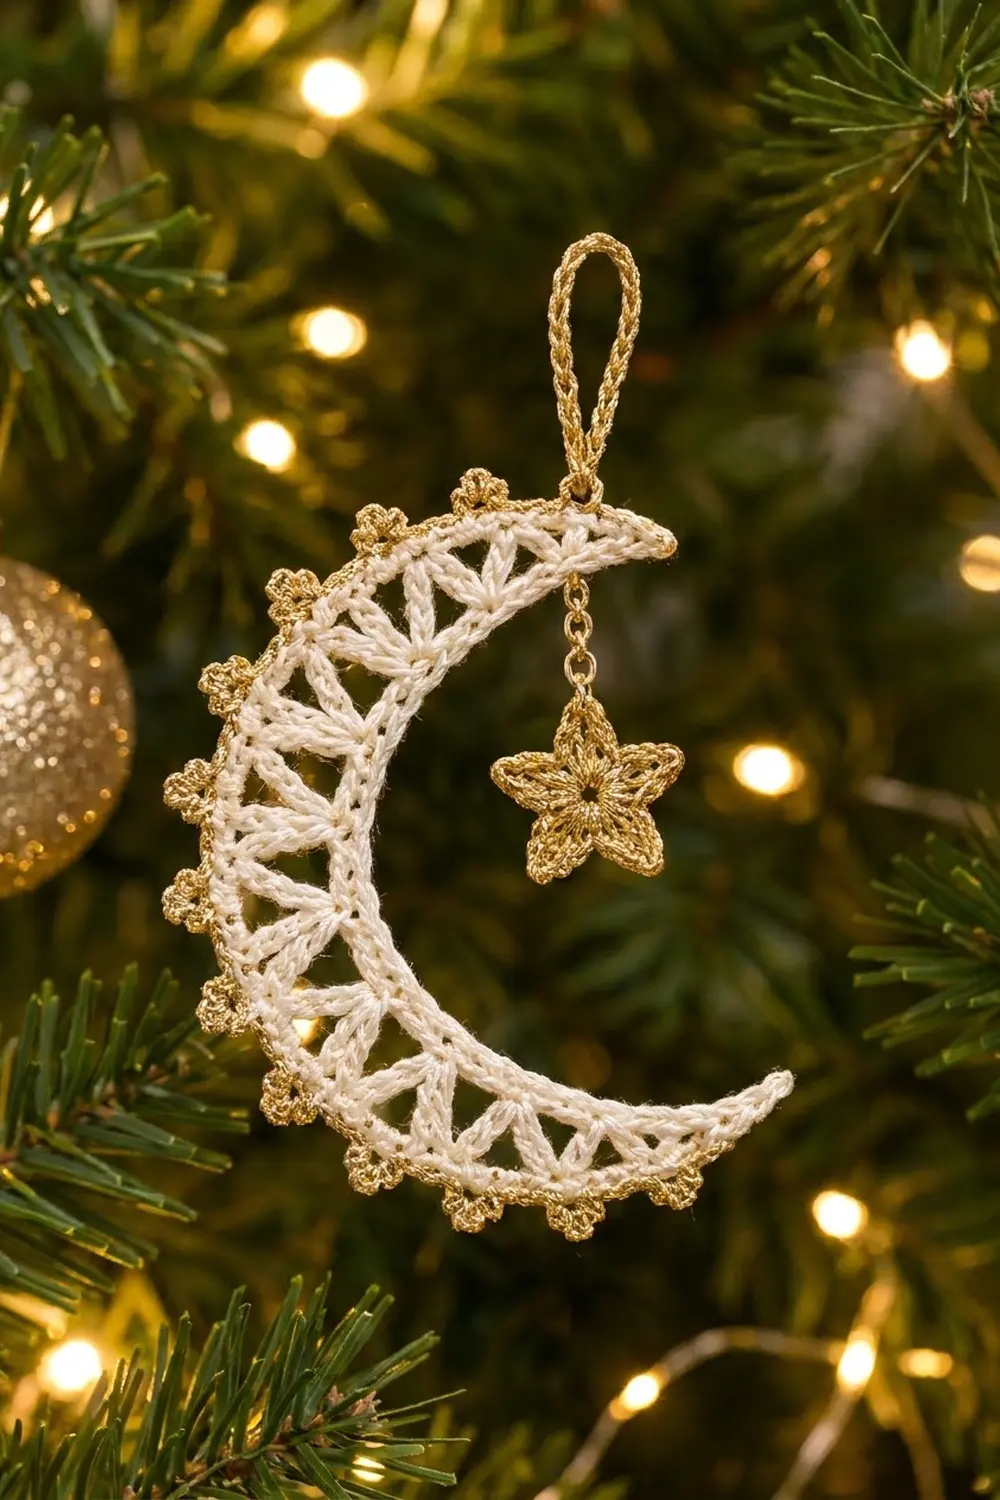
The Starlit Crescent is a light, lacy moon ornament. It has a cream lattice body, a gold trefoil edge along the outer curve, and a small gold star that hangs inside the curve. It looks delicate on a tree, but it uses only basic stitches and takes about an evening.
Two colors are used: soft cream for the moon and metallic gold for the edging, chain loop, and star. Together they give a warm, vintage holiday look. The ornament also works for Ramadan or Eid decor, a nursery mobile, or a gift-wrap topper.
This pattern uses US crochet terms. The finished crescent is about 4.5 in (11.4 cm) tall and 3 in (7.6 cm) wide. The star is 1 in (2.5 cm) across and hangs on a 1.5 in (3.8 cm) chain.
Here is how it’s made. You crochet the crescent flat in three cream rows, from the inner curve outward. The curve comes from stitch height: short stitches at the tips and tall stitches in the middle. Then you add one gold edging row with trefoils along the outer curve. The hanging loop and star drop are worked straight from the last tip, so there’s no sewing beyond weaving in ends.
Finished Size and Construction
- Finished size: 4.5 in (11.4 cm) tall × 3 in (7.6 cm) wide
- Skill level: Easy–Intermediate
- Terminology: US crochet terms
- Yarn weight: Fingering (#1 Super Fine)
- Hook: 2.25 mm (US B-1)
- Number of pieces: 2 components (1 crescent, 1 star), joined by a chain
- Layout: Star hangs inside the crescent’s curve from the upper tip
- Crescent size before border: 4 in (10.2 cm) tall × 2.75 in (7.0 cm) wide
- Band width at center before border: 0.75 in (1.9 cm)
- Border depth: 0.25 in (0.6 cm), outer curve only
- Star size: 1 in (2.5 cm) across
Materials
Yarn: Use mercerized cotton or a cotton blend in fingering weight. It holds a crisp, open lattice and blocks well. For the gold, choose a metallic thread or cotton-metallic blend of similar thickness. Very slippery metallic yarns make the trefoils hard to keep even.
- Color A – Cream: 5 g (about 20 m / 22 yd)
- Color B – Metallic Gold: 4 g (about 16 m / 17.5 yd)
The quantities include a comfortable margin for a gauge test and ends.
Tools:
- 2.25 mm (US B-1) crochet hook
- Tapestry needle
- Scissors
- Blocking board or foam
- Rustproof pins
- Spray bottle
- Optional: fabric stiffener or starch
Abbreviations (US Terms)
- ch – chain
- sl st – slip stitch
- sc – single crochet
- hdc – half double crochet
- dc – double crochet
- tr – treble crochet
- sk – skip
- sp – space
- st(s) – stitch(es)
- MR – magic ring
- RS – right side
Special stitches
- hdc-V: (hdc, ch 1, hdc) in the same stitch.
- dc-V: (dc, ch 2, dc) in the same stitch.
- tr-V: (tr, ch 2, tr) in the same stitch.
- Trefoil: ch 2 (stem). [Ch 3, sl st in 2nd stem ch] 3 times, so you have 3 petals. Then sl st in 1st stem ch, which brings you back to the base.
Gauge and Checkpoints
Gauge: 9 sc = 1 in (2.5 cm), and 10 ch = 1 in (2.5 cm).
Test first. Work Rows 1–3 of the crescent, then stop and measure before adding the gold edge. Since the whole ornament is just one crescent, this test is your real piece if it measures correctly.
Checkpoints:
- After Row 1: The straight strip of 45 sc measures 5 in (12.7 cm).
- After Row 2: The strip starts to curl into a curve. The tr-Vs in the middle stand about 0.5 in (1.3 cm) tall.
- After Row 3: The outer edge measures about 8 5/8 in (21.9 cm) along the curve. The band is 0.75 in (1.9 cm) wide at the center and about 0.25 in (0.6 cm) at each tip. Laid flat, the crescent is about 4 in (10.2 cm) tall × 2.75 in (7.0 cm) wide.
- After Row 4: The trefoils add 0.25 in (0.6 cm) along the outer curve, for 4.5 in (11.4 cm) × 3 in (7.6 cm) overall.
If your piece is too big (Row 1 is longer than 5 in / 12.7 cm), go down to a 2.0 mm hook. If it’s too small, go up to a 2.5 mm hook. Keep the same stitch counts. The curve depends on the ratio of 45 inner stitches to 78 outer stitches, not on hook size.
Crescent
Use Color A (cream). The crescent has two tips, which this pattern calls Tip A (where you start) and Tip B (where you finish).
Foundation: Ch 46.
Row 1 (inner edge): Sc in 2nd ch from hook and in each ch across. Turn. (45 sc)
You are now at Tip B.
Row 2 (lattice): Ch 1. Work across as follows:
- Sc in first sc, ch 1, sk 1 sc, hdc-V in next sc. (V1)
- Ch 2, sk 3 sc, dc-V in next sc. (V2)
- Ch 3, sk 3 sc, dc-V in next sc. (V3)
- Ch 3, sk 3 sc, tr-V in next sc. (V4)
- [Ch 4, sk 3 sc, tr-V in next sc] 4 times. (V5–V8)
- Ch 3, sk 3 sc, dc-V in next sc. (V9)
- Ch 3, sk 3 sc, dc-V in next sc. (V10)
- Ch 2, sk 3 sc, hdc-V in next sc. (V11)
- Ch 1, sk 1 sc, sc in last sc. Turn.
Count: 2 sc and 11 V-stitches.
- The Vs sit in Row 1 stitches 3, 7, 11, 15, 19, 23, 27, 31, 35, 39, and 43.
- The connecting chain spaces, in order, are: ch 1, ch 2, ch 3, ch 3, ch 4, ch 4, ch 4, ch 4, ch 3, ch 3, ch 2, ch 1.
Each V fans upward from a single base stitch, forming a down-pointing triangle. The chains run along the top between the Vs. The open spaces between neighboring V legs form up-pointing triangles over Row 1. Taller Vs in the middle and short Vs at the ends give the band its crescent shape.
Row 3 (outer edge): Ch 1. Work 1 sc in each stitch and the number of sc shown into each space:
- Sc in first sc, sc in ch-1 sp.
- Over V1 (hdc-V): sc in hdc, sc in ch-1 V-sp, sc in hdc. (3)
- 2 sc in ch-2 sp.
- Over V2: sc in dc, 2 sc in V-sp, sc in dc. (4)
- 3 sc in ch-3 sp. Over V3: 4 sc as for V2.
- 3 sc in ch-3 sp. Over V4: sc in tr, 2 sc in V-sp, sc in tr. (4)
- [4 sc in ch-4 sp, 4 sc over next tr-V] 4 times.
- 3 sc in ch-3 sp, 4 sc over V9.
- 3 sc in ch-3 sp, 4 sc over V10.
- 2 sc in ch-2 sp, 3 sc over V11.
- Sc in ch-1 sp, sc in last sc.
Count: 78 sc, worked out as:
- Ends: 2 + 2 = 4
- hdc-Vs: 3 × 2 = 6
- dc-Vs: 4 × 4 = 16
- tr-Vs: 4 × 5 = 20
- Chain spaces: 2 + 3 + 3 + 4 + 4 + 4 + 4 + 3 + 3 + 2 = 32
- Total: 4 + 6 + 16 + 20 + 32 = 78
Fasten off Color A and weave in the ends. You finish at Tip B. Check the Row 3 measurements against checkpoint 3 before you go on.
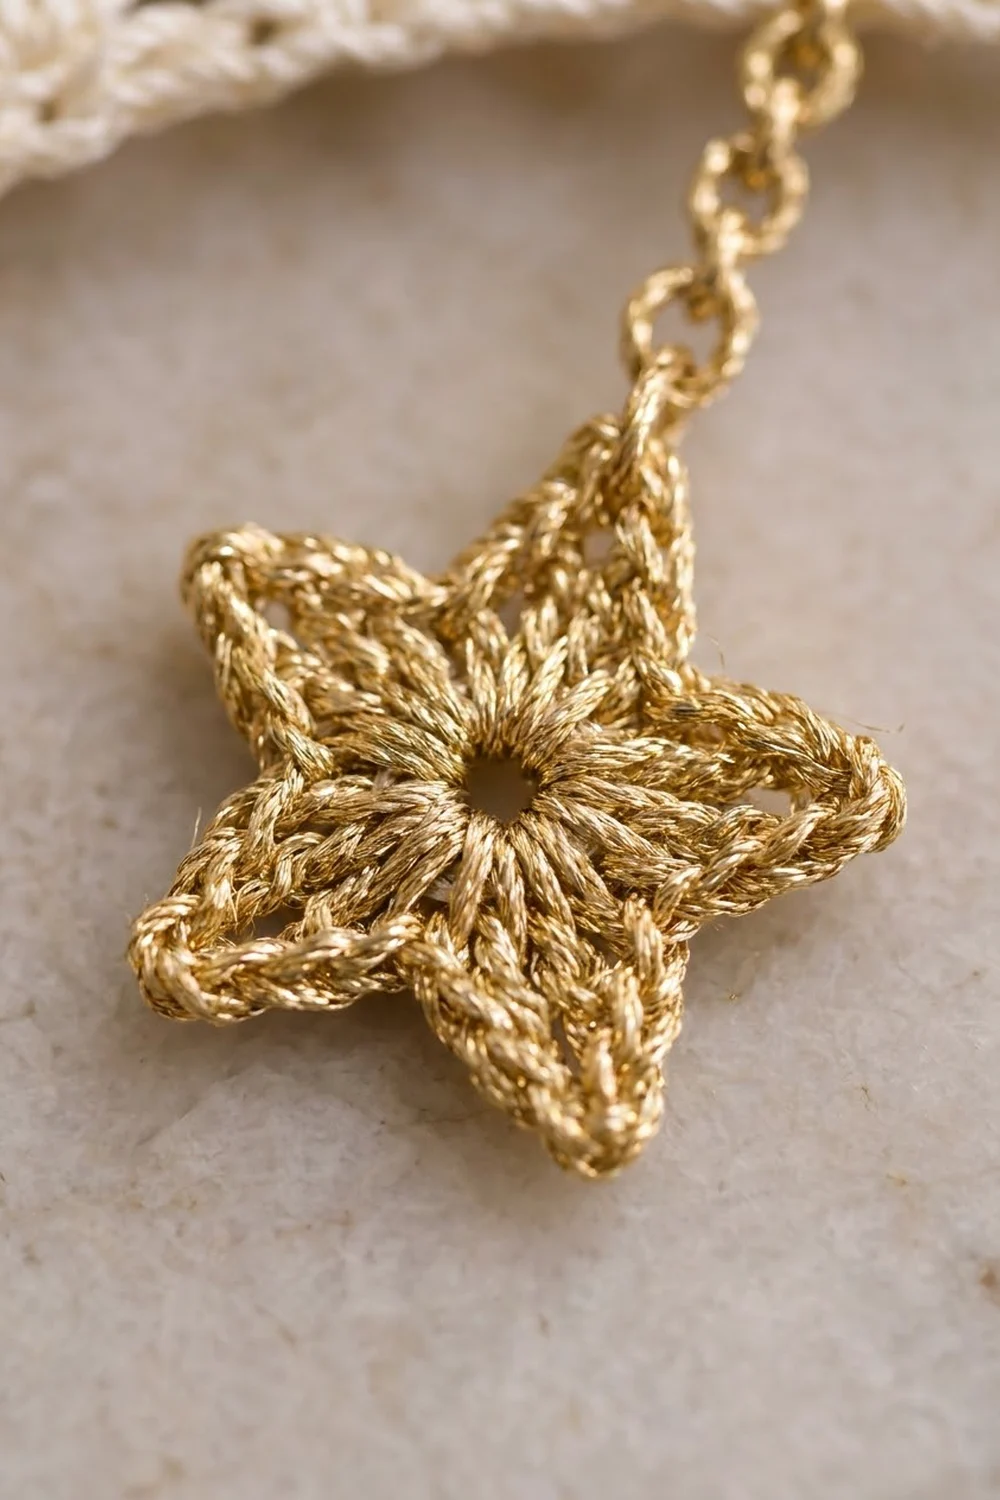
Star
Use Color B (gold).
Rnd 1: MR, ch 1, 10 sc in ring. Pull the ring closed, leaving a small center hole. Sl st in first sc. (10 sc)
Rnd 2 (points): Ch 4, sl st in 2nd ch from hook, sc in next ch, hdc in next ch, sk next sc, sl st in next sc. Repeat from * to * 5 times in total. The final sl st lands in the first sc of Rnd 1.
Count: 5 points. Each point has 1 sl st, 1 sc, and 1 hdc along its chain, and each point is anchored over 2 sc of Rnd 1 (5 × 2 = 10).
Fasten off, leaving a 6 in (15.2 cm) tail. Weave in the tail. The star measures 1 in (2.5 cm) from point to opposite notch.
Border: Gold Trefoil Edge
Border gauge: The edge uses the same 9 sc per 1 in (2.5 cm). Each trefoil sticks out about 0.25 in (0.6 cm).
Row 4: Keep the RS (the Row 3 side) facing and don’t turn. Join Color B with a sl st in the first sc of Row 3, at Tip A. Ch 1. Then:
- Sc in the same st and in the next 3 sts (4 sc), then make a Trefoil.
- [Sc in next 5 sts, Trefoil] 14 times.
- Sc in the last 4 sts.
Do not fasten off.
Count: 78 sc and 15 trefoils.
Why the math works:
- The sc: 4 + (5 × 14) + 4 = 78, which matches Row 3 exactly. Each Row 3 stitch gets one sc, with no increases or decreases.
- The trefoils: 1 + 14 = 15 trefoils. Each is made from the last sc worked, so it adds nothing to the stitch count.
- The spacing: with 4 sc at each end, the first and last trefoils sit the same distance in from each tip. The 5-stitch spacing places a trefoil about every 0.55 in (1.4 cm) along the outer curve.
The inner curve gets no border and stays clean cream, as shown.
Hanging Loop and Star Drop
You are now at Tip B with Color B still attached.
Hanging loop: Ch 40 and sl st in the last sc of Row 4. The loop rises about 2 in (5.1 cm) above the tip.
Star drop: Sl st into the end of Row 1 at the inner side of Tip B, so the drop hangs inside the curve. Ch 15 to get a 1.5 in (3.8 cm) drop. Sl st into the tip of any star point, then fasten off. Leave an 8 in (20.3 cm) tail.
Thread the tail through the star point once more so it’s secure, then weave it in through the back of the star. The star should hang upright, point-up, centered inside the crescent.
Final Blocking
- Weave in any remaining ends, staying inside solid sc rows so they don’t show through the lattice.
- Draw a 4.5 in (11.4 cm) circle on paper and put it under plastic wrap on your blocking board.
- Wet the crescent lightly with the spray bottle, or dip it in diluted stiffener and squeeze out the extra.
- Pin the outer gold sc line along the circle, starting at the center and working out to each tip.
- Pin each tip at a sharp point, about 0.25 in (0.6 cm) wide.
- Open each triangle with a pin in each V-space so the lattice reads clearly.
- Shape each trefoil with a pin through the center petal so all three petals spread.
- Lay the star flat beside the moon, pin out the five points, and let the chain lie straight.
- Let it dry completely, at least 12 hours if you used stiffener, before unpinning.
Final Quality-Control Checklist
- Row 1 has 45 sc, Row 3 has 78 sc, and Row 4 has 78 sc with 15 trefoils.
- The Vs follow the order hdc, dc, dc, tr, tr, tr, tr, tr, dc, dc, hdc, so the crescent is symmetric.
- The band is 0.75 in (1.9 cm) wide at the center and tapers to sharp tips.
- The finished size is 4.5 in (11.4 cm) × 3 in (7.6 cm).
- The star has 5 even points and measures 1 in (2.5 cm).
- The star chain is 1.5 in (3.8 cm), and the star doesn’t touch the inner edge.
- The hanging loop is secure and the ornament hangs upright.
- No ends show from the front.
Troubleshooting
- The crescent is flat or barely curves. Your Row 3 is probably short. Recount the sc in the chain spaces; it should total 78.
- The crescent ruffles. Row 1 is too tight compared with Row 3. Make the foundation chain with a hook one size larger.
- The tips are lopsided. Check that V1 and V11 are both hdc-Vs and that each end has a ch 1 and a sc.
- The trefoils are uneven. Keep the stem ch 2 snug, and sl st into the same stem chain each time.
- The star curls. Rnd 1 is too tight. Work the 10 sc more loosely or block with stiffener.
- The ornament tilts. Move the drop’s sl st further toward the inner edge of Tip B.
Care
Spot clean with cool water and mild soap, then reshape and dry flat. Store it flat in tissue so the trefoils and star points don’t get crushed.
Final Notes
Here’s the measurement chain:
- The gauge of 9 sc = 1 in (2.5 cm) gives a 5 in (12.7 cm) inner edge of 45 sc.
- The graded lattice opens that into a 78 sc outer edge, about 8 5/8 in (21.9 cm), which makes a 4 in (10.2 cm) × 2.75 in (7.0 cm) crescent.
- The gold trefoil border adds 0.25 in (0.6 cm), for a finished 4.5 in (11.4 cm) × 3 in (7.6 cm).
- The 1 in (2.5 cm) star hangs 1.5 in (3.8 cm) below the upper tip.
Check each stage, and your moon will come out symmetric with a clean curve. It makes a lovely ornament to keep or give away.
Happy crocheting!