

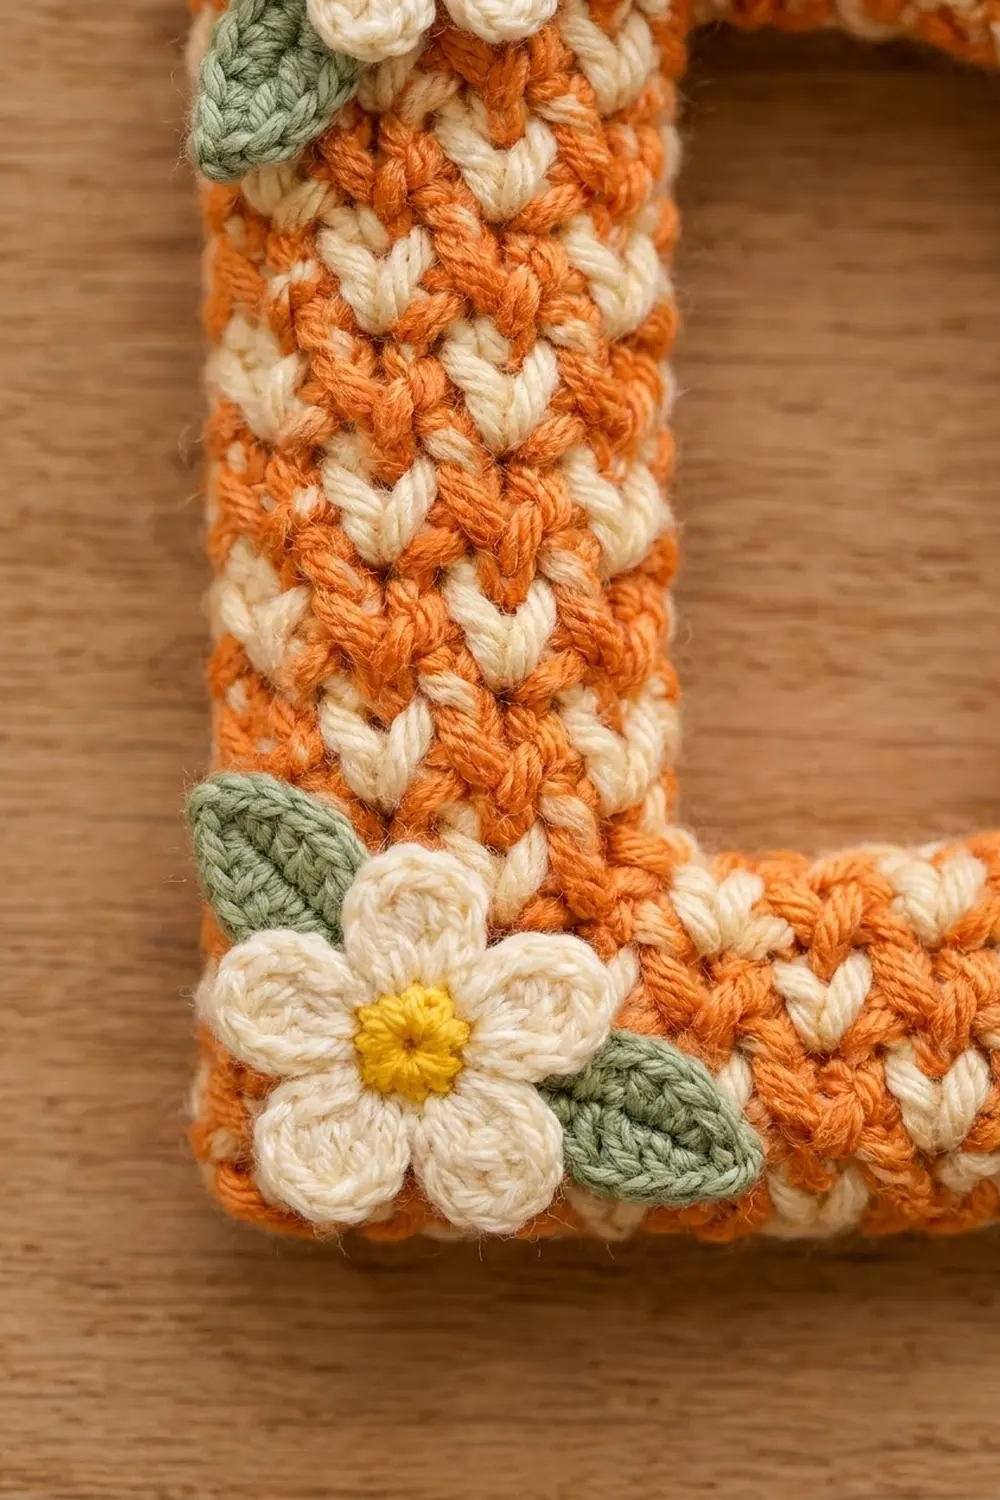
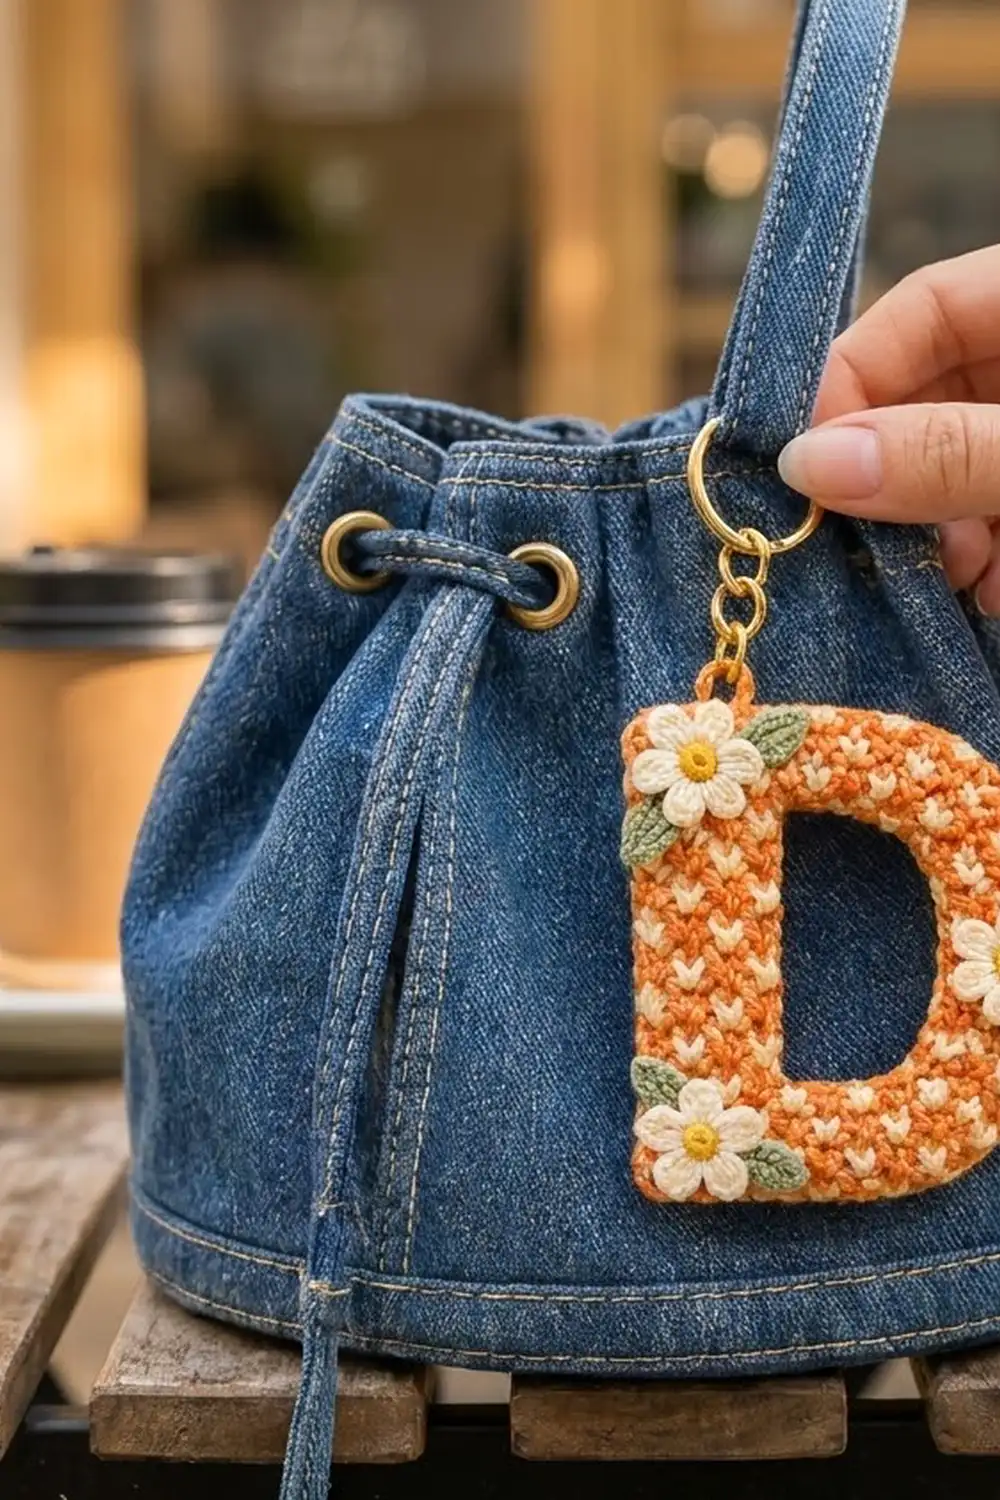
This little letter D is a bag charm with a lot of personality. Bright orange and soft cream are worked together in tapestry single crochet, so small cream V-shaped stitches stagger across the whole letter like a tiny checkerboard. Three cream daisies with yellow centers and sage green leaves sit on the corners and the curve, and a gold key ring finishes it off.
The style is cozy, handmade and a bit retro. It’s perfect for clipping to a denim tote, a backpack zipper or a set of keys. Because tapestry crochet carries both colors inside every stitch, the fabric is dense and firm. It holds its shape without stiffener or a backing.
All terms are US crochet terms. The finished letter measures 3.25 in (8.3 cm) wide by 3.75 in (9.5 cm) tall, not counting the tab and hardware.
The letter is one single piece, worked flat in rows from the bottom up. First comes a bottom bar that curves out on the right. Next, the stem and the right side of the bowl are worked as two separate columns around the open center. Last comes a top bar that curves back in. One round of single crochet neatens the outside and a second round neatens the opening. The daisies and leaves are sewn on at the end.
Finished Size and Construction
- Finished size: 3.25 in (8.3 cm) wide x 3.75 in (9.5 cm) tall
- Skill level: Easy-Intermediate (tapestry color changes, simple edge shaping)
- Terminology: US crochet terms
- Yarn weight: Sport weight (#2) cotton
- Hook: 2.5 mm (US B-1 or C-2)
- Number of pieces: 1 letter, plus 3 flowers and 6 leaves for decoration
- Layout: a single letter D, with flowers at the top-left corner, the right curve and the bottom-left corner
- Letter size before border: 3 in (7.6 cm) wide x 3.5 in (8.9 cm) tall
- Opening (counter): about 1.25 in (3.2 cm) wide x 2 in (5.1 cm) tall
- Border depth: 1 round of sc, about 0.125 in (0.3 cm)
Materials
Choose a smooth mercerized or combed cotton in sport weight. Cotton gives crisp stitch definition, so the cream Vs stay sharp, and it wears well on a bag that gets handled every day.
- Color A, Orange: 8 g, about 24 m
- Color B, Cream: 7 g, about 21 m (letter and petals)
- Color C, Yellow: 1 g, about 3 m (flower centers)
- Color D, Sage Green: 2 g, about 6 m (leaves)
These quantities include a margin of about 20 percent for swatching and tails.
Tools:
- 2.5 mm crochet hook
- Tapestry needle
- Stitch markers (2)
- Scissors
- 1 gold split key ring, 1 in (2.5 cm)
- 1 short gold chain, about 0.75 in (1.9 cm)
- 2 gold jump rings, 8 mm, and 2 pairs of flat-nose pliers
- Pins and a blocking mat or folded towel
Abbreviations (US Terms)
- ch: chain
- sc: single crochet
- sc2tog: single crochet 2 together
- inc: 2 sc in the same stitch
- hdc: half double crochet
- dc: double crochet
- sl st: slip stitch
- st(s): stitch(es)
- RS / WS: right side / wrong side
- A, B, C, D: yarn colors as listed above
Special stitch: tapestry single crochet (tsc). Hold the unused color along the top of the stitches you are working into and crochet over it, so it is hidden inside each sc. To change color, work the last sc before the change until 2 loops remain on the hook. Then yarn over with the new color and pull through both loops.
Color rule for the letter: Colors alternate every stitch (A, B, A, B), and every stitch is the opposite color of the stitch directly below it. This stagger creates the cream Vs on orange.
- At an increase, the 2 new stitches still alternate (one A, one B).
- At a decrease, the sc2tog takes whichever color keeps the row alternating.
- If shaping ever stacks two matching colors, just keep alternating along the row. It won’t show in the finished piece.
Gauge and Checkpoints
Gauge: 14 sts and 16 rows of tapestry sc = 2 in (5.1 cm) square. That is 7 sts and 8 rows per 1 in (2.5 cm).
Make a swatch first, carrying both colors exactly as you will in the letter. Tapestry crochet is tighter than plain sc, so a plain swatch will give you the wrong gauge.
Checkpoints:
- After Row 6: 21 sts, 3 in (7.6 cm) wide and 0.75 in (1.9 cm) tall.
- Each column (Rows 7–22): 6 sts, about 0.875 in (2.2 cm) wide.
- After Row 22: 2.75 in (7.0 cm) tall from the foundation.
- After Row 28: 3 in (7.6 cm) wide x 3.5 in (8.9 cm) tall.
- After the border: 3.25 in (8.3 cm) x 3.75 in (9.5 cm).
If your piece is too big, go down to a 2.25 mm hook. If it is too small, go up to a 2.75 mm hook. Do not change the stitch counts, because the letter shape depends on them.
Letter D Pattern
Start with A and carry B from the first stitch. Turn at the end of every row. The ch 1 at the start of a row does not count as a stitch.
With the RS facing, odd rows are worked from the bowl edge (right) toward the stem edge (left). Even rows are worked from the stem edge back to the bowl edge.
Bottom Bar (Rows 1–6)
The bottom bar grows outward at the bowl edge only, one stitch per row. This builds the rounded bottom-right corner.
Foundation: With A, ch 17.
Row 1 (RS): Starting in the 2nd ch from hook, tsc in each ch, alternating A and B. (16 sts)
Row 2 (WS): Ch 1, tsc in each st to last st, inc in last st. (17 sts)
Row 3: Ch 1, inc in first st, tsc in each st to end. (18 sts)
Row 4: Ch 1, tsc in each st to last st, inc in last st. (19 sts)
Row 5: Ch 1, inc in first st, tsc in each st to end. (20 sts)
Row 6: Ch 1, tsc in each st to last st, inc in last st. (21 sts)
Fasten off both colors, leaving short tails to weave in. Check the width now: it should be 3 in (7.6 cm).
With the RS facing, count the 21 sts of Row 6 from the bowl edge (right). They split into 3 groups:
- Sts 1–6: the bowl side
- Sts 7–15: the 9 sts under the opening
- Sts 16–21: the stem
Place a marker in st 7 and in st 15.
Stem (Rows 7–22)
Row 7 (RS): With RS facing, join A in st 16 of Row 6 and carry B. Ch 1, tsc in sts 16–21. (6 sts)
Rows 8–22: Ch 1, tsc in each st. (6 sts)
The stem has 16 rows in total. Fasten off both colors at the end of Row 22.
Bowl Side (Rows 7–22)
Row 7 (RS): With RS facing, join A in st 1 of Row 6 at the bowl edge and carry B. Ch 1, tsc in sts 1–6. (6 sts)
Rows 8–22: Ch 1, tsc in each st. (6 sts)
Do not fasten off. The 9 marked sts of Row 6 stay unworked and form the bottom edge of the opening. Both columns should be exactly 16 rows tall, which is 2 in (5.1 cm).
Top Bar (Rows 23–28)
Row 23 (RS): Ch 1 and tsc in each of the 6 bowl sts. Ch 9 with A, laying B alongside so it is carried through the chains. Then tsc in each of the 6 sts of the stem’s Row 22. (12 sc + 9 ch = 21 sts)
Row 24 (WS): Ch 1, tsc in each of the 6 stem sts, tsc in each of the 9 ch, tsc in each st to last 2 sts, sc2tog. (6 + 9 + 4 + 1 = 20 sts)
Row 25: Ch 1, sc2tog, tsc in each st to end. (19 sts)
Row 26: Ch 1, tsc to last 2 sts, sc2tog. (18 sts)
Row 27: Ch 1, sc2tog, tsc to end. (17 sts)
Row 28: Ch 1, tsc to last 2 sts, sc2tog. (16 sts)
Fasten off B and keep A on the hook for the border. The top bar now mirrors the bottom bar: 6 rows each, with 16 sts at the outer edge and 21 sts at the widest. The piece should measure 3 in (7.6 cm) x 3.5 in (8.9 cm).
Border
Border gauge: Along the stem and bowl edges, 1 sc per row end gives 8 sc per 1 in (2.5 cm), which matches the row gauge exactly. Along the top and bottom, 1 sc per stitch matches the stitch gauge of 7 sts per 1 in (2.5 cm). Because both rates match the fabric, the edge lies flat without ruffling or pulling.
Outer Border (Round 1)
Work with A only. Do not carry B. Turn so the RS faces you.
- Top edge: Ch 1. Working from the bowl end toward the stem end, sc in each of the first 15 sts of Row 28, then work 3 sc in the last st at the stem corner. (18 sc)
- Stem edge: Work 1 sc in each of the 28 row ends down to the foundation. (28 sc)
- Bottom edge: Working into the free loops of the foundation chain, work 3 sc in the first st at the stem corner, then sc in each of the remaining 15 sts. (18 sc)
- Bowl edge: Work 1 sc in each of the 28 row ends up the curve: 6 along the bottom slope, 16 along the straight side and 6 along the top slope. (28 sc)
Sl st to the first sc. Total: 18 + 28 + 18 + 28 = 92 sc. Fasten off.
Each square corner gets 2 extra sc from its 3-sc group. These are already counted in the 18 sc of the top and bottom edges. The bowl corners are already rounded by the row shaping, so they need no extra stitches.
Inner Edge (Opening)
With RS facing, join A in the first marked st on the bottom edge of the opening.
- Bottom of opening: sc in each of the 9 unworked sts of Row 6. (9 sc)
- Stem side: 1 sc in each of the 16 row ends. (16 sc)
- Top of opening: sc in the free loop of each of the 9 chains from Row 23. (9 sc)
- Bowl side: 1 sc in each of the 16 row ends. (16 sc)
Sl st to the first sc. Total: 9 + 16 + 9 + 16 = 50 sc. Inside the opening, the corners get no extra stitches, so they stay crisp. Fasten off.
Hanging Tab
With RS facing, find the center sc of the top-left corner. Count 3 sc along the top edge from it and join A in the next sc.
Row 1: Ch 1, sc in this st and the next 2 sts. (3 sts)
Rows 2–4: Ch 1, sc in each st. (3 sts)
Fasten off. The tab is about 0.5 in (1.3 cm) tall and sits over the stem.
Daisies and Leaves
Daisy (make 3)
Round 1: With C, make a magic ring and work 5 sc in the ring. Pull the ring closed and sl st to the first sc. (5 sts) Fasten off.
Round 2: Join B with a sl st in any st.
– (Ch 2, 2 dc, ch 2, sl st) in the same st, then sl st in the next st.
– Repeat from * 4 more times, working the last sl st into the joining sl st. (5 petals)
Fasten off, leaving a 10 in (25.4 cm) tail for sewing. Each daisy is about 1 in (2.5 cm) across.
Leaf (make 6)
With D, ch 6. Starting in the 2nd ch from hook, work: sl st, sc, hdc, sc, sl st. (5 sts) Fasten off, leaving an 8 in (20.3 cm) tail. Each leaf is about 0.75 in (1.9 cm) long.
Placement
- Daisy 1: over the top-left corner, with one leaf pointing right along the top bar and one pointing down the stem.
- Daisy 2: on the right side of the bowl, just below center, with one leaf above it and one below it along the curve.
- Daisy 3: over the bottom-left corner, with one leaf pointing up the stem and one pointing right along the bottom bar.
Tuck each leaf base under the edge of its daisy and pin. Sew each piece on with small stitches through the back loops only, so nothing shows on the back of the letter.
Final Blocking
- Weave in all remaining tails along same-color stitches on the WS.
- Lightly mist the letter (not the flowers) with water until it is damp.
- Lay it RS up on a mat and pin the stem edge straight.
- Check the size: 3.25 in (8.3 cm) x 3.75 in (9.5 cm). Ease the curve into a smooth arc with your fingers.
- Pin the opening square at its four corners.
- Let it dry completely, then sew on the flowers and leaves if you haven’t already.
- Open a jump ring with the two pairs of pliers. Pass it through the top of the tab and the bottom link of the chain, then close it.
- Use the second jump ring to attach the top link of the chain to the split key ring.
Final Quality-Control Checklist
- The letter measures 3.25 in (8.3 cm) x 3.75 in (9.5 cm).
- The outer border has 92 sc and the inner edge has 50 sc.
- The stem and bowl columns are both 6 sts wide and 16 rows tall.
- The cream Vs stagger evenly, with no long floats showing on the front.
- The top and bottom curves mirror each other.
- The daisies are evenly spaced and the leaves are tucked neatly.
- The jump rings are fully closed with no gap.
- The tab is firm and the hardware holds when tugged.
Troubleshooting
Cream shows through orange stitches. Keep the carried strand snug along the top of the row and pull it gently every few stitches.
The letter curls. Tapestry crochet tends to lean. Check that you are turning at the end of every row, then block the letter flat.
The columns are different heights. Count the rows on both columns before Row 23. Both must have 16 rows.
The border ruffles. You are adding stitches. Use exactly 1 sc per row end and 1 sc per stitch.
The border pulls the curve tight. Your border is tighter than the rest of the letter. Loosen your tension, or use a hook 0.25 mm larger for the border only.
The petals look flat. Pull the magic ring tail tighter and give each petal a gentle pinch to cup it.
Care
Hand wash in cool water with mild soap, press out the water in a towel and dry flat. Keep the metal hardware dry to protect its gold finish.
Final Notes
The measurement chain is short and simple:
- A gauge of 7 sts and 8 rows per 1 in (2.5 cm) gives a letter of 21 sts and 28 rows, which is 3 in (7.6 cm) x 3.5 in (8.9 cm).
- Two 6-st columns around a 9-st opening keep the D balanced, and the mirrored curves give it a smooth bowl.
- One round of 92 sc brings the letter to 3.25 in (8.3 cm) x 3.75 in (9.5 cm).
- The 50-sc inner edge tidies the opening, and three daisies finish the look.
Make one for yourself, then try the same technique with another initial for a friend.
Happy crocheting!